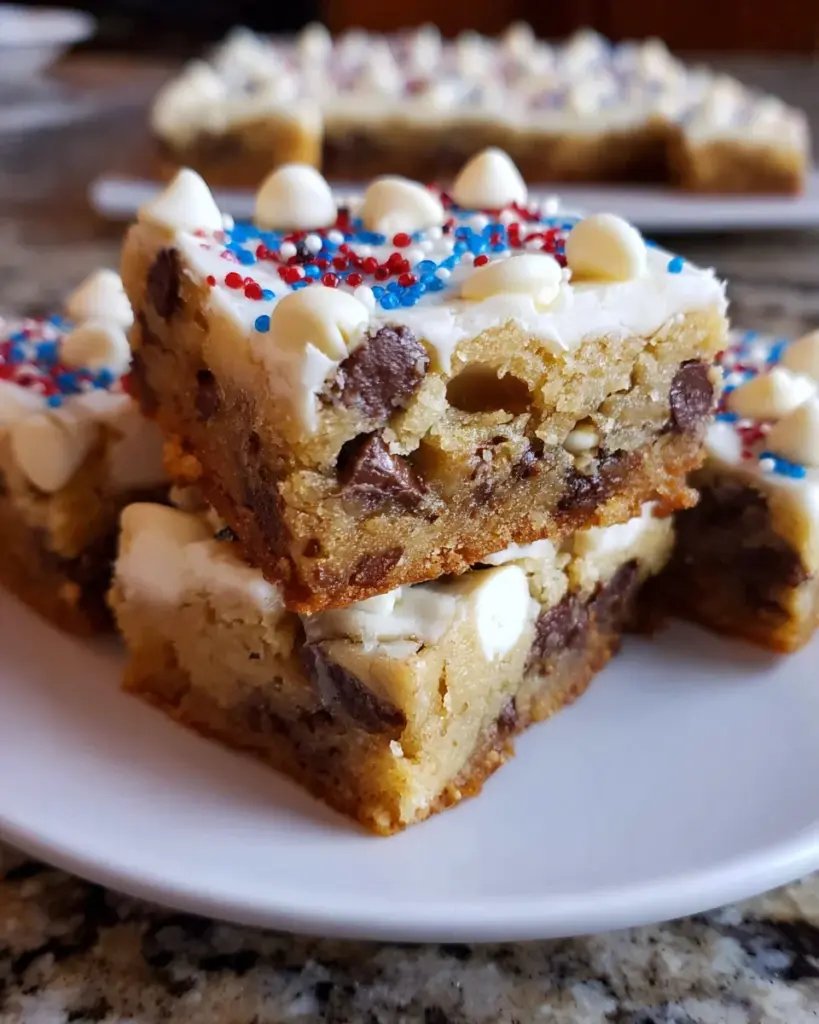
Introduction to Red White and Blue Chocolate Chip Cookie Bars
Ah, the joy of baking! When I whip up a batch of Red White and Blue Chocolate Chip Cookie Bars, it’s like throwing a mini celebration in my kitchen. These dessert bars are festive, easy to make, and absolutely delicious—a perfect treat for busy moms, professionals, or anyone looking to add a bit of flair to their day. Whether it’s a backyard BBQ, a birthday, or simply a weekend indulgence, this recipe brings a smile to faces and a sweet aroma to homes. Trust me, your loved ones will feel special when you serve these vibrant cookie bars!
Why You’ll Love This Red White and Blue Chocolate Chip Cookie Bars
These delightful bars are a game changer for anyone in a rush! With just a handful of ingredients and a straightforward process, you can whip them up in no time. Plus, who can resist that gooey layer of chocolatey goodness? They’re not just quick and easy; they also feel like a treat! You’ll love how they steal the spotlight at any gathering while catering to everyone’s sweet tooth.
Ingredients for Red White and Blue Chocolate Chip Cookie Bars
Gathering the right ingredients is half the fun! Here’s what you’ll need to create these colorful cookie bars:
- Unsalted butter: Softened butter gives that rich, creamy texture that melts in your mouth.
- Granulated sugar: This sweetener adds a delightful crunch and balances the flavors.
- Brown sugar: With its deep, caramel flavor, brown sugar brings sweetness with a hint of richness.
- Eggs: These act as a binder, giving the bars their soft and chewy structure.
- Vanilla extract: Pure vanilla lends that comforting aroma and warmth, absolutely essential in dessert!
- Baking soda: This leavening agent helps the bars rise, creating a light, fluffy texture.
- All-purpose flour: The foundation of your cookie bars, responsible for their structure.
- Salt: Just a pinch balances the sweetness and enhances all the flavors.
- Mini chocolate chips: These little gems bring bursts of chocolatey goodness in every bite.
- Vanilla milk chips or white chocolate chips: Adding these elevates the visual appeal and introduces a creamy flavor.
- Powdered sugar: This is key for frosting; it creates that smooth and sweet finish.
- Heavy cream: Essential for a rich, creamy frosting that can flow over those delicious bars.
- Vanilla extract (for frosting): A touch of vanilla in your frosting makes the taste even sweeter.
- Salt (for frosting): Just a tiny amount takes your frosting from sweet to absolutely heavenly!
You can find more about the exact measurements for each ingredient at the bottom of this article, where you can also print this recipe for your convenience. Enjoy assembling your cookie bar masterpiece!
How to Make Red White and Blue Chocolate Chip Cookie Bars
Step 1: Preheat the Oven and Prepare the Pan
Let’s get the ball rolling by preheating your oven to 350 degrees. This ensures even baking and a golden finish. While that’s heating up, grab a 9×13 baking pan. Line it with foil, leaving some overhang, and then give it a light spray of cooking spray. This helps the bars lift out easily later on. Trust me, this little preparation step is crucial!
Step 2: Mix the Dry Ingredients
In a bowl, whisk together the flour, baking soda, and salt. This is your dry mixture. Blending these ingredients thoroughly prevents any clumps and ensures even distribution in the dough. A solid mix here means every bite will taste just right!
Step 3: Cream the Butter and Sugars
Now, it’s time to make things creamy! Using a mixer, combine the softened butter, granulated sugar, and brown sugar in a mixing bowl. Beat this mixture on medium-high speed for about two minutes. You want it to transform into a smooth, fluffy texture. This step is the heart of your Red White and Blue Chocolate Chip Cookie Bars!
Step 4: Add Eggs and Vanilla
Next up, add in the eggs and vanilla extract. Mix on medium speed until everything is well combined, which should take about a minute. The eggs are your magic ingredients here, binding everything together and adding moisture. The aroma of vanilla will remind you why baking feels so comforting!
Step 5: Combine Dry and Wet Ingredients
Gently fold the dry mixture into your creamy mixture. Start by adding about a third of the flour blend, mixing gently to avoid overworking the dough. Repeat until all the dry ingredients are combined. Don’t worry if it looks a bit crumbly; that’s just fine! The moistness will come with the next steps.
Step 6: Incorporate Chocolate Chips
This is the part where joy truly meets indulgence! Add the mini chocolate chips and white chocolate chips into the dough. Using a rubber spatula, fold them in gently. You want every bite of your cookie bars to have that glorious chocolate goodness without overmixing, which could toughen the bars.
Step 7: Press into the Pan
With your delicious dough ready, it’s time to press it into the prepared pan. Use your fingers or a rubber spatula—lightly spraying them with cooking spray helps prevent sticking. Spread the dough evenly across the pan. Don’t be afraid to get in there; it’s all part of the fun!
Step 8: Bake the Bars
Pop your pan into the preheated oven and let it bake for 30 to 35 minutes. Keep an eye on it! You’ll know it’s done when the edges are golden brown and a toothpick inserted in the center comes out clean. Trust your instincts; a little browning on top adds character!
Step 9: Prepare the Frosting
As the bars cool down, it’s frosting time! In a separate bowl, mix softened butter, powdered sugar, heavy cream, vanilla extract, and salt together until creamy. You want a smooth, luscious frosting that will be the crown jewel on top of your cookie bars. This part is pure bliss!
Step 10: Frost and Decorate
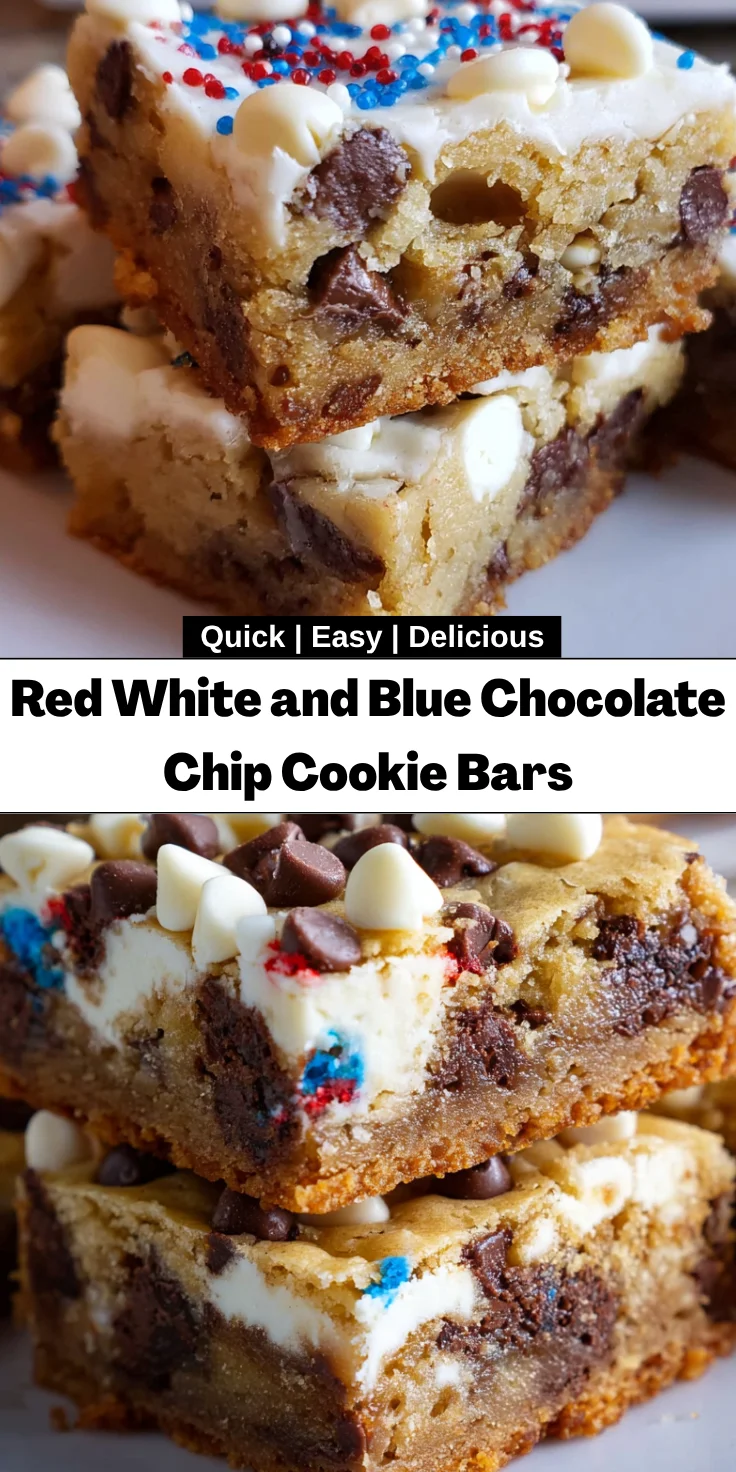
As soon as your cookie bars are completely cooled, frost them generously with your freshly made frosting. Don’t hesitate! Add your decorative touches right after you frost. Glittery sprinkles, red and blue candies, or anything festive you crave can enhance the joyous vibe of your chocolate chip cookie bars!
Step 11: Cut and Serve
Now for the thrilling moment: cutting the bars into squares. Use a sharp knife and wipe it clean between cuts for perfect edges. Aim for about 24 squares. Place them on a delightful platter, and watch smiles bloom as you serve these treats. You’ve done it!
Tips for Success
- Ensure your butter is softened to room temperature for easy mixing.
- Use a toothpick to check doneness in the center of the bars; it should come out clean.
- Let the bars cool completely before frosting to avoid a melty mess.
- Experiment with toppings to make your Red White and Blue Chocolate Chip Cookie Bars extra festive!
- Store leftovers in an airtight container to keep them fresh and chewy.
Equipment Needed
- 9×13 baking pan: Any large baking dish will work if you don’t have this size.
- Mixing bowls: Use any mixing bowl; a large one makes it easier!
- Electric mixer: A hand mixer is perfect, but a whisk works too for arm workouts.
- Rubber spatula: A must-have for folding; a wooden spoon can substitute in a pinch.
- Measuring cups and spoons: Essential for getting those ingredient ratios just right!
Variations
- Nutty Delight: Add chopped nuts like pecans or walnuts for extra crunch and flavor.
- Dairy-Free Option: Substitute non-dairy butter and use dark chocolate chips for a dairy-free treat.
- Gluten-Free Version: Swap all-purpose flour with a gluten-free baking blend to cater to gluten sensitivities.
- Brown Butter: For a deeper flavor, brown the butter before mixing it with sugars; it adds a rich, nutty taste.
- Fruit Addition: Fold in some dried cranberries or blueberries for a fruity twist that pairs well with the chocolate.
Serving Suggestions
- Pair with Ice Cream: A scoop of vanilla or strawberry ice cream on the side elevates the experience.
- Festive Drinks: Serve with lemonade or a berry smoothie for a refreshing touch.
- Presentation: Arrange bars on a colorful platter and garnish with fresh berries for a vibrant look.
- Picnic Treat: Pack them for your next picnic; they’re perfect for sharing!
FAQs about Red White and Blue Chocolate Chip Cookie Bars
Can I bake these cookie bars ahead of time?
Absolutely! You can prepare your Red White and Blue Chocolate Chip Cookie Bars a day in advance. Just store them in an airtight container once they cool, and frost them right before serving to keep that creamy frosting fresh.
What can I use instead of butter?
If you want to cut down on dairy, you can swap butter for coconut oil or a plant-based alternative. This keeps the recipe moist and delicious while still giving you that rich flavor in your cookie bars!
How do I know when my cookie bars are done baking?
Look for a golden-brown edge and a firm top. For a foolproof check, insert a toothpick in the center. If it comes out clean or with a few crumbs, they’re ready to be pulled from the oven!
Can I add more chocolate chips?
Of course! Feel free to go wild with the chocolate chips. Whether you add more mini chocolate chips or mix in some chunks, it’ll only make your chocolate chip cookie bars more indulgent!
What should I do with leftovers?
Keep any leftover cookie bars in an airtight container at room temperature. They’ll stay soft and chewy for several days. If you want to enjoy them longer, they freeze well, too!
Final Thoughts
Baking Red White and Blue Chocolate Chip Cookie Bars is more than just a recipe; it’s an experience filled with joy, laughter, and sweet memories. Whether it’s the delight of your children bubbling with excitement or friends gathering to share these treats, each square brings everyone a little closer. The vibrant colors and delicious flavors make any occasion feel special. I love how these bars transform a simple day into a delicious celebration! So, gather your loved ones and dive into this baking adventure—trust me, every bite will be worth it!
Print
Red White and Blue Chocolate Chip Cookie Bars
- Total Time: 55 minutes
- Yield: 24 squares 1x
- Diet: Vegetarian
Description
A delicious and festive treat, Red White and Blue Chocolate Chip Cookie Bars are perfect for any celebration.
Ingredients
- 1 cup unsalted butter, softened
- 3/4 cup granulated sugar
- 1 cup brown sugar
- 2 eggs
- 1 tbsp vanilla
- 1 tsp baking soda
- 3 cups all-purpose flour
- 1/2 tsp salt
- 1 cup mini chocolate chips
- 1/2 cup vanilla milk chips or white chocolate chips
- 1/2 cup unsalted butter, softened (for frosting)
- 3 cups sifted powdered sugar
- 3 tablespoons heavy cream
- 1 teaspoon vanilla extract (for frosting)
- 1/8 teaspoon salt (for frosting)
Instructions
- Preheat oven to 350 degrees and line a 9×13 pan with foil and spray with cooking spray; set aside.
- In a bowl, whisk together the flour, baking soda, and salt; set aside.
- Using a mixer, add butter and sugars together in a mixing bowl and mix on medium-high speed until smooth and creamy, about 2 minutes.
- Add eggs and vanilla and mix until combined, about 1 minute.
- Add in the flour mixture to the wet mixture and mix together until combined.
- Stir in chocolate chips using a rubber spatula.
- Press cookie dough evenly into the pan (you can lightly spray your fingertips with cooking spray to make it easier or use a rubber spatula).
- Bake for 30-35 minutes.
- Remove from oven and allow to cool completely.
- While cooling, make the frosting by mixing all ingredients together until creamy.
- Frost cooled cookie dough bars with frosting and add decorative items immediately after frosting, as the top of the frosting will firm up.
- Cut into small squares.
Notes
- For stiffer frosting, add more powdered sugar; for creamier consistency, add more heavy cream.
- Store any leftovers in an airtight container.
- Prep Time: 20 minutes
- Cook Time: 35 minutes
- Category: Dessert
- Method: Baking
- Cuisine: American
Nutrition
- Serving Size: 1 square
- Calories: 220
- Sugar: 15g
- Sodium: 150mg
- Fat: 10g
- Saturated Fat: 6g
- Unsaturated Fat: 3g
- Trans Fat: 0g
- Carbohydrates: 32g
- Fiber: 1g
- Protein: 2g
- Cholesterol: 30mg