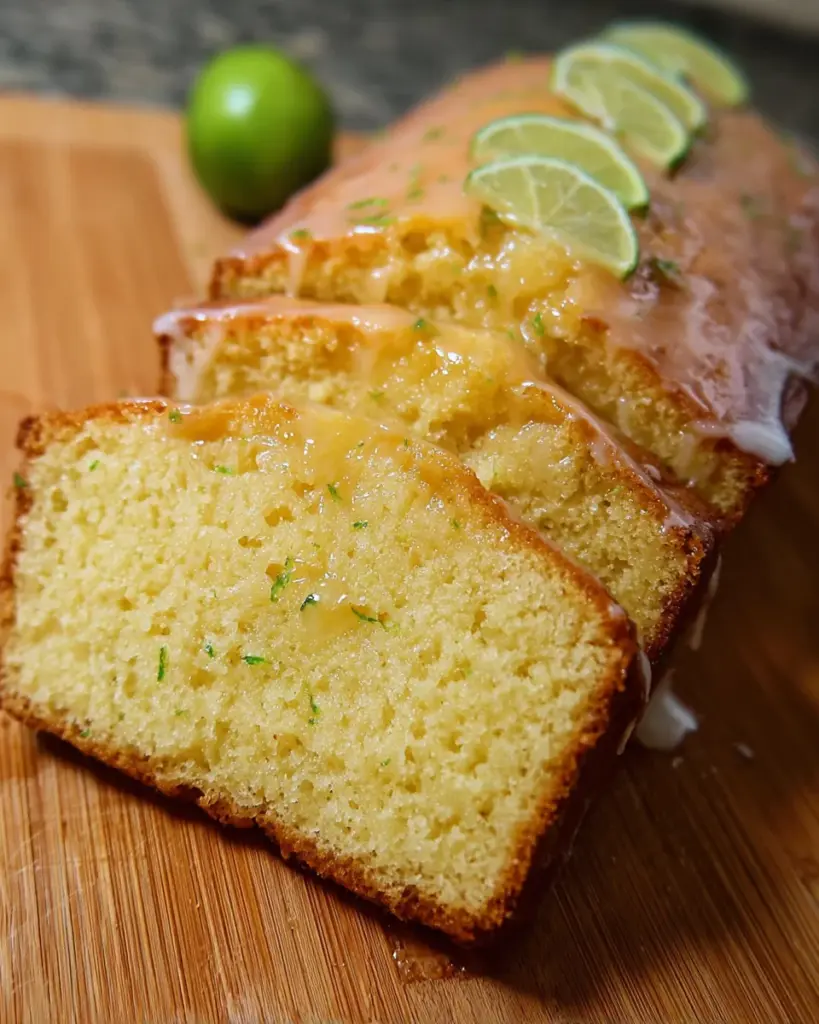
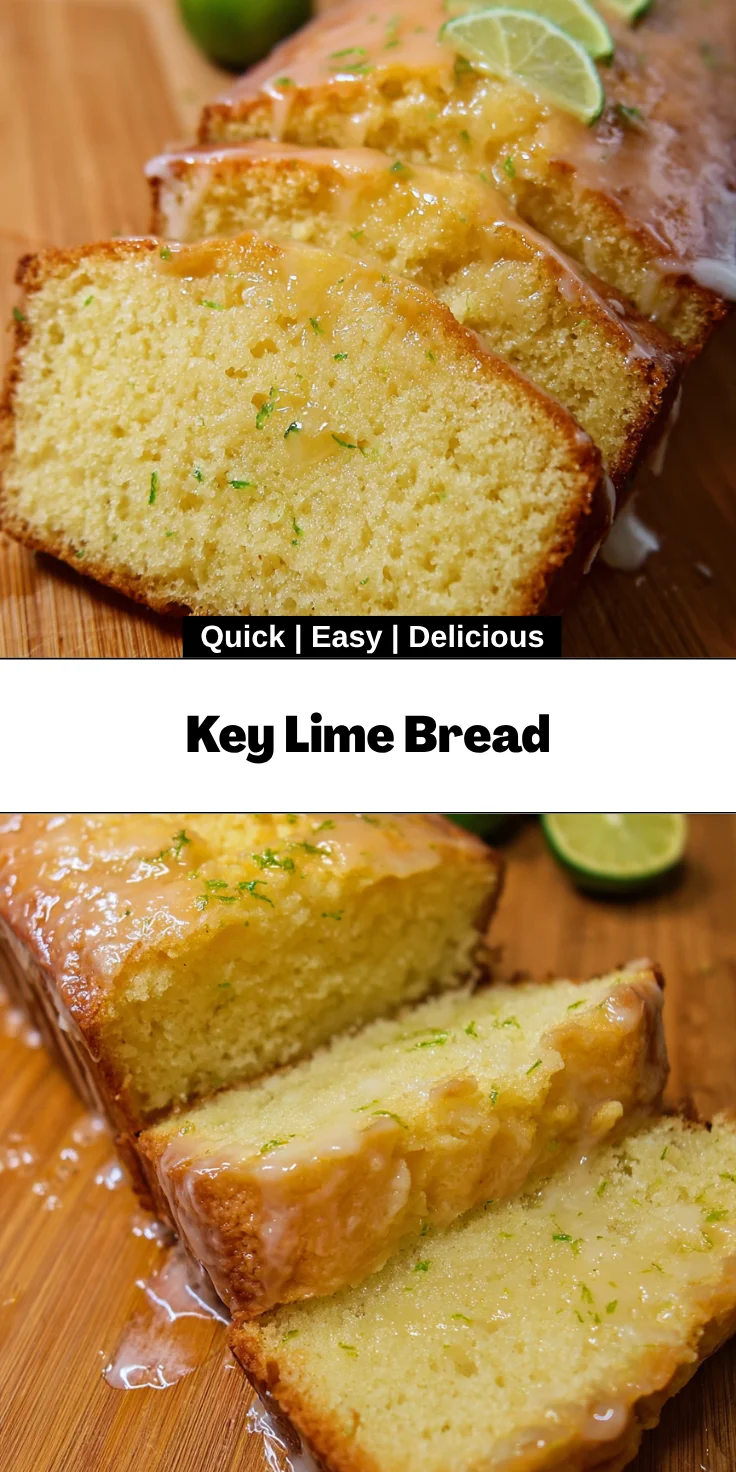
Introduction to Key Lime Bread
Hey there, fellow home cooks! If you’re like me, juggling the daily hustle and bustle, you know how crucial it is to have a few quick, delicious recipes up your sleeve. That’s where my Key Lime Bread comes in! This delightful treat is not just easy to whip up but also captures that zesty, refreshing flavor that instantly brightens any day. Perfect for a snack or a sweet finish to dinner, it’ll impress your loved ones without breaking a sweat. Trust me, you’ll be savoring every slice!
Why You’ll Love This Key Lime Bread
This Key Lime Bread is a true game-changer for busy lives. It’s quick to make and delivers a burst of citrusy flavor that awakens the senses. Imagine indulging in a slice that’s both sweet and tart, providing the perfect pick-me-up during your hectic day. Whether you’re hosting friends or simply treating yourself, this bread brings smiles. Plus, the delightful aroma while baking? Pure joy in your kitchen!
Ingredients for Key Lime Bread
Ready to get zesty? Here’s a look at what you’ll need to create this incredible Key Lime Bread. Each ingredient plays an essential role in achieving that perfect balance of sweetness and tang.
- Unsalted Butter: Adds richness and moisture, creating a soft texture. Use it softened for easy mixing.
- Sugar: Sweetens the bread beautifully, creating a delightful contrast to the tart lime. Granulated sugar works perfectly!
- Eggs: They act as a binding agent, ensuring that everything melds into a lovely loaf.
- Key Lime Zest: This is the star of the show! It infuses the bread with an intense citrus aroma.
- Key Lime Juice: Enhances the zesty flavor. Fresh juice is best, but bottled can work in a pinch.
- Vanilla Extract: Adds depth and a touch of warmth that complements the lime beautifully.
- All-Purpose Flour: The base for your bread, providing the right structure. No need for fancy flours here!
- Salt: A little pinch elevates the flavors, balancing the sweetness of the sugar.
- Baking Powder: This is your leavening agent, giving the bread that lovely rise.
- Buttermilk: This adds moisture and a slight tang, making for a tender crumb.
- Powdered Sugar: Used for the dreamy glaze that drips over the top, creating that sweet finish.
- Extra Key Lime Juice (for glaze): Provides the zesty kick that makes the glaze oh-so-delicious!
For exact measurements, you can find them at the bottom of the article, where you can also print the full recipe if you’re ready to get started on this zesty adventure!
How to Make Key Lime Bread
Prepare the Oven and Pan
First things first, let’s set the stage for magic! Preheat your oven to 350 degrees. While that’s warming up, grab your trusty 9×5 loaf pan and grease it up. I like using a little butter or non-stick spray. This ensures your Key Lime Bread slides right out, making clean-up a breeze!
Creaming the Mixture
Next, in a medium-sized mixing bowl, cream together your softened butter and sugar. Mix until it’s light and fluffy—think of it as a cloud of sweetness! This process is key for the best texture when you bake your zesty bread.
Incorporating Eggs and Flavorings
Once your mixture is fluffy, it’s time to add in the eggs. Crack them in one at a time, mixing well after each addition. Then toss in the zest and juice from your fresh key limes, along with the vanilla extract. The aroma will make your kitchen feel like a beachside paradise!
Mixing Dry Ingredients
Now, let’s bring in the dry ingredients! Into the same bowl, add the all-purpose flour, salt, baking powder, and buttermilk. Stir gently until just combined. Avoid over-mixing; we want tender, moist bread, not a dense loaf!
Baking the Bread
Pour the luscious batter into your prepared loaf pan. Smooth out the top with a spatula, and then pop it into your preheated oven. Bake for about 45 minutes or until you see golden brown edges and a toothpick comes out clean. Your kitchen will fill with a mouth-watering scent—trust me, it’s hard to wait!
Preparing the Glaze
While your bread is baking, whisk together the powdered sugar and the extra key lime juice in a small bowl. You want it to be a drizzle-able consistency. Adjust it with more sugar or juice until it hits the sweet spot!
Cooling and Glazing
Once your bread is done, remove it from the oven. Let it cool for about 10 minutes before carefully removing it from the pan. Place it on a cooling rack or a tray. Pour that delightful glaze over the warm bread, allowing it to soak in. Enjoy your homemade Key Lime Bread—it’s time to dig in!
Tips for Success
- Always use fresh key limes for the best flavor; it makes a noticeable difference!
- Don’t skip the creaming step; it helps create a light and fluffy texture.
- Mix until just combined to keep the bread tender and avoid toughness.
- Allow the bread to cool slightly before glazing for better absorption.
- Experiment with adding nuts or coconut for extra flavor and texture.
Equipment Needed
- Loaf Pan (9×5): A standard size for baking. If you don’t have one, mini pans or muffin tins work too!
- Mixing Bowls: Use medium and large bowls for creaming and mixing.
- Whisk: Handy for mixing the glaze; a fork can substitute in a pinch.
- Spatula: Great for pouring and smoothing batter into the pan.
Variations for Key Lime Bread
- Coconut Key Lime Bread: Add ½ cup of shredded coconut for a tropical twist.
- Gluten-Free Option: Substitute all-purpose flour with a gluten-free flour blend for a gluten-free delight.
- Vegan Key Lime Bread: Replace eggs with flaxseed meal or applesauce and use a plant-based butter alternative.
- Nuts and Seeds: Stir in ½ cup of chopped walnuts or pecans for a crunchy texture boost.
- Key Lime Blueberry Bread: Fold in 1 cup of fresh blueberries for a burst of flavor and color.
Serving Suggestions
- Whipped Cream: A dollop of fresh whipped cream balances the tartness beautifully.
- Fruit Salad: Pair it with a refreshing fruit salad for a delightful contrast.
- Herbal Tea: Enjoy your slice with a warm cup of chamomile or mint tea.
- Presentation: Serve on a colorful platter and garnish with lime slices for that extra zing!
FAQs about Key Lime Bread
Got questions about making this Key Lime Bread? Don’t worry, I’ve got you covered! Here are some common inquiries I often hear from fellow home bakers:
Can I use regular limes instead of key limes? Absolutely! While key limes offer a unique flavor, regular limes can work in a pinch. Just keep in mind that the taste might be a tad different.
How do I store leftover Key Lime Bread? To keep your bread fresh, store it in an airtight container at room temperature. It should stay delightful for up to three days. If you want it longer, consider freezing it!
Can I add mix-ins like nuts or chocolate chips? Of course! Feel free to get creative. Adding chopped nuts, chocolate chips, or even dried fruit can elevate your zesty bread to new heights!
What’s the best way to serve Key Lime Bread? This bread shines on its own, but adding a dollop of whipped cream or fresh fruit makes it even more spectacular. A warm cup of tea alongside wouldn’t hurt either!
Can I make this bread ahead of time? Yes! You can bake your Key Lime Bread ahead and freeze it. Just thaw it out when you need it, and it’ll taste as fresh as the day you made it!
Final Thoughts
There’s something truly special about baking Key Lime Bread. It fills your home with a fragrant, zesty aroma that beckons everyone to the kitchen. With each slice, you savor a delightful balance of sweet and tart, which invites a smile to your face. Best of all, it’s a breeze to make! Whether it’s spring, summer, or any day that needs a touch of sunshine, this bread is a cheerful companion. Share it with family and friends or indulge solo—it’s simply joyful. Trust me, once you taste it, you’ll want to bake it again and again!
Print
Key Lime Bread
- Total Time: 1 hour
- Yield: 1 loaf 1x
- Diet: Vegetarian
Description
A zesty and delicious Key Lime Bread that is easy to make and perfect for dessert or a snack.
Ingredients
- ⅓ cup butter *unsalted, softened
- ¾ cup sugar
- 2 eggs
- 1 tablespoon key lime zest
- 1 tablespoon key lime juice
- 1 teaspoon vanilla extract
- 1 ½ cups flour *all-purpose
- ½ teaspoon salt
- 1 ½ teaspoon baking powder
- ½ cup buttermilk
- ¾ cup powdered sugar (for glaze)
- 2 tablespoon key lime juice (for glaze)
Instructions
- Preheat oven to 350 degrees and grease a loaf pan (9×5).
- In a medium mixing bowl, cream together the butter and sugar until fluffy.
- Add in the eggs, lime zest, lime juice, and vanilla extract.
- Add in the flour, salt, baking powder, and buttermilk stirring until just combined.
- Pour batter into prepared loaf pan (or mini pans/muffin pan).
- Place into oven and bake about 45 minutes or until golden brown edges and cooked through.
- While bread is baking, whisk the powdered sugar and lime juice together in a small bowl.
- Remove bread from oven and allow to cool for about 10 minutes before removing from pan and placing on tray.
- Pour glaze over bread while bread is still warm and enjoy!
Notes
- Ensure to use fresh key limes for the best flavor.
- Store leftover bread in an airtight container.
- This bread can be made ahead of time and freezes well.
- Prep Time: 15 minutes
- Cook Time: 45 minutes
- Category: Dessert
- Method: Baking
- Cuisine: American
Nutrition
- Serving Size: 1 slice
- Calories: 180
- Sugar: 14g
- Sodium: 150mg
- Fat: 7g
- Saturated Fat: 4g
- Unsaturated Fat: 2g
- Trans Fat: 0g
- Carbohydrates: 24g
- Fiber: 0g
- Protein: 2g
- Cholesterol: 35mg