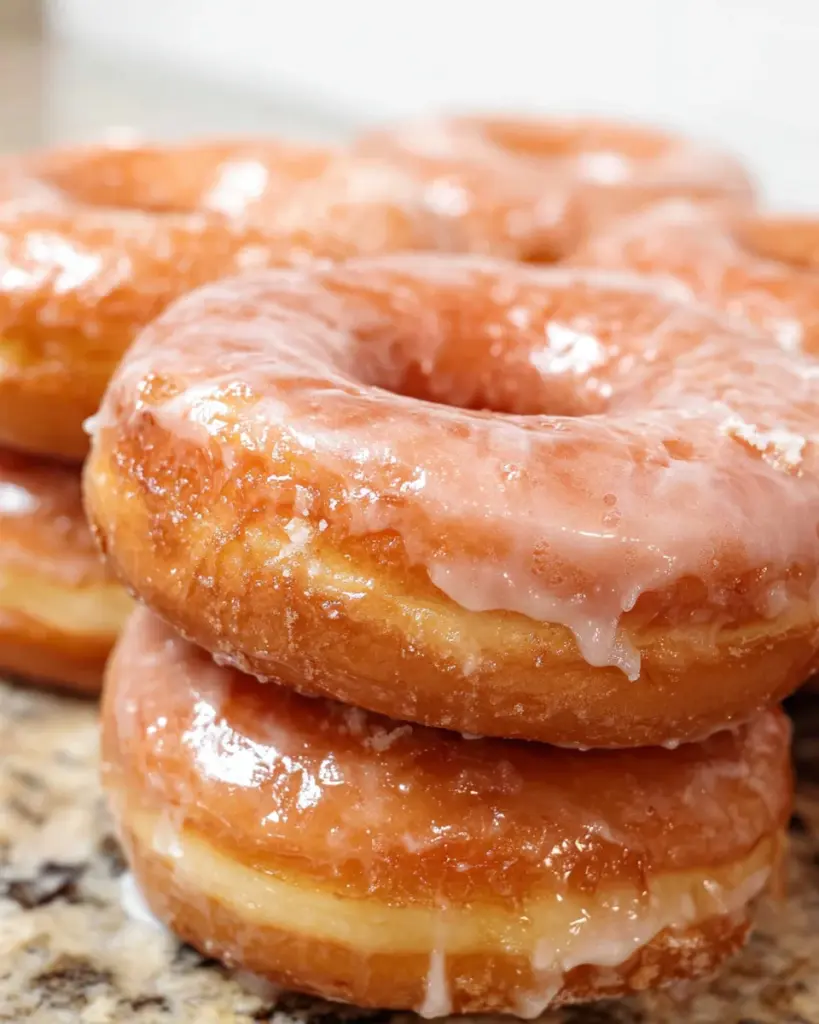
Introduction to Homemade Glazed Donuts
Ah, the magic of Homemade Glazed Donuts! There’s something truly special about waking up to the aroma of fresh, warm donuts wafting through the house. As a busy mom myself, I know how precious those little moments of joy can be. This recipe is not just a treat; it’s a way to create lasting memories with your loved ones. Trust me, making these delightful donuts is easier than you think, and the satisfaction of serving homemade goodies is unmatched. Let’s dive into this culinary adventure together!
Why You’ll Love This Homemade Glazed Donuts
Let me tell you, Homemade Glazed Donuts are a game changer for any hectic morning! They’re quick and simple to whip up, making them perfect for busy lives. The sweet aroma of frying donuts fills your kitchen, wrapping you in a warm hug as they cook. Plus, there’s nothing quite like watching your family’s faces light up when they taste these warm, sugary delights. Trust me; they’ll become an instant favorite!
Ingredients for Homemade Glazed Donuts
To create these scrumptious Homemade Glazed Donuts, you’ll need a few key ingredients that each play a special role.
- Instant yeast: This helps the donuts rise faster, giving them that fluffy texture we all love.
- Warm water: It activates the yeast, creating the perfect environment for the dough to rise.
- Sugar: This sweetener not only enhances the flavor but also aids in the browning process when frying.
- Salt: A pinch satisfies the taste buds and enhances the sweetness.
- Unsalted butter: This adds richness, making the donuts tender and flavorful.
- Egg and egg yolk: They provide structure and moisture, creating a light, airy donut.
- Vanilla and almond extracts: These add depth, giving a lovely aroma and taste to each bite.
- All-purpose flour: The base of the dough, providing structure and texture.
- Vegetable oil: Essential for frying, ensuring a crispy exterior.
Exact quantities for each ingredient are listed at the end for your convenience!
How to Make Homemade Glazed Donuts
Now, let’s embark on the delightful journey of making Homemade Glazed Donuts. I promise this adventure will be worth every joyful bite! Follow these steps closely for donut perfection!
Step 1: Activate the Yeast
Start by grabbing your stand mixer. In the bowl, add 2¼ teaspoons of instant yeast along with ¾ cup of warm water. This warm hug of water helps awaken the yeast, allowing it to come to life. Let it rest for about 10 minutes. You’ll know it’s ready when it looks bubbly and frothy. That’s your first sign of incredible donuts ahead!
Step 2: Prepare the Dough
Once the yeast is bubbling, it’s time for the second act! Add ⅓ cup of sugar, ½ teaspoon of salt, ¼ cup of softened unsalted butter, 1 egg, 1 egg yolk, ½ teaspoon of vanilla extract, and ½ teaspoon of almond extract to the yeast mixture. Attach the dough hook to your mixer and mix on low speed. This combines the ingredients beautifully and gets a delightful dough forming!
Step 3: Knead and Rise
Now comes the fun part—adding flour! Gradually mix in 2½ to 3 cups of all-purpose flour, half a cup at a time. Keep kneading on low speed. The dough should start pulling away from the bowl. If it feels overly sticky, sprinkle in flour, one tablespoon at a time. Aim for a dough that’s somewhat tacky but not too sticky—this is where the magic happens!
Once your dough is just right, transfer it to a lightly greased bowl. Cover it tightly with plastic wrap and slip it into a warm, draft-free spot. Let it rise for about 2 hours. You’ll feel like a proud parent as it grows, fluffy and beautiful!
Step 4: Chill the Dough
After the dough has risen, gently press it to deflate. Now comes the secret to extra flavor: wrap the dough in plastic wrap and place it in the refrigerator for 6 to 8 hours or overnight. This extra chill time allows the flavors to develop—trust me, you won’t regret it!
Step 5: Shape the Donuts
Ready to make those donuts? Roll the chilled dough out on a lightly floured surface to about ½ inch thick. Then, use a round donut cutter or a big cookie cutter to cut circles out of the dough. For those tiny holes, grab a smaller cutter. This step makes me feel like a kid again—it’s just so much fun!
Place the cut-out donuts on a parchment-lined baking sheet. Lightly cover them with plastic wrap and drape a clean, dry towel over the top. Let them rest for about 1 hour. Watching them puff up again is like seeing a miracle unfold!
Step 6: Fry the Donuts
Alright, friends, it’s the moment we’ve all been waiting for! In a large Dutch oven, heat 2 to 3 inches of vegetable oil to 350°F. Carefully, I mean carefully, place the donuts into the hot oil. Fry them until golden brown, about 1-2 minutes per side. The smell is heavenly! They’ll bubble and dance, and you might find yourself dreaming of those sweet flavors.
Once cooked, remove the donuts and place them on a baking sheet lined with paper towels and a cooling rack. Repeat until all donuts are fried. It’s time to revel in your triumph, but hold on—we still need that glaze!
Step 7: Prepare the Glaze
While the donuts cool slightly, let’s whip up the glaze. In a bowl, combine 2 cups of powdered sugar, ¼ cup of milk, 1 teaspoon of vanilla extract, and if you’re feeling adventurous, ½ teaspoon of butter extract. Whisk until the mixture is silky smooth. The sweetness is simply irresistible!
Step 8: Glaze the Donuts
Take each slightly cooled donut and dip it into the glaze, flipping to coat both sides. Lay them back on the cooling rack to let that luscious glaze set for about 10 minutes. This is the moment when you can fully appreciate your hard work. The sweet, shiny finish makes each donut an absolute masterpiece!
And there you have it! Your very own Homemade Glazed Donuts are ready to be devoured by family and friends—or saved just for you (I won’t tell!). Enjoy the smiles and laughter that come with sharing these delightful bites!
Tips for Success
- Make sure your oil temperature stays around 350°F for that perfect golden finish—too hot, and they burn; too cool, and they’ll turn out doughy.
- Don’t skip the resting period before frying; it helps the donuts become fluffy and light.
- Experiment with the glaze by adding flavors like maple or chocolate for a fun twist.
- For fresher donuts, serve them warm right after glazing!

Equipment Needed
To create your Homemade Glazed Donuts, you’ll need a few essential tools:
- Stand mixer with a dough hook (or you can knead by hand).
- Rolling pin for spreading the dough.
- Round donut cutter (a large cookie cutter works too).
- Small round cutter for the donut holes.
- Large Dutch oven or deep fryer for frying.
- Thermometer to check the oil temperature.
- Parchment paper for easy cleanup.
Variations for Homemade Glazed Donuts
Unleash your creativity with Homemade Glazed Donuts! Try a chocolate glaze for a rich twist or add sprinkles for a festive touch. You can fill them with custard or fruit preserves for a delightful surprise. Experimenting with flavors ensures there’s a donut for everyone!
Serving Suggestions
Elevate your Homemade Glazed Donuts experience by pairing them with a steaming cup of freshly brewed coffee or a glass of cold milk. For a delightful twist, serve with fresh fruit like berries or bananas. Plating them on a colorful cake stand adds a lovely touch to your spread!
FAQs about Homemade Glazed Donuts
Having a few questions about making Homemade Glazed Donuts is perfectly normal! Here are some common queries I often hear:
Can I use active dry yeast instead of instant yeast?
While it’s best to stick to instant yeast for this recipe, if you only have active dry yeast, just activate it in warm water with a bit of sugar before adding it to the mix.
How should I store leftover donuts?
Keep any leftover donuts in an airtight container at room temperature. They’re best enjoyed fresh, but you can also freeze them for up to a month. Just thaw and reheat them for that fresh-out-of-the-fryer taste!
What if my donuts come out doughy in the center?
This can happen if the oil isn’t hot enough or if they aren’t cooked long enough. Make sure to monitor oil temperature closely for crispy perfection!
Hopefully, these tips help you create the best Homemade Glazed Donuts ever!
Final Thoughts
Making Homemade Glazed Donuts isn’t just about satisfying a sweet tooth; it’s about crafting joy and memories in your kitchen. The process invites you to slow down and enjoy the art of baking. There’s something incredibly satisfying about watching your loved ones devour your delicious creations. In this fast-paced world, taking time to create something from scratch can bring pure delight. So, roll up your sleeves, gather your family, and dive into this delightful recipe. Remember, the smiles and laughter that follow will be the sweetest reward of all!
Print
Homemade Glazed Donuts
- Total Time: 2 hours 40 minutes (plus rising and refrigeration time)
- Yield: 12 donuts 1x
- Diet: Vegetarian
Description
Delicious homemade glazed donuts that are easy to make and irresistibly tasty.
Ingredients
- 2¼ teaspoons instant yeast (not active dry yeast)
- ¾ cup warm water
- ⅓ cup sugar
- ½ teaspoon salt
- ¼ cup unsalted butter (softened)
- 1 egg
- 1 egg yolk
- ½ teaspoon vanilla extract
- ½ teaspoon almond extract
- 2½ to 3 cups all-purpose flour
- Vegetable oil (for frying)
- Glaze: 2 cups powdered sugar
- ¼ cup milk
- 1 teaspoon vanilla extract
- ½ teaspoon butter extract (optional)
Instructions
- In the bowl of a stand mixer, add yeast and warm water. Let stand for 10 minutes.
- Add sugar, salt, unsalted butter, egg, egg yolk, vanilla extract, and almond extract. Attach the dough hook and mix on low speed to combine.
- Add 2½ cups flour, half a cup at a time while the stand mixer is on low speed. Knead on low until the dough starts to form.
- If the dough is still very sticky add more flour, 1 tablespoon at a time until the dough pulls away from the sides of the bowl. The dough should be somewhat tacky, but not sticky.
- Transfer the dough to a lightly greased bowl and cover it tightly with plastic wrap. Place the bowl in a draft-free, warm spot and allow it to rise for 2 hours.
- Gently press in the middle of the dough to deflate. Wrap the dough in plastic wrap and refrigerate for 6 to 8 hours, or overnight.
- On a lightly floured surface, roll the dough out to about ½ inch thick. Use a round donut cutter or large round cookie cutter to cut circles out of the dough and a smaller round cutter to cut out the center.
- Place the cut-out donuts on a parchment-lined baking sheet, lightly cover with plastic wrap, and drape a clean dry towel over the top. Let rest for 1 hour.
- In a large Dutch oven, heat 2 to 3 inches of vegetable oil to 350°F. Carefully place the donuts into the hot oil and cook until golden brown.
- Remove cooked donuts and place on a baking sheet lined with paper towels and a cooling rack. Repeat until all donuts are cooked.
- For the glaze, combine powdered sugar, milk, vanilla extract, and butter extract in a bowl and whisk until smooth.
- Lower each slightly cooled donut into the glaze, flip to coat the other side, and place back on the cooling rack to set for about 10 minutes.
Notes
- Ensure the oil temperature is accurate to avoid doughy centers.
- Do not let the donuts rest longer than 1 hour before frying.
- The dough can be refrigerated overnight for better flavors.
- Prep Time: 20 minutes
- Cook Time: 20 minutes
- Category: Dessert
- Method: Frying
- Cuisine: American
Nutrition
- Serving Size: 1 donut
- Calories: 250
- Sugar: 10g
- Sodium: 200mg
- Fat: 12g
- Saturated Fat: 7g
- Unsaturated Fat: 3g
- Trans Fat: 0g
- Carbohydrates: 34g
- Fiber: 1g
- Protein: 3g
- Cholesterol: 40mg