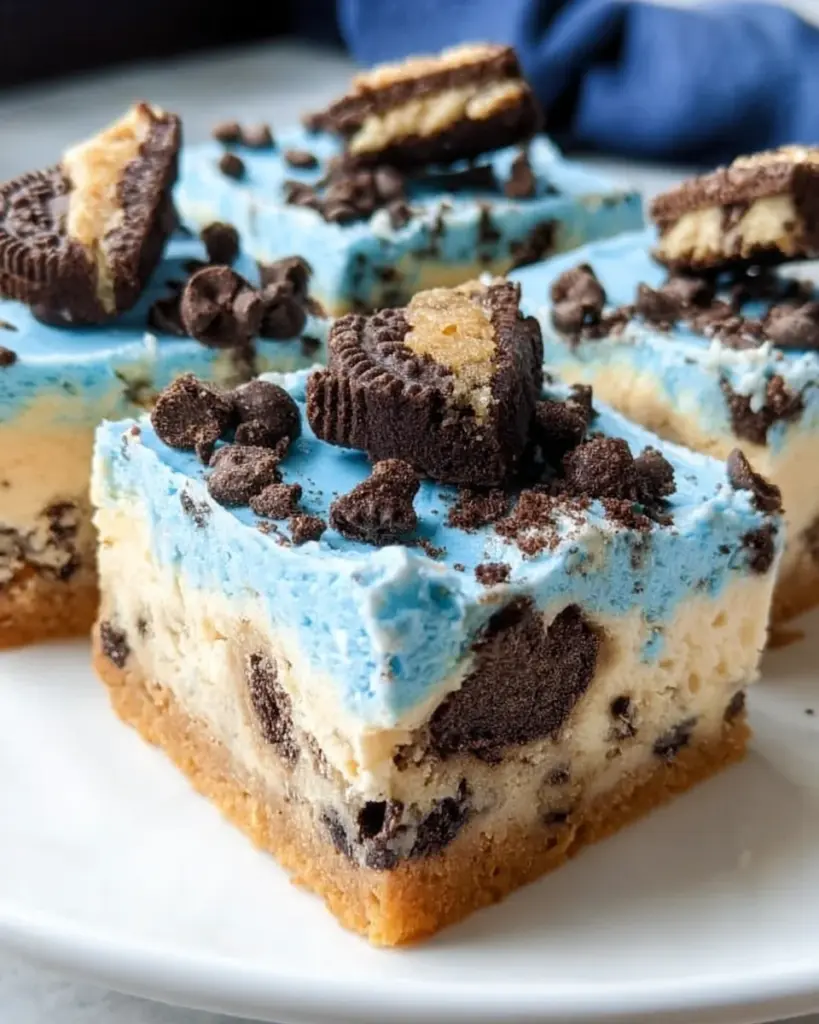
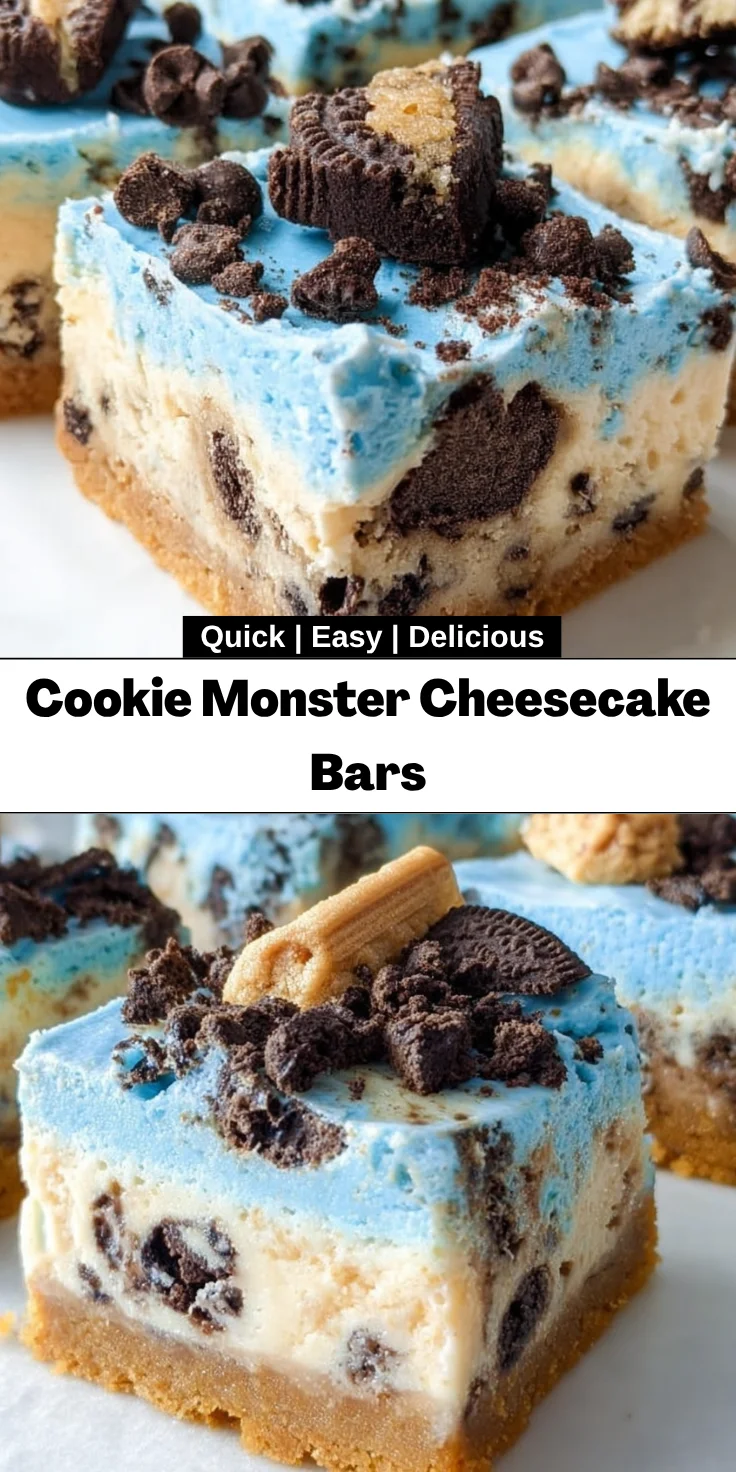
Introduction to Cookie Monster Cheesecake Bars
Hey there, fellow kitchen enthusiast! If you’re anything like me, you cherish those moments when a dessert can be both indulgent and simple. That’s why I’m excited to introduce you to my Cookie Monster Cheesecake Bars! Combining a delicious cookie crust with a creamy no-bake cheesecake layer, these bars are a showstopper that can easily steal the spotlight at any gathering. They come together quickly and are perfect for busy days when you just want to impress your loved ones without spending hours in the kitchen. Trust me, this dessert will leave everyone asking for seconds!
Why You’ll Love This Cookie Monster Cheesecake Bars
One of the best things about these Cookie Monster Cheesecake Bars is how effortlessly they come together. With minimal prep time, you can whip up a delightful treat that family and friends will rave about. The rich, creamy layers, paired with crunchy cookie bits, provide a texture and flavor that’s simply irresistible. Plus, they’re a wonderful way to satisfy that sweet tooth without spending an entire afternoon in the kitchen!
Ingredients for Cookie Monster Cheesecake Bars
Gathering the right ingredients is half the battle in the quest for the perfect dessert. Here’s what you’ll need for these delicious Cookie Monster Cheesecake Bars:
- Butter: Softened butter serves as the foundation for your cookie crust, adding richness.
- Brown Sugar: This brings out that delightful caramel flavor, enhancing the sweetness of your crust.
- Granulated Sugar: A classic sweetener that balances the brown sugar’s depth.
- All-Purpose Flour: Essential for structure, this will help your cookie crust hold together beautifully.
- Vanilla: A splash of vanilla extract uplifts the flavors, adding that home-baked goodness.
- Semi-Sweet Mini Chocolate Chips: These tiny morsels give a delightful surprise in every bite, ideal for any cookie-lover!
- Salt: Just a pinch helps to balance the sweetness and enhances the overall flavor.
- Egg: A vital binder for your crust, helping everything come together perfectly.
- Cream Cheese: The star of the show—it creates a creamy, dreamy cheesecake layer that’s simply irresistible.
- Powdered Sugar: This fine sugar dissolves easily, ensuring a smooth cheesecake filling.
- Sour Cream: Adds tanginess, making your cheesecake layer rich and luscious.
- Blue Food Coloring: This gives your cheesecake that iconic Cookie Monster hue! Adjust to your liking.
- Cool Whip: A shortcut to lightness in the cheesecake filling, making it fluffy and light.
- Lemon Juice: Just a dash brightens up the flavor and adds a subtle tartness.
- Mini Chip Ahoy Cookies: These crunchy delights make for scrumptious toppings on your cheesecake.
- Mini Oreos: Because who doesn’t love the additional chocolatey flavors? They add a delightful crunch.
For exact measurements, check the bottom of the article where you can also print the recipe!
How to Make Cookie Monster Cheesecake Bars
Creating these Cookie Monster Cheesecake Bars is easier than one might think! With just a few steps, you’ll be on your way to a dessert that will wow your family and friends. Let’s dive into the steps, ensuring you get a delicious treat in no time!
Step 1: Preheat Your Oven
Before anything else, it’s vital to preheat your oven to 350 degrees Fahrenheit. Preheating ensures that your cookie base bakes evenly and to the perfect texture. If you skip this step, you might end up with a doughy mess rather than a delicious dessert.
Step 2: Prepare the Cookie Crust
In a stand mixer, start mixing your softened butter along with the brown and granulated sugars until it’s light and fluffy. This step adds lots of flavors.
Next, crack in the egg and add a splash of vanilla. Mix until combined. Now, carefully fold in your all-purpose flour, salt, and semi-sweet mini chocolate chips. This will be your cookie crust, so make sure not to overmix; gentle folding is key!
Step 3: Bake the Cookie Base
Transfer your cookie mixture into a parchment-lined 8×8 pan. Spread it evenly, then pop it into your preheated oven. Bake for 15 to 20 minutes, until the edges are lightly golden and a toothpick inserted into the center comes out clean. Once done, remove it from the oven and let it cool completely.
Step 4: Create the Cheesecake Layer
While your cookie base cools, it’s time to work on the dreamy cheesecake layer! In the same stand mixer, whip the softened cream cheese until smooth. Gradually mix in the powdered sugar, sour cream, lemon juice, and a splash of vanilla.
Don’t forget the fun part! Add blue food coloring until you achieve the desired Cookie Monster color. Then, gently fold in the Cool Whip to keep it light and airy. This step is crucial for that perfect cloud-like texture!
Step 5: Assemble the Cheesecake Bars
Now that both layers are ready, it’s time to assemble! Pour the cheesecake mixture over your cooled cookie crust, spreading it gently to cover the base.
Next, sprinkle crushed mini Chip Ahoy cookies and mini Oreos on top. This gives it that delightful crunch that ties all the flavors together beautifully.
Step 6: Refrigerate and Set
Refrigerate the assembled bars for at least 6 hours, but overnight is even better. This chilling time is essential for the flavors to meld together and for the cheesecake to set perfectly.
Now, you’re just a slice away from indulging in these delightful Cookie Monster Cheesecake Bars!
Tips for Success
- Ensure your cream cheese is at room temperature for smooth mixing.
- Use a ruler or knife to measure even squares when slicing the bars.
- For easy crumbling, freeze the mini cookies briefly before topping.
- Don’t rush the chilling time; it’s crucial for texture.
- Feel free to swap out cookies as per your taste preferences!
Equipment Needed
- Stand Mixer: A handy tool for mixing; a hand mixer works too.
- Parchment Paper: Essential for easy removal of the bars; aluminum foil can work in a pinch.
- 8×8 Baking Pan: The perfect size for these bars; any square baking dish will suffice.
- Measuring Cups and Spoons: Accurate measurements ensure success; a kitchen scale could be an alternative.
- Spatula: Ideal for spreading the cheesecake layer; a spoon is a great substitute.
Variations on Cookie Monster Cheesecake Bars
- Gluten-Free Option: Swap regular flour with a gluten-free all-purpose blend for a delicious gluten-free dessert.
- Vegan Delight: Use dairy-free cream cheese, coconut cream, and vegan butter to make these bars plant-based.
- Different Colors: Choose alternate food colorings for a new twist—think pink for a fun Valentine’s Day treat!
- Nutty Crunch: Incorporate chopped nuts into the crust or as toppings for added crunch and flavor.
- Cheesecake Swirl: Blend some of the cheesecake filling with caramel or peanut butter for a delightful marbled effect.
Serving Suggestions for Cookie Monster Cheesecake Bars
- Pair these bars with a scoop of vanilla ice cream for a delightful contrast of flavors and temperatures.
- Serve with a drizzle of chocolate syrup or caramel sauce for an extra indulgent touch.
- Add a sprinkle of colorful sprinkles on top for a festive presentation.
- Accompany with a tall glass of cold milk or a rich cup of coffee to balance the sweetness.
- For a family gathering, arrange bars on a colorful platter, cutting them into fun shapes for added pizzazz!
FAQs about Cookie Monster Cheesecake Bars
Got questions about these delightful Cookie Monster Cheesecake Bars? You’re not alone! Here are some common queries that might just address your culinary curiosities.
Can I use different cookies for the topping?
Absolutely! While mini Chip Ahoy and Oreos are a classic combo, feel free to mix it up. Try using your favorite cookies like Nutter Butters or even some crushed graham crackers for a different flavor profile.
How long do these cheesecake bars last?
These bars can last up to a week in the refrigerator. Just be sure to store them in an airtight container to keep them fresh and delicious for longer.
Can I freeze the Cookie Monster Cheesecake Bars?
You definitely can! After they’ve set, slice them into squares and freeze them in individual portions. Just wrap them well in plastic wrap, and they’ll stay good for about a month. When you’re ready to enjoy, simply thaw them in the fridge overnight.
Is there a way to make these bars lower in sugar?
Yes! You can reduce the amount of sugar in both the crust and cheesecake layer. Also, consider using a sugar substitute like erythritol or stevia to keep the sweetness without all the calories.
What’s the best way to cut these cheesecake bars?
To achieve clean cuts, use a sharp knife that you have dipped in warm water. Wipe the knife between cuts for neat and uniform squares. This trick will make your presentation as delightful as the taste!
Final Thoughts
Making Cookie Monster Cheesecake Bars is more than just baking; it’s a joyful experience that brings smiles to faces. The combination of creamy cheesecake and crunchy cookie goodness creates a treat that’s both nostalgic and fun. Whether you’re serving them at family gatherings or enjoying a quiet night in, these bars are sure to be a hit. The vibrant blue color even adds a playful twist to your dessert table. So, roll up those sleeves, grab your ingredients, and create unforgettable memories with this easy and delicious recipe. Trust me, you won’t regret it!
Print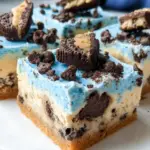
Cookie Monster Cheesecake Bars
- Total Time: 6 hours 50 minutes
- Yield: 16 bars 1x
- Diet: Vegetarian
Description
Delicious Cookie Monster Cheesecake Bars that combine a cookie crust with a creamy no-bake cheesecake layer, topped with cookie pieces.
Ingredients
- 1/2 cup butter, softened
- 1/2 cup brown sugar
- 1/4 cup granulated sugar
- 1 1/4 cup all-purpose flour
- 1 teaspoon vanilla
- 1 cup semi-sweet mini chocolate chips
- 1/2 teaspoon salt
- 1 large egg
- 16 ounces cream cheese, softened
- 1 cup powdered sugar
- 1/3 cup sour cream
- 1 teaspoon vanilla
- 1 1/2 cups cool whip
- 1 teaspoon lemon juice
- blue food coloring
- 12 mini Chip Ahoy chocolate chip cookies
- 12 mini Oreos
Instructions
- Preheat oven to 350 degrees.
- Mix butter and granulated and brown sugar in a stand mixer for the cookie crust.
- Add in the egg, vanilla, salt, and slowly stir in the flour.
- Fold in the chocolate chips and place in a parchment-lined 8×8 pan.
- Bake for 15-20 minutes or until the cookie bars are done. Remove from the oven and let cool.
- In a stand mixer, whip the softened cream cheese. Add sour cream, lemon juice, vanilla, and powdered sugar gradually.
- Add blue food coloring until desired color is achieved. Fold in the cool whip.
- Pour the cheesecake mixture into the 8×8 pan.
- Top with chopped cookies and refrigerate for 6 hours or overnight.
- Slice into squares and serve.
Notes
- Ensure the cream cheese is thoroughly softened for easier mixing.
- Allow bars to set in the refrigerator for the best texture.
- Feel free to adjust the amount of blue food coloring to achieve your preferred shade.
- Prep Time: 30 minutes
- Cook Time: 20 minutes
- Category: Dessert
- Method: Baking and No-Bake
- Cuisine: American
Nutrition
- Serving Size: 1 bar
- Calories: 250
- Sugar: 20g
- Sodium: 150mg
- Fat: 12g
- Saturated Fat: 7g
- Unsaturated Fat: 3g
- Trans Fat: 0g
- Carbohydrates: 30g
- Fiber: 1g
- Protein: 4g
- Cholesterol: 30mg