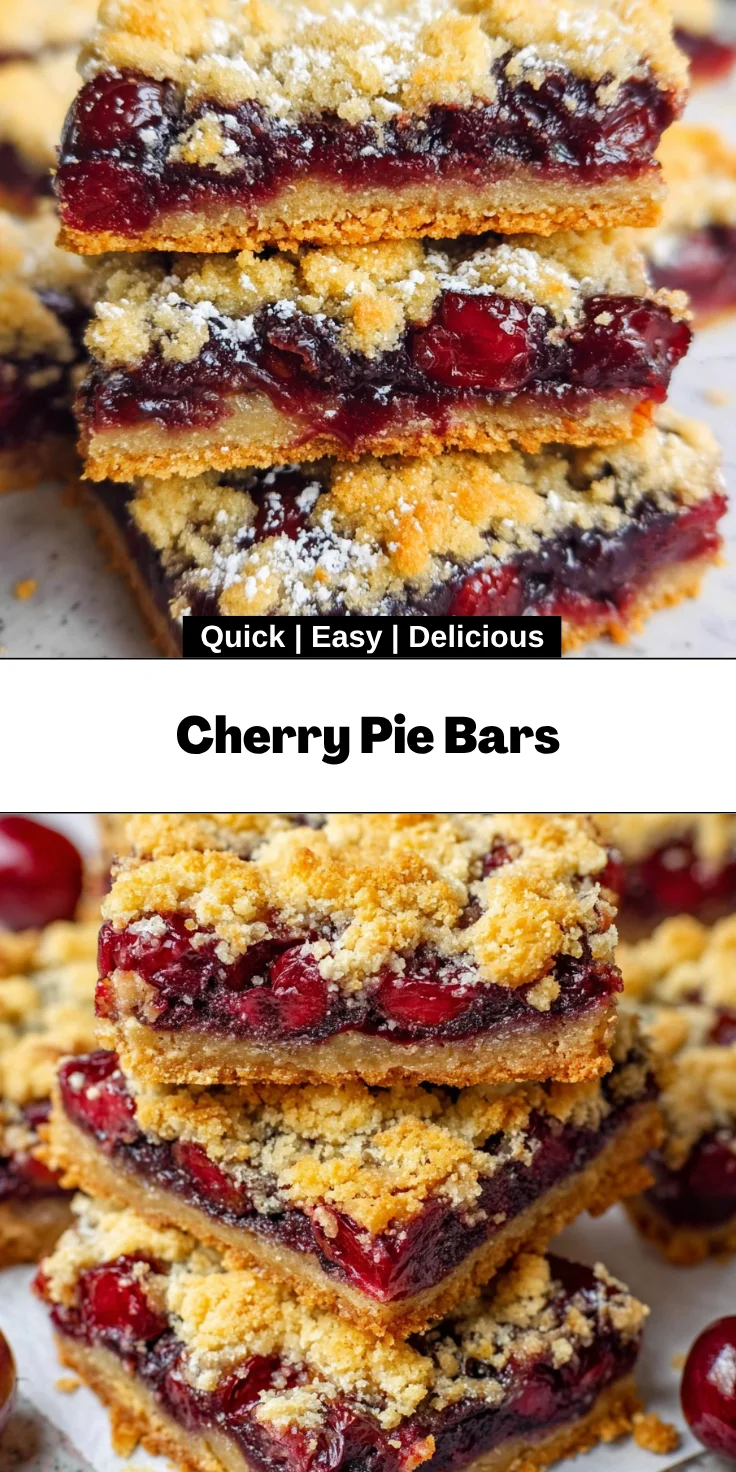
Introduction to Cherry Pie Bars
There’s something magical about Cherry Pie Bars that always brings a smile to my face. They remind me of summer picnics and lazy afternoons spent with loved ones. If you’re like me, juggling work, family, and everything in between, these delightful bars offer a quick solution for busy days. What’s better? They pair the juicy goodness of fresh cherries with a charming crumb topping, making them perfect for impressing guests or simply satisfying a sweet tooth. Let’s dive into this easy recipe and create something delicious that everyone will love!
Why You’ll Love This Cherry Pie Bars
These Cherry Pie Bars are a dream come true for anyone in need of a quick, mouthwatering dessert. They are easy to make, taking just 40 minutes from start to finish. Plus, the combination of fresh cherries and a buttery crumb topping creates a flavor explosion that’s hard to resist. Whether it’s a busy weekday or a weekend gathering, these bars are sure to hit the sweet spot, delighting everyone around the table.
Ingredients for Cherry Pie Bars
Let’s gather everything we need to whip up these delightful Cherry Pie Bars! Each ingredient plays a key role in creating that perfect blend of flavors, so let’s take a closer look.
- Fresh Cherries: The star of the show! Ripe, sweet cherries bring that vibrant flavor and natural sweetness. Feel free to use frozen cherries if fresh ones aren’t available; just thaw them first!
- Lemon Juice: A splash of lemon juice brightens the filling, balancing the sweetness of the cherries perfectly. It’s like sunshine in a bowl.
- Cornstarch: Essential for thickening the cherry filling. It helps to prevent the bars from becoming too runny.
- Sugar: The sweetness from sugar accentuates the fruitiness of the cherries. You can use granulated sugar or swap with coconut sugar for a hint of caramel flavor.
- Unsalted Butter: Melted butter gives the crumb topping its rich, buttery texture. If you’re looking for a dairy-free option, coconut oil works wonderfully!
- Salt: A pinch of salt balances the sweetness. Trust me, it makes a difference!
- Baking Powder & Baking Soda: These leavening agents ensure the crumb topping is light and fluffy. They’re the secret behind that lovely texture.
- Flour: All-purpose flour is the base for the crumb mixture, providing structure. For a gluten-free version, you could try a gluten-free baking blend.
- Additional Sugar: A sprinkle on top before baking creates a slightly crunchy, sweet crust that’s absolutely divine.
For exact measurements of these ingredients, just scroll down to the bottom of this article where you’ll find a handy print-friendly recipe!
How to Make Cherry Pie Bars
Now that we have our ingredients ready, let’s roll up our sleeves and start making these delightful Cherry Pie Bars! Follow the steps below, and soon your kitchen will be filled with the irresistible aroma of fresh cherries and buttery goodness.
Prepare Your Baking Dish
Preheat and Line
First things first, preheat your oven to 375°F. While it warms up, grab an 8×8 baking dish and line it with parchment paper. This helps to keep your bars from sticking and makes clean-up a breeze. Trust me, you’ll thank yourself later!
Make the Cherry Filling
Mixing Ingredients
In a large bowl, toss your sliced fresh cherries with the tablespoon of lemon juice and cornstarch. The lemon juice enhances the cherries’ sweetness while the cornstarch works its magic to thicken the mixture. Give it a good stir until everything is fully combined. This sweet fruit mixture will be the centerpiece of your bars!
Create the Crumb Topping
Combining Dry Ingredients
In another bowl, mix the melted butter and sugar together until smooth. Then, add in the salt, baking powder, baking soda, and flour. Stir it all up until the mixture resembles a crumbly texture. Don’t forget to save about ¾ of this crumb mixture aside for later. You want it to be crumbly, not doughy—like the perfect blend of cake crumbs and cookie dough!
Assemble the Bars
Layering Process
Press the remaining crumb mixture firmly into the bottom of your lined baking dish. This crust will create a delicious base for your cherry filling. Once it’s nice and compact, pour the cherry mixture evenly over the crust, spreading it out gently. Finally, sprinkle the reserved crumb topping over the cherries. It’s like putting a cozy blanket on your favorite dessert!
Baking
Cooking Time and Tips
Pop the dish into your preheated oven and bake for 25 minutes. Keep an eye on it! You want the top to turn golden brown, signaling that the bars are perfectly baked. Once done, remove them from the oven and sprinkle the last bit of sugar on top for that sweet finishing touch. Allow the bars to cool a bit before slicing. Patience (just a little) is key when it comes to enjoying your delicious Cherry Pie Bars!
Tips for Success
- Use ripe cherries for the best flavor—sweetness is key!
- Don’t skip the lemon juice; it brightens the filling beautifully.
- Let the bars cool completely before cutting for cleaner slices.
- Store leftovers in an airtight container in the fridge for up to three days.
- Experiment with spices like cinnamon for an extra flavor kick!
Equipment Needed
- Baking Dish: An 8×8 dish is ideal, but you can use a 9×9 as well.
- Mixing Bowls: A couple of large bowls will make mixing easy.
- Measuring Cups and Spoons: Accurate measurements are key for delicious results.
- Parchment Paper: This helps prevent sticking; aluminum foil can be a backup.
- Whisk and Spatula: Use these to blend ingredients smoothly and spread evenly.
Variations
- Berry Mix: Substitute cherries with a mix of blueberries and raspberries for a delicious twist! This adds a fun berry medley to your bars.
- Nuts for Crunch: Add chopped walnuts or pecans to the crumb topping for a delightful crunch. It boosts texture and adds unique flavor.
- Gluten-Free: Swap all-purpose flour with a gluten-free flour blend for a gluten-free treat that everyone can enjoy.
- Vegan Version: Use coconut oil instead of butter and a flax egg as a binder. They’ll still be just as tasty!
- Spice it Up: Add a pinch of cinnamon or nutmeg to the cherry filling for an extra flavor boost that complements the fruit beautifully.
Serving Suggestions
- Ice Cream: Serve warm Cherry Pie Bars with a scoop of vanilla ice cream for a delightful dessert experience.
- Fresh Whipped Cream: A dollop of whipped cream on top adds a creamy finish that pairs beautifully with the tart cherries.
- Garnish: Sprinkle with powdered sugar or fresh mint leaves for a pop of color and a touch of elegance.
- Drinks: Pair with sweet iced tea or a light rosé wine to enhance the fruity flavors.
FAQs about Cherry Pie Bars
As we embrace the joy of making these Cherry Pie Bars, you may have a few questions on your mind. Let’s tackle some common inquiries that pop up—everything from the best cherry types to storage tips!
Can I use frozen cherries for this recipe?
Absolutely! Frozen cherries are a great alternative. Just remember to thaw them and drain any excess liquid before mixing them with the lemon juice and cornstarch. They still deliver delicious results!
How do I store leftover Cherry Pie Bars?
To keep them fresh, store your Cherry Pie Bars in an airtight container in the refrigerator. They can last for up to three days—if they make it that long!
Can I make these bars ahead of time?
You bet! You can prepare the bars a day in advance. Just bake, cool, and store them in the fridge. When it’s time to serve, you can sprinkle a bit of sugar on top for a fresh touch.
What if I don’t have cornstarch?
No worries! You can use all-purpose flour as a substitute, although the filling might be slightly less thick. It’s an effective backup to keep those beautiful cherry juices in check.
Are these Cherry Pie Bars suitable for freezing?
Yes, indeed! If you want to save some for later, just wrap them tightly in plastic wrap, then in foil before freezing. When you’re ready to enjoy them, thaw in the fridge overnight. You’ll have a slice of joy waiting for you!
Final Thoughts
Baking these Cherry Pie Bars is more than just a recipe; it’s a delightful journey that fills your kitchen with warmth and sweet aromas. I love how easy they are to make, yet they always impress my family and friends. The juicy cherries paired with that crumbly topping offer a delicious symphony of flavors that transports me back to sun-kissed summers. Whether you serve them at a family gathering or sneak a slice for yourself, these bars bring a lovely sense of joy. Trust me, once you try them, they’ll become a cherished go-to in your baking repertoire!
Print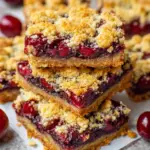
Cherry Pie Bars
- Total Time: 40 minutes
- Yield: 16 bars 1x
- Diet: Vegetarian
Description
Delicious Cherry Pie Bars made with fresh cherries and a crumbly topping, perfect for dessert.
Ingredients
- 2 cups Fresh Cherries (pitted and sliced into small slices)
- 1 tablespoon Lemon Juice
- 1 tablespoon Cornstarch
- ½ cup Sugar
- ½ cup Butter unsalted, melted
- ¼ teaspoon Salt
- 1 teaspoon Baking Powder
- 1 teaspoon Baking Soda
- 1 ½ cups Flour
- 2 tablespoons Sugar
Instructions
- Line an 8×8 baking dish with parchment paper and preheat the oven to 375° F.
- In a large bowl add the sliced cherries, lemon juice and cornstarch. Stir together until fully combined.
- In another large bowl add the melted butter and sugar, stir to combine.
- Add the salt, baking powder, baking soda and flour. Stir until it becomes a crumb texture. Save 3/4 of the crumb mixture and set it to the side.
- Add the remaining crumb mixture to the bottom of the pan and press together to form a crust.
- Add the cherry mixture and evenly spread it over the bottom crust.
- Sprinkle the remaining crumb mixture over top.
- Bake in the preheated oven for 25 minutes, or until the top is a golden color.
- Remove from the oven and sprinkle 2 tablespoons of sugar on top.
- Let cool and slice.
Notes
- For the best flavor, use ripe, sweet cherries.
- These bars can be served warm or cold.
- They can be stored in an airtight container in the refrigerator for up to 3 days.
- Prep Time: 15 minutes
- Cook Time: 25 minutes
- Category: Dessert
- Method: Baking
- Cuisine: American
Nutrition
- Serving Size: 1 bar
- Calories: 180
- Sugar: 14g
- Sodium: 150mg
- Fat: 7g
- Saturated Fat: 4g
- Unsaturated Fat: 2g
- Trans Fat: 0g
- Carbohydrates: 26g
- Fiber: 1g
- Protein: 2g
- Cholesterol: 15mg