Introduction to Butterfinger Cake
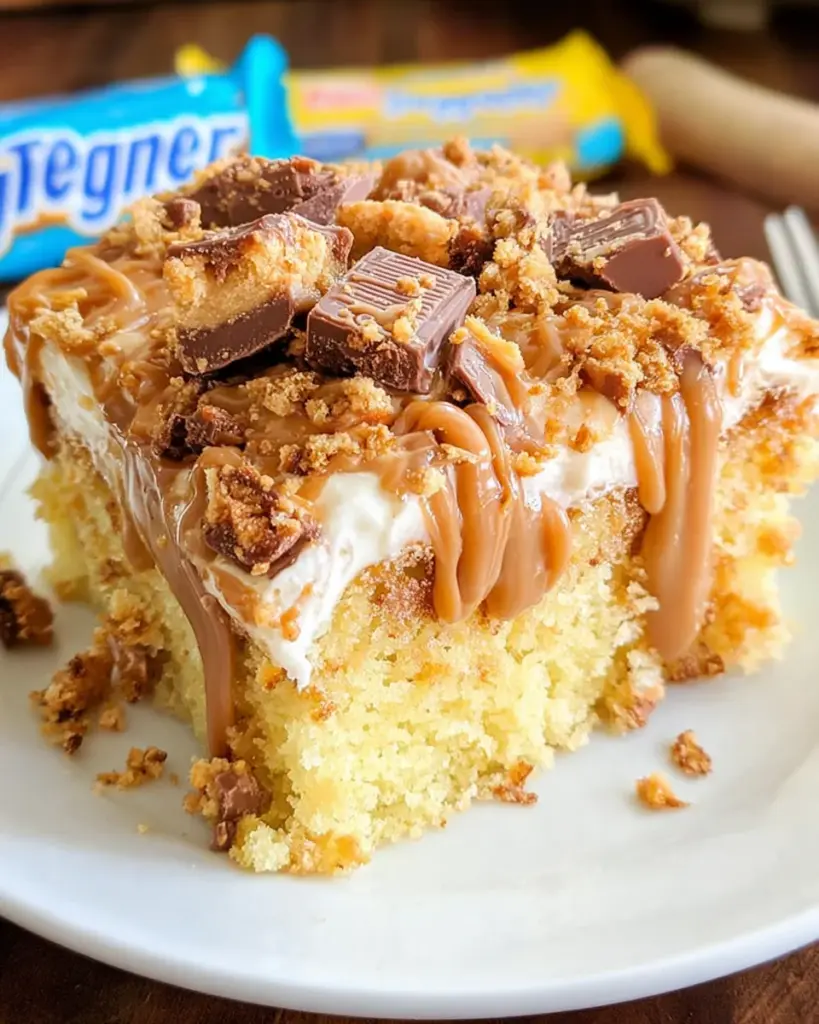
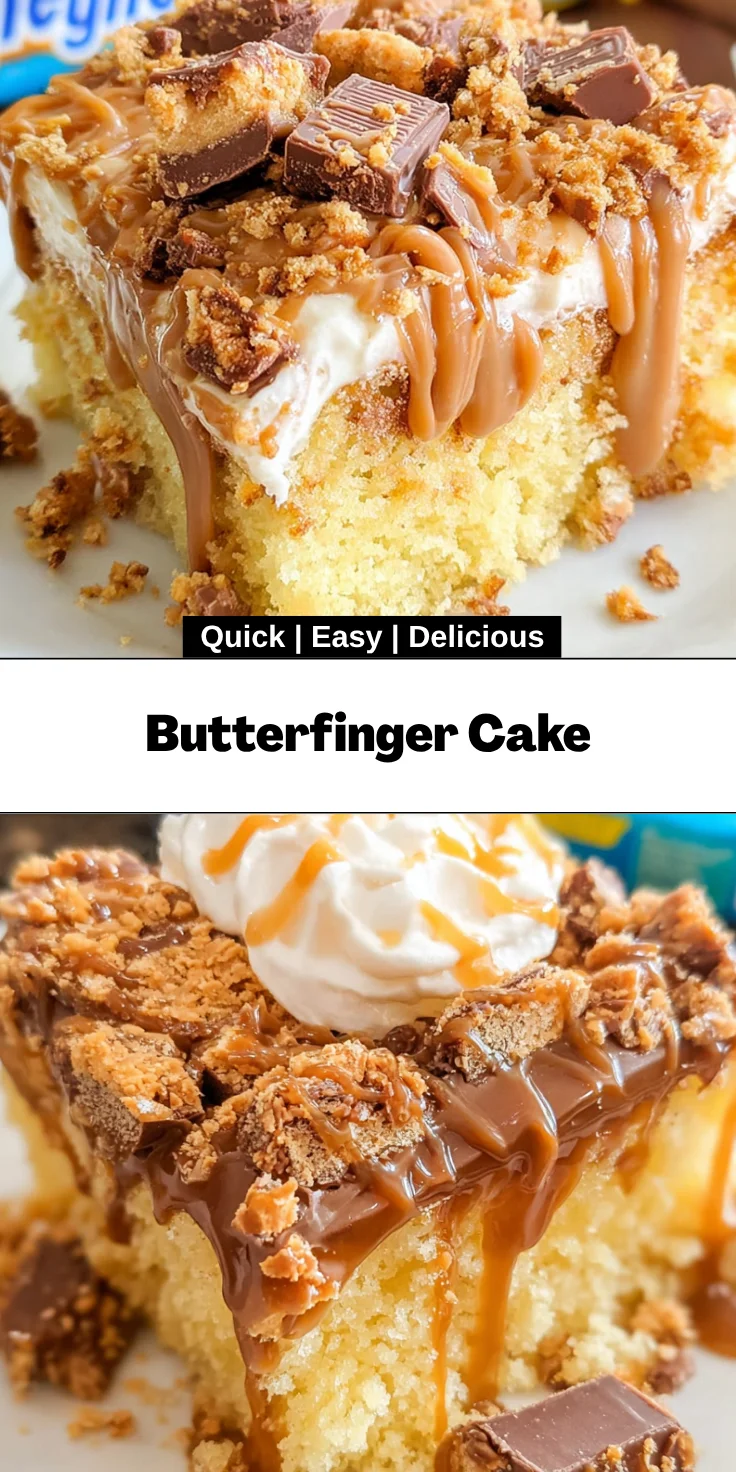
There’s something magical about a slice of Butterfinger Cake that instantly transports me back to my childhood. This delightful dessert, with its rich layers of caramel and creamy topping, never fails to put a smile on my loved ones’ faces. As a busy mom, I know that time is often a luxury we can’t afford. That’s why this Butterfinger Cake is a perfect solution for those hectic days when you want to impress but still need something quick and easy. Trust me, this delicious treat will have everyone begging for seconds!
Why You’ll Love This Butterfinger Cake
Oh, where do I begin? This Butterfinger Cake is a dreamy combination of rich flavors and simple preparation. It’s the kind of dessert that can be whipped up in no time, making it perfect for those unexpected guests or family gatherings. Plus, with its layers of caramel and crunchy toppings, every bite is like a sweet hug. An easy cake recipe that even the pickiest eaters will adore? Sign me up!
Ingredients for Butterfinger Cake
To create this mouthwatering Butterfinger Cake, you’ll need a few simple ingredients that pack a big punch in flavor. Here’s what you’ll gather:
- Sweetened Condensed Milk: This creamy treat adds sweetness and moisture, creating a luscious texture.
- Jarred Caramel Sauce: For that rich, caramel goodness that seeps into every bite, make sure to choose a high-quality sauce.
- Yellow Cake Mix: This is your base, offering convenience and flavor. Look for a brand you love!
- Butterfinger Candy Bits: These crunchy bits bring that signature flavor and crunch. You can find them pre-packaged or chop up regular Butterfinger bars.
- Cool Whip: This fluffy topping is the perfect way to balance the sweetness of the cake. You can use homemade whipped cream if you prefer.
Feel free to experiment! For a richer flavor, use homemade caramel or substitute the Cool Whip with whipped cream. If you can’t find Butterfinger bits, sub them out for crushed toffee or chocolate bars.
The exact measurements for these ingredients are listed at the bottom of the article. Trust me, you’ll want to print this recipe and keep it handy for all your dessert cravings!
How to Make Butterfinger Cake
Ready to create this delicious Butterfinger Cake? Let’s dive into the fun of baking. Follow these simple steps, and I promise your kitchen will be filled with lovely aromas and happy faces!
Preheat the Oven
Start by preheating your oven to 350°F. This is crucial for getting that perfect bake!
Grab a 9×13-inch glass baking dish and lightly spray it with baker’s spray, like Baker’s Joy. This will help your cake come out beautifully and effortlessly.
Prepare the Caramel Mixture
In a medium-sized bowl with a pour spout, combine 1 cup of sweetened condensed milk with 1 cup of jarred caramel sauce.
Whisk them together until they’re creamy and well combined.
Set this mouthwatering caramel mixture aside while you work on the cake.
Make the Cake Batter
In a large mixing bowl, grab your yellow cake mix.
Add the ingredients listed on the box and mix for 1 to 2 minutes. Make sure there are no lumps, as a smooth batter bakes beautifully!
Once you’re done, the anticipation of the Butterfinger Cake will grow!
Bake the Cake
Pour the batter into the prepared baking dish and place it in your preheated oven.
Bake for about 28 to 30 minutes. You’ll know it’s done when the cake is lightly golden and a toothpick inserted into the center comes out clean.
Try not to peek too much—your cake needs that steam to rise!
Poke and Pour
Once your cake is baked, take it out of the oven and set it on a cooling rack for a few minutes.
Using a fork or wooden skewer, poke lots of holes all over the warm cake. This is super important!
Slowly pour the caramel mixture evenly over the top, allowing it to seep into those holes. Your cake will thank you later!
Add Butterfinger Candy
Now, it’s time to sprinkle in the magic! Take ½ cup of crushed Butterfinger candy and sprinkle it evenly over the cake.
Once you’ve done that, let the cake cool on the counter for 1 hour.
This helps all those sweet flavors meld together into one irresistible treat.
Top with Cool Whip
After the cake has cooled, grab a container of Cool Whip.
Evenly spread it over the cooled cake, creating a nice fluffy layer. Then, take the remaining 1 cup of crushed Butterfinger candy and sprinkle it on top for that extra crunch.
This topping will make your Butterfinger Cake look as good as it tastes!
Chill Before Serving
Now for the hardest part—waiting!
Refrigerate your Butterfinger cake for 1 to 2 hours, or even overnight if you can resist. This chilling time enhances the flavors and makes it easier to slice.
When you’re finally ready to serve, slice, and enjoy every delicious bite of this blissful dessert.
Tips for Success
- Ensure your cake is warm when pouring the caramel mixture for better absorption.
- Use room temperature ingredients for a smoother batter; it really makes a difference!
- Don’t skip the chilling step; it enhances the flavors and makes serving easier.
- For a fun twist, try adding a sprinkle of sea salt on top for that sweet-salty combo.
- Adding crushed nuts can give an extra layer of crunch and flavor!
Equipment Needed
- 9×13-inch Glass Baking Dish: This is perfect for even baking. You can also use a metal pan if that’s what you have on hand.
- Mixing Bowls: A variety of sizes is handy for mixing ingredients.
- Whisk and Fork: Essential for blending and poking the cake.
- Cooling Rack: You can use a plate if you don’t have one.
Variations of Butterfinger Cake
- Peanut Butter Butterfinger Cake: Add a layer of creamy peanut butter to the Cool Whip topping for a rich, nutty flavor.
- Gluten-Free Option: Substitute the yellow cake mix with a gluten-free version to cater to gluten-sensitive eaters.
- Chocolate Cake Variation: Swap the yellow cake mix for chocolate cake mix for a decadent chocolate Butterfinger Cake.
- Nutty Crunch: Mix in some crushed peanuts or walnuts with your Butterfinger candy for an added crunch and depth of flavor.
- Vegan Version: Use vegan cake mix and coconut cream instead of Cool Whip for a delicious dairy-free dessert.
Serving Suggestions for Butterfinger Cake
- Serve with Vanilla Ice Cream: A scoop of vanilla ice cream melts perfectly over warm slices.
- Pair with Fresh Berries: Garnish with strawberries or raspberries for a pop of color and tartness.
- Presentation: Dust with powdered sugar for an elegant finish when serving at gatherings.
- Drinks: Complement with a cup of coffee or a glass of milk to balance the sweetness.
FAQs about Butterfinger Cake
I often receive questions about this delightful Butterfinger Cake, so I thought I’d share a few answers to help you on your baking journey. Here are some frequently asked questions that might just pop into your mind!
Can I use a different cake mix for this Butterfinger Cake?
Absolutely! If you’re in the mood for chocolate, feel free to swap the yellow cake mix for chocolate. It’ll add a rich twist to this treat!
How can I make the Butterfinger Cake ahead of time?
This cake is perfect for preparing in advance. You can assemble the cake up to a day before serving. Just make sure to refrigerate it, so the flavors meld beautifully.
What if I don’t have Cool Whip?
No worries! You can use homemade whipped cream instead. Just whisk some heavy cream with a bit of sugar and vanilla until soft peaks form. It will be just as delicious!
Can I freeze Butterfinger Cake?
While I recommend enjoying it fresh, you can freeze it without the Cool Whip topping. Just wrap it tightly and store it for up to a month. When you’re ready to enjoy, let it thaw and add the topping before serving.
How should I store leftovers?
Store any leftovers in the refrigerator for up to three days. Just make sure it’s covered to keep it fresh and delicious.
Final Thoughts
There’s something incredibly rewarding about sharing a piece of homemade Butterfinger Cake with family and friends. The joy that lights up their faces as they indulge in each decadent bite makes all the effort worthwhile. This dessert offers the perfect blend of creamy caramel and crunchy candy, creating a symphony of flavors that dance on your taste buds.
Whether it’s a gathering, birthday, or simply a Tuesday treat, this Butterfinger Cake brings people together. It reminds me that life is sweeter when we share our kitchen adventures. So grab your apron, and let’s create some wonderful memories!
Print
Butterfinger Cake
- Total Time: 1 hour 30 minutes
- Yield: 12 servings 1x
- Diet: Vegetarian
Description
Delicious Butterfinger Cake layered with caramel and topped with whipped cream and Butterfinger candy bits.
Ingredients
- 1 cup sweetened condensed milk
- 1 cup jarred caramel sauce
- 15.25 ounces yellow cake mix (and ingredients listed on the box to make the cake)
- 1½ cups Butterfinger candy bits, divided into ½ cup and 1 cup
- 8 ounces container Cool Whip
Instructions
- Preheat the oven to 350°F. Lightly spray a 9×13-inch glass baking dish with baker’s spray (like Baker’s Joy brand). Set aside.
- In a medium-sized bowl with a pour spout, stir together the sweetened condensed milk and jarred caramel sauce until completely combined. Set the caramel mixture aside.
- In a large mixing bowl, whisk together the ingredients for the box cake mix for 1 to 2 minutes or just until completely combined and no lumps remain.
- Bake the cake for 28 to 30 minutes or until lightly golden and a toothpick inserted into the center of the cake comes out clean.
- Using a fork or wooden skewer, poke lots of holes all over the cake. Slowly pour the caramel filling mixture evenly over the top of the warm cake.
- Sprinkle ½ cup of the crushed Butterfinger candies evenly over the top of the cake. Allow your cake to cool on the counter for 1 hour.
- Evenly spread the Cool Whip onto the cooled cake and top with the additional 1 cup of crushed Butterfinger candy pieces.
- Refrigerate the Butterfinger cake for 1 to 2 hours, up to overnight, before slicing and serving.
Notes
- Make sure the cake is warm when pouring the caramel mixture to allow better absorption.
- Store leftovers in the refrigerator for up to 3 days.
- This cake can be made a day in advance for better flavor.
- Prep Time: 30 minutes
- Cook Time: 30 minutes
- Category: Dessert
- Method: Baking
- Cuisine: American
Nutrition
- Serving Size: 1 slice
- Calories: 380
- Sugar: 32g
- Sodium: 250mg
- Fat: 18g
- Saturated Fat: 9g
- Unsaturated Fat: 6g
- Trans Fat: 0g
- Carbohydrates: 54g
- Fiber: 1g
- Protein: 4g
- Cholesterol: 40mg