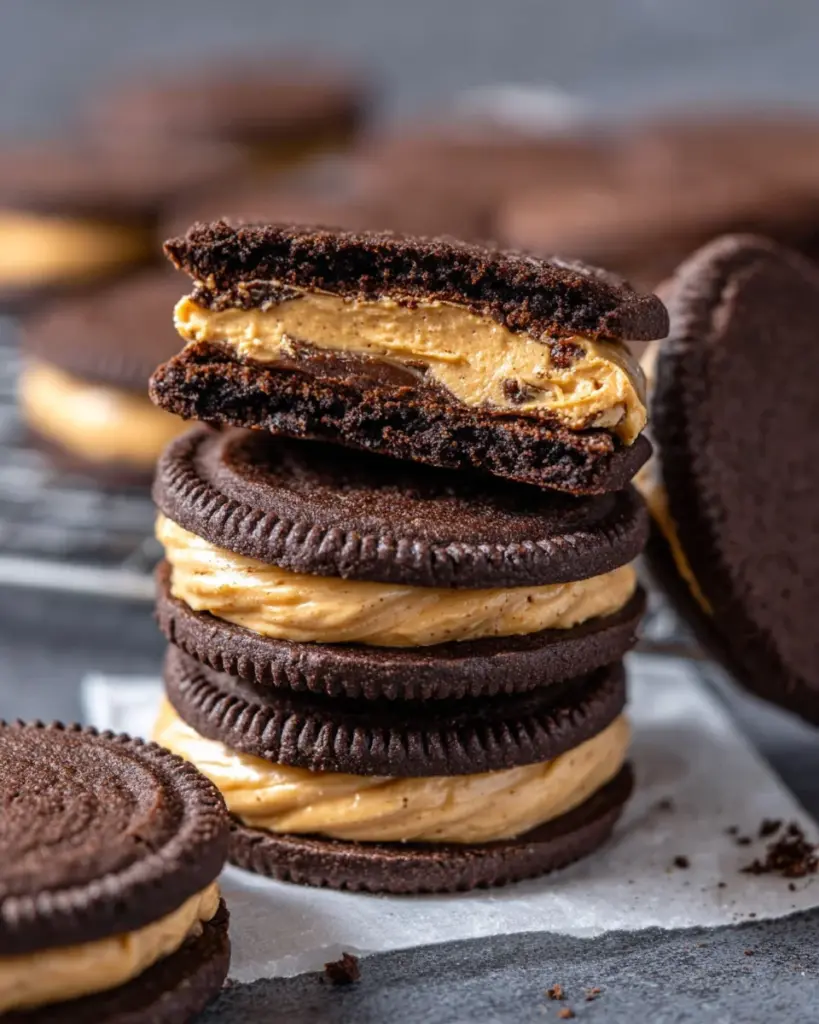
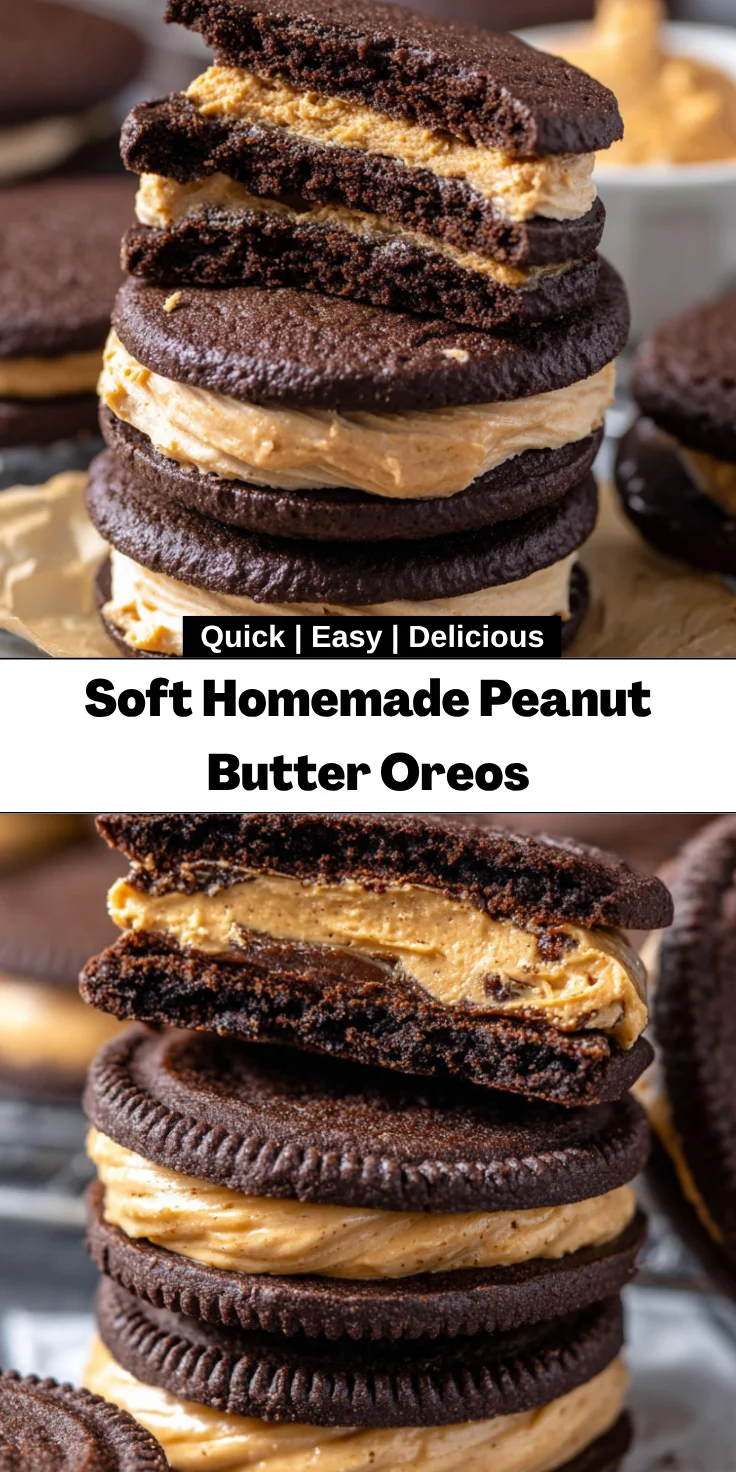
Introduction to Soft Homemade Peanut Butter Oreos
Welcome! If you’re anything like me, you know how hectic life can get, especially when juggling work, family, and everything in between. That’s why I absolutely adore these Soft Homemade Peanut Butter Oreos. They’re not just a sweet treat; they’re a little moment of joy in your day. Perfect for satisfying those late-night cravings or impressing your loved ones at gatherings, you can whip them up quickly. With simple ingredients and an effortless process, you’ll feel like a baking pro in no time. Ready to bring some sweetness into your busy life?
Why You’ll Love This Soft Homemade Peanut Butter Oreos
These Soft Homemade Peanut Butter Oreos are a dream come true for busy moms and professionals alike. They come together so quickly, making them an ideal choice for those surprise sweet cravings. Plus, the taste? Oh my goodness! The rich peanut butter filling paired with the soft chocolate cookies is unparalleled. They’re perfect for school lunches, after dinner treats, or cozy gatherings. Who wouldn’t love a little homemade goodness?
Ingredients for Soft Homemade Peanut Butter Oreos
Gathering the right ingredients is essential for these Soft Homemade Peanut Butter Oreos. Each one plays a vital role in creating that melt-in-your-mouth experience. Here’s what you’ll need:
- All-purpose flour: This is the backbone of our cookies, providing the structure and a tender bite.
- Salt: Just a pinch enhances flavor, balancing the sweetness in each cookie.
- Baking soda: It helps the cookies rise, ensuring they stay soft and chewy.
- Cocoa powder: Use Hershey’s Special Dark for a rich chocolate flavor that pairs fantastically with peanut butter.
- Unsalted butter: Room temperature butter is key for creaming with sugars, creating a smooth texture.
- Brown sugar: This adds moisture and a hint of caramel flavor, deepening the sweetness.
- Granulated sugar: It contributes to the sweetness and gives the cookies a delightful crisp edge.
- Large egg: Acts as a binding agent and adds richness to the dough.
- Vanilla extract: A splash of vanilla amplifies the flavors, marrying chocolate and peanut butter beautifully.
- For the filling:
- Unsalted butter: Similar to the cookie dough, it needs to be softened for easy blending.
- Peanut butter: The star of the filling! Smooth peanut butter creates a creamy texture, but chunky offers a tasty crunch.
- Salt: Just a touch again to balance the sweetness of the filling.
- Powdered sugar: This sweetens the filling and gives it a fluffy texture. The perfect combination!
- Heavy whipping cream: Optional, but it helps achieve the desired creamy consistency for the filling.
For exact quantities, check at the bottom of the article. They’re available for printing and easy access, making your baking day a breeze!
How to Make Soft Homemade Peanut Butter Oreos
Step 1: Preheat and Prepare
Start by preheating your oven to 350°F. This ensures that our Soft Homemade Peanut Butter Oreos bake evenly and have that perfect texture. While the oven warms up, line your cookie sheets with parchment paper or silicone mats. Trust me, this makes cleanup a breeze. Plus, it prevents the cookies from sticking and getting all sad and flat. It’s like giving them a cozy little home during their baking journey!
Step 2: Mix Dry Ingredients
In a medium-sized bowl, whisk together the all-purpose flour, salt, baking soda, and cocoa powder. This step is crucial; it blends the dry ingredients evenly and helps in preventing clumps. It also sets the stage for the right texture. You want your cookies to be soft, not rubbery! So take your time here—think of it as a mini workout for your whisk!
Step 3: Cream Butter and Sugars
Now, it’s time for the fun part! In the bowl of an electric mixer, combine unsalted butter, brown sugar, and granulated sugar. Beat them together until the mixture is light and fluffy—about 3 minutes should do the trick. This process creates air pockets in the dough, which make your cookies soft and tender. So, don’t rush; let that mixer work its magic!
Step 4: Combine Wet and Dry Ingredients
Next, add in the large egg and vanilla extract to your creamed mixture. Mix until everything is well incorporated, making sure to scrape the sides of the bowl. Gradually add the dry ingredients—a little at a time—until the dough comes together. You’ll notice it’s a bit sticky, but that’s just how we like it! Sticky means soft and chewy cookies, and who can resist that?
Step 5: Shape and Bake
Using a cookie scoop, drop 1- or 2-tablespoon-sized balls of dough onto the prepared baking sheets. Make sure to leave some space between them because they’ll spread while baking. Pop them into your preheated oven for about 12–15 minutes. They’re done when they lose their gloss and look set. They might seem soft, but they’ll firm up as they cool. Keep an eye on your oven; no one likes a burnt cookie!
Step 6: Prepare the Filling
While your cookies cool, let’s whip up that luscious peanut butter filling. In a large bowl, combine the soft unsalted butter and creamy peanut butter. Beat until smooth and velvety. Gradually mix in the powdered sugar until you have a thick, spreadable filling. Add the vanilla extract and one tablespoon of heavy whipping cream. Beat for an additional 30 seconds. If needed, adjust the consistency by adding more cream—just make it nice and smooth without being runny!
Step 7: Assemble the Cookies
Finally, let’s put those beauties together! Using a piping bag or a knife, spread a generous dollop of peanut butter filling on the flat side of half the cookies. Top them off with the remaining cookies to create delicious sandwiches. Press gently to ensure the filling oozes just a touch. Voila! You’ve made your very own Soft Homemade Peanut Butter Oreos!
Tips for Success
- Always measure your flour accurately—too much can lead to dry cookies.
- Let your butter come to room temperature for easier blending.
- Don’t skip cooling the cookies before filling; it prevents melty disasters!
- Make the filling thicker or thinner with cream to suit your taste.
- Experiment with chunky peanut butter for added texture!
Equipment Needed
- Mixing Bowl: A large bowl for combining ingredients; any sturdy bowl will do.
- Electric Mixer: A stand or hand mixer speeds things up, but you can also use a whisk.
- Cookie Scoop: A tablespoon or cookie scoop for portioning dough; a spoon works too.
- Baking Sheets: Parchment-lined baking sheets; silicone mats are a great alternative.
- Piping Bag: For filling; a plastic bag with the corner snipped off works just as well!
Variations of Soft Homemade Peanut Butter Oreos
- Chocolate Peanut Butter Oreo: Swap half the all-purpose flour for cocoa powder to enhance the chocolate flavor in the cookies.
- Gluten-Free Option: Substitute all-purpose flour with a gluten-free baking blend for a gluten-free version of these cookies.
- Nut-Free Version: Use sunbutter or soy nut butter to create a nut-free filling that everyone can enjoy.
- Extra Chocolate Chunk: Fold in mini chocolate chips into the dough for an extra chocolatey burst in each bite!
- Maple Peanut Butter Filling: Replace granulated sugar in the filling with maple syrup for a delightful twist on sweetness.
Serving Suggestions for Soft Homemade Peanut Butter Oreos
- Pair them with a glass of cold milk for that classic cookie experience.
- Serve alongside a scoop of vanilla ice cream for a delightful dessert platter.
- Dress them up with a drizzle of melted dark chocolate for an elegant touch.
- Share them at parties, weddings, or as gifts for friends and family.
- Display them on a cute dessert stand to impress your guests!
FAQs about Soft Homemade Peanut Butter Oreos
How long do Soft Homemade Peanut Butter Oreos last?
These delicious cookies can be stored in an airtight container for up to three days at room temperature. If you’re lucky enough to have leftovers, they freeze beautifully for up to a month. Just make sure to wrap them well, so they don’t get freezer burn. You’ll thank yourself later when that sweet craving hits!
Can I use crunchy peanut butter for the filling?
Absolutely! Using crunchy peanut butter will give your Soft Homemade Peanut Butter Oreos an added texture that’s delightful. The nutty bits add a fun surprise in every bite. If you like things a bit more robust, don’t hesitate to go for it!
What if my dough is too sticky?
If you find your dough too sticky, don’t panic! You can gradually add a bit more flour until it’s manageable. Just be careful not to add too much, as it could alter the softness you’re aiming for. Remember, stickiness means softness, so a little tackiness is perfectly okay!
Can I make these cookies ahead of time?
Yes! You can prepare the cookie dough a day in advance and store it in the fridge. When you’re ready to bake, just scoop and bake as usual. This makes your baking day even easier, especially if you anticipate a busy schedule!
What drinks pair well with these Soft Homemade Peanut Butter Oreos?
These cookies are heavenly with a chilled glass of milk, but they also pair wonderfully with coffee or a creamy hot chocolate. If you’re feeling adventurous, try them with a scoop of vanilla ice cream for a perfect dessert duo!
Final Thoughts
Making these Soft Homemade Peanut Butter Oreos is more than just baking; it’s about creating cherished memories with family and friends. The joy of watching faces light up with every bite is simply priceless. These cookies are a sweet remedy to a busy day and a delightful treat that lingers long after the last crumb is gone. Whether you enjoy them with a glass of milk or gift them to a neighbor, they bring a sprinkle of happiness to any occasion. So roll up your sleeves, embrace the flour, and let the sweet aroma fill your kitchen!
Print
Soft Homemade Peanut Butter Oreos
- Total Time: 35 minutes
- Yield: Approximately 12 cookies 1x
- Diet: Vegetarian
Description
Deliciously soft and homemade peanut butter Oreos, perfect for satisfying your sweet tooth.
Ingredients
- 1 ¼ cups (155g) all-purpose flour
- ¼ teaspoon salt
- ½ teaspoon baking soda
- ⅓ cup (17g) Hershey’s Special Dark unsweetened cocoa powder
- ½ cup (113g) unsalted butter
- ⅔ cup (134g) packed brown sugar
- ¼ cup (50g) granulated sugar
- 1 large egg
- 1 teaspoon vanilla extract
- FOR THE FILLING:
- ¼ cup (57g) unsalted butter
- ½ cup (134g) peanut butter
- ¼ teaspoon salt
- 1½ cups (170g) powdered sugar
- ½ teaspoon vanilla extract
- 1–3 tablespoons heavy whipping cream
Instructions
- Preheat oven to 350°F. Line cookie sheets with parchment paper or silicone baking mats.
- Whisk flour, salt, baking soda, and cocoa powder in a medium sized bowl. Set aside.
- Cream butter and both sugars in the bowl of an electric mixer fitted with the paddle attachment, or use a hand mixer. Mix until smooth, scraping the sides of the bowl as needed. Mix in egg and vanilla, then slowly mix in dry ingredients until smooth. The dough will be sticky.
- Scoop 1- or 2-tablespoon size balls of cookie dough onto prepared cookie sheets. Bake cookies for small (8-11 minutes) or large (12-15 minutes), or just until they are no longer glossy. Cool before removing from cookie sheets.
- Make the filling: beat butter, salt, and peanut butter with a hand mixer in a large bowl until smooth, about a minute. Slowly mix in powdered sugar until the mixture is smooth and thick, then add vanilla and 1 tablespoon of heavy whipping cream. Beat for 30 seconds, then add more cream as needed for consistency, up to 1 more tablespoon. You want it smooth and spreadable, but not runny.
- Pipe the filling onto half the cookies and sandwich with a second cookie. Store in an airtight container for up to 3 days or freeze for up to one month.
Notes
- Ensure butter is at room temperature for easier blending.
- Feel free to adjust the thickness of the filling by adding more or less cream.
- These cookies can be frozen for future enjoyment.
- Prep Time: 20 minutes
- Cook Time: 15 minutes
- Category: Dessert
- Method: Baking
- Cuisine: American
Nutrition
- Serving Size: 1 cookie
- Calories: 150
- Sugar: 10g
- Sodium: 70mg
- Fat: 7g
- Saturated Fat: 4g
- Unsaturated Fat: 2g
- Trans Fat: 0g
- Carbohydrates: 20g
- Fiber: 1g
- Protein: 2g
- Cholesterol: 15mg