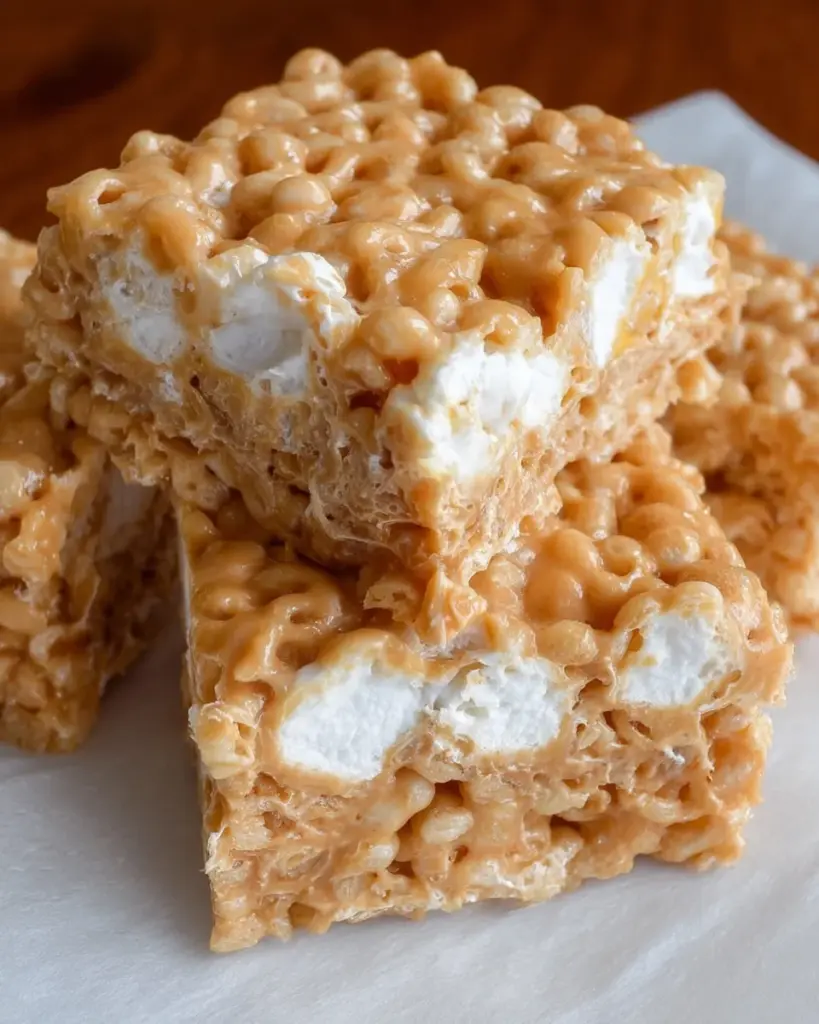
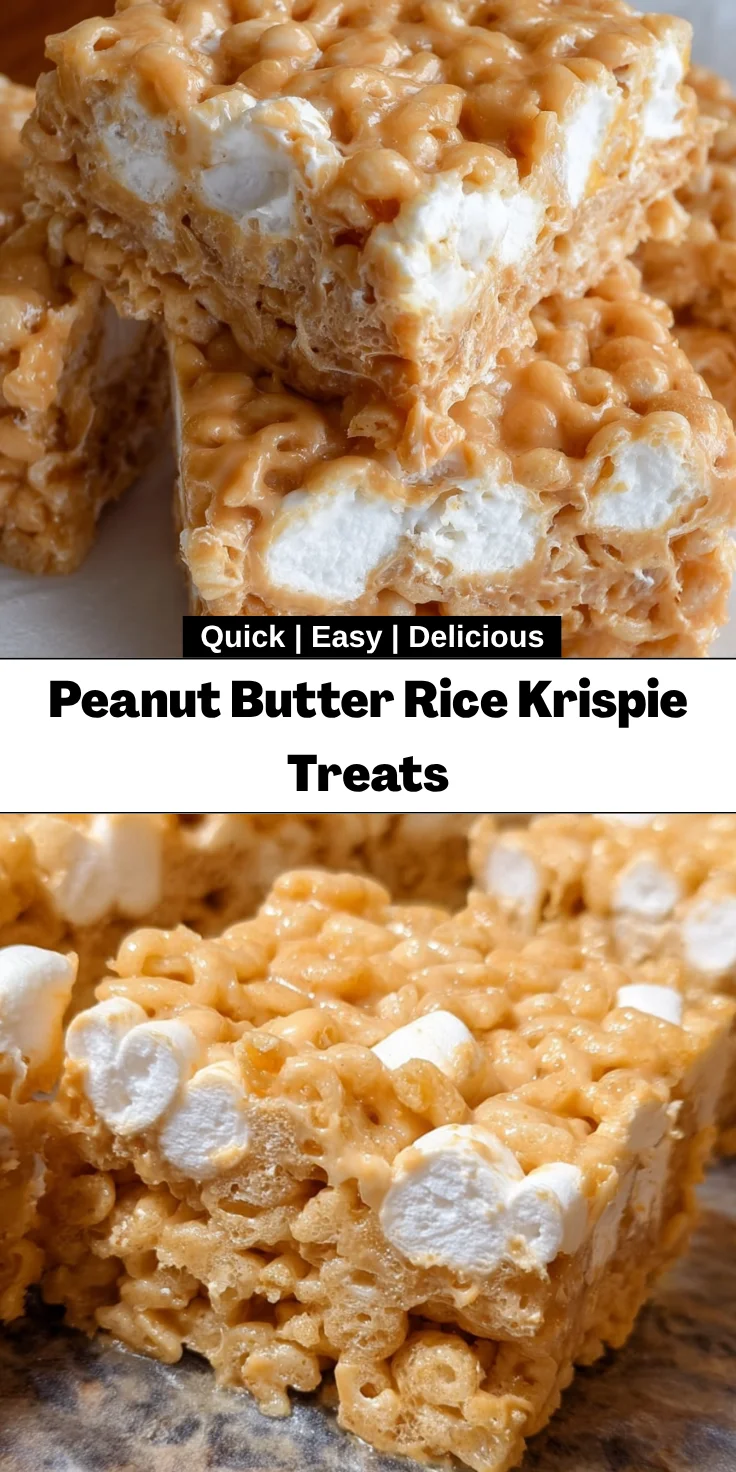
Introduction to Peanut Butter Rice Krispie Treats
As a busy mom, I know how hectic life can get. Sometimes, you just need a quick sweet treat that satisfies your cravings. That’s where these Chocolate Chip Peanut Butter Rice Krispie Treats come in! They’re a delightful mix of gooeyness and crunch, offering a comforting bite of nostalgia that warms the heart.
This recipe is perfect for a whirlwind of a day or when you want to surprise your loved ones. With minimal prep and simple ingredients, whipping up these treats is as easy as pie. So, roll up your sleeves and let’s create some magic in the kitchen!
Why You’ll Love This Peanut Butter Rice Krispie Treats
Who doesn’t love a dessert that’s both effortless and scrumptious? These Chocolate Chip Peanut Butter Rice Krispie Treats are a game changer for busy days. They’re not only quick to whip up—ready in just 25 minutes—but they also bring joy with every bite. The combination of creamy peanut butter and sweet chocolate chips will have your family coming back for seconds, or even thirds! Trust me; they’re irresistible!
Ingredients for Peanut Butter Rice Krispie Treats
Gathering the right ingredients is half the fun! Here’s what you’ll need to create these delightful Chocolate Chip Peanut Butter Rice Krispie Treats:
- Peanut Butter: The star ingredient that adds creaminess and that nutty flavor we crave!
- Rice Cereal: Gives that signature crunch. You can use any brand you love!
- Mini Marshmallows: They melt beautifully, making the treats gooey. Two sizes of marshmallows add depth!
- Butter: Adds richness and helps everything stick together. Use unsalted for better control over flavor.
If you want to experiment, try adding some dried fruits or nuts for an extra twist.
All the exact quantities are at the bottom of the article and ready for printing—let’s get cooking!
How to Make Peanut Butter Rice Krispie Treats
Ready to dive into the fun part? Making Chocolate Chip Peanut Butter Rice Krispie Treats is a straightforward process, and I’ll guide you through it step by step. Let’s sprinkle some joy in the kitchen!
Measure the Ingredients
First things first, let’s gather everything. Measure out your peanut butter, rice cereal, mini marshmallows, and butter. Trust me, having your ingredients ready makes the process smoother. It’s like having a well-prepared canvas for painting!
Melt the Butter and Mix the Marshmallows and Peanut Butter
Now, grab a large pot and set it over medium-low heat. Add the butter and let it melt like the sun melting away morning frost. Once the butter’s bubbling away, toss in 10 ounces of mini marshmallows along with the peanut butter. Stir them together until they meld into a glossy, creamy mixture—you’ll know you’re on the right track when the aroma fills your kitchen!
Combine with Rice Cereal
Once everything is nicely combined and melted, turn off the heat. Carefully add the rice cereal and the remaining 5 ounces of marshmallows. Stir gently but thoroughly, ensuring every clump of rice cereal gets coated in that luscious peanut buttery bliss. This is the moment where magic happens; the mix transforms into a glorious treat base!
Prepare and Press into the Baking Pan
Next, line a baking pan with parchment paper. This makes it easier to remove the treats later. Pour your mixture into the prepared pan, and then get in there! Use your hands or a spatula to gently press it down. Don’t be shy—press firmly to help them hold together later. Think of it as giving your treats a snug hug!
Cool and Cut
Finally, patience is key! Allow your treats to cool completely on the counter. This step is crucial for easy cutting. When they’re cool, lift them out from the pan, and slice them into squares. Serve these delectable squares to your family and enjoy the smiles they bring!
Tips for Success
- Use fresh ingredients for the best flavor and texture.
- For extra gooeyness, be generous with the peanut butter.
- Don’t melt the marshmallows too quickly; keep the heat low for even melting.
- Press down the mixture firmly in the pan for better structure.
- Let the treats cool completely before cutting for clean edges.
Equipment Needed
- Large Pot: A sturdy pot for melting the ingredients. A good-sized saucepan works too!
- Spatula: Essential for stirring and pressing the mixture. A wooden spoon is a lovely alternative!
- Baking Pan: Use a 9×13-inch pan or any similar-sized dish you have on hand.
- Parchment Paper: For easy removal of treats. Wax paper can work in a pinch!
Variations on Peanut Butter Rice Krispie Treats
- Chocolate Drizzle: Melt extra chocolate chips and drizzle on top for a sweet finish!
- Nutty Twist: Throw in some chopped nuts like almonds or walnuts for added crunch and flavor.
- Healthy Alternative: Swap out regular peanut butter for almond or sunflower seed butter for variety.
- Dairy-Free: Use dairy-free butter and marshmallows for a vegan-friendly option!
- Fun Mix-Ins: Add sprinkles or crushed candies for a festive touch that kids will love.
Serving Suggestions
- Milk: Serve these treats with a cold glass of milk—classic and comforting!
- Fruit: Pair with fresh fruit like strawberries or bananas for a refreshing contrast.
- Presentation: Arrange on a colorful platter to brighten up your dessert table.
- Party Favorites: These treats make a perfect addition to a celebration or school bake sale!
FAQs about Peanut Butter Rice Krispie Treats
Got questions? I’ve got answers! Here are some common FAQs about these delightful Chocolate Chip Peanut Butter Rice Krispie Treats that might help you out.
Can I make these treats ahead of time?
Absolutely! You can prepare these treats a day in advance. Just store them in an airtight container at room temperature to keep them fresh and chewy.
How do I store leftovers?
To store your delicious leftovers, place them in a sealed container. They should stay fresh for about a week. Just remember to hide them, or they may disappear faster than you think!
Can I substitute ingredients for dietary restrictions?
For sure! If you have nut allergies, use sunflower seed butter instead of peanut butter. There are also dairy-free marshmallows available for a vegan option. Enjoy experimenting!
Why are my treats too hard?
This can happen if you pressed the mixture down too firmly or let them cool too long. Keep the texture soft by gently pressing and cutting while they’re still slightly warm.
Can I add extra flavors or mix-ins?
Absolutely! Love coconut? Toss in some shredded coconut! Want a hint of vanilla? Add a splash of vanilla extract! Let your creativity shine with these scrumptious treats!
Final Thoughts
As I reflect on these delightful Chocolate Chip Peanut Butter Rice Krispie Treats, I can’t help but smile. They bring families together, create moments of joy, and evoke laughter with every gooey bite. This simple recipe is not just about dessert; it’s about the love and memories baked into each batch. Whenever I’m in the kitchen, I know I’m not just making treats—I’m crafting joy for my loved ones. So gather your family, whip up this quick creation, and relish the sweet moments together. Trust me, these treats will become a beloved tradition!
Print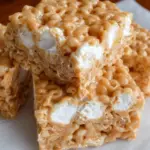
Peanut Butter Rice Krispie Treats
- Total Time: 25 minutes
- Yield: 12 servings 1x
- Diet: Vegetarian
Description
Chocolate Chip Peanut Butter Rice Krispie Treats are a delicious and easy-to-make dessert combining the flavors of chocolate, peanut butter, and crispy rice cereal.
Ingredients
- 1/2 cup peanut butter
- 6 cups rice cereal
- 15 ounces mini marshmallows
- 6 tablespoons butter
Instructions
- Start by measuring all the ingredients out. Separate the marshmallows by 10oz and 5oz.
- In a large pot on medium low heat, add in the butter. Once the butter is melted then add in 10oz of the marshmallows and the peanut butter. Allow them all to melt together until combined.
- Once combined, turn off the heat. Then add in the rice cereal and 5oz of marshmallows. Stir until mixed.
- In a lined baking pan, add in the mix and gently press down to fit it into the pan.
- Allow them to sit on the counter and completely cool before lifting them out of the pan.
- When they are cool, slice, serve, and enjoy!
Notes
- Press down hard to minimize leftovers.
- Let them cool completely for better cutting.
- Prep Time: 15 minutes
- Cook Time: 10 minutes
- Category: Dessert
- Method: Stovetop
- Cuisine: American
Nutrition
- Serving Size: 1 treat
- Calories: 180
- Sugar: 10g
- Sodium: 90mg
- Fat: 7g
- Saturated Fat: 3g
- Unsaturated Fat: 4g
- Trans Fat: 0g
- Carbohydrates: 26g
- Fiber: 1g
- Protein: 2g
- Cholesterol: 15mg