
Introduction to Soft Whoopie Pies with Marshmallow Filling
When life gets busy, finding a sweet escape can feel like searching for a unicorn. That’s where these Soft Whoopie Pies with Marshmallow Filling come into play! They’re not just a treat; they’re your delicious ally in creating joy amidst the chaos of daily life. Picture this: after a long day of juggling work and home, you can whip up a batch of these delightful desserts in no time. They’re perfect for satisfying your sweet tooth or impressing your loved ones, all while requiring minimal effort. Who wouldn’t want to savor that?
Why You’ll Love This Soft Whoopie Pies with Marshmallow Filling
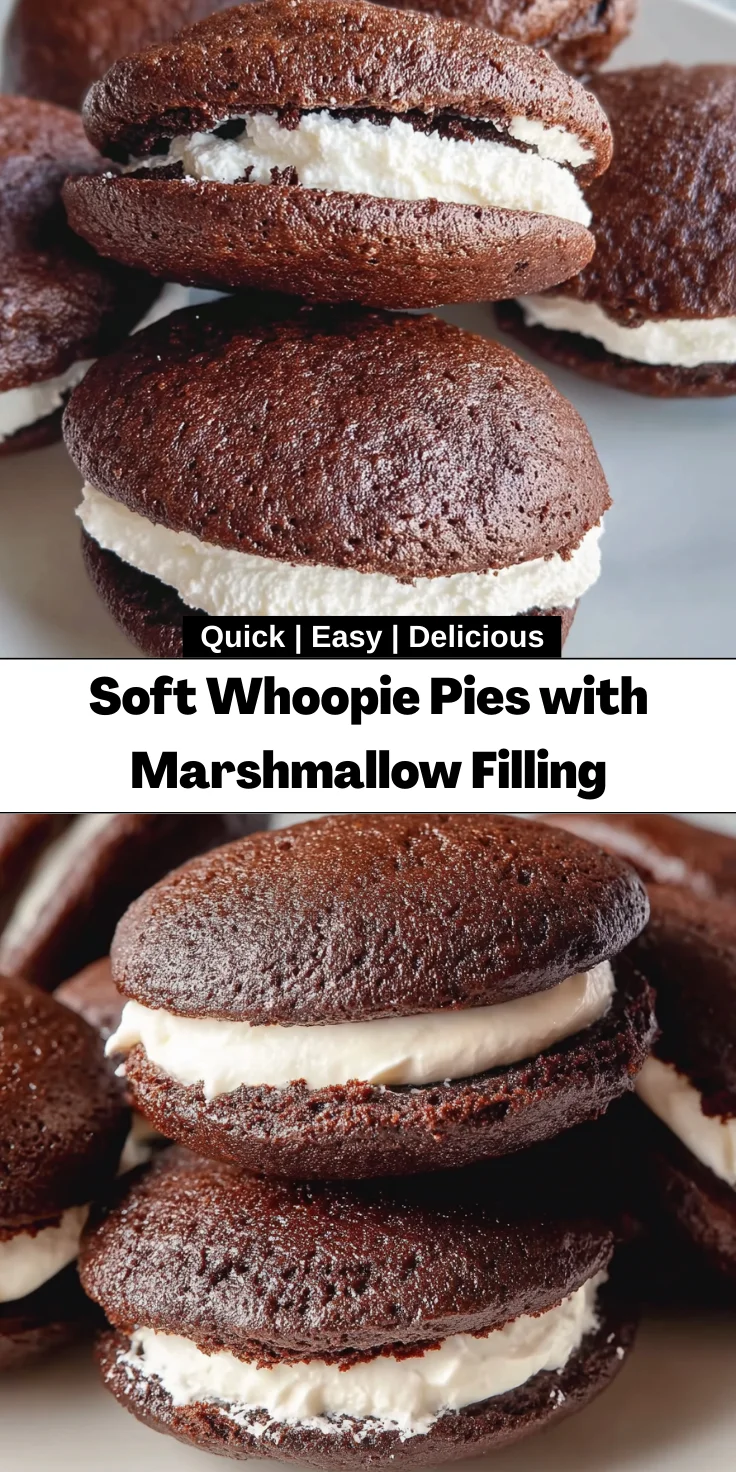
These Soft Whoopie Pies have it all: they’re quick, easy, and oh-so-delicious! Each bite transports you to dessert heaven, with that perfect balance of soft cake and fluffy marshmallow filling. Whether it’s a random Thursday or a special occasion, these treats never disappoint. Plus, they make for a delightful activity to share with your kids or friends, bringing everyone together with laughter and sweetness. What’s not to love?
Ingredients for Soft Whoopie Pies with Marshmallow Filling
Getting ready to make these delightful Soft Whoopie Pies with Marshmallow Filling? Let’s talk ingredients! Each component plays a crucial role in creating that moist cake and luscious filling. Here’s what you’ll need:
- All-purpose flour: The backbone of our pies! It gives them structure and a soft texture.
- Unsweetened cocoa powder: This adds rich chocolate flavor, making every bite a delightful treat.
- Baking soda: The magic that helps our whoopie pies rise, giving them a fluffy texture.
- Salt: A pinch of salt enhances flavors, balancing the sweetness perfectly.
- Unsalted butter: Cream it for lightness in the batter, plus it brings a rich, buttery flavor.
- Sugar (granulated or brown): Sweetness galore! Brown sugar adds a hint of caramel flavor for richness.
- Large egg: An essential moisture source, bringing everything together and binding the ingredients.
- Vanilla extract: This aromatic addition rounds out the sweetness and adds warmth. A must-have!
- Buttermilk: It contributes tenderness, and that slight tang gives the whoopie pies a unique flavor.
- Marshmallow creme: For that dreamy filling! It’s what makes these pies irresistibly marshmallow and fluffy.
- Powdered sugar: This helps sweeten the filling and create that creamy texture we love.
- Pinch of salt: Just a little to balance the sweetness in that fluffy filling.
All these ingredients come together in a symphony of flavor, with just the right amounts listed at the bottom of this article for your convenience. Trust me, you’ll want to keep this recipe handy for your next sweet craving!
How to Make Soft Whoopie Pies with Marshmallow Filling
Making these Soft Whoopie Pies with Marshmallow Filling is a delightful experience! Follow these simple steps to create your own batch of deliciousness. I promise, they’re easy enough to whip up even on those hectic weekdays. Let’s dive in!
Step 1: Preheat Your Oven
First things first, preheat your oven to 350°F (180°C). Preheating is essential for even baking, helping the whoopie pies rise beautifully. You want that fluffy texture, and starting with a hot oven is the way to achieve it!
Step 2: Prepare Dry Ingredients
Next, sift together the all-purpose flour, cocoa powder, baking soda, and salt. Sifting ensures those dry ingredients are aerated, preventing clumps. This little step is crucial for creating a batter that’s light and fluffy, resulting in perfect whoopie pies.
Step 3: Cream Together Butter and Sugar
In a large bowl, use an electric mixer to cream together the room-temperature butter and sugar until light and fluffy—about three minutes. This process incorporates air into the mixture, making your whoopie pies soft and airy. Don’t rush it; this step is key!
Step 4: Add Eggs and Buttermilk
Now, add in that large egg and vanilla extract, mixing until fully combined. Then, pour in the buttermilk. These wet ingredients add moisture to the batter, creating that deliciously soft texture we love in whoopie pies.
Step 5: Combine Wet and Dry Mixtures
Gradually add the sifted dry ingredients to the wet mixture, mixing just until combined. Avoid overmixing, or your batter could turn tough. A few lumps are entirely fine! We want those tender whoopie pies, not dense ones.
Step 6: Prepare Baking Sheets
Line two baking sheets with parchment paper. Use a cookie scoop to scoop mounds of batter—about 1.5 tablespoons each—onto the sheets. Make sure to leave about 2–3 inches between each mound. They need room to spread and rise while baking!
Step 7: Bake the Whoopie Pies
Bake the whoopie pies in your preheated oven for 10–12 minutes. They’re ready when the tops spring back lightly when touched. Avoid opening the oven door too soon; this can impact their rise!
Step 8: Make the Marshmallow Filling
While the pies cool, let’s whip up that dreamy marshmallow filling. In a large bowl, combine room-temperature butter, marshmallow creme, powdered sugar, vanilla extract, and a pinch of salt. Beat together until creamy and fluffy. If it’s too stiff, add a splash of milk or cream.
Step 9: Assemble the Whoopie Pies
Now, it’s time to bring it all together! Spread a generous amount of marshmallow filling on the flat side of half of the cooled whoopie pies. Top them with the remaining pie halves, pressing gently to create a delicious sandwich.
Step 10: Chill and Serve
Finally, cover your assembled whoopie pies and place them in the fridge for a bit. Chilling allows the filling to set, enhancing texture and flavor. Serve them at room temperature for the best experience!
Tips for Success
- Use room-temperature ingredients for better mixing and fluffiness.
- Don’t skip sifting the dry ingredients; it makes a difference in texture.
- For an extra soft filling, beat the marshmallow mixture a little longer.
- Feel free to experiment with flavor extracts, like almond or peppermint.
- Store whoopie pies in an airtight container to maintain freshness.
Equipment Needed
- Mixing bowls: Use any size you have; just make sure they’re large enough to accommodate your batter.
- Electric mixer: A hand mixer works great if you don’t have a stand mixer.
- Baking sheets: Regular cookie sheets or any flat baking trays will do.
- Parchment paper: Helps prevent sticking; you can use silicone baking mats as an alternative.
- Cookie scoop: A tablespoon works fine if you don’t have a scoop on hand!
Variations
- Gluten-free whoopie pies: Substitute all-purpose flour with a 1:1 gluten-free baking blend for a gluten-free version.
- Chocolate chip filling: Mix mini chocolate chips into the marshmallow filling for an extra chocolatey bite!
- Salted caramel filling: Drizzle some salted caramel sauce into your marshmallow filling for a sweet and salty twist.
- Nutty version: Fold in crushed nuts like pecans or walnuts into the batter or sprinkle them on the filling.
- Different flavors: Swap the vanilla extract for other flavors like almond or even hazelnut to change up the taste.

Serving Suggestions
- Pair these Soft Whoopie Pies with a cold glass of milk for a classic treat!
- Serve them alongside fresh berries for a pop of color and added nutrition.
- For special occasions, arrange them on a decorative platter with a dusting of powdered sugar.
- Consider adding a scoop of vanilla ice cream for an indulgent dessert experience.
- Top with a drizzle of chocolate sauce for an extra touch of decadence!
FAQs about Soft Whoopie Pies with Marshmallow Filling
Got questions about these delightful Soft Whoopie Pies with Marshmallow Filling? You’re not alone! Here are some common queries that often pop up:
Can I use a different filling instead of marshmallow?
Absolutely! You can get creative with your filling! Try cream cheese frosting or peanut butter buttercream for a different flavor experience.
How do I store leftovers?
Store your whoopie pies in an airtight container in the fridge. They stay fresh for up to a week, but you might finish them before then!
Can these be frozen?
Yes, you can freeze them! Just wrap each whoopie pie in plastic wrap and place them in a freezer-safe bag. They’ll keep for up to two months.
What can I substitute for buttermilk?
If you don’t have buttermilk on hand, mix 1 cup of milk with 1 tablespoon of vinegar or lemon juice. Let it sit for a few minutes, and voilà—homemade buttermilk!
Why are my whoopie pies flat?
Flat cakes can be due to insufficient leavening or overmixing the batter. Make sure your baking soda is fresh and avoid overmixing once you combine wet and dry ingredients.
Final Thoughts
Making these Soft Whoopie Pies with Marshmallow Filling is more than just baking; it’s about creating sweet moments with family and friends. With each fluffy bite, you’re not just satisfying a craving; you’re crafting memories that linger long after the last crumb has disappeared. Whether it’s a cherished childhood treat or a fun weekend project, these whoopie pies bring joy and connection to your kitchen. So, the next time life gets hectic, whip up a batch and let those delightful flavors take you back to simpler times. Enjoy every delicious moment!
Print
Soft Whoopie Pies with Marshmallow Filling
- Total Time: 32 minutes
- Yield: 12-16 whoopie pies 1x
- Diet: Vegetarian
Description
Soft Whoopie Pies filled with creamy marshmallow filling are a delightful treat that are easy to make and perfect for any occasion.
Ingredients
- 2 cups all-purpose flour
- 2/3 cup unsweetened cocoa powder
- 1 1/4 tsp baking soda
- 1/2 tsp salt
- 1/2 cup (1 stick) unsalted butter, room temperature
- 1 cup granulated (or brown) sugar
- 1 large egg
- 1 tsp vanilla extract
- 1 cup buttermilk, at room temperature
- 1/2 cup (1 stick) unsalted butter, at room temp
- 2 cups marshmallow creme (such as Marshmallow Fluff)
- 1 cup powdered sugar (4 oz)
- 1 tsp vanilla extract
- pinch of salt
Instructions
- Preheat your oven to 350°F (180°C).
- Sift together the all-purpose flour, unsweetened cocoa powder, baking soda, and salt, then set aside.
- Cream the room-temperature unsalted butter and granulated (or brown) sugar in an electric mixer until light and fluffy, about 3 minutes.
- Add the egg and vanilla extract, mixing until combined, then blend in the buttermilk.
- Gradually add the sifted dry ingredients and mix just until combined, avoiding overmixing.
- Line two baking pans with parchment paper and scoop mounds of batter (1 1/2 tablespoons each) onto the prepared pans, spacing them 2–3 inches apart.
- Bake in the preheated oven for 10–12 minutes or until the tops spring back when touched.
- Transfer the cake rounds to a wire rack to cool completely.
- In a large bowl, combine the room-temperature unsalted butter, marshmallow creme, powdered sugar, vanilla extract, and a pinch of salt, beating until creamy and fluffy.
- If filling is too stiff, mix in a tablespoon of milk or heavy cream until desired consistency is reached.
- Spread marshmallow filling on the flat side of half the cake rounds and top with remaining rounds, pressing gently.
- Assemble the whoopie pies and place in the fridge covered for up to a week.
- Allow to come to room temperature before serving.
Notes
- For extra-fluffy filling, beat for an additional minute.
- These can be stored in the fridge for up to a week.
- Add a little extra filling if desired for indulgence.
- Prep Time: 20 minutes
- Cook Time: 12 minutes
- Category: Dessert
- Method: Baking
- Cuisine: American
Nutrition
- Serving Size: 1 whoopie pie
- Calories: 250
- Sugar: 20g
- Sodium: 150mg
- Fat: 10g
- Saturated Fat: 6g
- Unsaturated Fat: 2g
- Trans Fat: 0g
- Carbohydrates: 38g
- Fiber: 1g
- Protein: 3g
- Cholesterol: 30mg


