Introduction to Roasted Garlic Hummus Veggie Bowl
Hey there, fellow food lovers! If you’re like me, you probably find yourself juggling a million things daily. That’s where my Roasted Garlic Hummus Veggie Bowl sweeps in like a culinary superhero! This recipe is a delightful, nutritious dish that packs a flavorful punch. It’s perfect for busy moms and professionals who want something effortless yet impressive. With vibrant veggies and creamy hummus, it’s also a wonderful way to sneak in those essential nutrients. So, whether it’s a quick lunch or a colorful dinner, let me guide you on this delightful journey!
Why You’ll Love This Roasted Garlic Hummus Veggie Bowl
This Roasted Garlic Hummus Veggie Bowl is the perfect blend of simplicity and taste. It comes together in just 35 minutes, making it a quick meal solution for any day. Imagine creamy, roasted garlic hummus mingling with fresh veggies and protein-packed quinoa—what a treat! Plus, it’s highly customizable, so you can please everyone at the table, even the pickiest eaters. What’s not to love?
Ingredients for Roasted Garlic Hummus Veggie Bowl
Let’s gather our vibrant ingredients for this Roasted Garlic Hummus Veggie Bowl! It’s all about fresh and wholesome elements that come together in delicious harmony. Here’s what you’ll need:
- Canned chickpeas: These little powerhouses are full of protein and fiber. Rinse and drain them for a perfect base.
- Garlic: Roasting brings out a sweet, buttery flavor. The magic of garlic brings your hummus to life!
- Tahini: This sesame seed paste adds creaminess and a unique taste. It’s a must-have for that authentic hummus flavor.
- Olive oil: A drizzle of good quality olive oil can elevate your dish’s flavor. It also aids in achieving a silky-smooth hummus.
- Lemon juice: Freshly squeezed lemon juice brightens the entire dish, cutting through the richness of the hummus.
- Salt and pepper: Simple seasonings that allow all the flavors to shine. Don’t be shy—add to taste!
- Cooked quinoa: This nutty grain serves as your hearty base, packed with protein and fiber. A great gluten-free option too!
- Cherry tomatoes: Sweet and juicy, these add a pop of color and freshness. Halving them releases more flavor!
- Cucumber: A refreshing crunch, cucumbers are low in calories and hydrating. Dice them for an ideal bite!
- Bell pepper: Any color works! Bell peppers add sweetness along with that lovely crunch.
- Baby spinach or mixed greens: These leafy greens not only add color, but they’re also packed with nutrients.
- Feta cheese (optional): For those who love a bit of tangy saltiness, sprinkle some crumbled feta on top.
- Fresh parsley: A sprinkle of chopped parsley brightens everything up and gives a lovely finish.
Each ingredient plays a vital role in making this bowl special. For exact quantities, you can find them at the end of the article. Get ready to dive into a tasty symphony of flavors!

How to Make Roasted Garlic Hummus Veggie Bowl
Step 1: Preheat and Prepare Garlic
Let’s kick off this delicious journey by preheating our oven to 400°F (200°C). This temperature is perfect for roasting garlic, bringing out that sweet, irresistible flavor we all adore. While the oven heats, grab your garlic cloves. Place them with their skins on a piece of aluminum foil. Drizzle a little olive oil over the cloves, just enough to coat them lightly. This olive oil will keep them moist and add flavor. Then, wrap the garlic snugly in the foil. It’s like giving them a cozy blanket! Now, set it aside while your oven reaches the right temperature. We’re on our way to flavor town!
Step 2: Roast the Garlic
Now that our oven is preheated, pop that wrapped garlic in! Let it roast for about 20-25 minutes. You’ll know it’s ready when you catch that heavenly aroma wafting through the kitchen. The garlic should feel soft to the touch, making it easy to squeeze out of its skin. It’s like a little treasure hunt! Once done, carefully unwrap the foil and let it cool slightly. Be cautious, as it will be hot! After a few moments, you can handle the cloves. Squeeze the soft garlic flesh out into a bowl—trust me, this roasted delight will be the star of your hummus.
Step 3: Blend the Hummus
With our roasted garlic ready, it’s time for the fun part—blending! In a food processor, combine the roasted garlic, drained chickpeas, tahini, lemon juice, olive oil, salt, and pepper. As you add these ingredients together, imagine the flavors doing a joyful dance! Blend until the mixture turns smooth and creamy. If the hummus feels too thick, add water, one tablespoon at a time, until you reach your desired consistency. At this point, take a moment to taste and adjust the seasoning. More salt? A splash of lemon? Feel free to make it your own; it’s all about balance and love!
Step 4: Assemble the Veggie Bowl
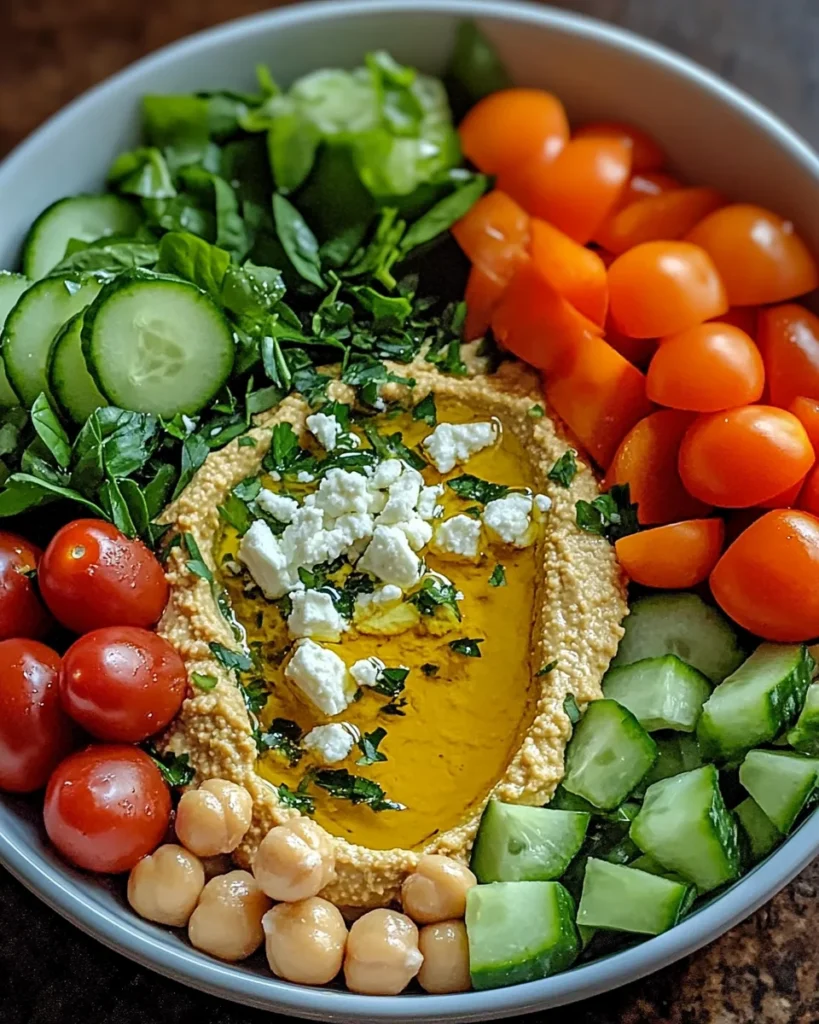
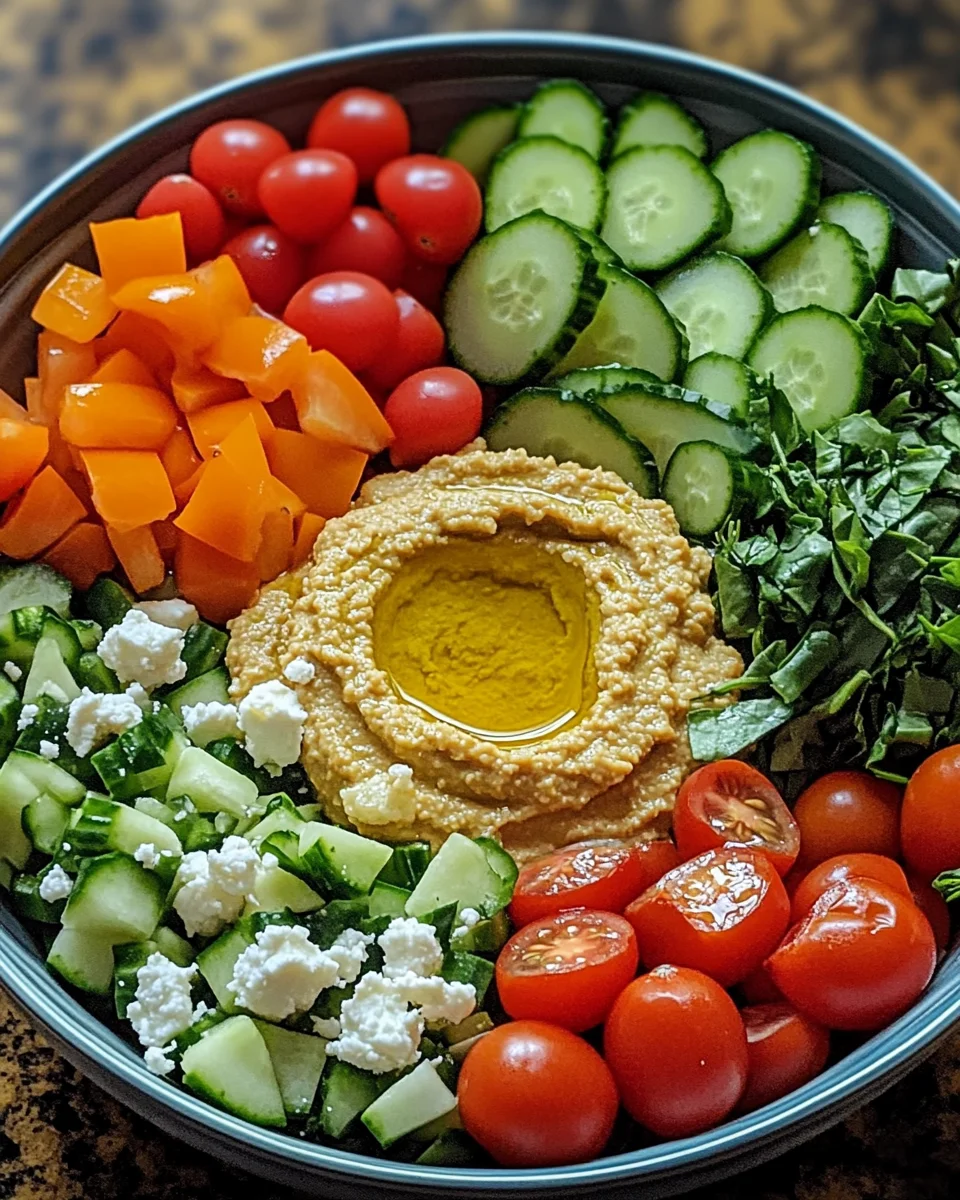
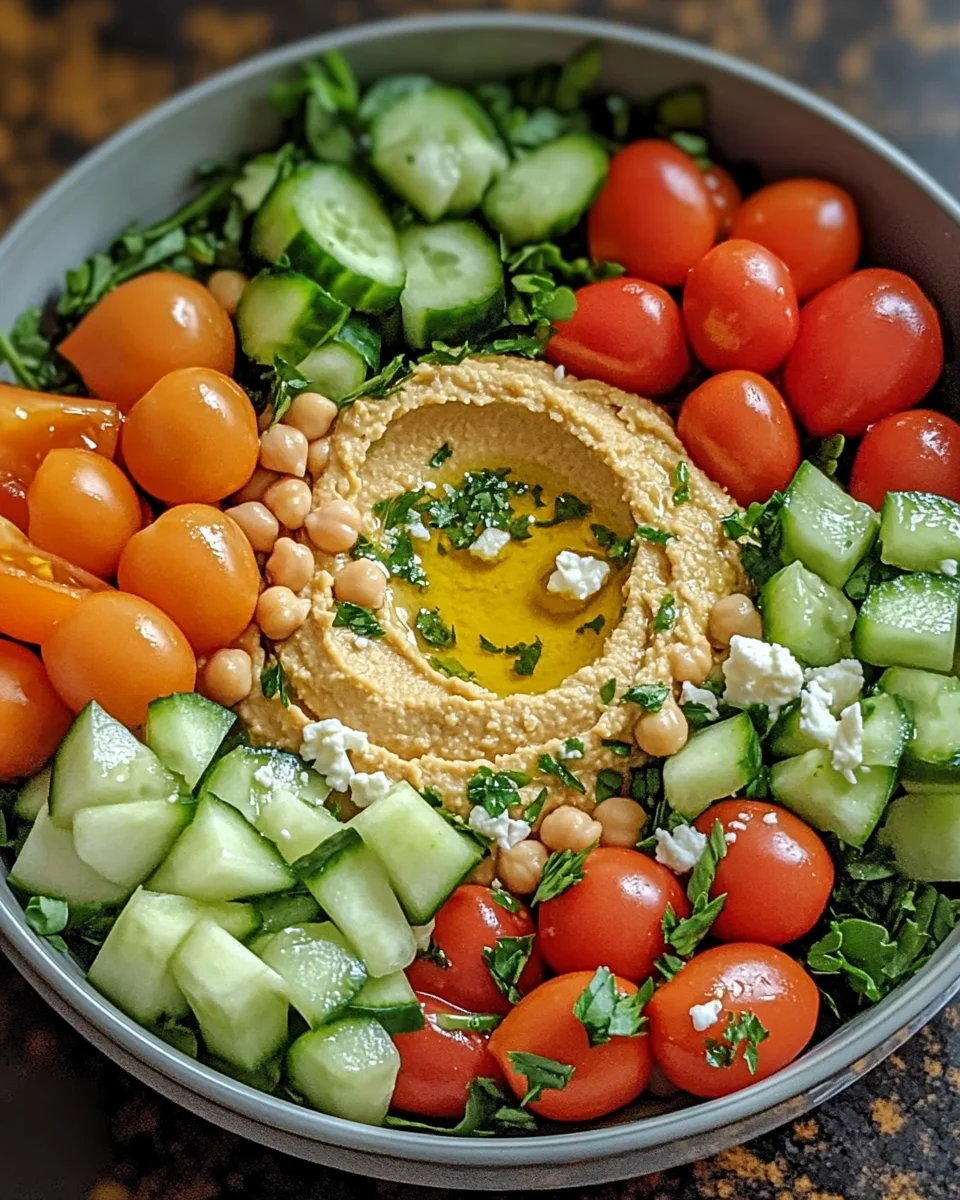
Now comes the exciting part—assembling your Roasted Garlic Hummus Veggie Bowl! Grab four serving bowls and start by adding a generous scoop of cooked quinoa at the bottom. This hearty grain serves as the perfect base. Next, arrange your colorful veggies—halved cherry tomatoes, diced cucumber, and bell pepper—happily over the quinoa. Then pile on the baby spinach or mixed greens for that fresh touch. Finally, scoop generous dollops of your creamy roasted garlic hummus on top. Drizzle a bit more olive oil for that extra oomph, and if you like, sprinkle some feta and fresh parsley for those beautiful finishing touches. Your creation is now vibrant, colorful, and ready to impress!
Tips for Success
- Make your hummus ahead of time and store it in the fridge for quick meals.
- Experiment with seasonal veggies for a fresh twist each time!
- Add a pinch of cayenne for a spicy kick or some herbs for extra flavor.
- Double the recipe for meal prep; the leftovers are perfect for lunches.
- Keep your ingredients prepped and ready for a speedy assembly!
Equipment Needed
- Oven: To roast the garlic. A countertop toaster oven works as well.
- Aluminum foil: For wrapping the garlic. Parchment paper can be a great alternative.
- Food processor: Essential for blending the hummus. A sturdy blender also gets the job done.
- Serving bowls: Use any bowls you have on hand, even plates!
Variations on Roasted Garlic Hummus Veggie Bowl
- Swap the Grains: Instead of quinoa, try farro, brown rice, or even cauliflower rice for a different texture and flavor.
- Protein Boost: Add grilled chicken, shrimp, or chickpea patties for an extra protein punch.
- Roasted Veggies: Roast your veggies instead of using them fresh for a smoky flavor. Think zucchini, carrots, or sweet potatoes!
- Swap the Cheese: Use goat cheese or nutritional yeast for a creamy or cheesy flavor while keeping it dairy-free.
- Spice It Up: Toss in some avocado or jalapeños for creaminess and heat. It adds a fun twist!
- Different Dressings: Experiment with a tahini dressing or a yogurt drizzle to change up the flavor profile.
Serving Suggestions for Roasted Garlic Hummus Veggie Bowl
- Sides: Pair with warm pita bread, roasted veggies, or crispy flatbreads to complement the bowl.
- Salads: A side salad with lemon vinaigrette enhances the meal’s freshness and brightness.
- Drinks: Refresh with iced herbal tea or sparkling water with a splash of lemon.
- Presentation: Serve in colorful bowls and garnish with extra parsley for a beautiful display!
FAQs about Roasted Garlic Hummus Veggie Bowl
As a fellow enthusiast of the Roasted Garlic Hummus Veggie Bowl, I understand that you might have a few questions swirling around in your mind. Let’s tackle them together!
Can I make the hummus in advance?
Absolutely! In fact, making your roasted garlic hummus ahead of time enhances the flavors. Just store it in an airtight container in the fridge for up to a week.
What can I substitute for tahini?
If you’re out of tahini or looking for a change, consider using peanut butter or sunflower seed butter. They both lend unique flavors while maintaining creaminess.
Is this recipe suitable for meal prep?
Definitely! The Roasted Garlic Hummus Veggie Bowl is perfect for meal prep. Just store each component separately, and you can assemble fresh bowls throughout the week!
Can I use different vegetables?
Yes! This bowl is incredibly versatile. Feel free to mix and match your favorite veggies, like roasted zucchini or shredded carrots. It’s all about what you enjoy!
How can I make it gluten-free?
This recipe is already gluten-free with quinoa as the base. Just ensure any added ingredients like pita bread or dressings are also gluten-free!
Final Thoughts
Our culinary adventure with the Roasted Garlic Hummus Veggie Bowl has brought not just a meal, but a delightful experience filled with color and flavor. Each bite is a reminder that healthy eating doesn’t have to be boring! This recipe brings joy, ease, and nourishment, perfect for busy days or family gatherings. Plus, it’s a fabulous way to get everyone involved in the kitchen—the kids can help with the veggies, and you’ll bask in the delicious aromas of roasted garlic. So, here’s to savoring life’s little pleasures, one veggie bowl at a time!
Print
Roasted Garlic Hummus Veggie Bowl
- Total Time: 35 minutes
- Yield: 4 servings 1x
- Diet: Vegetarian
Description
A flavorful and nutritious bowl featuring roasted garlic hummus, fresh veggies, and quinoa.
Ingredients
- 1 cup canned chickpeas, drained and rinsed
- 4 cloves garlic
- 2 tablespoons tahini
- 2 tablespoons olive oil, plus more for drizzling
- 2 tablespoons lemon juice
- Salt and pepper, to taste
- 1 cup cooked quinoa
- 1 cup cherry tomatoes, halved
- 1 cucumber, diced
- 1 bell pepper (any color), diced
- 1 cup baby spinach or mixed greens
- ¼ cup feta cheese, crumbled (optional)
- Fresh parsley, chopped, for garnish
Instructions
- Preheat your oven to 400°F (200°C).
- Place the garlic cloves (with skins on) on a piece of aluminum foil, drizzle with olive oil, and wrap them up.
- Roast in the oven for about 20-25 minutes or until the garlic is soft and fragrant. Once done, allow to cool slightly before peeling.
- In a food processor, combine the roasted garlic (squeezed out of the skins), chickpeas, tahini, lemon juice, olive oil, salt, and pepper.
- Blend until smooth, adjusting the texture with water if needed (add one tablespoon at a time until desired consistency is reached). Taste and adjust seasoning if necessary.
- In four serving bowls, divide the cooked quinoa as a base.
- Arrange the halved cherry tomatoes, diced cucumber, diced bell pepper, and baby spinach or mixed greens evenly over the quinoa.
- Spoon generous amounts of the roasted garlic hummus over the veggies and quinoa.
- Drizzle with additional olive oil and sprinkle feta cheese (if using) and fresh parsley on top.
- Serve immediately and enjoy your colorful and nutritious Roasted Garlic Hummus Veggie Bowl!
Notes
- Feel free to customize the bowl with your favorite vegetables.
- For a vegan option, omit the feta cheese.
- This dish can be served warm or cold.
- Prep Time: 10 minutes
- Cook Time: 25 minutes
- Category: Main Dish
- Method: Roasting, Blending
- Cuisine: Mediterranean
Nutrition
- Serving Size: 1 bowl
- Calories: 350
- Sugar: 2g
- Sodium: 200mg
- Fat: 15g
- Saturated Fat: 2g
- Unsaturated Fat: 10g
- Trans Fat: 0g
- Carbohydrates: 45g
- Fiber: 10g
- Protein: 12g
- Cholesterol: 5mg