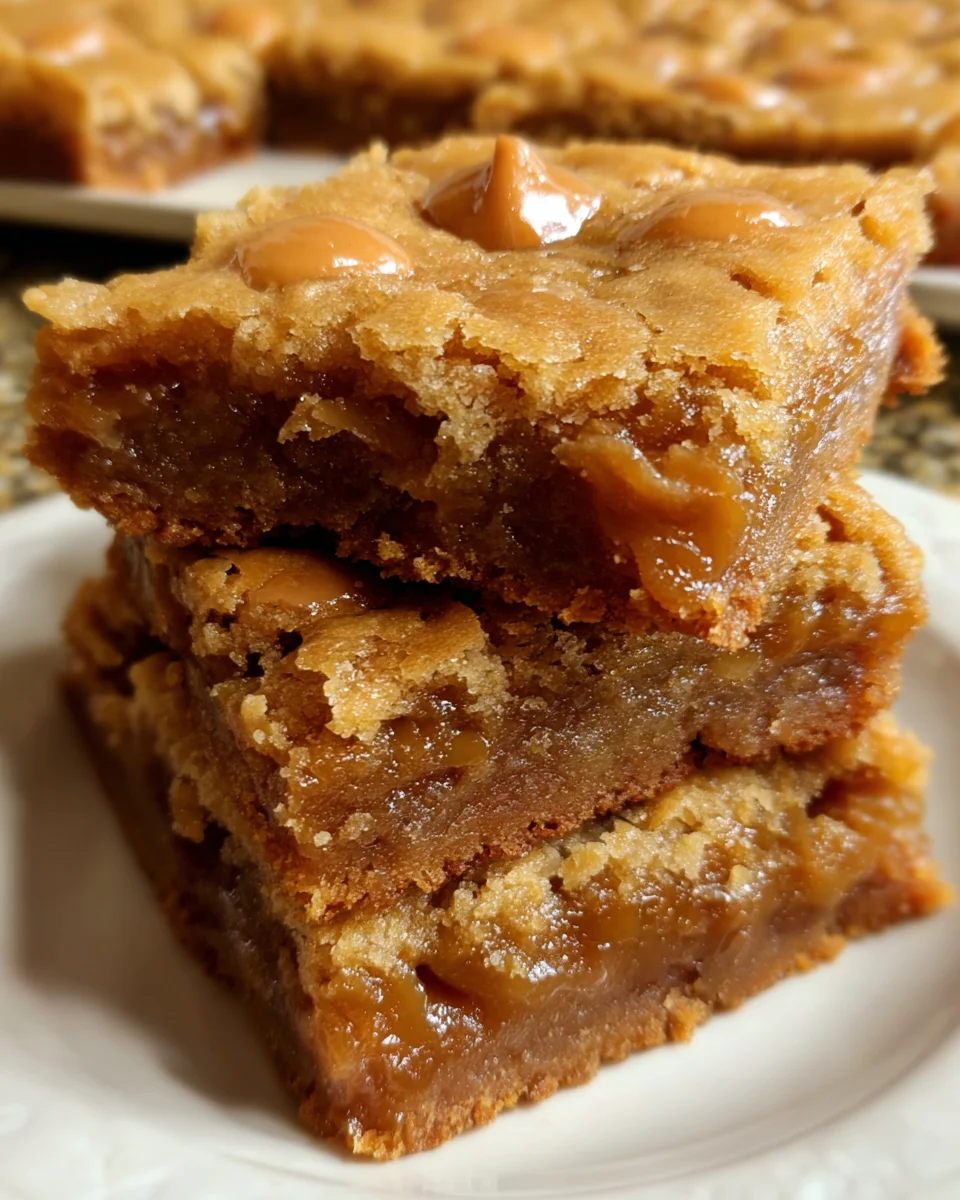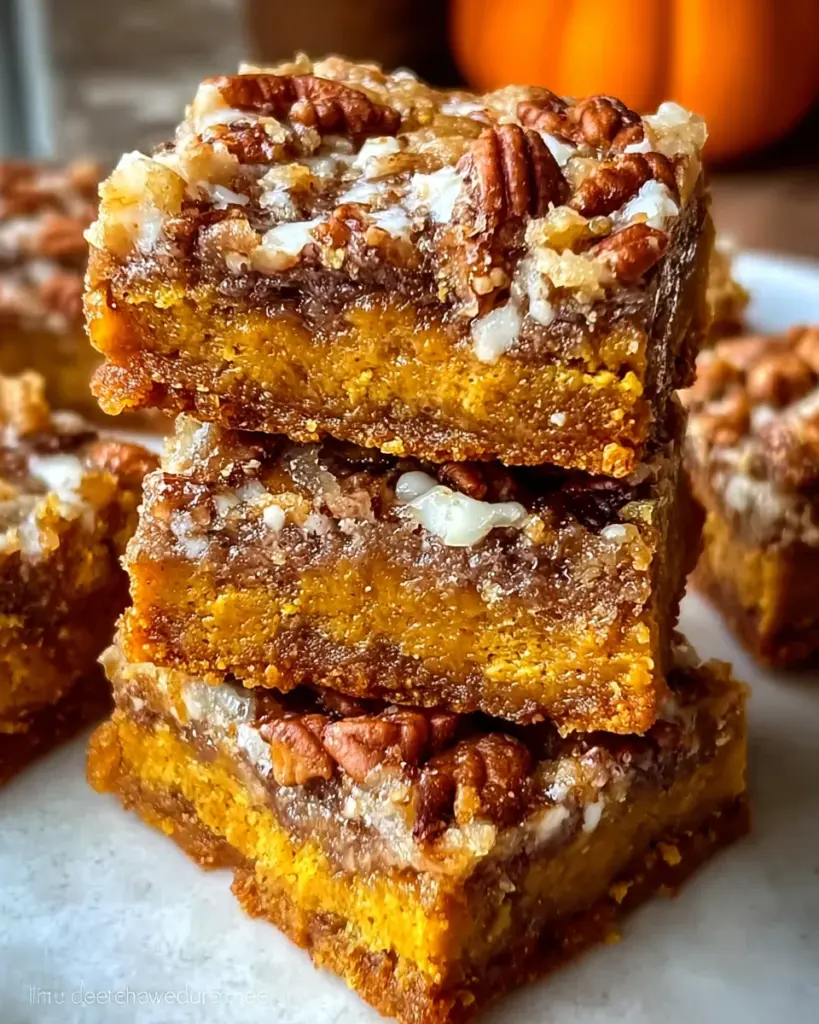
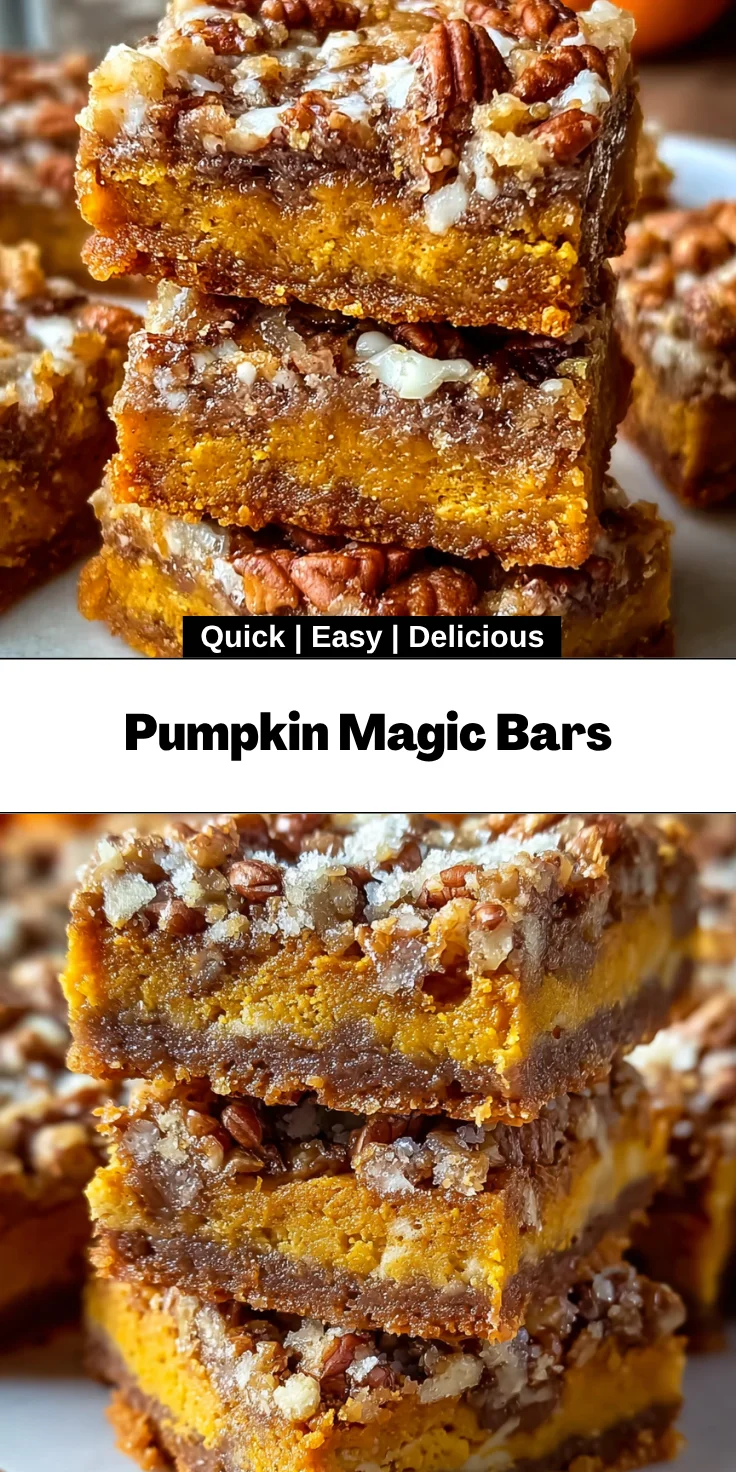
Introduction to Pumpkin Magic Bars
Autumn is here, and that means warm spices and cozy treats! If you’re like me, you crave something quick and delicious that will bring smiles to your family’s faces. That’s where my Pumpkin Magic Bars come in. These delightful layers of pumpkin goodness create the perfect harmony of flavors; they’re not just easy to whip up, but they’re also a fantastic way to wow your loved ones. Whether you’re juggling busy schedules or just need a sweet escape, these bars are your answer to fall’s sweet cravings!
Why You’ll Love This Pumpkin Magic Bars
What’s not to adore about these Pumpkin Magic Bars? They promise a burst of flavor in every bite, making them a true delight for the taste buds. They’re wonderfully simple to prepare, meaning even the busiest of moms can indulge. Plus, they’re a hit at gatherings! Quick, delicious, and incredibly satisfying, these bars embody the essence of fall while bringing joy to everyone around the table.
Ingredients for Pumpkin Magic Bars
Gathering the right ingredients for Pumpkin Magic Bars is half the fun! Here’s what you’ll need for this fall delight:
- Unsalted Butter: This rich base adds creaminess to our bars, enhancing the overall flavor.
- Light Brown Sugar: A touch of sweetness with a hint of molasses makes these bars heavenly.
- All-Purpose Flour: This ingredient binds everything together, creating the perfect crust.
- Pumpkin Pie Spice: Brings that classic autumn flavor; feel free to adjust it to your liking!
- Fine Sea Salt: Just a pinch balances out the sweetness and enhances the flavors.
- Pumpkin Pie Filling: The star of the show! This creamy mixture gives moisture and that lovely pumpkin taste.
- Butterscotch Chips: These little gems melt into a sweet layer that pairs perfectly with pumpkin.
- Toffee Bits: They add a delightful crunch and additional sweetness – an unexpected treat!
- Chopped Pecans: Offering a nutty flavor and crisp texture, they elevate every bite. Substitute with your favorite nut if you prefer.
- Sweetened Condensed Milk: This rich liquid binds all the layers and adds gooey goodness.
- Ground Cinnamon, Nutmeg, Ground Ginger, Ground Cloves, and Ground Allspice: A medley of spices that evoke the warmth of the season; they truly make these bars sing with flavor!
Don’t worry; precise measurements are provided at the end of the article for easy printing and reference!
How to Make Pumpkin Magic Bars
Now that you have all your ingredients ready, let’s dive into the fun part! Making these Pumpkin Magic Bars is a breeze. Follow along, and you’ll be indulging in the ultimate fall treat in no time!
Step 1: Prepare Your Baking Dish
Start by preheating your oven to 350°F. Grab an 11×7-inch baking dish and line it with foil.
Don’t forget to spray the foil with cooking spray. This little trick ensures that your bars won’t stick, making cleanup much easier!
Step 2: Cream the Butter and Sugar
In a large bowl, combine your unsalted butter and light brown sugar. Using a hand mixer or a whisk, cream them together for about 2 minutes.
You want your mixture to be light and fluffy, which adds a lovely texture to your bars.
Step 3: Add Dry Ingredients
Now it’s time to add the all-purpose flour, pumpkin pie spice, and a pinch of fine sea salt. Gently fold these dry ingredients into the butter and sugar mixture.
Mix until everything is well combined. This is your crust base, so make sure there are no pockets of flour left.
Step 4: Create the Crust
Press the mixture evenly into the bottom of your prepared baking dish. You can use your fingers or the back of a measuring cup to make it nice and flat.
Then, bake this crust for about 15 minutes, or until it’s lightly browned. This provides the perfect foundation for those luscious layers!
Step 5: Add Pumpkin Filling
Once your crust is ready, spread the pumpkin pie filling evenly over the top. This step is crucial; the creamy filling will be the heart of your Pumpkin Magic Bars.
Spread it out evenly with a spatula. Trust me; you don’t want an uneven distribution of pumpkin goodness!
Step 6: Layer the Toppings
Time for the fun part—layering! Sprinkle the butterscotch chips all over the pumpkin pie filling, followed by the toffee bits and chopped pecans.
Each of these toppings adds delightful textures and flavors that will bring your bars to life!
Step 7: Pour Sweetened Condensed Milk
Now, take your sweetened condensed milk and pour it evenly over all the layers. This creamy layer acts as the glue, holding everything together.
Be sure to cover the layers completely, allowing that sweet goodness to seep into every nook and cranny.
Step 8: Bake to Perfection
Place your dish in the oven and bake for an additional 30 to 35 minutes. Keep a close eye; the tops should be golden brown.
The smell wafting from your oven will be mouthwatering and will have everyone peeking in!
Step 9: Cool and Cut
Once baked, let the bars cool completely in the pan. Once they’re cool, refrigerate them for a bit to set the layers. This makes cutting them easier and enhances the flavors.
When ready, lift them out using the foil, cut into bars, and serve. Enjoy the joy of sharing these Pumpkin Magic Bars with friends and family!
Tips for Success
- Make sure your butter is softened for easy creaming with the sugar.
- Use a spatula to ensure the pumpkin filling is spread evenly.
- Don’t rush the cooling process; it helps the bars set better.
- For extra spice, sprinkle a bit more pumpkin pie spice on top before baking.
- Cutting the bars after refrigeration will give you cleaner edges.
Equipment Needed for Pumpkin Magic Bars
- 11×7-inch Baking Dish: You can also use an 8×8-inch pan if that’s what you have on hand.
- Mixing Bowl: A large bowl will work great, but a stand mixer can save you some elbow grease!
- Whisk or Hand Mixer: Perfect for creaming your butter and sugar.
- Spatula: Handy for spreading and scraping every last bit of goodness.
- Measuring Cups and Spoons: Essential for accurate ingredient measurements.
Variations of Pumpkin Magic Bars
- Gluten-Free Option: Substitute all-purpose flour with a gluten-free flour blend to make these bars gluten-free.
- Dairy-Free Version: Use coconut oil instead of butter and almond milk in place of sweetened condensed milk for a dairy-free treat.
- Chocolate Lovers: Swirl in chocolate chips with the butterscotch chips for a decadent twist.
- Nut-Free Choice: Omit pecans and replace with seeds like sunflower or pumpkin seeds for a nut-free alternative.
- Spicy Kick: Add a pinch of cayenne pepper to the pumpkin pie spice for a deliciously unexpected heat.
Serving Suggestions for Pumpkin Magic Bars
- Pair these Pumpkin Magic Bars with a dollop of whipped cream for extra creaminess.
- Serve with a steaming cup of spiced chai or hot apple cider for the perfect fall experience.
- For a trendy touch, dust with powdered sugar before serving to elevate presentation.
FAQs about Pumpkin Magic Bars
Got questions? I’ve got answers! Here are some common inquiries about Pumpkin Magic Bars to help you on your baking journey.
Can I make Pumpkin Magic Bars ahead of time?
Absolutely! These bars can be made a day or two in advance. Just store them covered in the fridge until you’re ready to serve.
Can I freeze these bars?
You bet! After completely cooling and cutting, place them in an airtight container. They can be frozen for up to 3 months—perfect for unexpected guests or cravings!
What if I can’t find pumpkin pie filling?
No worries! You can make your own by mixing canned pumpkin puree with sugar and spices like cinnamon and nutmeg. Voila, homemade pumpkin pie filling!
How should I store the leftover bars?
To keep them fresh, store your Pumpkin Magic Bars in an airtight container in the refrigerator. They’ll stay good for up to a week!
Can I substitute the nuts in this recipe?
Certainly! If you’re not a fan of pecans, feel free to use walnuts, almonds, or even leave them out altogether for a nut-free version.
Final Thoughts on Pumpkin Magic Bars
Every bite of these Pumpkin Magic Bars is like a warm hug on a chilly fall day. They effortlessly blend sweet and spice, making them irresistible for gatherings or quiet family nights. I cherish the moments when I pull these bars from the oven, filling my home with that delightful aroma of fall. There’s something truly magical about sharing a homemade treat, isn’t there? So, whether you’re treating yourself or impressing guests, I hope these bars bring as much joy to your table as they do to mine!
Print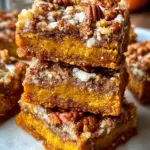
Pumpkin Magic Bars
- Total Time: 1 hour 5 minutes
- Yield: 16 bars 1x
- Diet: Vegetarian
Description
Delightful Pumpkin Magic Bars layered with rich flavors, perfect for fall.
Ingredients
- ½ cup unsalted butter
- ⅓ cup light brown sugar, packed
- 1 cup all-purpose flour
- ½ teaspoon pumpkin pie spice
- Pinch of fine sea salt
- 1 cup pumpkin pie filling
- 11 ounces butterscotch chips
- 1 cup toffee bits
- 2 cups chopped pecans
- 14 ounces sweetened condensed milk
- 2 teaspoons ground cinnamon
- ⅛ teaspoon nutmeg
- ¼ teaspoon ground ginger
- ¼ teaspoon ground cloves
- ½ teaspoon ground allspice
Instructions
- Preheat the oven to 350°F and line an 11×7 baking dish with foil. Spray it with cooking spray and set aside.
- In a large bowl, cream together the butter and brown sugar until light and fluffy, about 2 minutes.
- Add the flour, pumpkin pie spice, and sea salt to the mixture. Mix until well combined.
- Press the mixture evenly into the bottom of the prepared baking dish and bake for 15 minutes, or until the crust is lightly browned.
- Spread the pumpkin pie filling on top of the crust.
- Layer the butterscotch chips evenly on top of the pumpkin, followed by the toffee bits and chopped pecans.
- Pour the sweetened condensed milk evenly over the layers.
- Bake for an additional 30-35 minutes, or until the top is golden brown.
- Allow the bars to cool completely in the pan, then refrigerate before cutting into bars.
Notes
- For a stronger spice flavor, adjust the pumpkin pie spice according to your taste.
- These bars are best served chilled after refrigerating.
- You can substitute pecans with any other nut of your choice, if desired.
- Prep Time: 15 minutes
- Cook Time: 50 minutes
- Category: Dessert
- Method: Baking
- Cuisine: American
Nutrition
- Serving Size: 1 bar
- Calories: 250
- Sugar: 18g
- Sodium: 150mg
- Fat: 12g
- Saturated Fat: 7g
- Unsaturated Fat: 3g
- Trans Fat: 0g
- Carbohydrates: 35g
- Fiber: 1g
- Protein: 3g
- Cholesterol: 30mg