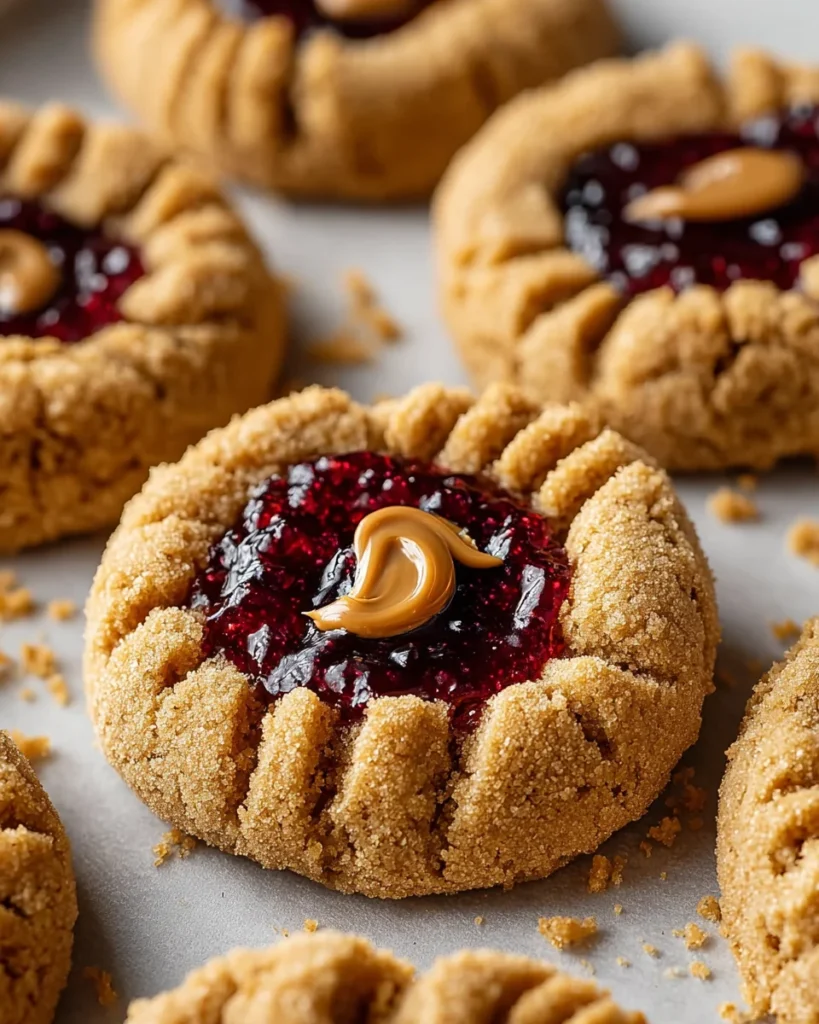
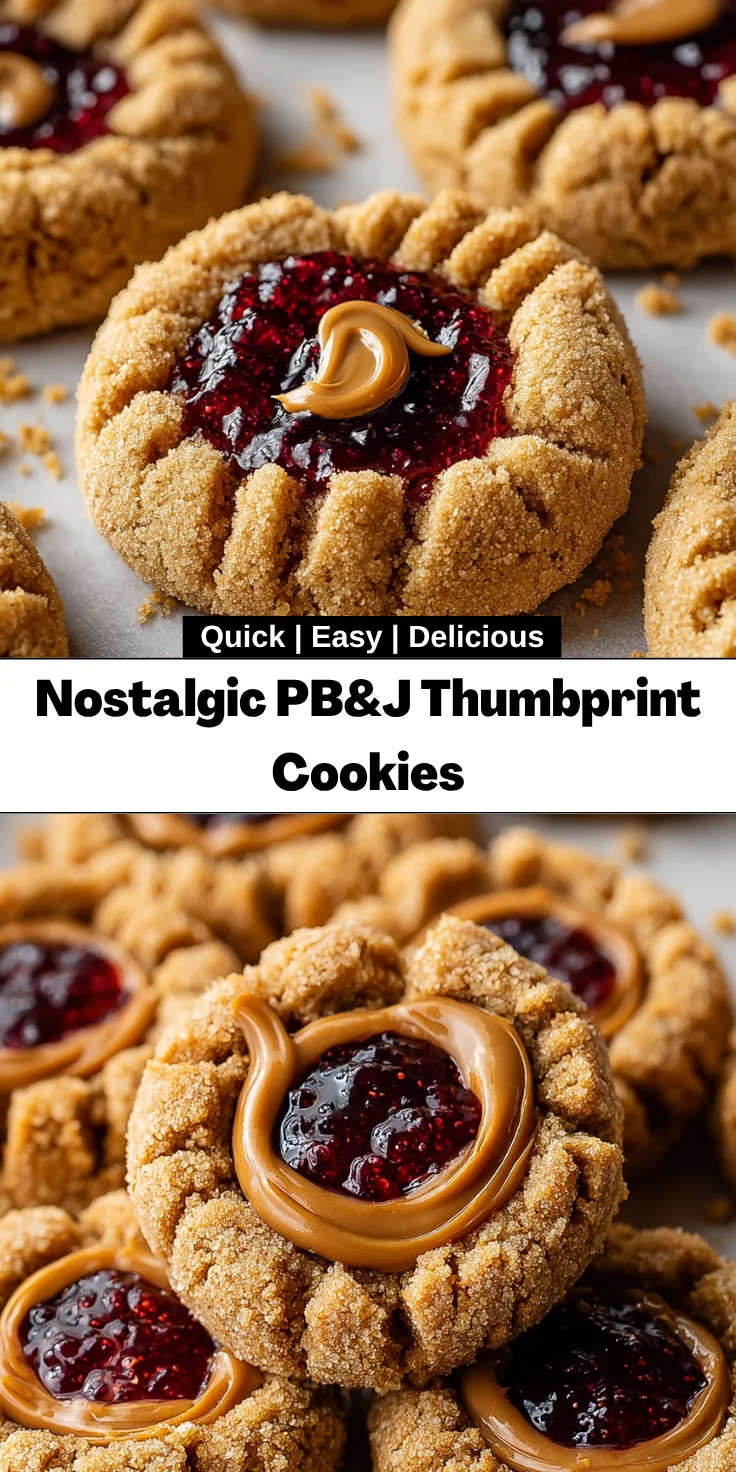
Introduction to Nostalgic PB&J Thumbprint Cookies
As a busy mom of four, trying to find treats that merge simplicity and nostalgia is always at the top of my list. I’m so excited to share my sweet PB&J thumbprint cookie recipe! These little beauties are a marriage of creamy peanut butter and your favorite jelly – and totally take you back to childhood with each bite. Short of that – they’re fast to pull together, and oh-so-sweet for little sweet moments at home with the kids as well. Trust me, your loved ones will love them, and you will love the warm memories they bring.
Why You’ll Love This Nostalgic PB&J Thumbprint Cookies
These nostalgic PB&J thumbprint cookies are a dream for any busy kitchen! They’re quick to whip up, taking less than 30 minutes from start to finish. Plus, the combination of peanut butter and fruity preserves creates an explosion of flavor that satisfies cravings. Whether it’s a sweet treat for the kids or a delightful snack for yourself, these cookies deliver comfort and smiles with every bite. You’ll love how they bring warmth to any occasion!
Ingredients for Nostalgic PB&J Thumbprint Cookies
Creating these nostalgic PB&J thumbprint cookies is as straightforward as it gets! Here’s what you’ll need:
- Unsalted Butter: Adds creaminess and richness to the cookies, helping to achieve that soft texture we all love.
- Granulated Sugar: Sweetens the cookies, giving them a delightful crunch on the outside.
- Brown Sugar: Brings a slight molasses flavor and moisture, keeping the cookies chewy.
- Salt: Enhances the sweetness and balances all the flavors beautifully.
- Creamy Peanut Butter: The star of the show! It provides that iconic flavor and delightful creaminess.
- Egg: Acts as a binding agent, helping the cookies hold their shape and stay moist.
- Vanilla Extract: A splash of vanilla adds depth and warmth to the overall taste.
- All-Purpose Flour: Forms the structure of the cookies, giving them that soft and tender texture.
- Baking Soda: The leavening agent that helps the cookies rise, creating a fluffy bite.
- Jelly or Jam: Choose from grape jelly, strawberry jam, or raspberry jam for a fruity burst in the center!
- Melted Peanut Butter: Use this for drizzling on top for an extra layer of delicious peanut butter flavor.
If you’re curious about exact measurements, don’t worry! You can find them at the bottom of the article for easy printing. The beauty of these cookies is also in their flexibility. Feel free to experiment with various jams or jellies to create your own twist on this classic treat!
How to Make Nostalgic PB&J Thumbprint Cookies
Making these nostalgic PB&J thumbprint cookies is a fun journey, one that I love taking. With a few simple steps, you’ll find yourself with warm, gooey cookies that everyone will adore. Let’s dive into the process together!
Preheat the Oven
First things first: preheat your oven to 350 degrees F. It’s like a cozy blanket warming up, ready to embrace your cookies. While that’s happening, grab your baking sheets and line them with parchment paper. This little step prevents any cookie sticking drama later on!
Cream the Wet Ingredients
Now, in a large mixing bowl, let’s cream together the unsalted butter, granulated sugar, brown sugar, and salt. I usually use a handy electric mixer for this part because it adds a delightful airiness. Mix until everything blends into a smooth, creamy indulgence.
Next, add in the egg, creamy peanut butter, and vanilla extract. Whisk it all together like you mean it! You should see a delightful mix that’s shiny and rich. Trust me; this combination is like a warm hug of flavor.
Combine the Dry Ingredients
In another bowl, combine the all-purpose flour and baking soda. I use a whisk to incorporate them well. This helps ensure that the baking soda is evenly distributed in your dry ingredients. Once mixed, gently fold this dry mix into your wet ingredients. Use a rubber spatula to make the process smooth, ensuring a thick dough forms with minimal lumps.
Shape the Cookie Dough
It’s time to scoop! Using a cookie scooper, take portions of dough and roll them into balls. I aim for about 2 inches apart on the baking sheet. This gives them room to spread and grow into fluffy cookies.
Create Wells for Jelly
Now here comes the fun part! Take the concave side of the scooper or your thumb and gently press into the center of each dough ball, creating a well. It’s like making little cookie bowls eager to be filled with fruity goodness. Remember, they’re waiting for that delicious jelly!
Bake the Cookies
Place the baking sheet in the preheated oven and let the cookies bake for 13 minutes. You want them to spread out and just become golden along the edges. Keep an eye on them as that magical scent wafts through your kitchen. Once they’re done, let them cool for about 5 minutes before transferring them to a cooling rack.
Add the Finishing Touch
The best part is yet to come! Melt a bit of peanut butter in the microwave until it’s smooth. Then, using a piping bag or a simple plastic bag with a cut corner, drizzle that warm peanut butter right into the center of each cookie. It’s the perfect crowning jewel on these nostalgic thumbprints!
Tips for Success
- Make sure your butter is at room temperature for easy creaming.
- Don’t skip the chilling step if you want thicker cookies! Pop the dough in the fridge for 30 minutes.
- Experiment with different nut butters for a unique flavor twist.
- For a crunch, add chopped nuts or chocolate chips to the dough.
- Get the kids involved! Let them fill the wells with jelly for extra fun.
Equipment Needed
- Baking Sheets: Any flat baking tray works, even a regular cookie sheet.
- Parchment Paper: If you don’t have this, use a silicone baking mat instead.
- Mixing Bowls: Large and medium bowls are handy; you can substitute with any deep bowls.
- Cookie Scooper: A tablespoon can do the trick if you don’t have one.
- Piping Bag: A ziplock bag with a corner cut is a great alternative!
Variations
- Nut Butter Swap: Try almond or cashew butter for a nutty twist that’s just as delightful!
- Gluten-Free Option: Substitute all-purpose flour with a 1:1 gluten-free baking blend for a gluten-friendly treat.
- Sweetener Alternatives: Use coconut sugar or honey in place of granulated sugar for a healthier touch.
- Fruit Preserves: Experiment with other flavors like apricot, peach, or even lemon curd for a zesty twist.
- Chunky Style: Add chopped peanuts or mini chocolate chips into the dough for extra texture and flavor.
Serving Suggestions for Nostalgic PB&J Thumbprint Cookies
- Pair these delightful cookies with a cold glass of milk for a classic treat.
- Serve alongside a warm cup of tea or coffee for a cozy afternoon snack.
- For added fun, plate them with fresh sliced fruit like apples or strawberries.
- Present them on a colorful platter to brighten up your dessert table.
FAQs about Nostalgic PB&J Thumbprint Cookies
Can I use crunchy peanut butter instead of creamy?
Absolutely! Using crunchy peanut butter will give these nostalgic PB&J thumbprint cookies a delightful texture. It’s a fun twist!
What other jams can I use in these cookies?
You can get creative! Raspberry jam, apricot preserves, or even chocolate spread can make each batch unique. The flavor possibilities are endless!
How should I store these cookies after baking?
To keep your cookies fresh, store them in an airtight container at room temperature. They’ll stay delicious for up to a week!
Can I freeze the cookie dough for later use?
Yes, you can! Portion the dough into balls, freeze them on a parchment-lined sheet, and then transfer to a freezer bag. Bake fresh cookies whenever the craving hits!
What’s the secret to soft cookies?
To keep your nostalgic PB&J thumbprint cookies soft, avoid overbaking. They should look slightly underdone when you take them out of the oven. Trust the cooling process to finish them off!
Final Thoughts
There’s something truly special about baking nostalgic PB&J thumbprint cookies. Each bite is a delightful trip down memory lane, mingling sweet flavors with comforting textures. They encapsulate the essence of childhood—and let’s be honest—the joy of sharing good food with family. Whether it’s a rainy day or a sunny afternoon, these cookies can bring smiles all around the table. So roll up your sleeves and get baking! The laughter and love you create in your kitchen will make every moment deliciously worthwhile. Trust me, your family will thank you for it!
Print
Nostalgic PB&J Thumbprint Cookies
- Total Time: 28 minutes
- Yield: 12-15 cookies 1x
- Diet: Vegetarian
Description
Delicious and nostalgic thumbprint cookies filled with your choice of grape jelly, strawberry jam, or raspberry jam.
Ingredients
- ½ cup unsalted butter (one stick)
- ½ cup granulated sugar
- ½ cup brown sugar
- ¼ teaspoon salt
- 1 cup creamy peanut butter
- 1 egg
- 1 teaspoon vanilla extract
- 1 ½ cups all purpose flour
- 1 teaspoon baking soda
- ½ cup grape jelly, strawberry jam or raspberry jam
- Melted peanut butter for drizzling
Instructions
- Preheat oven to 350 degrees F. Line 1-2 baking sheets with parchment paper and set aside.
- In a large mixing bowl, cream together the butter, brown and white sugar and salt.
- Add the egg, peanut butter and vanilla next. Whisk together again rapidly until the mixture is combined, making sure the peanut butter is fully incorporated.
- Using a rubber spatula or wooden spoon, fold the dry ingredients (flour and baking soda) into the wet ingredients until a thick dough is formed.
- Using the scooper, scoop out balls of dough. Place the cookie dough balls on the prepared baking sheet about 2 inches apart.
- Use the concave side of the scooper to flatten the center of each cookie, creating a well for the jelly.
- Place a teaspoonful of preserves in the center of each unbaked peanut butter cookie.
- Bake in the oven for 13 minutes. The cookies will have spread and the edges become slightly browned. Let cool for 5 minutes then transfer to a cooling rack.
- Melt the extra peanut butter and place in a piping bag.
- To finish, create a swirl of melted peanut butter in the center of each cookie.
Notes
- Allow cookies to cool completely before storing.
- Experiment with different types of fruit preserves for unique flavors.
- Store in an airtight container for up to one week.
- Prep Time: 15 minutes
- Cook Time: 13 minutes
- Category: Dessert
- Method: Baking
- Cuisine: American
Nutrition
- Serving Size: 1 cookie
- Calories: 180
- Sugar: 10g
- Sodium: 100mg
- Fat: 10g
- Saturated Fat: 3g
- Unsaturated Fat: 5g
- Trans Fat: 0g
- Carbohydrates: 20g
- Fiber: 1g
- Protein: 4g
- Cholesterol: 15mg