Introduction to No-Bake Strawberry Fudge Squares
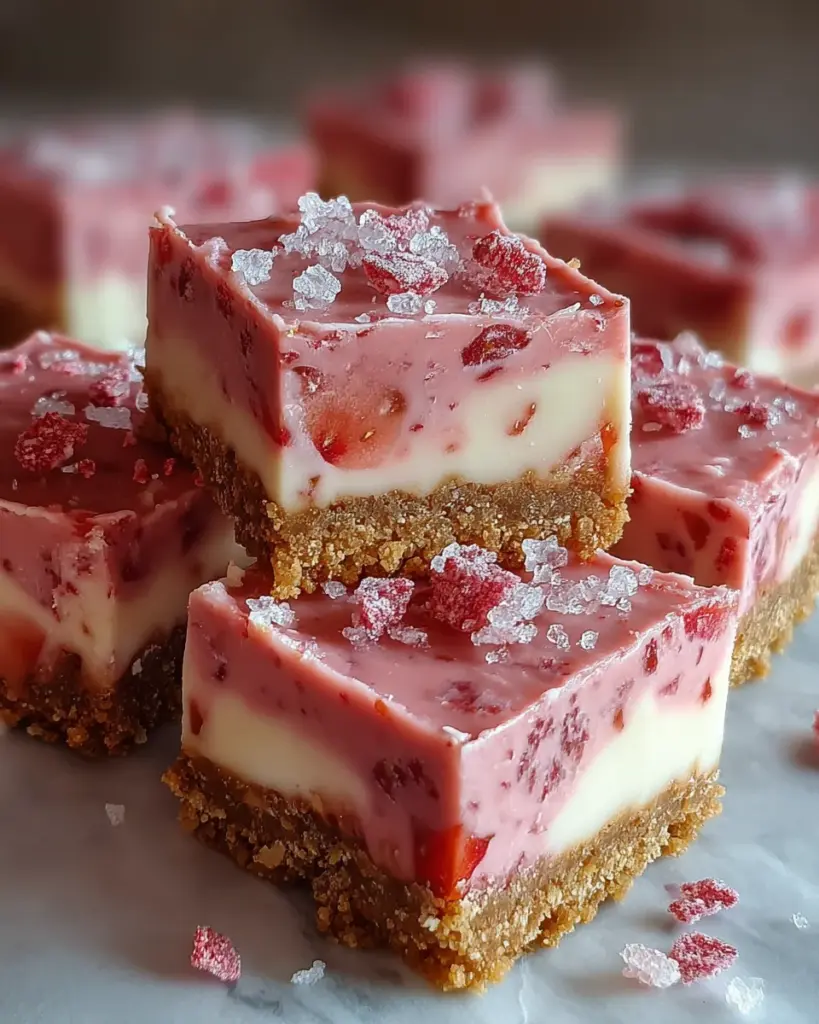
Hey there, fellow busy moms and hardworking professionals! If you’re anything like me, you know that sometimes life gets hectic, and the thought of baking can feel overwhelming. That’s where my No-Bake Strawberry Fudge Squares come to the rescue! This delightful treat is not only easy to whip up but also a sure way to impress your loved ones. With a buttery crust and creamy strawberry fudge layer, you’re looking at a heavenly dessert that hits the sweet spot without cranking up the oven. Let’s dive into this quick fix for your sweet tooth!
Why You’ll Love This No-Bake Strawberry Fudge Squares
Imagine treating yourself to a luscious dessert without spending hours in the kitchen. These No-Bake Strawberry Fudge Squares are here to save the day! They’re incredibly simple to make, requiring no oven time, which means less fuss for you. Plus, the delightful strawberry flavor brings a burst of summertime joy, making it a hit with kids and adults alike. These squares are the perfect balance of ease and taste!
Ingredients for No-Bake Strawberry Fudge Squares
Gathering your ingredients is half the fun! For these delightful No-Bake Strawberry Fudge Squares, you’ll need a few staples and some optional treats to play with. Here’s what to look for:
- Digestive biscuits or graham crackers: These form the buttery crust. Feel free to swap them out for your favorite cookie or even gluten-free options if needed.
- Unsalted butter: This adds richness to the crust, helping it hold together beautifully. If you’re dairy-free, you can try coconut oil!
- White chocolate: The star of the fudge layer. It offers a creamy texture and sweetness that pairs so well with strawberries. You could also use milk chocolate for a twist.
- Sweetened condensed milk: This thick, luscious liquid binds everything together and adds a wonderful sweetness. It’s hard to find a substitute for this, but evaporated milk with added sugar might work in a pinch.
- Freeze-dried strawberries: They bring intense strawberry flavor without added water. If you can’t find them, pureed fresh strawberries (strained of seeds) will do, though the flavor may be milder.
- Pure vanilla extract: Just a teaspoon enhances all the flavors, making each bite more divine. If you have vanilla bean paste, you can use that too!
- Pinch of salt: A little salt balances sweetness and elevates the fudge flavor. Don’t skip this, even if it seems minor!
- Gel food coloring (optional): For those who want a vibrant pink fudge, just a drop or two will brighten things up!
- Fresh strawberry slices and extra freeze-dried strawberries: These are perfect for garnishing and make your squares look extra tempting. They can also add that fresh burst of flavor.
You can find exact measurements for these ingredients at the bottom of the article, ready for printing. Let’s get ready to create some magic in the kitchen!
How to Make No-Bake Strawberry Fudge Squares
Now that you’ve gathered all those beautiful ingredients, it’s time to bring our No-Bake Strawberry Fudge Squares to life! Follow these simple steps, and I promise you’ll be savoring some heavenly bites in no time.
Step 1 – Prepare the Pan
First, let’s talk about the pan. Take an 8-inch square baking pan and line it with parchment paper. You want to leave a bit of an overhang on two sides. This little trick is key for easy removal later on. Trust me, when it’s time to cut the squares, you’ll be grateful!
Step 2 – Make the Crust
In a large bowl, combine your crushed digestive biscuits or graham crackers with the melted butter. Stir them together until the crumbs are totally moistened. When you press the mixture together, it should hold its shape. This is your delicious crust, so take care to mix it well!
Step 3 – Press and Chill the Crust
Now it’s time to press! Firmly pack the crumb mixture into the bottom of the prepared pan. Use the back of a measuring cup or your clean hands to make it even. Chilling the crust for about 10 minutes is vital; it helps it set up perfectly, making your fudge layer easier to spread later.
Step 4 – Melt Chocolate Base
Next up, let’s melt our chocolate! Set a heatproof bowl over a saucepan filled with simmering water for a double boiler. Combine white chocolate chips and sweetened condensed milk in this bowl. Stir gently until the chocolate is completely melted and smooth. This method prevents the chocolate from burning. So simple, yet so effective!
Step 5 – Add Strawberry Flavor
Take the melted chocolate mixture off the heat. Now, fold in the freeze-dried strawberry powder, vanilla extract, and a pinch of salt. If you’re using food coloring for that extra pop, add it now too! Mix everything until it’s well combined and the color is uniform. You want that dreamy pink fudge to shine!
Step 6 – Assemble the Fudge
Pour that luscious strawberry fudge mixture over your chilled crust. Use a spatula to spread it evenly into all corners of the pan. The last thing you want is an uneven distribution of flavor. Remember, a good looking dessert is half the fun!
Step 7 – Chill Until Firm
Cover the pan loosely with plastic wrap and pop it in the refrigerator. You’ll want to chill the fudge for at least 2-3 hours. This step is crucial; ensuring the fudge layer is firm allows you to cut clean squares without a mess!
Step 8 – Cut and Serve
Once your fudge is set, it’s showtime! Gently lift the fudge out of the pan using the parchment overhang. Transfer it to a cutting board and slice it into 16 squares using a sharp knife; wipe the blade clean between cuts for perfect edges. Serve these beauties chilled or let them sit a little to soften. Either way, don’t forget to garnish with fresh strawberry slices!
Tips for Success
- Make sure the butter is melted, but not hot, to avoid cooking the biscuit mixture.
- For a cleaner cut, use a hot knife—just dip it in warm water and dry it off.
- If your fudge seems too soft after chilling, let it sit in the fridge a bit longer.
- Crushing biscuits or crackers is easier in a sealed bag with a rolling pin!
- Always taste your fudge mixture before pouring it over the crust; adjust sweetness if needed!
Equipment Needed
- 8-inch square baking pan: Essential for setting your fudge. A round pan can work too, if that’s all you have!
- Parchment paper: This ensures easy removal. Aluminum foil is a decent alternative if you don’t have parchment.
- Mixing bowls: A large bowl for the crust and a medium one for the fudge. Any size will do!
- Heatproof bowl: For the double boiler method. A metal or glass bowl works best.
- Spatula: Perfect for spreading the fudge evenly. A butter knife can also do the trick!
Variations for No-Bake Strawberry Fudge Squares
- Dark Chocolate Delight: Swap white chocolate for dark chocolate if you prefer a more intense flavor.
- Nutty Crunch: Add chopped nuts, like almonds or walnuts, to the fudge mixture for a delightful texture contrast.
- Berry Blast: Mix in additional freeze-dried fruits, such as raspberries or blueberries, for a mixed berry flavor.
- Dairy-Free Option: Use dairy-free chocolate and coconut milk sweetened with natural sugar for a vegan-friendly treat.
- Minty Fresh: Add a few drops of peppermint extract to the fudge for a refreshing twist that’s perfect for summer!
Serving Suggestions
- Serve your No-Bake Strawberry Fudge Squares alongside a scoop of vanilla ice cream for a delightful contrast.
- Pair them with a refreshing glass of lemonade or iced tea for a perfect summer treat.
- Presentation matters! Arrange the squares on a colorful platter, and sprinkle with extra freeze-dried strawberries for visual appeal.
- Consider a dollop of whipped cream on top for extra indulgence!
FAQs about No-Bake Strawberry Fudge Squares
Can I use fresh strawberries instead of freeze-dried ones?
Absolutely! You can puree fresh strawberries, but remember to strain out the seeds for a smooth texture in your No-Bake Strawberry Fudge Squares. Just keep in mind the flavor may be slightly milder than using freeze-dried strawberries.
How long do these No-Bake Strawberry Fudge Squares last?
If stored in an airtight container in the refrigerator, they can last up to a week. Just make sure to keep them chilled to maintain their lovely texture!
Can I freeze these fudge squares?
Yes, indeed! Cut the squares and wrap them individually in plastic wrap, then place them in a freezer-safe container. They can last in the freezer for about a month, making for a great make-ahead treat!
What if I don’t have sweetened condensed milk?
If you’re short on sweetened condensed milk, you can make a homemade version by simmering regular milk with sugar until it thickens, though it takes some time. Alternatively, a combination of evaporated milk and sugar can work in a pinch.
Can I add any additional toppings to the fudge?
Of course! Get creative! You can sprinkle crushed nuts, drizzle some chocolate, or even mix in coconut to add unique flavors and textures to your No-Bake Strawberry Fudge Squares.
Final Thoughts
Making No-Bake Strawberry Fudge Squares is not just about creating a delicious dessert; it’s about bringing joy to your kitchen and your loved ones. The thrill of mixing colors and flavors without the oven means you can bake memories rather than worry about the mess. Each rich, creamy bite is a reminder that even in our busy lives, there’s always time for a sweet celebration. So grab your ingredients and share these delightful squares, knowing you’re not just baking, but crafting smiles and creating moments of happiness during any occasion!
Print
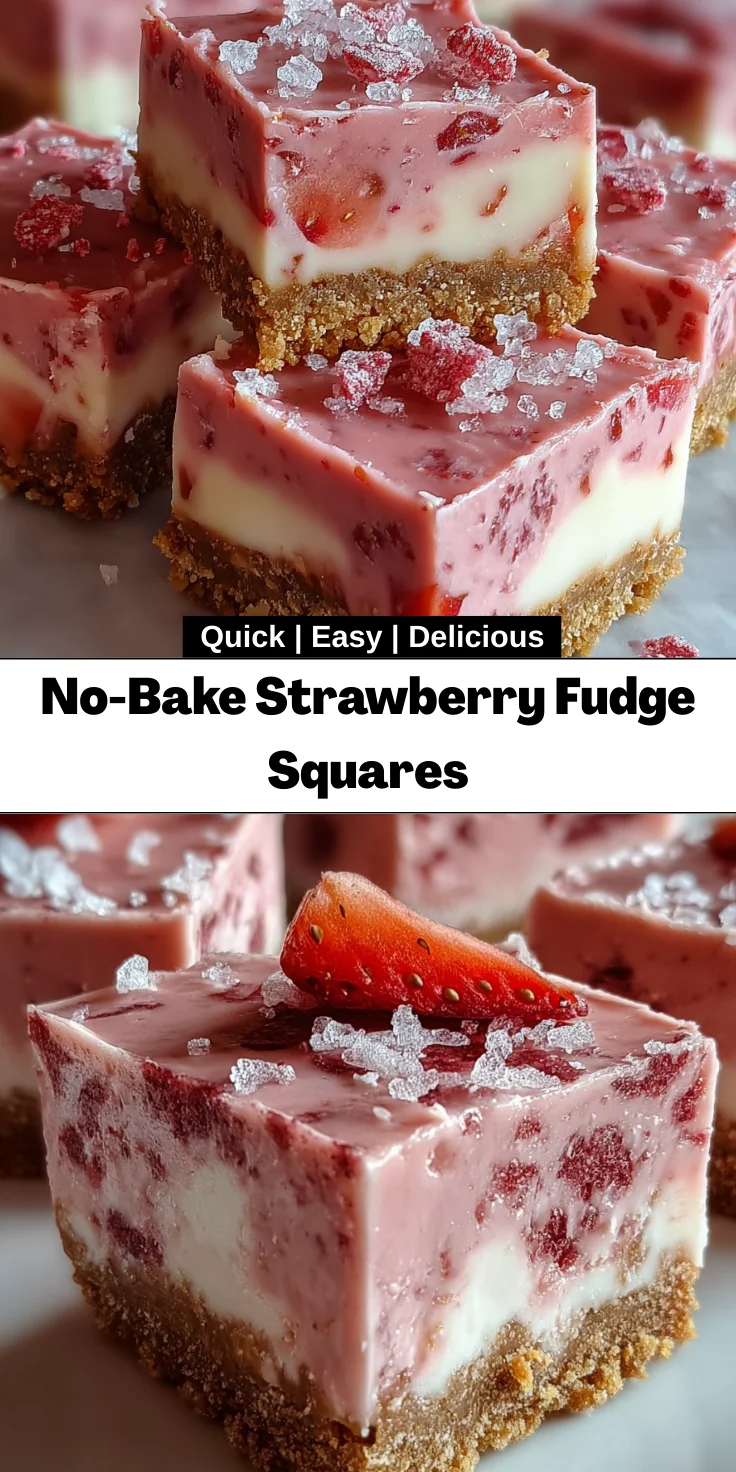
No-Bake Strawberry Fudge Squares
- Total Time: 2-3 hours (including chilling time)
- Yield: 16 squares 1x
- Diet: Vegetarian
Description
No-Bake Strawberry Fudge Squares are a delightful treat made with a buttery crust and a creamy strawberry fudge layer, perfect for satisfying your sweet tooth without the need for baking.
Ingredients
- 7 oz digestive biscuits or graham crackers, finely crushed
- 3.5 oz unsalted butter, melted
- 7 oz white chocolate chips or chopped white chocolate
- 14 oz sweetened condensed milk (1 can)
- 1.75 oz freeze-dried strawberries, ground to fine powder (or 3.5 oz fresh strawberries, puréed and strained)
- 1 tsp pure vanilla extract
- Pinch of salt
- 1–2 drops pink or red gel food coloring (optional)
- Fresh strawberry slices (for garnish)
- Extra freeze-dried strawberry pieces or coarse sugar crystals (for garnish)
Instructions
- Prepare the Pan: Line an 8-inch square baking pan with parchment paper, leaving a 1-inch overhang on two sides for easy removal.
- Make the Crust: In a large bowl, combine crushed biscuits and melted butter. Stir until all crumbs are moistened and the mixture holds together when pressed.
- Press and Chill Crust: Press the crumb mixture firmly into the prepared pan in an even layer. Chill in the refrigerator for 10 minutes.
- Melt Chocolate Base: Place white chocolate chips and sweetened condensed milk in a medium heatproof bowl. Set the bowl over a saucepan of simmering water (double boiler) and stir gently until the chocolate is completely melted and the mixture is smooth.
- Add Strawberry Flavor: Remove from heat. Stir in freeze-dried strawberry powder (or strained purée), vanilla extract, salt, and food coloring if using. Mix until fully combined and the color is uniform.
- Assemble the Fudge: Pour the strawberry fudge mixture over the chilled crust. Spread evenly with a spatula to reach all corners.
- Chill Until Firm: Cover the pan loosely with plastic wrap and refrigerate for at least 2-3 hours, or until the fudge layer is firm to the touch.
- Cut and Serve: Lift the fudge out of the pan using the parchment overhang. Place on a cutting board and slice into 16 squares with a sharp knife, wiping the blade clean between cuts. Garnish each square with a fresh strawberry slice or extra freeze-dried strawberry pieces, if desired. Serve chilled or slightly softened at room temperature.
Notes
- Ensure the chocolate is completely melted for a smooth fudge texture.
- If using fresh strawberries, make sure to strain out the seeds to avoid a gritty texture.
- Store any leftovers in an airtight container in the refrigerator for up to a week.
- Prep Time: 20 minutes
- Cook Time: No cooking required
- Category: Dessert
- Method: No-Bake
- Cuisine: American
Nutrition
- Serving Size: 1 square
- Calories: 180
- Sugar: 15g
- Sodium: 50mg
- Fat: 9g
- Saturated Fat: 5g
- Unsaturated Fat: 3g
- Trans Fat: 0g
- Carbohydrates: 25g
- Fiber: 0g
- Protein: 2g
- Cholesterol: 15mg