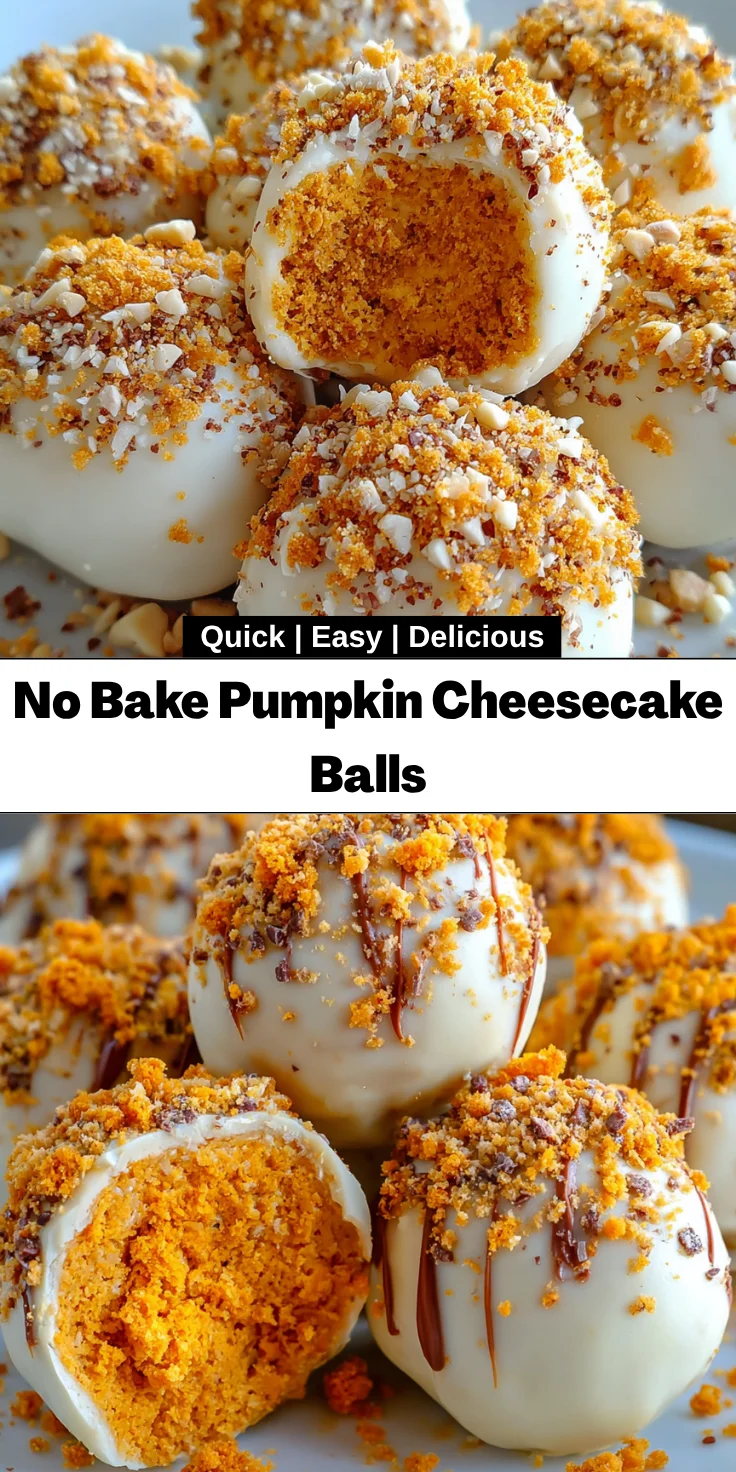
Introduction to No Bake Pumpkin Cheesecake Balls
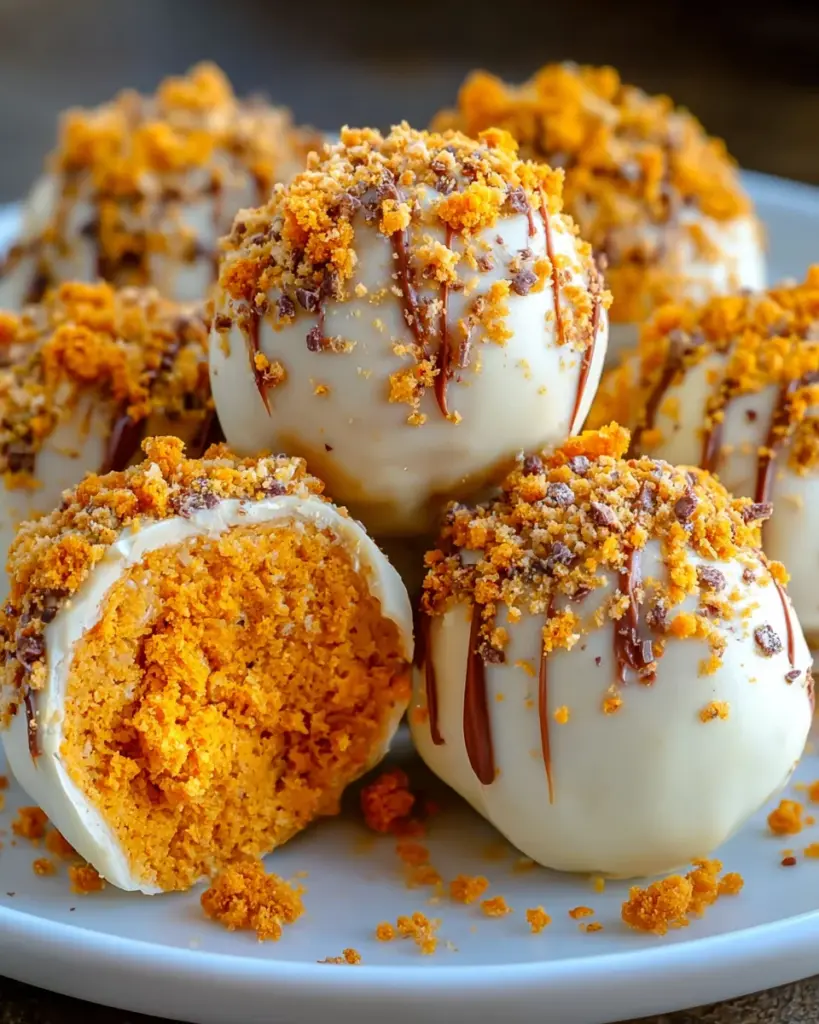
As the leaves start to turn and the scent of fall fills the air, there’s nothing quite like indulging in sweet, seasonal treats. These No Bake Pumpkin Cheesecake Balls are my go-to for navigating busy days while satisfying my sweet tooth. They’re quick to whip up and offer a delightful burst of pumpkin flavor, making them perfect for family gatherings or cozy evenings at home. I love how they can easily impress guests while being incredibly simple to make. Join me on this culinary adventure, and let’s craft these delicious bites together!
Why You’ll Love This No Bake Pumpkin Cheesecake Balls
These No Bake Pumpkin Cheesecake Balls are a delightful way to savor fall flavors without spending hours in the kitchen. They’re incredibly easy to prepare, requiring no baking—perfect for those busy evenings when the kids have activities or you’ve just come home from work. Plus, the sweet and creamy taste, paired with that hint of spice, keeps everyone coming back for seconds. Trust me, they’re a hit!
Ingredients for No Bake Pumpkin Cheesecake Balls
Gathering the right ingredients is the first step to crafting these scrumptious No Bake Pumpkin Cheesecake Balls. Here’s what you’ll need:
- Cream Cheese: This is the base of our cheesecake balls. It adds that luscious, creamy texture.
- Canned Pumpkin Puree: This brings in that signature pumpkin flavor and a beautiful orange hue to our treats.
- Powdered Sugar: For sweetness and a smooth finish, powdered sugar is a must. It dissolves easily!
- Vanilla Extract: Just a splash adds depth and richness to the flavor profile.
- Ground Cinnamon: The warm aroma of cinnamon is essential for that cozy, fall vibe.
- Ground Nutmeg: This spice elevates the flavor, giving it a hint of nutty warmth. A little goes a long way!
- Ground Ginger: A pinch of ginger balances the sweetness and adds a little zing to each bite.
- Ground Cloves (optional): If you love strong spice, cloves add a bold, aromatic essence to the mix.
- Graham Cracker Crumbs: These provide the crumbled texture of a traditional cheesecake crust. You could also use store-bought crumbs if you’re in a hurry!
- Chocolate (for dipping): You can choose between white chocolate, milk chocolate chips, or candy melts. They create a luscious coating!
- Extra Graham Cracker Crumbs or Crushed Nuts (optional): Use these for rolling your cheesecake balls to add flavor and a crunchy texture.
The exact quantities of these ingredients are available at the bottom of the article for easy printing. Let’s make the magic happen!
How to Make No Bake Pumpkin Cheesecake Balls
Now comes the fun part—putting together these delightful No Bake Pumpkin Cheesecake Balls! Follow these simple steps, and you’ll have a treat that everyone will adore. Trust me, it’s as easy as pie (or should I say cheesecake?). Let’s get started!
Step 1: Mix the Base
First, grab a large mixing bowl. Combine the softened cream cheese, canned pumpkin puree, powdered sugar, and vanilla extract. Using a hand mixer or whisk, blend everything until it’s smooth and creamy. This will be the luscious base of our cheesecake balls.
Step 2: Add the Spices
Next, sprinkle in your ground cinnamon, nutmeg, ginger, and optional cloves. I always recommend tasting at this stage, as these warm spices are the heart of your pumpkin flavor. Stir well until the spices are fully integrated into the creamy mixture. Your kitchen will smell amazing!
Step 3: Incorporate Graham Cracker Crumbs
Now, it’s time to fold in the graham cracker crumbs. Do this gradually, mixing until the blend is thick enough to roll into balls. If the mixture feels too sticky, don’t fret! Just add a bit more graham cracker crumbs until you reach a workable consistency. We want these balls to hold their shape.
Step 4: Roll into Balls
Using a tablespoon or a cookie scoop, portion out the mixture. Gently roll each scoop into bite-sized balls. Place them onto a baking sheet lined with parchment paper. It’s like making tiny pumpkin-flavored treasures!
Step 5: Chill to Firm Up
To ensure the cheesecake balls hold together, pop them into the fridge. Let them chill for at least one hour. This helps them firm up perfectly for the next step. Patience is key here!
Step 6: Melt the Chocolate
While the balls are chilling, it’s time to prepare the chocolate coating. In a microwave-safe bowl, melt your chosen chocolate chips or candy melts. Heat in 30-second intervals, stirring in between, until smooth and silky. You want that chocolate to be pourable for easy dipping.
Step 7: Dip the Balls
Now, the moment you’ve been waiting for! Carefully dip each chilled cheesecake ball into the melted chocolate. Use a fork or dipping tool to do this. Let any excess chocolate drizzle back into the bowl, then place them back on the parchment-lined baking sheet.
Step 8: Optional Coatings
If you want to jazz them up a bit more, here’s your chance! Before the chocolate sets, you can roll your balls in extra graham cracker crumbs, crushed nuts, or even colorful sprinkles. This adds a fun touch and extra texture!
Step 9: Final Chill
Give your chocolate-coated cheesecake balls another quick chill in the fridge for about 30 minutes. This step ensures that the chocolate coating firms up to perfection.
Step 10: Serve and Enjoy
Finally, once your balls are chilled and firm, it’s time to serve! Treat yourself and your loved ones with these little bites of joy. Store any leftovers in an airtight container in the fridge for up to five days. But honestly, they probably won’t last that long!
Tips for Success
- Always use softened cream cheese for easier mixing and a smoother texture.
- When rolling, wet your hands slightly to prevent the mixture from sticking.
- Don’t skip the chilling time; it’s crucial for holding shape and texture.
- If chocolate hardens while dipping, warm it slightly in the microwave.
- Experiment with different chocolate types for unique flavors!
Equipment Needed
- Mixing Bowl: A large bowl is essential. A smaller bowl works for melting chocolate.
- Hand Mixer or Whisk: A hand mixer speeds up mixing, but a whisk will do just fine.
- Cookie Scoop or Tablespoon: For easy portioning of the mixture. A regular spoon works too!
- Baking Sheet: Line it with parchment paper for easy cleanup.
- Microwave-Safe Bowl: For melting chocolate. A small saucepan can be used on the stove as an alternative.
Variations
- Vegan Version: Swap the cream cheese for dairy-free cream cheese and use vegan chocolate.
- Gluten-Free Option: Use gluten-free graham cracker crumbs to make these treats suitable for gluten-sensitive guests.
- Spice It Up: Add a few pinches of cayenne pepper for a spicy kick. It pairs surprisingly well with pumpkin!
- Nutty Delight: Incorporate some crushed pecans or walnuts into the mixture for added crunch and flavor.
- Mini Cheesecake Bites: Press the mixture into mini muffin tins instead of rolling into balls for more of a traditional cheesecake shape.
Serving Suggestions for No Bake Pumpkin Cheesecake Balls
- Pair these delightful bites with a steaming cup of spiced chai or apple cider for a warm, fall treat.
- Arrange them on a platter with fresh fruit like apple slices and grapes for a beautiful presentation.
- Serve alongside whipped cream or a dollop of yogurt for added creaminess.
- Sprinkle some cinnamon on top for an extra festive touch!
FAQs about No Bake Pumpkin Cheesecake Balls
Can I make these No Bake Pumpkin Cheesecake Balls ahead of time?
Absolutely! These delicious treats can be made ahead and stored in the refrigerator. Just make sure to keep them in an airtight container.
What if I can’t find graham cracker crumbs?
If graham cracker crumbs are elusive, don’t sweat it! You can substitute with crushed cookies like Oreos or even digestive biscuits. They add a unique twist!
How long do these pumpkin cheesecake balls last?
General rule of thumb: they stay fresh for about five days in the fridge. However, I doubt they’ll last that long once your family gets a taste!
Can I use fresh pumpkin instead of canned?
Sure thing! If you have fresh pumpkin, roast it, then puree it. Just ensure it’s smooth for the best texture in these no bake pumpkin cheesecake balls.
What’s the best way to store leftovers?
Store any leftovers in an airtight container in the fridge. This keeps them fresh and ready for that late-night snack craving!
Final Thoughts
Making these No Bake Pumpkin Cheesecake Balls is not just about creating a dessert; it’s about the joy of sharing something sweet with family and friends. The ease of preparation allows me to whip them up, even on my busiest days, and their delightful flavors remind me of those warm, cozy evenings. Watching my loved ones enjoy each bite fills my heart with happiness. So, as the leaves change, I hope you can enjoy these little bites of pumpkin goodness. Trust me, they’ll be a crowd-pleaser and become your new favorite autumn treat!
Print
No Bake Pumpkin Cheesecake Balls
- Total Time: 1 hour 30 minutes
- Yield: Approximately 24 balls 1x
- Diet: Vegetarian
Description
Delicious no-bake pumpkin cheesecake balls coated in chocolate, perfect for fall treats.
Ingredients
- 225 g cream cheese, softened
- 250 g canned pumpkin puree
- 125 g powdered sugar
- 1 tsp vanilla extract
- 1 tsp ground cinnamon
- 0.5 tsp ground nutmeg
- 0.25 tsp ground ginger
- Pinch of ground cloves (optional)
- 2 cups graham cracker crumbs
- White chocolate, milk chocolate chips, or candy melts (for dipping)
- Extra graham cracker crumbs or crushed nuts (optional, for rolling)
Instructions
- In a large mixing bowl, combine the softened cream cheese, pumpkin puree, powdered sugar, and vanilla extract. Use a hand mixer or a whisk to mix everything until smooth and well combined.
- Add the ground cinnamon, nutmeg, ginger, and optional cloves to the mixture. Stir well until all the spices are evenly incorporated into the creamy base.
- Fold in the graham cracker crumbs gradually. Mix until the mixture becomes thick enough to roll into balls. If it feels too soft, add more graham cracker crumbs as needed for a workable consistency.
- Using a tablespoon or a cookie scoop, portion out the mixture and roll it into bite-sized balls. Place each ball onto a baking sheet lined with parchment paper.
- Refrigerate the rolled balls for at least 1 hour to firm them up for the next step.
- In a microwave-safe bowl, melt the chocolate chips or candy melts. Heat in 30-second intervals, stirring after each interval until completely smooth and melted.
- Using a fork or dipping tool, carefully dip each chilled cheesecake ball into the melted chocolate. Let any excess chocolate drip back into the bowl before placing them back on the lined baking sheet.
- If desired, roll the chocolate-coated balls in extra graham cracker crumbs, crushed nuts, or sprinkles before the chocolate sets.
- Refrigerate the coated cheesecake balls again for about 30 minutes, or until the chocolate is firm.
- Serve the cheesecake balls chilled. Store any leftovers in an airtight container in the fridge for up to 5 days.
Notes
- For a vegan option, use dairy-free cream cheese and chocolate.
- These can be made ahead of time and stored in the refrigerator.
- Optional toppings can add extra flavor and texture.
- Prep Time: 30 minutes
- Cook Time: 0 minutes
- Category: Dessert
- Method: No Bake
- Cuisine: American
Nutrition
- Serving Size: 1 ball
- Calories: 150
- Sugar: 10g
- Sodium: 45mg
- Fat: 7g
- Saturated Fat: 4g
- Unsaturated Fat: 2g
- Trans Fat: 0g
- Carbohydrates: 18g
- Fiber: 1g
- Protein: 2g
- Cholesterol: 15mg


