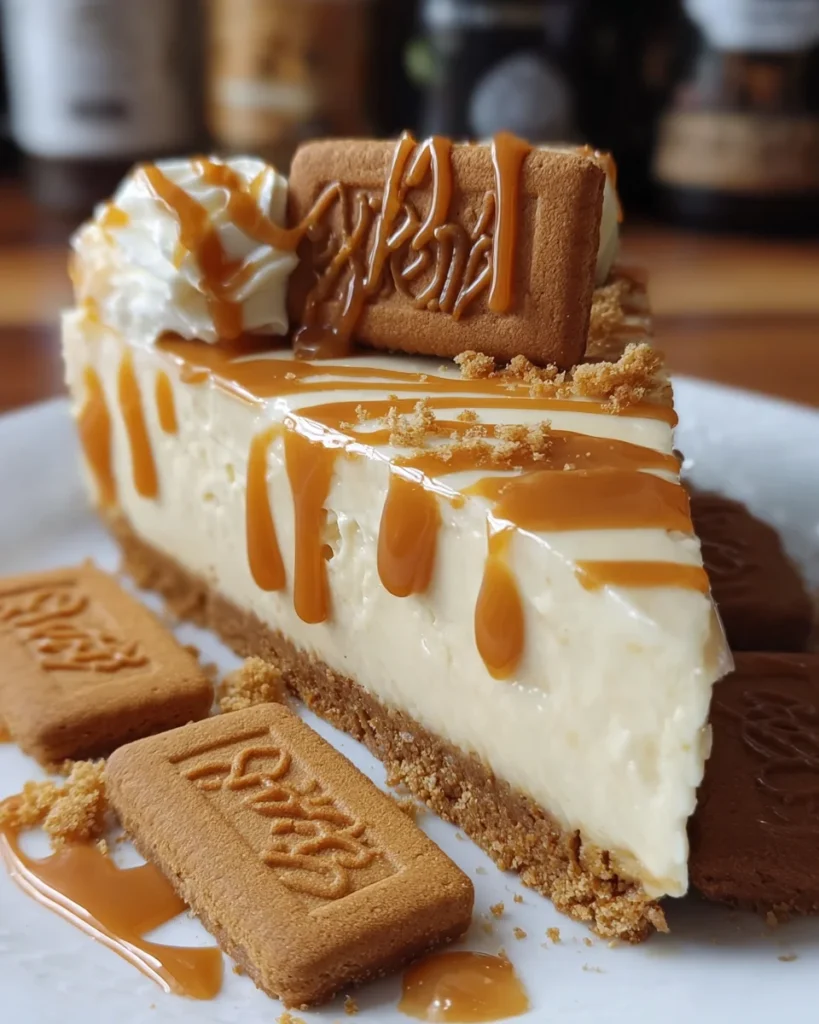
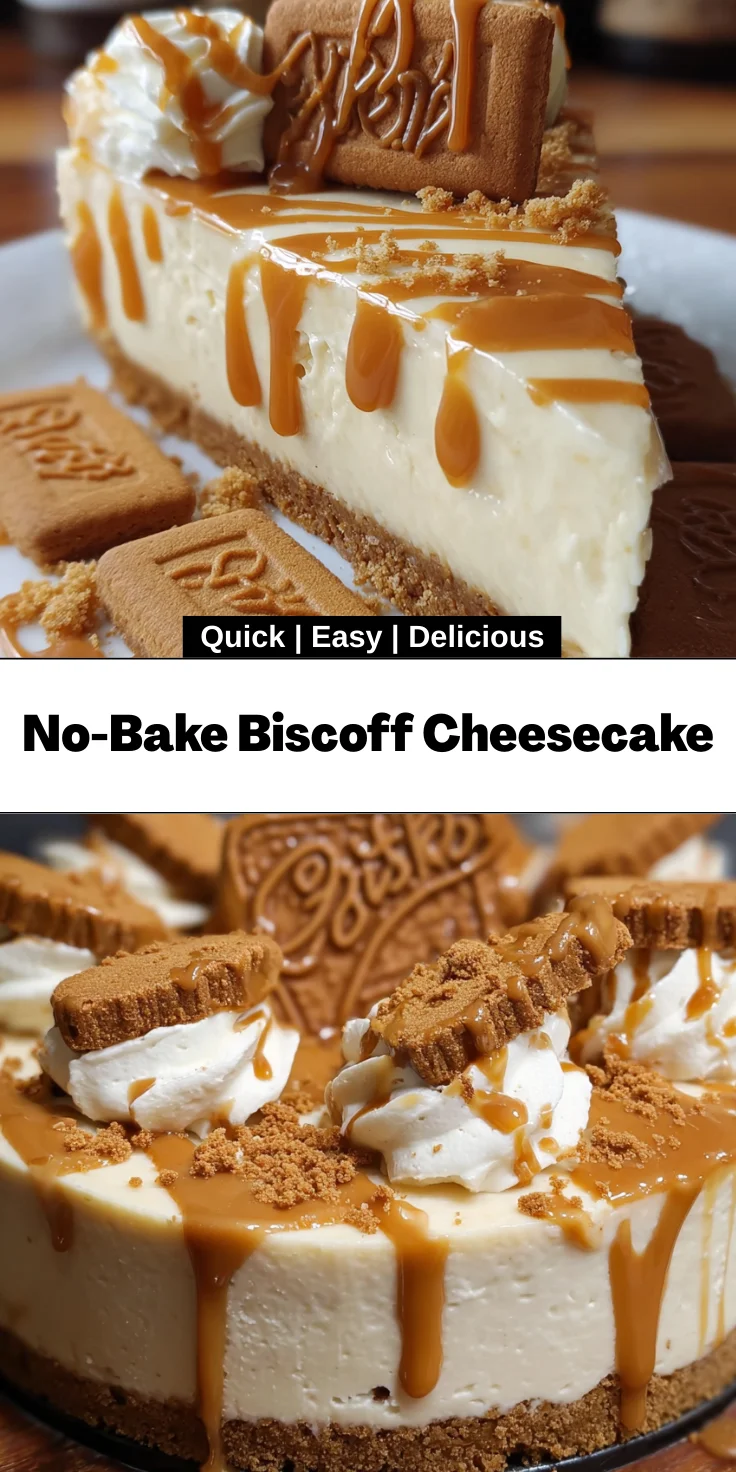
Introduction to No-Bake Biscoff Cheesecake
Let’s be real, life gets hectic, and as a busy home cook, I completely understand the need for simple, delicious desserts. That’s where this No-Bake Biscoff Cheesecake comes in! It’s a creamy delight that practically makes itself while you handle your daily whirlwind. With layers of decadent Biscoff flavor and a cookie crust that’s to die for, this dessert is perfect for impressing your loved ones or settling in for a cozy night alone. Trust me, after one bite, you’ll be dreaming of ways to make this heavenly cheesecake a staple in your home!
Why You’ll Love This No-Bake Biscoff Cheesecake
This No-Bake Biscoff Cheesecake is an absolute dream for those of us who cherish time-saving recipes without sacrificing flavor. You’ll love how effortlessly it comes together, making it a breeze for busy weeknights or last-minute gatherings. Plus, the rich, luscious taste of Biscoff cookies and spread will have everyone coming back for seconds—trust me, this creamy dessert will steal the show!
Ingredients for No-Bake Biscoff Cheesecake
Let’s dive into the wonderful world of ingredients that make this No-Bake Biscoff Cheesecake truly irresistible! Below, I’ve laid out everything you need, along with some insights on each component:
- Lotus/Biscoff biscuits: These are the star of your cheesecake crust. Their distinct caramel flavor and crunchy texture create a heavenly base.
- Unsalted butter: This binds the biscuit crumbs together, allowing you to achieve the perfect crust. Plus, unsalted lets you control the overall flavor.
- Full-fat cream cheese: The core of your cheesecake filling! It delivers creaminess and helps maintain the cheesecake’s structure.
- Icing sugar: This adds just the right amount of sweetness, balancing the cream cheese’s tanginess.
- Biscoff spread: Whether you choose smooth or crunchy, this spread elevates your dessert to new heights with its rich flavor.
- Vanilla extract: A whisper of vanilla enhances the sweetness and rounds out the flavors beautifully.
- Double cream (heavy cream): This is essential for that luscious texture. Whipping it up gives your cheesecake a light and airy quality.
- Optional double cream: For decoration! A little whipped cream on top makes it extra indulgent.
- Optional icing sugar: A sprinkle on the whipped cream adds sweetness and a lovely finish.
- Melty Biscoff spread: Drizzling this on top not only looks gorgeous but adds another layer of flavor.
- Biscoff biscuits for garnish: The perfect finishing touch, these little gems elevate your cheesecake presentation and give a nod to the star ingredient.
You can find these ingredients at your local grocery store, but feel free to explore specialty shops for unique finds or alternative brands. Remember, the exact quantities are listed at the bottom of the article for easy printing!
How to Make No-Bake Biscoff Cheesecake
Getting this No-Bake Biscoff Cheesecake ready is a delightful experience! Just follow these simple steps, and soon you’ll have a dessert that impresses everyone. I promise you won’t break a sweat!
Step 1: Prepare the Biscuit Base
Start by taking those lovely Biscoff biscuits and tossing them into a food processor. Pulse until they resemble fine crumbs.
Then, melt some unsalted butter and combine it with the cookie crumbs in a bowl.
Here’s the vital part: press this mixture firmly into the bottom of an 8-inch springform pan. This ensures your base holds together, keeping every bite just as delicious as the last!
Step 2: Make the Cream Cheese Filling
Now for the creamy magic! In a mixing bowl, blend the full-fat cream cheese, Biscoff spread, vanilla extract, and icing sugar.
Use an electric mixer for this part. Blend until it’s smooth and velvety.
Trust me, if it’s not smooth, your cheesecake won’t shine with that rich texture we’re after!
Step 3: Incorporate the Double Cream
This step is where your cheesecake becomes dreamy! Take your double cream and whip it in a separate bowl until stiff peaks form.
Gently fold this whipped cream into your cream cheese mixture.
It’s essential to keep it light; we want to preserve that airy texture. Think of folding in the cream like cradling your dessert—gentle but effective!
Step 4: Assemble and Refrigerate
Once your filling is beautifully blended, spread it evenly over your crumb base.
This is the time for patience—cover it and pop it into the fridge for at least 5-6 hours.
If you want the absolute best texture and flavor, let it set overnight. Trust me, it’s worth the wait!
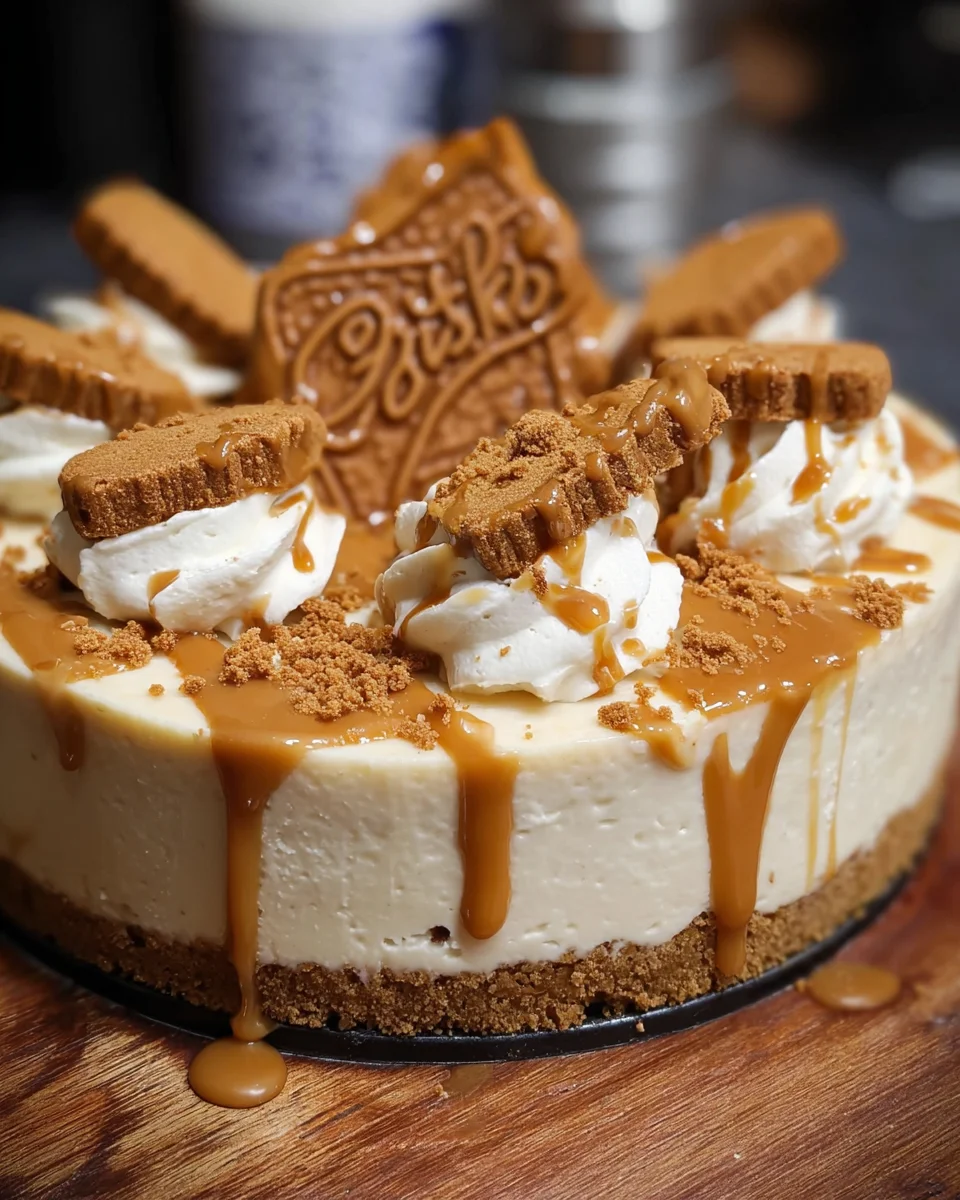
Step 5: Decorate and Serve
After chilling, it’s time for the big reveal! Carefully release the cheesecake from the springform pan and place it on a serving plate.
Whip some additional cream with icing sugar for a decorative touch; then pipe it on top however you like.
To finish, drizzle some melted Biscoff spread over the top and add a few whole biscuits for that Instagram-worthy flair!
Tips for Success
- Chill the cheesecake overnight for the best texture and flavor.
- Use room temperature cream cheese for easier blending.
- If using a springform pan, ensure it’s tightly sealed to prevent leaks.
- Don’t rush the whipping of the cream; stiff peaks will hold the cheesecake beautifully.
- Get creative! Add additional toppings like crushed cookies or a berry compote for excitement.
Equipment Needed
- Food processor: Essential for crushing those Biscoff biscuits, but a ziplock bag and rolling pin work too!
- Springform pan: Perfect for easy removal; a regular pie dish can work in a pinch, but slicing could get messy.
- Electric mixer: Ideal for achieving the silky cream cheese mixture; a whisk will do, but it takes longer!
- Mixing bowls: You’ll need a couple of these—one for the filling and one for whipping cream.
- Spatula: Use this for folding and spreading; a flexible one makes your life easier!
Variations of No-Bake Biscoff Cheesecake
- Chocolate Drizzle: Elevate your cheesecake by drizzling melted chocolate over the top for a rich contrast to the Biscoff flavors.
- Nutty Twist: Add crushed nuts such as almonds or hazelnuts into the filling for an exciting crunch and texture that complements the creaminess.
- Fruit Fusion: Top with fresh berries like raspberries or strawberries for a fruity kick that pairs wonderfully with the caramel notes.
- Gluten-Free Option: Substitute the Biscoff biscuits with gluten-free cookies to create a delightful version for those avoiding gluten.
- Lighter Version: Use low-fat cream cheese and whipped topping to lighten the dessert without compromising too much on flavor.
Serving Suggestions for No-Bake Biscoff Cheesecake
- Pair with Coffee: A steaming cup of coffee balances the sweetness and enhances the dessert experience.
- Add Fresh Berries: Serve with a side of fresh strawberries or raspberries for a refreshing tart flavor.
- Garnish with Mint: A sprig of mint brings a pop of color and freshness to the plate.
- Use Decorative Plates: Presenting on colorful or patterned plates elevates the whole dessert experience.
- Offer with Whipped Cream: A dollop of whipped cream on the side adds an extra touch of indulgence.
FAQs about No-Bake Biscoff Cheesecake
Can I make No-Bake Biscoff Cheesecake in advance?
Absolutely! In fact, this cheesecake tastes even better when made a day ahead. Just cover it well and store it in the fridge.
What can I use instead of double cream?
If you can’t find double cream, heavy whipping cream is a perfect substitute. Just make sure to whip it to stiff peaks for that light texture!
Can I freeze No-Bake Biscoff Cheesecake?
Yes, this cheesecake freezes beautifully! Just ensure it’s well-wrapped to prevent freezer burn. It can last up to three months in the freezer.
How do I get a smooth filling?
To achieve that dreamy smooth filling, make sure your cream cheese is at room temperature before mixing. An electric mixer works wonders for blending!
What can I serve with Biscoff cheesecake?
Pair it with fresh berries, a sprinkle of chopped nuts, or a warm cup of coffee. These add-ons really elevate the dessert experience!
Final Thoughts
Creating this No-Bake Biscoff Cheesecake is more than just whipping up a dessert; it’s about crafting moments of joy. Whether you’re sharing it with friends, celebrating a special occasion, or treating yourself after a long day, the rich flavors and creamy texture have a way of making everything feel special. Plus, the ease of preparation means you can spend less time in the kitchen and more time with the ones you love. So, go ahead—bake (or should I say, no-bake) your way to happiness with this delightful cheesecake and relish every creamy, dreamy bite!
Print
No-Bake Biscoff Cheesecake
- Total Time: 5-6 hours (including refrigeration)
- Yield: 8 servings 1x
- Diet: Vegetarian
Description
A creamy, no-bake cheesecake featuring the delicious flavors of Biscoff cookies and spread, perfect for dessert lovers.
Ingredients
- 10.5 oz Lotus/Biscoff biscuits
- 4.4 oz unsalted butter, melted
- 17.6 oz full-fat cream cheese
- 3.5 oz icing sugar
- 8.8 oz Biscoff spread (smooth or crunchy)
- 1 teaspoon vanilla extract
- 10 fl oz double cream (heavy cream)
- 5 fl oz double cream (optional, for decoration)
- 2 tablespoons icing sugar (optional, for decoration)
- 2.6 oz Biscoff spread, melted (optional, for decoration)
- Biscoff biscuits for garnish
Instructions
- Pulse the Lotus biscuits in a food processor until finely ground. Combine the crumbs with the melted butter and press firmly into the bottom of an 8-inch (20cm) deep springform pan.
- Using an electric mixer, blend the cream cheese, vanilla extract, icing sugar, and Biscoff spread until smooth and homogenous.
- Gradually add the double cream to the cream cheese mixture, whisking continuously until thickened and stable. For best results, whip the cream separately to stiff peaks before folding it in gently.
- Spread the filling evenly over the biscuit base. Refrigerate for a minimum of 5–6 hours, preferably overnight, to set completely.
- Remove the cheesecake from the springform pan. Whip the optional cream with icing sugar and pipe on top. Garnish each slice with a Biscoff biscuit and drizzle with melted Biscoff spread.
Notes
- Chilling overnight provides the best texture and flavor.
- Use a piping bag for a decorative finish with the whipped cream.
- This cheesecake can be frozen for later enjoyment, just make sure to cover it well.
- Prep Time: 20 minutes
- Cook Time: 0 minutes
- Category: Dessert
- Method: No-Bake
- Cuisine: American
Nutrition
- Serving Size: 1 slice
- Calories: 350
- Sugar: 28g
- Sodium: 150mg
- Fat: 25g
- Saturated Fat: 15g
- Unsaturated Fat: 10g
- Trans Fat: 0g
- Carbohydrates: 30g
- Fiber: 1g
- Protein: 4g
- Cholesterol: 70mg


