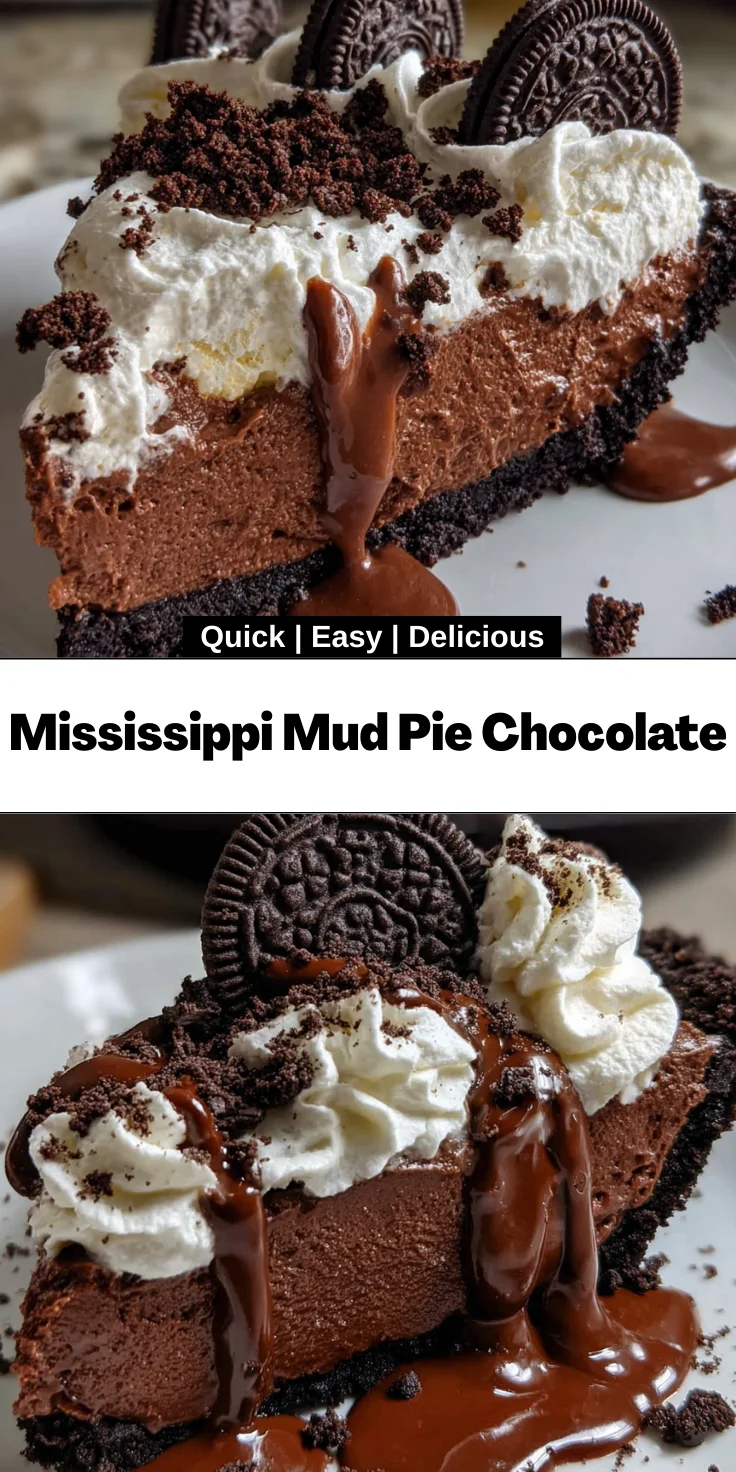
Introduction to Mississippi Mud Pie Chocolate
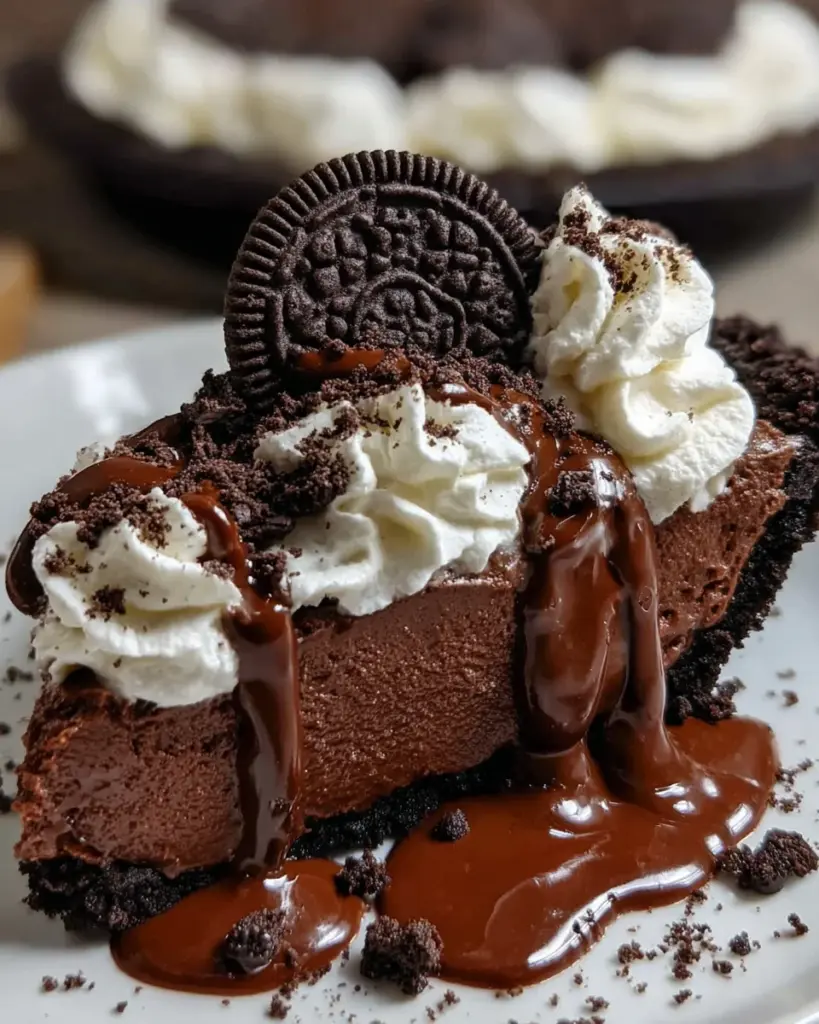
There’s something about a rich slice of Mississippi Mud Pie Chocolate that makes you feel all warm and fuzzy inside. Maybe it’s the idea of indulging in layers of chocolate goodness after a long day. As a busy mom juggling daily tasks, I cherish quick and delightful solutions that bring smiles to my family’s faces. This dessert, with its dreamy chocolate filling and a crust that’s as easy as pie (pun intended!), is perfect for those moments when you want to impress without spending hours in the kitchen. Let’s dive into this delicious adventure together!
Why You’ll Love This Mississippi Mud Pie Chocolate
This Mississippi Mud Pie Chocolate offers an easy escape into a world of rich flavors. With simple ingredients and straightforward steps, even the busiest of us can manage it. The chocolate cookie crust is a delightful surprise, providing a perfect crunch that pairs beautifully with the creamy filling. Not to mention, it’s a guaranteed crowd-pleaser! Your loved ones will beg for seconds, making it a hit at any gathering.
Ingredients for Mississippi Mud Pie Chocolate
Let’s gather our ingredients for this delightful Mississippi Mud Pie Chocolate! Each element plays a vital role in creating that rich, indulgent experience we crave.
- Oreo Sandwich Cookies: These provide a chocolatey crust that’s both crumbly and rich. You can substitute with other chocolate cookies if you’d like a twist.
- Unsalted Butter: Melted butter helps bind the crust together. If you’re looking for a healthier option, coconut oil can work in a pinch.
- Chocolate Chips or Melting Chocolate: This is the heart of the filling. Use your favorite dark, milk, or even white chocolate for a different flavor.
- Large Eggs: We’ll separate the yolks for the filling, which helps create a creamy texture. Egg substitutes can work, but I recommend keeping it traditional for this recipe!
- Milk: This helps to combine all flavors. Use whole, low-fat, or even non-dairy milk as a substitute for a lighter touch.
- Cornstarch: A magical thickener that helps our filling set up beautifully. If you’re out, try using flour, though results may vary.
- Double Cream: This deliciously rich cream makes our filling unbelievably smooth. Heavy whipping cream can be used here if double cream isn’t available.
- Salt: Just a pinch can balance sweetness, enhancing the chocolate flavors. Feel free to adjust to your taste.
- Granulated Sugar: Sweeten things up! You can swap in alternatives like coconut sugar or even stevia for a lighter option.
- Espresso Powder: A secret weapon to intensify chocolate flavor! If you’re not a coffee fan, feel free to omit this.
- Chocolate Ganache: This luscious topping adds an extra layer of indulgence. You can whip it up with just chocolate and cream.
- Whipped Cream: A lovely finishing touch! You could even sprinkle on some chocolate shavings or your favorite nuts if feeling fancy.
- Additional Oreos: For garnishing—because who doesn’t love more Oreos on their pie?
Exact measurements for each ingredient are available at the bottom of this article for your convenience. Now, let’s get ready to create this delicious masterpiece!
How to Make Mississippi Mud Pie Chocolate
Prepare the Cookie Crust
Let’s get started by making our cookie crust. First, grab those Oreo sandwich cookies and pull out a food processor. You’ll want to pulse the cookies until they resemble fine crumbs—think sand on a summer beach. This should take just a minute!
Next, melt your unsalted butter and add it to the cookie crumbs. Mix them together until the crumbs absorb the butter, creating a wet mixture that holds together. Now comes the fun part: press this mixture evenly into the base and up the sides of your pie dish. I usually use the back of a measuring cup for this—it helps create a smooth, even layer without much fuss!
Create the Silky Chocolate Filling
Now for the heart of the Mississippi Mud Pie Chocolate—our chocolate filling! Start by separating the egg yolks, placing them carefully in a medium bowl. It’s important to reserve the egg whites for another recipe; they’re not needed here. In a smaller bowl, whisk together half a cup of milk and cornstarch until smooth—this will help thicken our filling.
In a saucepan, combine the double cream, remaining milk, salt, and sugar. Whisk it all together over medium heat until it’s smooth and starts to warm up. As it begins to warm, stir in the espresso powder. When the mixture simmers, remove it from the heat.
Pour a ladleful of the warm mixture over the egg yolks while whisking continuously. This will temper the eggs, ensuring they don’t scramble! Gradually add the remaining warm mixture to the yolks, always whisking. Return it to the pan, continue stirring over medium heat until it thickens into a smooth custard-like filling.
Finally, mix in the chopped chocolate until it’s melted and perfectly silky. Now this filling is ready to meet its crust!
Assemble the Pie
You’ve done the hard work, and now for the fun part! Carefully pour that luscious chocolate filling into your prepared cookie crust. Spread it evenly using a spatula for a lovely finish. Don’t be shy—get every last drop in there!
To take this dessert over the top, add a layer of chocolate ganache on top of the filling. This rich, glossy topping makes it look absolutely stunning! You’ll be tempted to dive in right away, but hang tight for just a bit longer.
Chill and Serve
After you’ve assembled everything, it’s time for the pie to chill. Place it in the refrigerator for at least four hours; this helps it to firm up and set perfectly. Trust me, waiting is worth it. The anticipation only builds up the excitement!
When you’re ready to serve, you can top the pie with fluffy whipped cream and garnish it with crushed Oreos or chocolate shavings for that extra flair. Each slice will reveal layers of chocolate goodness that are sure to impress!
Tips for Success
- Make sure your Oreo crumbs are finely ground for a smoother crust.
- Temper the eggs carefully to avoid cooking them; whisk continuously!
- Allow the pie to chill fully to achieve the right texture before serving.
- Experiment with different chocolate types for varied flavors.
- Keep an eye on the filling while heating to prevent burning.
Equipment Needed
- Food Processor: Ideal for crushing Oreos; a sturdy zip-top bag and rolling pin work too!
- Mixing Bowls: You’ll need a few for blending and separating ingredients; any bowls will do!
- Whisk: Essential for mixing the filling; a fork can substitute in a pinch.
- Pie Dish: A 23cm dish for baking; an 8-inch square pan can also work.
- Spatula: Handy for spreading; any flat utensil can help too!
Variations on Mississippi Mud Pie Chocolate
- Nutty Delight: Add chopped walnuts or pecans to the cookie crust for an extra crunch.
- Mint Chocolate: Mix in peppermint extract to the filling to create a refreshing minty twist.
- Gluten-Free: Use gluten-free chocolate cookies in place of Oreos for a delicious gluten-free option.
- Vegan Version: Swap eggs for flax eggs and use non-dairy butter and milk for a vegan alternative.
- Fruity Surprise: Fold in a layer of raspberry or cherry preserves beneath the ganache for a fruity contrast!
Serving Suggestions
- Pairing Drinks: Serve with a rich cup of coffee or a scoop of vanilla ice cream for a delightful contrast.
- Presentation: Dust the top with cocoa powder or chocolate shavings for a gourmet look.
- Side Treats: Offer fresh strawberries or raspberries on the side to balance the sweetness.
FAQs about Mississippi Mud Pie Chocolate
Can I make Mississippi Mud Pie Chocolate ahead of time?
Absolutely! This dessert can be made a day in advance. Just be sure to refrigerate it properly to maintain its creamy texture. The flavors get even better overnight!
What can I use instead of chocolate ganache?
If you’re looking for a lighter topping, whipped cream or a simple chocolate drizzle can work wonders. You can even try a layer of melted chocolate chips if you’re in a pinch!
How do I store leftovers of Mississippi Mud Pie Chocolate?
Store any leftovers in an airtight container in the refrigerator. It should last about 3 days, though trust me, it’ll be tough to resist finishing it off sooner!
Can I freeze Mississippi Mud Pie Chocolate?
Yes, you can freeze this pie! Wrap it tightly in plastic wrap and then foil before placing it in the freezer. Just remember to allow it to thaw in the refrigerator before serving.
What can I do to enhance the chocolate flavor?
Consider adding a teaspoon of vanilla extract to the filling. Using high-quality chocolate will also elevate the overall taste experience of your Mississippi Mud Pie Chocolate!
Final Thoughts
Creating this Mississippi Mud Pie Chocolate is more than just following a recipe; it’s about crafting joy in your kitchen. Each velvety slice is a little piece of happiness that brings family and friends together, sparking laughter and sweet memories. I love how a simple dessert can make busy days feel special and turn an ordinary moment into a celebration. So, whether you’re sharing it at a gathering or indulging after a long day, this delightful pie promises to make hearts melt. Dive into the deliciousness, and enjoy the smiles that come with it!
Print
Mississippi Mud Pie Chocolate
- Total Time: 4 hours 45 minutes
- Yield: 8 servings 1x
- Diet: Vegetarian
Description
Indulge in the rich and velvety Mississippi Mud Pie Chocolate, a delightful dessert that combines a chocolate cookie crust, creamy chocolate filling, and a luscious chocolate ganache topping.
Ingredients
- Crust
- 24 Oreo sandwich cookies
- 5 tablespoons (70g) unsalted butter, melted
- Filling
- 1 cup (170g) chocolate chips or melting chocolate, chopped
- 5 large eggs, separated
- ½ cup (120ml) milk
- ¼ cup (30g) cornstarch
- 1 cup (240ml) double cream
- 1 ½ cups (360ml) milk
- 1 teaspoon salt
- ⅔ cup (130g) granulated sugar
- 1 teaspoon espresso powder
- Topping
- 1 cup (about 240ml) chocolate ganache
- Whipped cream, for serving
- Additional Oreos, for serving
Instructions
- Pulse the Oreos in a food processor until finely ground. Add melted butter and blend until combined.
- Press the cookie mixture firmly into the base and up the sides of a 23cm pie dish, ensuring an even layer.
- Separate the eggs, placing yolks in a medium bowl and reserving whites for another use.
- In a small bowl, whisk ½ cup milk with the cornstarch until smooth.
- In a saucepan, combine double cream, remaining 1 ½ cups milk, salt, and sugar. Whisk until smooth and place over medium heat.
- Stir in espresso powder once the mixture is warm.
- When the dairy mixture reaches a simmer, remove from heat. Pour a ladleful over the egg yolks, whisking constantly. Gradually add remaining hot liquid to yolks, whisking continuously.
- Return the mixture to the pan. Heat over medium, whisking constantly, until thickened and smooth.
- Remove from heat and stir in the chopped chocolate until fully melted and silky.
- Pour the chocolate filling into the prepared crust. Spread evenly. Top with chocolate ganache.
- Refrigerate for at least 4 hours, or until firm and set.
- Before serving, top with whipped cream and garnish with additional Oreos if desired.
Notes
- Ensure the filling is well mixed to achieve a smooth texture.
- Allow chilling time to set the pie properly before serving.
- Prep Time: 30 minutes
- Cook Time: 15 minutes
- Category: Dessert
- Method: Baking
- Cuisine: American
Nutrition
- Serving Size: 1 slice
- Calories: 450
- Sugar: 30g
- Sodium: 280mg
- Fat: 25g
- Saturated Fat: 15g
- Unsaturated Fat: 7g
- Trans Fat: 0g
- Carbohydrates: 45g
- Fiber: 2g
- Protein: 7g
- Cholesterol: 150mg


