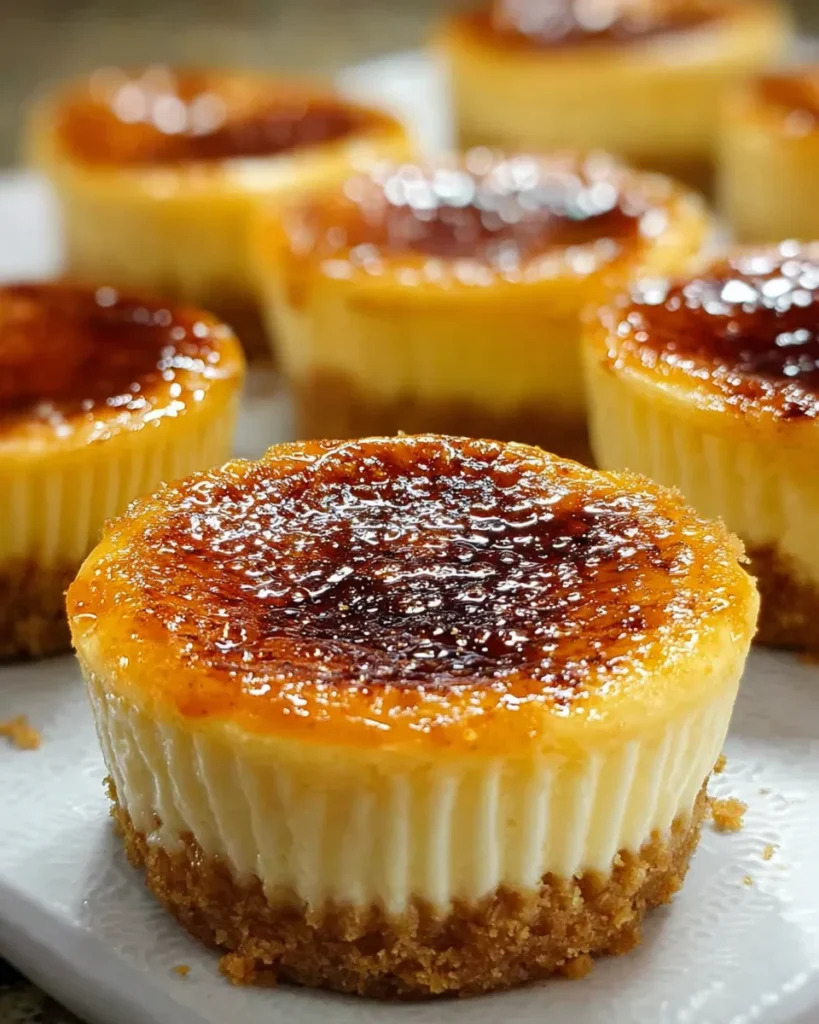
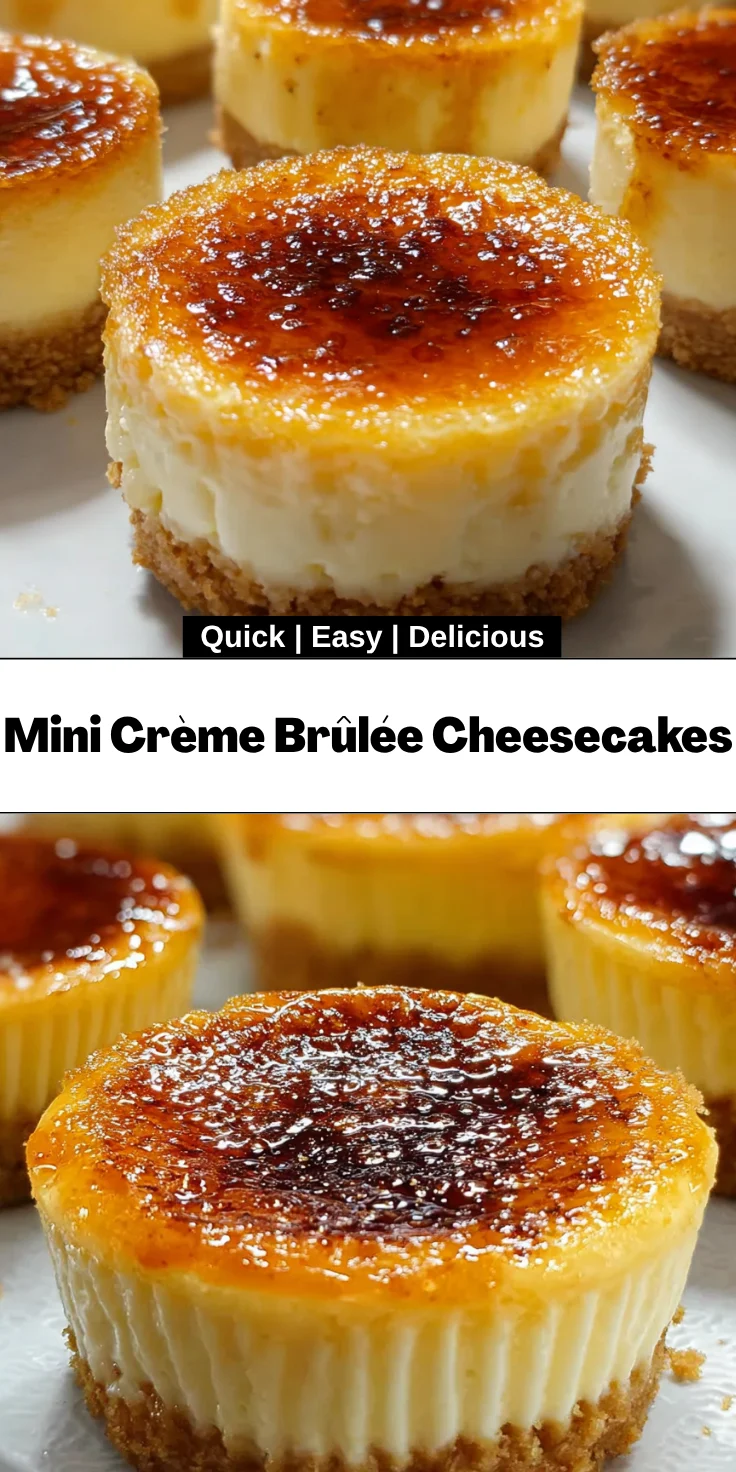
Introduction to Mini Crème Brûlée Cheesecakes
The perfect dessert is the culinary equivalent of finding a gem in the rough – subtle and delightfully delicious. At least, that’s my experience with Mini Crème Brûlée Cheesecakes, which sport a cheesy cake base and the splash of a traditional crème brûlée. Good for serving to most people, really. Hosting a dinner party or wanting to simply amaze your kids with “fancy” food in the middle of the week isn’t hard with this recipe in hand. It provides a way to do so very quickly, without making many dishes dirty. Just a few simple ingredients can prepare you to dazzle your guests and delight your kids.
Why You’ll Love This Mini Crème Brûlée Cheesecake
Imagine diving into a mini cheesecake that is velvety smooth and drizzled with caramel perfection. That’s what you’ll get with these Mini Crème Brûlée Cheesecakes! They are easy to whip up, making them perfect for busy days. Plus, they pack an impressive flavor punch. Your guests will be raving about them long after dessert is over. Trust me, once you try these, they’ll become a regular in your dessert rotation.
Ingredients for Mini Crème Brûlée Cheesecakes
Let’s gather our magical ingredients to create these Mini Crème Brûlée Cheesecakes. Each one plays a vital role in crafting this delightful dessert. Here’s what you’ll need:
- Graham cracker crumbs: These form the base, giving our cheesecakes a crunch. You can also use digestive biscuits if you prefer something a little different.
- Unsalted butter: This adds richness to the crust. Make sure to melt it well for an easily compactable mix.
- Granulated sugar: For sweetness in both the crust and the filling. Don’t skimp on this; it’s part of the charm!
- Salt: Just a pinch brings out the sweetness and rounds out the flavor—don’t underestimate it!
- Cream cheese: The star of the show, giving that luxurious creaminess. Bring it to room temperature for smooth mixing.
- Large egg yolks: They add richness and help create a silky texture. Remember to keep them fresh!
- Vanilla extract: For a hint of warmth and sophistication. Always opt for pure vanilla for the best flavor.
- Whipping cream: This creamier element takes our filling to the next level. Chill it before use—it makes a difference!
- Granulated sugar (for topping): Don’t forget this! It caramelizes beautifully on top, creating that iconic brûlée crust.
For exact quantities of each ingredient, scroll down to the bottom of the article where they are clearly laid out for you to print. Now, let’s dive into the fun part—making these mouthwatering Mini Crème Brûlée Cheesecakes.
How to Make Mini Crème Brûlée Cheesecakes
Creating these Mini Crème Brûlée Cheesecakes is easier than you might think. Follow my simple steps, and soon you’ll have a delicious treat that’s perfect for any occasion. Let’s dive right in!
Step 1: Preheat and Prepare the Pan
First, preheat your oven to 300°F (150°C). This sets the perfect stage for baking.
Next, grab your mini cheesecake pan with removable bottoms. Greasing the pan is essential—it helps with easy removal later.
Step 2: Make the Crust
Now, let’s create that tasty crust! Mix your graham cracker crumbs, melted butter, sugar, and salt in a bowl until it looks like wet sand.
Take a tablespoon of the mixture and press it firmly into each cavity of the pan. Compacting it well ensures a sturdy base for our cheesecakes.
Step 3: Prepare the Cheesecake Filling
In a large mixing bowl, beat the cream cheese and sugar together until it’s smooth and creamy. This is where the magic begins!
Then, add the egg yolks one at a time, mixing just until combined. Stir in the vanilla extract. Trust me, the aroma will take you places!
Finally, pour in the chilled whipping cream and mix until everything is smooth. This step makes all the difference!
Step 4: Fill the Mini Cheesecake Pan
Using a ladle or a small measuring cup, fill each cavity of the prepared pan to the top. Smooth the surface with a spatula—presentation is key!
Step 5: Bake the Mini Cheesecakes
Time to bake! Place your pan in the oven and bake for about 15 minutes. Keep an eye on them around the 12-minute mark.
If you see any puffing or overflowing, it’s time to take them out. We want them perfectly set, not overcooked!
Step 6: Cooling and Chilling
Once baked, allow the cheesecakes to cool completely in the pan. This is crucial—I suggest patience here!
Once they’re cool, transfer them to the refrigerator. Chill them for a minimum of six hours, or overnight for the best flavor.
Step 7: Brûlée the Topping
Finally, the fun part! Before serving, sprinkle a teaspoon of granulated sugar evenly on each cheesecake.
Using a kitchen torch, caramelize the sugar until it bubbles and turns a lovely golden brown. Let them set for a couple of minutes before serving—this creates that signature crispy topping.
And there you have it—gorgeous Mini Crème Brûlée Cheesecakes that will wow everyone!
Tips for Success
- Ensure all ingredients, especially cream cheese and eggs, are at room temperature for a smoother cheesecake.
- Don’t rush the cooling process; letting them chill properly enhances the flavors.
- Keep an eye on the cheesecakes while baking; every oven is slightly different!
- Use a high-quality kitchen torch for perfect sugar caramelization.
- Experiment with flavor extracts, like almond or lemon, for a twist on the classic!
Equipment Needed
- Mini cheesecake pan: A must-have for that perfect shape. If you don’t have one, muffin tins work too!
- Mixing bowls: Use a set of different sizes for convenience in mixing.
- Electric mixer: Ideal for achieving smooth fillings; a whisk can work if you’re up for a workout!
- Kitchen torch: Essential for caramelizing; alternatively, you can use the broiler method if you don’t have one.
- Spatula: For spreading and filling; handy tool for any baking project!
Variations
- Chocolate Mini Crème Brûlée Cheesecakes: Add melted chocolate to the filling for a rich twist. Just fold it in before filling the pan!
- Fruit-Infused Cheesecakes: Blend in pureed berries—like strawberries or raspberries—into the filling for a fruity flair. You can also top with fresh fruit before the brûlée topping.
- Gluten-Free Option: Substitute graham cracker crumbs with gluten-free cookies or almond flour for a delightful crust without the gluten.
- Vegan Version: Use vegan cream cheese and a flaxseed egg substitute. Coconut cream can be a creamy replacement for the whipping cream!
- Cheesecake Swirl: Swirl in a layer of fruit preserves or caramel sauce into the filling for a beautiful and delicious marbled effect.
Serving Suggestions
- Fresh Berries: Serve with a side of mixed berries for a burst of color and refreshing taste.
- Whipped Cream: A dollop of freshly whipped cream adds extra creaminess.
- Coffee or Tea: Pair the cheesecakes with a robust coffee or a fragrant herbal tea.
- Elegant Presentation: Arrange on a decorative platter with mint leaves for a beautiful touch.
- Chilled Dessert Wine: A sweet dessert wine can complement the rich flavors brilliantly.
FAQs about Mini Crème Brûlée Cheesecakes
Can I make Mini Crème Brûlée Cheesecakes ahead of time?
Absolutely! These cheesecakes are perfect for prepping in advance. You can make them a day or two ahead and keep them in the fridge. Just add the brûlée topping right before serving for that delightful crunch.
What can I use if I don’t have a kitchen torch?
If you don’t own a kitchen torch, no worries! Use your oven’s broiler instead. Just sprinkle sugar on top and place them under the broiler for a couple of minutes. Keep an eye on them to prevent burning!
How do I know when the Mini Crème Brûlée Cheesecakes are done baking?
They should be slightly jiggly in the center but set around the edges. If the tops puff up too much, that’s your cue to take them out. They will continue to set as they cool!
Can I customize the flavor of these cheesecakes?
Definitely! Feel free to add your favorite flavor extracts like almond or even citrus zest for a refreshing twist. You can also play around with mix-ins like chocolate or fruit puree.
What should I do if I have leftover cheesecakes?
If you’re lucky enough to have leftover Mini Crème Brûlée Cheesecakes, store them in an airtight container in the fridge. They should stay delicious for about 2-3 days. Just remember to add the topping before serving!
Final Thoughts
Creating these Mini Crème Brûlée Cheesecakes has been such a rewarding experience for me. Each bite brings together the creamy texture of cheesecake and the irresistible crunch of a caramelized topping. It’s like a little party in your mouth! I love how versatile this recipe is, allowing for endless variations. Whether you’re celebrating a special occasion or simply indulging after a long day, these mini desserts will surely bring smiles all around. Trust me, you’ll find joy not just in the making, but in sharing them with those you love. Happy baking, my fellow dessert enthusiasts!
Print
Mini Crème Brûlée Cheesecakes
- Total Time: 6 hours 45 minutes (including chill time)
- Yield: 12 mini cheesecakes 1x
- Diet: Vegetarian
Description
Delicious mini cheesecakes with a creamy crème brûlée topping that will impress your guests.
Ingredients
- 2 cups graham cracker crumbs
- 1/2 cup unsalted butter, melted
- 2 tablespoons granulated sugar
- 1 pinch salt
- 500 g cream cheese, room temperature
- 1/2 cup granulated sugar
- 4 large egg yolks, room temperature
- 1 1/2 teaspoons vanilla extract
- 1/2 cup whipping cream (35%), chilled
- 12 teaspoons granulated sugar (for topping)
Instructions
- Preheat oven to 300°F (150°C). Grease a mini cheesecake pan with removable bottoms.
- Mix graham cracker crumbs, melted butter, sugar, and salt until sandy. Press 1 tablespoon into each cavity and compact.
- Beat cream cheese and sugar until smooth. Add yolks one at a time, mixing just until combined. Stir in vanilla.
- Add chilled cream and mix until smooth.
- Fill cavities to the top with batter and smooth the surface.
- Bake for 15 minutes, checking around the 12-minute mark. Remove if puffing or overflowing.
- Cool completely, then refrigerate at least 6 hours.
- Before serving, sprinkle 1 teaspoon sugar on each cheesecake and caramelize with a kitchen torch. Let set 1–2 minutes before serving.
Notes
- For best results, make sure all ingredients are at room temperature before starting.
- Using a kitchen torch for caramelizing sugar enhances the flavor and presentation.
- Prep Time: 30 minutes
- Cook Time: 15 minutes
- Category: Dessert
- Method: Baking
- Cuisine: French
Nutrition
- Serving Size: 1 cheesecake
- Calories: 250
- Sugar: 15g
- Sodium: 180mg
- Fat: 18g
- Saturated Fat: 10g
- Unsaturated Fat: 6g
- Trans Fat: 0g
- Carbohydrates: 20g
- Fiber: 0g
- Protein: 3g
- Cholesterol: 90mg


