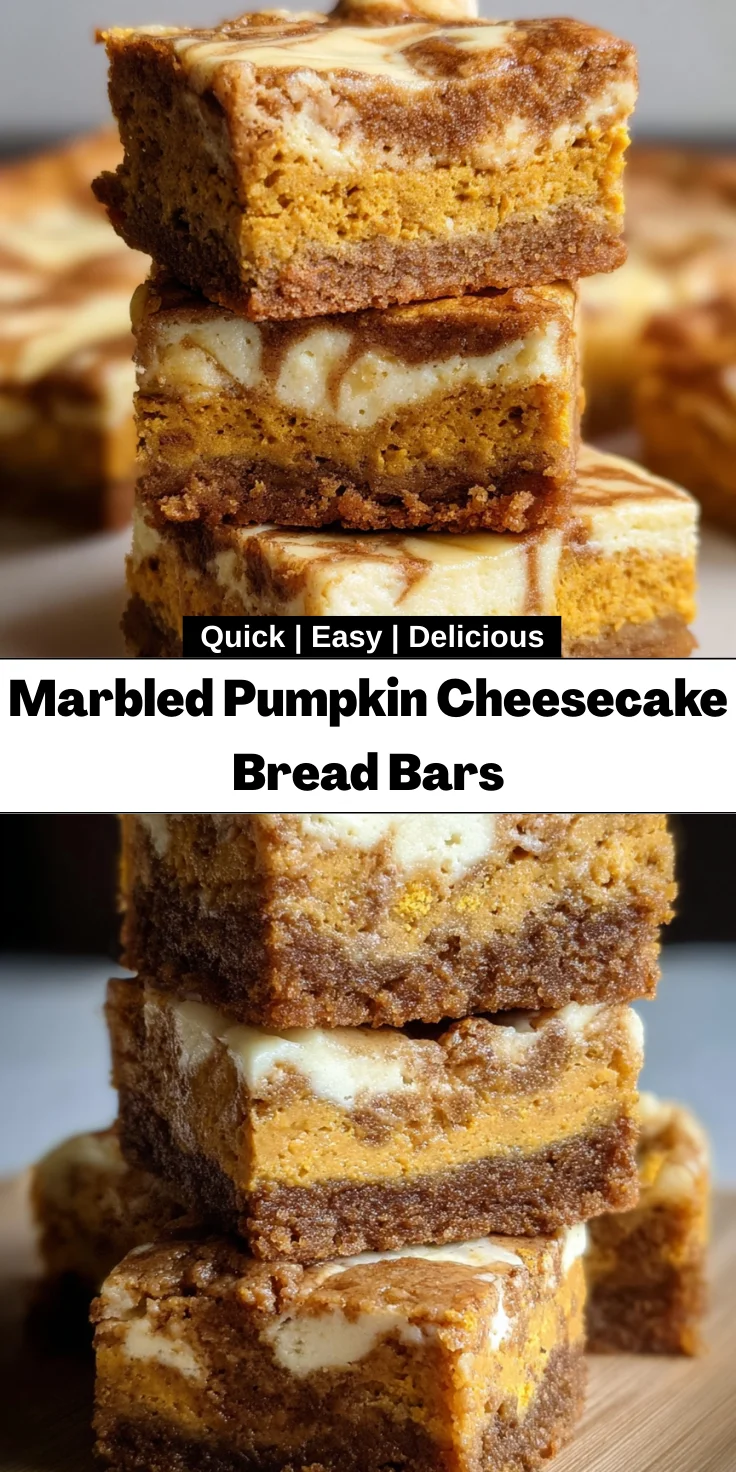
Introduction to Marbled Pumpkin Cheesecake Bread Bars
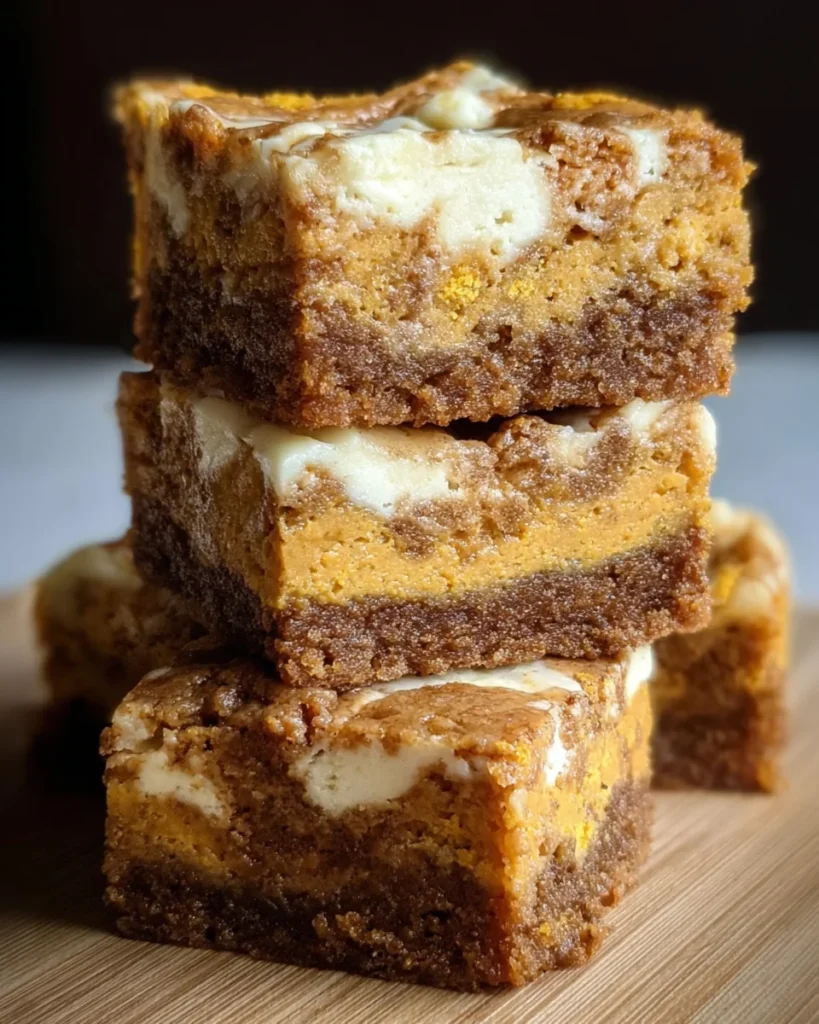
Are you ready to swoon over these Marbled Pumpkin Cheesecake Bread Bars? Picture this: the crisp air of fall, the sun dipping below the horizon, and the smell of spiced pumpkins wafting through your home. I know how busy life can get, but this delightful treat is here to rescue you from the routine. They’re not just bars; they’re a hug in dessert form, perfect for sharing with friends or family, or simply indulging after a long day. Trust me; this recipe is a quick solution that’ll wow your taste buds and lift your spirits.
Why You’ll Love This Marbled Pumpkin Cheesecake Bread Bars
Let’s talk about why these Marbled Pumpkin Cheesecake Bread Bars are a total game-changer. They’re incredibly simple to whip up, even on your busiest days. The combination of pumpkin spice and creamy cheesecake creates a mouthwatering symphony of flavors. Plus, they’re perfect for fall gatherings or cozy nights in. You can easily impress your loved ones without breaking a sweat, all while enjoying a little slice of heaven.
Ingredients for Marbled Pumpkin Cheesecake Bread Bars
Let’s gather our ingredients for these heavenly Marbled Pumpkin Cheesecake Bread Bars. Each component plays a crucial role in creating that irresistible flavor blend you’ll adore. Here’s what you’ll need:
- Pumpkin puree: The star of the show, this adds moisture and that classic pumpkin flavor. You can use homemade or canned, just make sure it’s pure pumpkin!
- Brown sugar: This brings a lovely depth of flavor and a bit of caramel sweetness to the bars.
- White sugar: Perfectly balances out the brown sugar, giving your bars just the right amount of sweetness.
- Butter: Softened butter is essential for that rich, creamy texture. Don’t skip it!
- All-purpose flour: This serves as the base for your bars and gives them structure. Gluten-free flour can be used as a substitute for a gluten-free version.
- Baking soda and baking powder: These are your leavening agents, making your bars rise and keeping them light.
- Salt: Just a pinch enhances all the flavors. It’s a crucial player in any sweet dish!
- Ground cinnamon, ginger, nutmeg, and cloves: The warm spices that scream fall! Each contributes to that cozy flavor profile, enveloping you in spice bliss.
- Whole milk: Adds moisture to the batter, ensuring a soft and tender crumb.
- Egg: Binds everything together and provides structure. The recipe calls for two eggs—one for the pumpkin mixture and the other for the cheesecake layer.
- Cream cheese: This is the key to the creamy cheesecake layer. Be sure it’s at room temperature for easy mixing!
- Granulated sugar: A bit more for the cheesecake layer to enhance its sweetness and flavor.
- Vanilla extract: Just a splash adds a delightful aromatic note to your bars.
These ingredients are listed with exact quantities at the bottom of the article for your convenience, along with a printable option. Happy baking!
How to Make Marbled Pumpkin Cheesecake Bread Bars
Prepare Your Oven and Baking Dish
First things first—let’s get that oven ready! Preheat it to 350 degrees Fahrenheit. This step is vital because a hot oven ensures even baking for our Marbled Pumpkin Cheesecake Bread Bars.
Next, grab a 9″x13″ baking dish and line it with parchment paper. This makes transferring the bars a breeze later on. Plus, it helps to prevent any sticking disasters. Trust me, you’ll appreciate this small effort when it’s time to slice and serve!
Mix the Dry Ingredients
Now, let’s move on to the dry ingredients. In a large bowl, combine all-purpose flour, baking soda, baking powder, salt, cinnamon, ginger, nutmeg, and cloves. This blend of spices is the secret weapon in our bars!
Each spice brings its charisma to the table, creating that warm, cozy flavor reminiscent of fall. Mix well until everything is evenly distributed. The right balance of spices not only enhances the taste but also creates an aromatic environment that’ll make your kitchen feel like a warm embrace.
Combine Wet Ingredients
It’s time to move to the wet ingredients! In the bowl of your stand mixer, cream together the softened butter and both sugars until it’s light and fluffy. This process is key to achieving that rich, creamy texture.
Next, add in the pumpkin puree and one egg, mixing until everything is well combined. The pumpkin doesn’t just add flavor; it keeps the bars moist and luscious. Trust me; this creamy fill will make a world of difference!
Combine Dry and Wet Mixtures
Now comes the fun part, blending the dry and wet mixtures! Gradually add the flour mixture to the pumpkin mixture in your stand mixer. Beat until everything is smooth and well incorporated.
Your batter should be thick and delectably gooey. This texture is crucial for creating the diverse layers of flavor. You’ll want to scrape down the sides of the bowl to ensure nothing is left behind, which ensures a consistent taste in every bite.
Prepare the Cheesecake Layer
Next up is crafting the cheesecake layer! In a separate bowl, use your mixer to beat the cream cheese until it’s completely smooth. Make sure it’s at room temperature to avoid any lumps, as they’re unwelcome guests in your bars!
Add in the granulated sugar, one egg, and vanilla extract, mixing until it’s creamy and delightful. This step is essential for creating a rich, velvety texture that will beautifully complement your pumpkin layer. Oh, the possibilities this layer brings!
Layer and Swirl the Mixtures
Let’s build those layers! Start by pouring three-quarters of the pumpkin mixture into your lined baking dish, spreading it into an even layer.
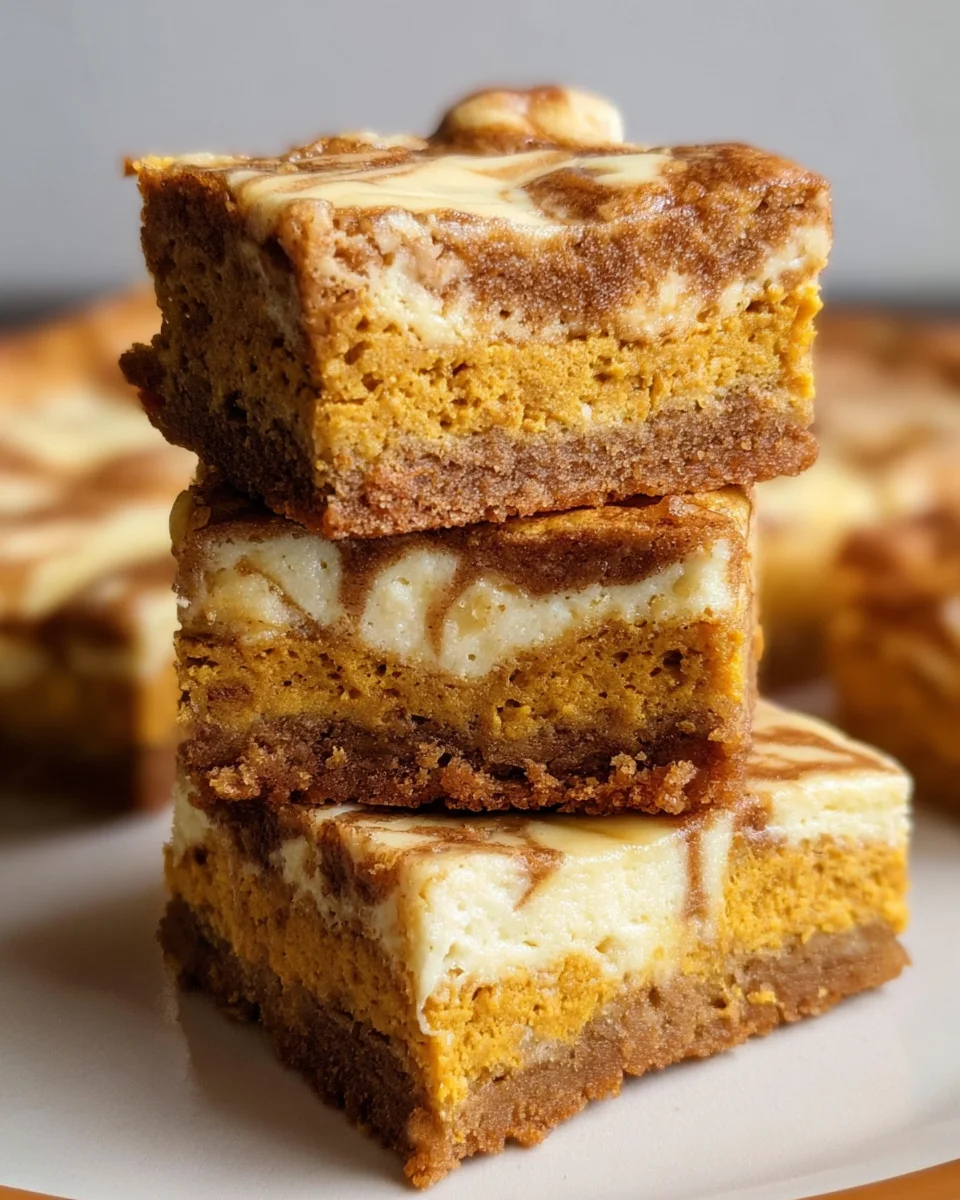
Next, gently pour the cheesecake mixture on top. Now take the remaining pumpkin mixture and drop it by spoonfuls over the cheesecake. Here’s where the magic happens—using a butter knife, swirl the two mixtures together gently!
A beautiful marbled effect is what we’re aiming for. Be careful not to mix them too much; we want distinct layers that marry well together, creating a delightful look and taste in each bite.
Bake and Cool
It’s baking time! Place your creation in the preheated oven and let it bake for 30 to 35 minutes. You’ll know it’s ready when the top is set and a knife inserted comes out clean.
Once the bars are done baking, let them cool completely in the pan. After they’ve cooled, place them in the fridge for about an hour to chill. This step is crucial for setting the bars perfectly, so resist the urge to dive right in. You’ll get the best texture if you wait!
Tips for Success
- Make sure your cream cheese is at room temperature for a smooth cheesecake layer.
- Don’t skip the parchment paper—it helps with easy lifting and cleanup!
- Allow the bars to cool completely before refrigerating for the best texture.
- Feel free to adjust spices to match your taste; a little extra cinnamon can be heavenly!
- Store leftovers in an airtight container to keep them fresh.
Equipment Needed
- 9″x13″ baking dish (Use any standard baking dish if you don’t have this size)
- Parchment paper (Aluminum foil can substitute, but parchment is preferred)
- Stand mixer or hand mixer (A whisk can also work, but it’ll take more effort)
- Mixing bowls (Any size will do)
- Baking spatula (A regular spatula will work in a pinch)
Variations
- Gluten-Free: Substitute all-purpose flour with a gluten-free flour blend to make this recipe suitable for gluten-sensitive friends.
- Nutty Twist: Add some chopped pecans or walnuts to the pumpkin layer for added texture and a delightful crunch.
- Spiced Up: Enhance the warmth with a touch of cardamom or allspice; these spices pair beautifully with the pumpkin flavor.
- Vegan Option: Replace the eggs with flaxseeds or chia seeds and use a plant-based butter and cream cheese for a vegan twist.
- Chocolate Lovers: Swirl in some melted chocolate or chocolate chips into the cheesecake layer for a decadent chocolate-pumpkin fusion.
Serving Suggestions for Marbled Pumpkin Cheesecake Bread Bars
- Pair with a hot cup of spiced chai or apple cider for a cozy autumn treat.
- Serve with a dollop of whipped cream or a scoop of vanilla ice cream on top.
- For presentation, dust with powdered sugar or drizzle with caramel sauce for an elegant touch.
- Garnish with a sprinkle of cinnamon for that perfect finishing flair.
FAQs about Marbled Pumpkin Cheesecake Bread Bars
Can I use fresh pumpkin instead of canned? Absolutely! Just ensure that you puree it well and remove any excess moisture. Fresh pumpkin can add a lovely, vibrant taste to your Marbled Pumpkin Cheesecake Bread Bars.
How do I store leftovers? These bars store well in an airtight container in the fridge for up to a week. Just make sure they’re fully cooled so they maintain their delicious texture.
Can I freeze these bars? Yes, you can freeze Marbled Pumpkin Cheesecake Bread Bars! Just wrap them tightly in plastic wrap and then place them in a freezer bag. They’ll keep for up to three months. Thaw in the fridge before enjoying.
How do I know when the bars are done baking? Keep an eye on the baking time! The bars are done when the top is set and doesn’t jiggle. You can also insert a knife into the center; if it comes out clean, they’re ready!
What can I substitute for cream cheese? If you’re looking for a dairy-free option, consider using cashew cream or a non-dairy cream cheese alternative. Both can create a similar creamy cheesecake layer.
Final Thoughts
As you savor each bite of these Marbled Pumpkin Cheesecake Bread Bars, I want you to remember the joy of creating something truly special. The delightful blend of creamy cheesecake and spiced pumpkin is like a warm embrace on a chilly day, beautifully illustrating the essence of comfort food. Whether you share these bars at a gathering or indulge quietly at home, they’re bound to spark smiles and heartwarming conversations. So, roll up your sleeves, put on your apron, and enjoy the sweet journey of baking. You’ll be glad you did, and your taste buds will thank you too!
Print
Marbled Pumpkin Cheesecake Bread Bars
- Total Time: 1 hour 55 minutes
- Yield: 16 bars 1x
- Diet: Vegetarian
Description
Delicious marbled pumpkin cheesecake bread bars that combine the flavors of pumpkin bread and creamy cheesecake in a delightful treat.
Ingredients
- ¾ cup pumpkin puree
- ½ cup brown sugar
- ¼ cup white sugar
- ½ cup butter softened
- 1–¼ cup all purpose flour
- ¾ teaspoon baking soda
- ¼ tsp baking powder
- ¾ tsp salt
- 1 teaspoon ground cinnamon
- 1 tsp ground ginger
- ½ tsp ground nutmeg
- ¼ teaspoon ground cloves
- 2 tablespoon whole milk
- 1 egg
- 8 oz cream cheese brick
- ¼ cup granulated sugar
- ½ teaspoon vanilla extract
- 1 egg
Instructions
- Preheat oven to 350 degrees.
- In a large bowl; mix flour, cinnamon, cloves, ginger, nutmeg, salt, baking soda and baking powder.
- In the bowl of your stand mixer, blend butter and sugars until smooth. Beat in egg, pumpkin puree and milk.
- Add the flour mixture to your stand mixer and beat until smooth. Set aside.
- Beat cream cheese, sugar, egg and vanilla until smooth and creamy.
- Line a 9″x13″ baking dish with parchment paper.
- Pour ¾ of pumpkin bread mixture in an even layer on the bottom of the baking dish leaving about ¼ for the marbled topping.
- Evenly pour the cheesecake mixture directly on top of the pumpkin bread layer.
- Drop spoonfuls of the pumpkin bread mixture on top of the cheesecake layer like a checkerboard. Using a butter knife, swirl the cheesecake and bread spoonfuls together for a marbled look, being careful not to swirl the bottom bread layer into the cheesecake.
- Place bars in the oven and bake for 30-35 minutes until the top is no longer jiggly and a butter knife runs through and comes out clean.
- Remove bars from oven and let cool completely before placing in the fridge for about 1 hour to chill. Slice into 16 bars.
Notes
- Ensure to cool the bars completely before chilling for the best texture.
- Prep Time: 20 minutes
- Cook Time: 35 minutes
- Category: Dessert
- Method: Baking
- Cuisine: American
Nutrition
- Serving Size: 1 bar
- Calories: 210
- Sugar: 12g
- Sodium: 150mg
- Fat: 10g
- Saturated Fat: 5g
- Unsaturated Fat: 3g
- Trans Fat: 0g
- Carbohydrates: 29g
- Fiber: 1g
- Protein: 3g
- Cholesterol: 40mg


