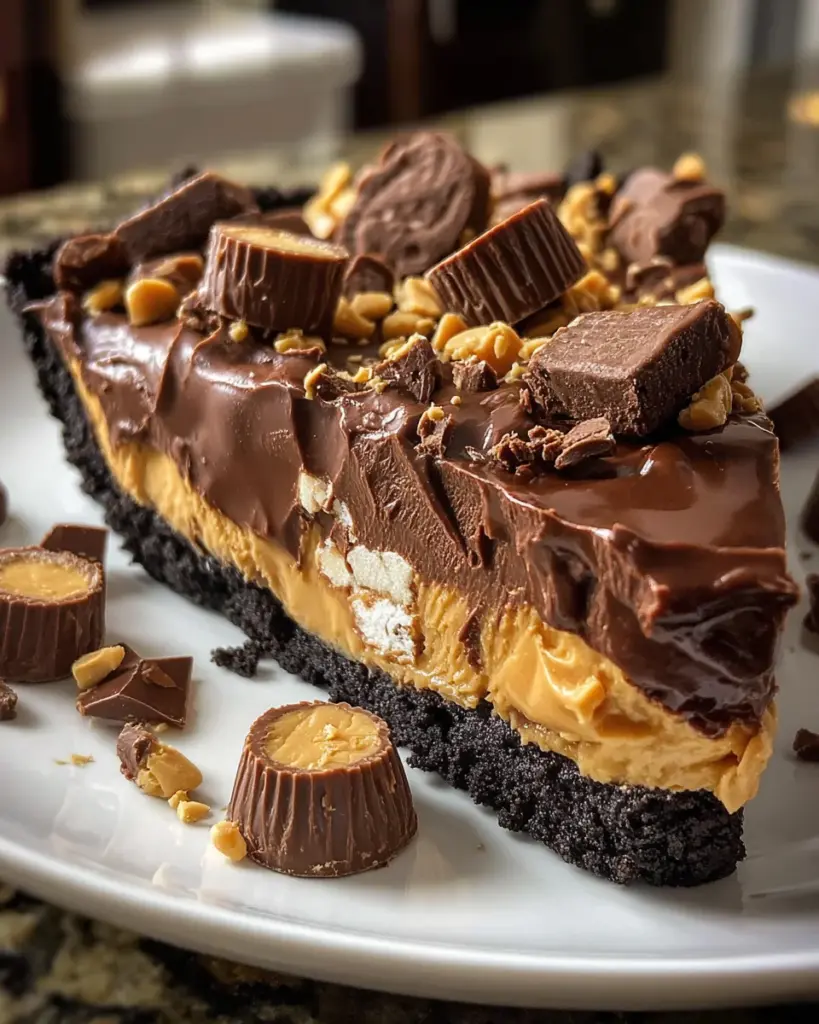
Introduction to Giant Reese’s Peanut Butter Cup
Hey there, fellow peanut butter lovers! If you’re like me, the thought of a Giant Reese’s Peanut Butter Cup brings a smile to your face. It’s the ultimate fusion of creamy peanut butter and rich chocolate that can instantly brighten any day. Whether you’re juggling a busy family schedule or looking to impress friends at a gathering, this decadent dessert is a simple solution. With no baking involved, you can whip it up in a flash and leave everyone asking for seconds. Trust me; it’s a sweet treat that truly speaks to the heart!
Why You’ll Love This Giant Reese’s Peanut Butter Cup
There’s so much to adore about this no-bake dessert! First, it’s incredibly easy to make, saving you precious time in the kitchen. Plus, the rich and creamy flavors will have your taste buds dancing with joy. Perfect for gatherings or a cozy family night, it’s a surefire hit for peanut butter and chocolate fans. What’s not to love about a dessert that combines indulgence with simplicity?
Ingredients for Giant Reese’s Peanut Butter Cup
This recipe is a delightful mix of textures and flavors, and I can assure you, each ingredient plays a vital role in creating that dreamy experience. Here’s what you’ll need:
- Chocolate cookie crumbs: These give the crust a delicious chocolatey base. I often use Oreo cookies (just remove the filling) for the best taste.
- Unsalted butter: Melted butter helps bind the crust together, adding richness. Unsalted is recommended so you can control the saltiness of the dessert.
- Creamy peanut butter: This is the star of our dessert! Avoid natural varieties, as they can alter the texture of the filling.
- Cream cheese: Softened cream cheese adds a velvety texture to the filling and helps it hold shape.
- Powdered sugar: This sweetener not only adds sweetness but gives a smoother consistency compared to regular sugar.
- Vanilla extract: A splash enhances all the flavors, making them sing! You can even try using almond extract for a twist.
- Heavy whipping cream: Whipped to stiff peaks, it gives the filling an airy fluffiness, making it lighter than air.
- Semi-sweet chocolate chips: Essential for the rich ganache topping, they balance the sweetness with just enough cocoa flavor.
- Additional heavy cream: This is used to make the ganache, enhancing its silky depth.
- Butter (optional): A bit of butter in the ganache adds a glossy finish. It’s a small touch that makes a big difference.
- Mini Reese’s cups: Perfect for garnishing! These little wonders make the dessert look tempting and taste even more irresistible.
- Chopped peanuts: They’re optional but add a lovely crunch for texture contrast in every bite.
- Chocolate drizzle: Who doesn’t love a good drizzle? It adds flair and extra chocolate goodness.
- Peanut butter drizzle: Another tasty addition that enhances the peanut butter flavor.
- Sea salt flakes: Just a sprinkle elevates the sweetness, balancing it beautifully.
You can find the exact quantities for each ingredient listed at the bottom of the article, where you can also print them for your convenience.
How to Make Giant Reese’s Peanut Butter Cup
Prepare the Cookie Crust
Let’s start with the cookie crust! In a medium bowl, combine your chocolate cookie crumbs with melted butter. Use a fork to mix until the crumbs are fully moistened and resemble wet sand. This creates a delicious base for our Giant Reese’s Peanut Butter Cup.
Once mixed, take a 9-inch springform pan and press the crumb mixture firmly into the bottom and just slightly up the sides. It’s helpful to use a measuring cup for even pressure and a smooth layer.
Now, we have two choices: refrigerate the crust for about 20 to 30 minutes, or you can pop it in a preheated oven at 350°F for 10 minutes.
Both ensure it sets nicely; just remember to cool it completely before moving on to the filling!
Make the Peanut Butter Filling
As our crust chills or cools, let’s dive into making the creamy peanut butter filling. Start by whipping your heavy cream. In a chilled mixing bowl, beat 1 1/4 cups of heavy cream until stiff peaks form. Trust me; this fluffiness is the magic here!
In another bowl, beat 8 ounces of softened cream cheese until smooth. Then, add in 1 1/2 cups of creamy peanut butter—don’t skimp here!—along with 1 cup of powdered sugar and 1 teaspoon of vanilla extract.
Mix it all until thick and creamy. Now, gently fold in that whipped cream with a spatula. This step adds that light, dreamy touch to our filling.
Make sure not to rush this; we want a fluffy combination. Once fully mixed, your peanut butter filling is ready to spread into the crust!
Assemble the Dessert
Now comes the exciting part: assembly! With your crust ready and cooling, it’s time to spread that luscious peanut butter filling into the prepared base.
Use a spatula to evenly smooth the filling all the way to the edges of the crust. Make it as pretty as you can; it’ll set the stage for our ganache topping later.
Once your filling looks perfect, cover the springform pan with plastic wrap or a lid and refrigerate it for at least 1 hour. This step allows the flavors to meld beautifully and ensures it firms up before we top it off.
Patience is key here—it’s worth the wait!
Prepare the Ganache Topping
While we wait, let’s whip up the chocolate ganache! In a small saucepan, heat 3/4 cup of heavy cream over medium heat. Watch closely until it just begins to simmer.
Once simmering, pour the hot cream over 1 1/2 cups of semi-sweet chocolate chips in a heatproof bowl. Add 2 tablespoons of butter if you’re feeling adventurous—the gloss it gives is out of this world!
Let this mixture stand for about 2 minutes so the chocolate can melt. Then stir gently until it becomes smooth and glossy.
Once it cools slightly, it’ll be ready to pour over our chilled peanut butter filling. We’re almost there!
Chill and Decorate
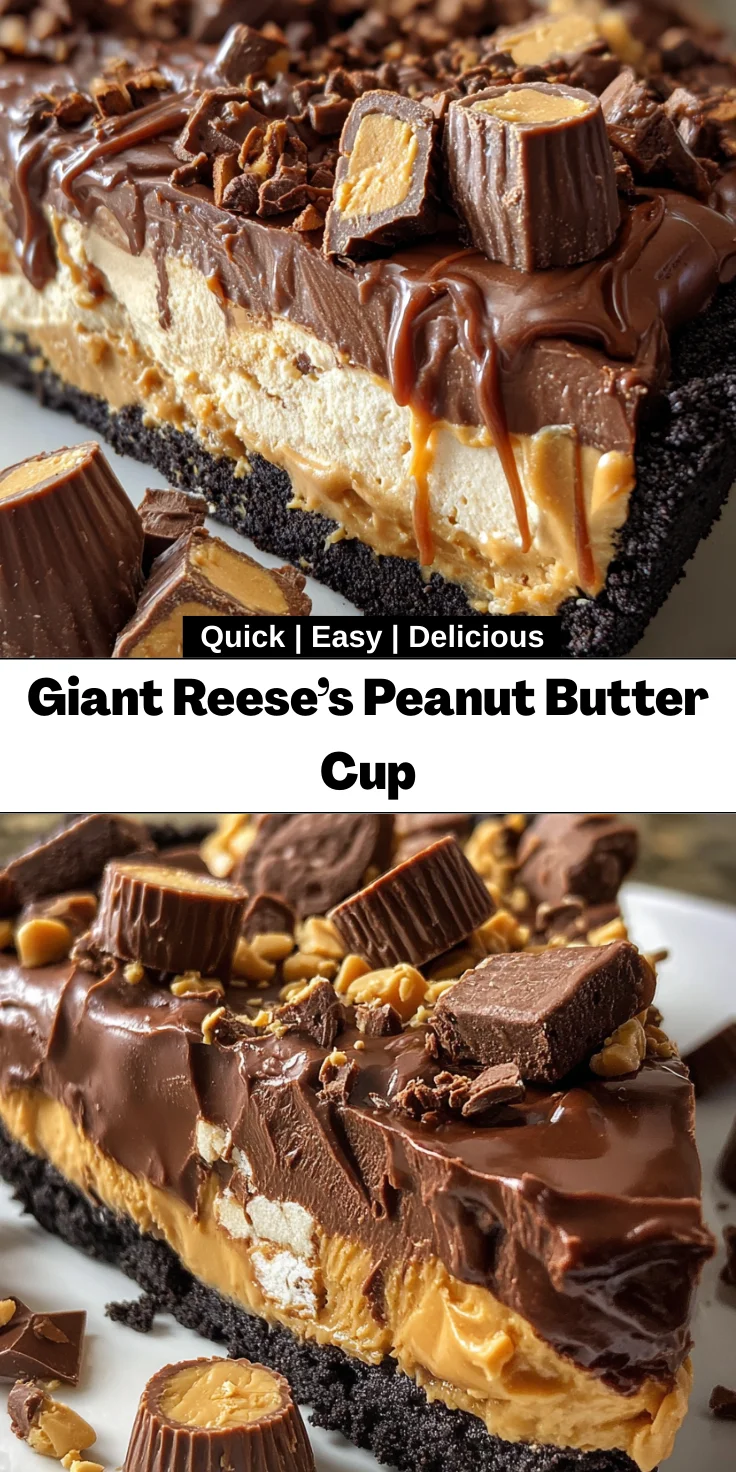
Now that your ganache is ready, it’s time to finish up! Gently pour the cooled ganache over the peanut butter filling, spreading it to the edges for an even layer. Tap the pan lightly on the counter to release any air bubbles trapped underneath.
Return the dessert to the fridge for a final chill—this time for 3 to 4 hours, or for best results, overnight.
Before serving, you can add some delightful garnishes. Use mini Reese’s cups, sprinkle chopped peanuts for crunch, and drizzle with chocolate or peanut butter if you’re feeling fancy. A little sprinkle of sea salt flakes really elevates the taste.
Get ready to enjoy your wildly delicious Giant Reese’s Peanut Butter Cup!
Tips for Success
- Use room temperature ingredients for a smooth filling—softened cream cheese works wonders.
- When whipping cream, make sure your bowl and beaters are cold for best results.
- Don’t rush the chilling times; this ensures the best texture and flavor development.
- Experiment with garnishes—mix and match for visual flair and added taste.
- If you’re short on time, prepare this dessert the day before to let it set overnight.
Equipment Needed for Giant Reese’s Peanut Butter Cup
- 9-inch springform pan: A must for easy release; a regular pie dish works too!
- Mixing bowls: One large and one medium for mixing and whipping.
- Electric mixer or whisk: A handheld mixer makes whipping cream a breeze.
- Spatula: For spreading and smoothing layers perfectly.
- Small saucepan: To heat the cream for the ganache.
Variations of Giant Reese’s Peanut Butter Cup
- Chocolate-Mint Twist: Add a few drops of peppermint extract to the peanut butter filling for a refreshing mint chocolate flavor.
- Chunky Peanut Butter: Swap creamy peanut butter for crunchy peanut butter for added texture and nutty goodness.
- Gluten-Free Option: Use gluten-free chocolate cookie crumbs for those sensitive to gluten, making this dessert accessible to all.
- Dark Chocolate Delight: Substitute semi-sweet chocolate chips with dark chocolate chips for a richer, more decadent flavor.
- Healthy Swaps: Use Greek yogurt instead of cream cheese for a lighter filling, while maintaining that creamy texture.
- Nut-Free Alternative: Replace the peanut butter with sunflower seed butter for a delicious nut-free version suitable for schools.
Serving Suggestions for Giant Reese’s Peanut Butter Cup
- Pair with a scoop of vanilla ice cream to add a creamy contrast to the rich dessert.
- Serve alongside fresh berries for a burst of color and a refreshing bite.
- Drizzle with extra chocolate or peanut butter sauce for visual appeal and extra flavor.
- Offer a side of whipped cream for those who love a little extra fluff.
- Complement with coffee or milk for a perfect indulgent treat!
FAQs about Giant Reese’s Peanut Butter Cup
Can I make this dessert ahead of time?
Absolutely! In fact, I highly recommend preparing your Giant Reese’s Peanut Butter Cup a day in advance. This allows it to chill overnight, ensuring all the flavors meld beautifully while the filling sets perfectly.
Can I use natural peanut butter instead of creamy?
It’s best to avoid natural peanut butter. The texture can be quite different and may not provide the same creamy filling we’re after. Stick with regular creamy peanut butter for that perfectly indulgent experience.
How do I store leftovers?
Store any leftovers in the refrigerator, covered, for up to a week. This dessert holds up surprisingly well, but let’s be honest—there might not be any leftovers to worry about!
What can I use instead of chocolate cookie crumbs?
If you’re looking for alternatives, you can use graham cracker crumbs or even vanilla wafer crumbs. Just adjust the flavor profile slightly, but it will still create a delicious crust!
Can I freeze the Giant Reese’s Peanut Butter Cup?
Yes, you can! After the dessert is fully assembled, wrap it tightly in plastic wrap and aluminum foil before freezing. Just thaw it in the fridge before serving, and enjoy that beautiful, creamy texture again!
Final Thoughts
This Giant Reese’s Peanut Butter Cup is more than just a dessert; it’s a joyous celebration of flavors that’s perfect for any occasion. Each rich and creamy slice is a hug for your taste buds, promising smiles and satisfaction with every bite. As a busy mom myself, I appreciate how simple and quick it is to prepare, while still impressing my loved ones. It brings everyone together, sharing laughter and deliciousness. Trust me, once you treat yourself to this delightful creation, it will undoubtedly become a cherished favorite in your home!
Print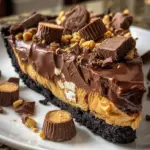
Giant Reese’s Peanut Butter Cup
- Total Time: 4 hours 40 minutes
- Yield: 1 giant pie (serves 10-12) 1x
- Diet: Vegetarian
Description
A deliciously indulgent dessert that combines a chocolate crust, creamy peanut butter filling, and a rich chocolate ganache topping, perfect for peanut butter lovers.
Ingredients
- 2 1/2 cups chocolate cookie crumbs (from Oreo cookies, filling removed)
- 1/2 cup unsalted butter, melted
- 1 1/2 cups creamy peanut butter (not natural variety)
- 8 ounces cream cheese, softened
- 1 cup powdered sugar
- 1 teaspoon vanilla extract
- 1 1/4 cups heavy whipping cream, whipped to stiff peaks
- 1 1/2 cups semi-sweet chocolate chips
- 3/4 cup heavy cream (for ganache)
- 2 tablespoons unsalted butter (optional, for gloss)
- Mini Reese’s cups (for garnish)
- Chopped peanuts (for garnish)
- Chocolate drizzle (for garnish)
- Peanut butter drizzle (for garnish)
- Sea salt flakes (for garnish)
Instructions
- Combine chocolate cookie crumbs with melted butter in a medium bowl. Mix until the crumbs are thoroughly moistened.
- Press the mixture firmly onto the bottom and slightly up the sides of a 9-inch springform pan. Refrigerate the crust for 20 to 30 minutes, or bake at 350°F for 10 minutes then allow to cool completely.
- Using a chilled mixing bowl and whisk or electric mixer, whip 1 1/4 cups heavy cream to stiff peaks and set aside.
- In a separate large bowl, beat cream cheese until smooth. Add peanut butter, powdered sugar, and vanilla extract, then mix until thick and creamy.
- Gently fold the whipped cream into the peanut butter mixture until the filling becomes light and fully combined.
- Spread the prepared peanut butter filling evenly into the cooled crust. Smooth the surface with a spatula. Refrigerate for at least 1 hour before topping.
- Heat 3/4 cup heavy cream in a small saucepan until it just begins to simmer. Pour over chocolate chips and butter in a heatproof bowl. Let stand for 2 minutes before stirring until glossy and fully smooth. Allow ganache to cool slightly.
- Gently pour the cooled ganache over the pie filling, spreading to the edges. Tap the pan to remove any air bubbles.
- Refrigerate the assembled dessert for 3 to 4 hours or overnight, until completely firm.
- Optionally, decorate with mini Reese’s cups, chopped peanuts, chocolate or peanut butter drizzle, or sea salt flakes before serving.
Notes
- This dessert is best prepared a day in advance for optimal firmness.
- For extra flair, use a mix of garnishes for presentation.
- Be sure to use creamy peanut butter for the best texture.
- Prep Time: 30 minutes
- Cook Time: 10 minutes
- Category: Dessert
- Method: No-Bake
- Cuisine: American
Nutrition
- Serving Size: 1 slice
- Calories: 500
- Sugar: 35g
- Sodium: 250mg
- Fat: 30g
- Saturated Fat: 15g
- Unsaturated Fat: 5g
- Trans Fat: 0g
- Carbohydrates: 45g
- Fiber: 2g
- Protein: 8g
- Cholesterol: 40mg