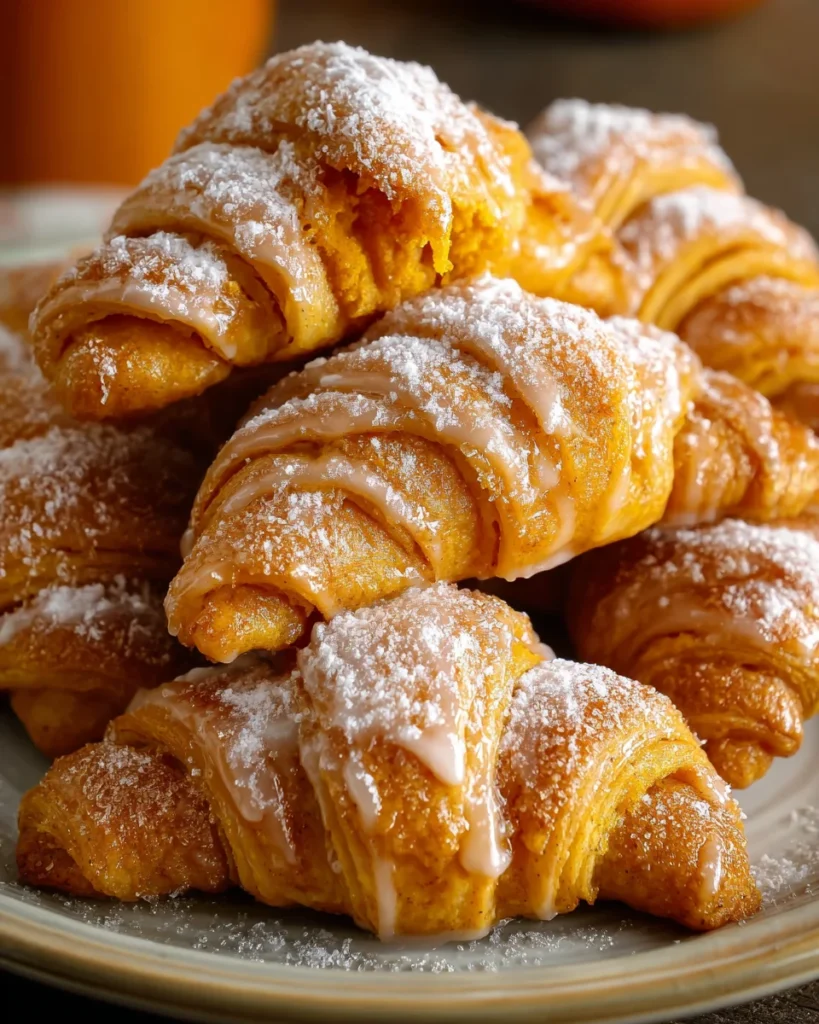
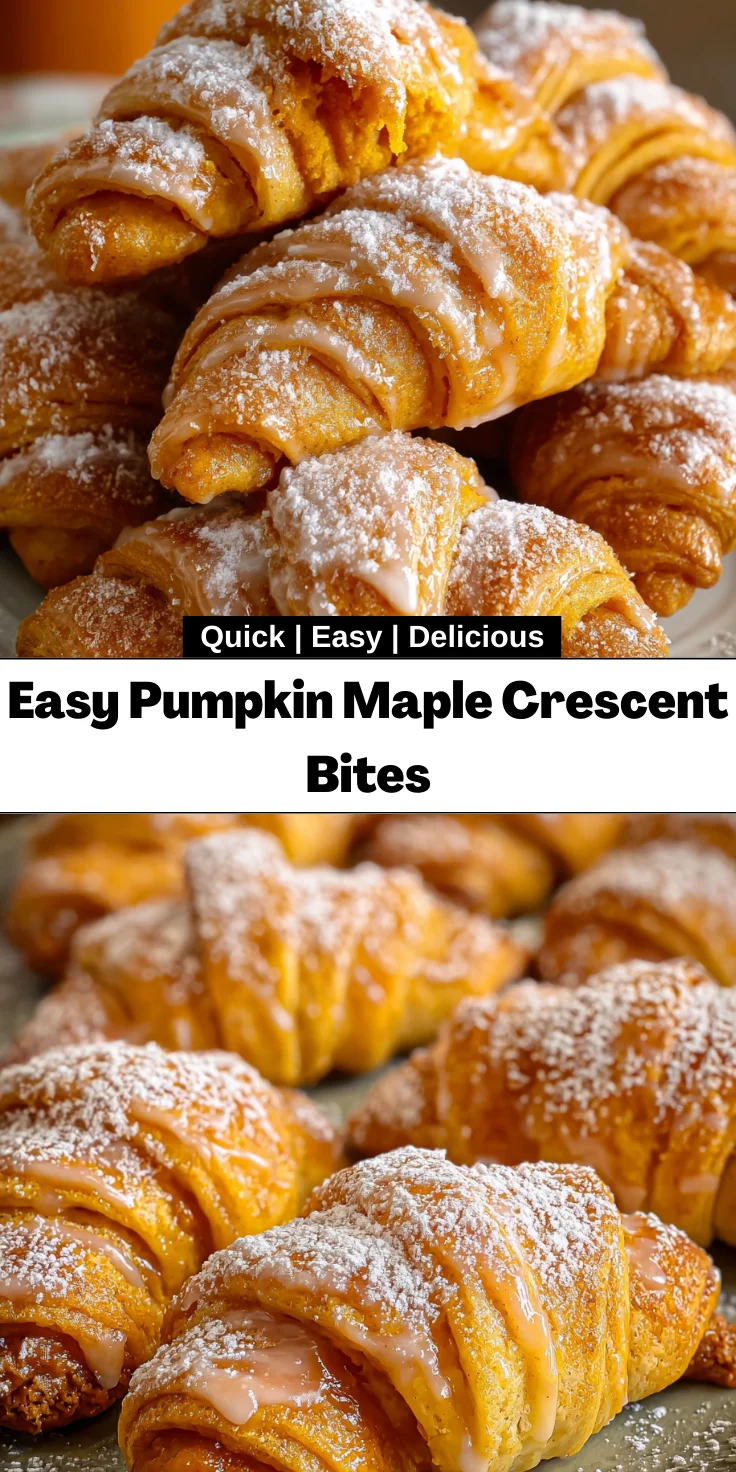
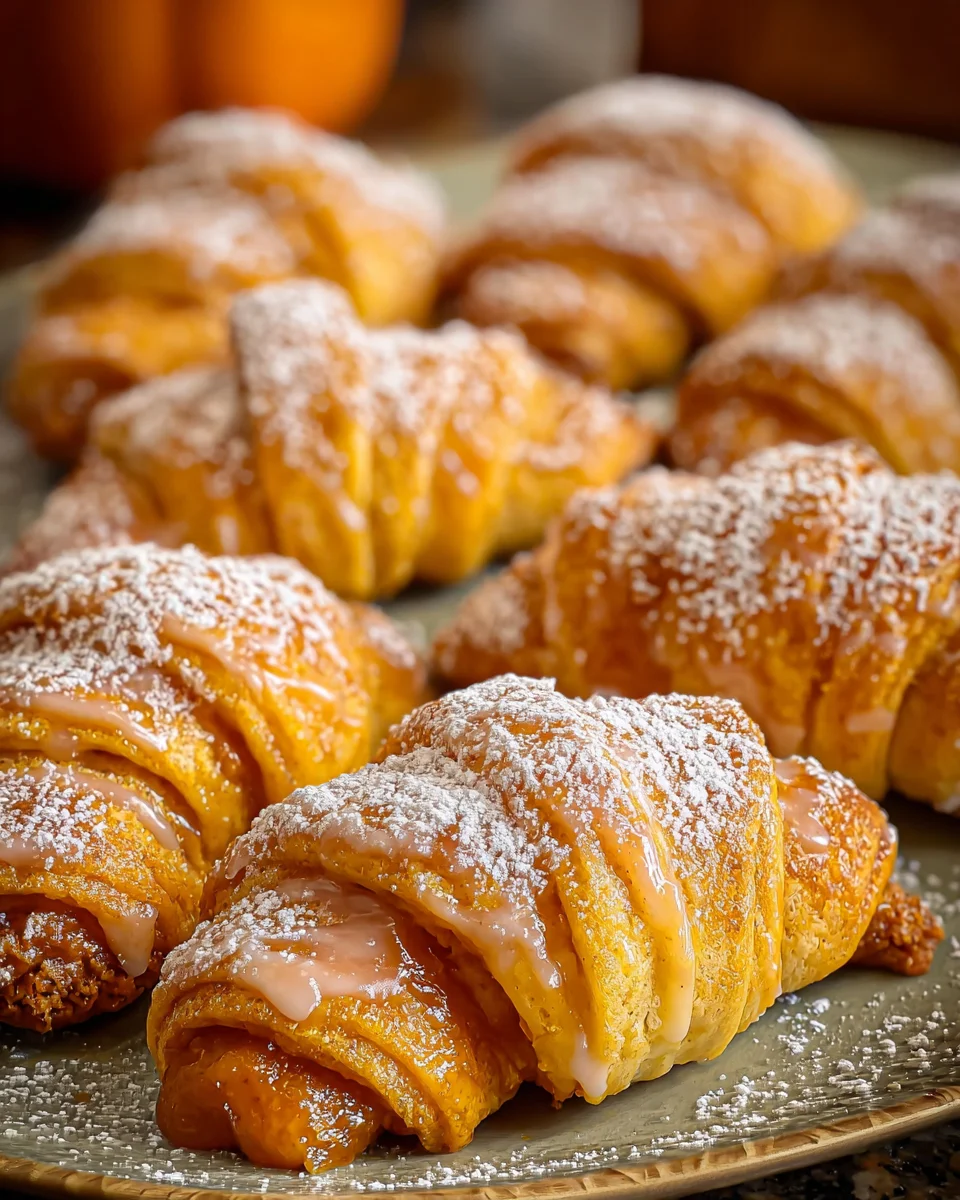
Introduction to Easy Pumpkin Maple Crescent Bites
Hey there, fellow food lovers! When life gets busy and the chaos of everyday routines creeps in, I’m always on the lookout for that perfect recipe. Enter my Easy Pumpkin Maple Crescent Bites. These little delights are the epitome of cozy comfort food, wrapped up in a flaky crescent roll.
They’re a quick solution for those days when you need something sweet but don’t have hours to spare. Trust me, they’ll impress your loved ones and give your home that warm, autumn aroma that simply beckons everyone to the kitchen!
Why You’ll Love This Easy Pumpkin Maple Crescent Bites
These Easy Pumpkin Maple Crescent Bites are a winner in every way! They come together in just 30 minutes, making them perfect for busy days. The delightful spice blend combined with creamy pumpkin gives an irresistible flavor that everyone will love. Plus, they’re equally suitable for family gatherings or a cozy night in. Trust me, these bites will be the highlight of your dessert table!
Ingredients for Easy Pumpkin Maple Crescent Bites
Gathering the right ingredients is the first step to culinary success! Here’s what you’ll need for these delightful Easy Pumpkin Maple Crescent Bites:
- Crescent Rolls: The foundation of this recipe; they create a flaky, buttery exterior that cradles all the deliciousness inside.
- Canned Pumpkin Puree: This is the star ingredient! It gives an earthy, sweet flavor and creamy texture. Make sure to get pure pumpkin, not pumpkin pie filling!
- Brown Sugar: Adding a touch of natural sweetness with hints of caramel flavor that beautifully complements the spices.
- Ground Cinnamon: This warm spice infuses everything with autumn vibes—think cozy evenings by the fire.
- Ground Ginger: A dash of this spice brings a zing to the mixture, enhancing that cheerful fall flavor profile.
- Ground Nutmeg: A pinch of nutmeg adds depth; its rich, warm qualities work wonders with pumpkin dishes.
- Ground Cloves: Another warm spice that’s potent in flavor—just a little goes a long way in elevating the overall taste.
- Vanilla Extract: This little dash of magic amplifies the sweetness and adds an extra layer of flavor complexity.
- Powdered Sugar: Used for the maple glaze that transforms these bites from delicious to utterly irresistible!
- Pure Maple Syrup: Oh, the sweet, rich goodness! This syrup provides a classic flavor that screams autumn.
- Milk: Just a splash helps achieve the perfect consistency for the glaze. You can adjust this according to your desired thickness.
All the ingredient measurements you need for the exact quantities in your recipe are neatly tucked away at the bottom of the article, ready for your printing adventure!
How to Make Easy Pumpkin Maple Crescent Bites
Let’s dive into the exciting world of making these Easy Pumpkin Maple Crescent Bites! Follow along with these simple steps to create mouthwatering treats that are sure to impress. Ready? Let’s get started!
Step 1: Preheat and Prepare
First things first, preheat your oven to 375°F. This step ensures your bites bake evenly. While that’s happening, line a baking sheet with parchment paper or a silicone baking mat. This will prevent sticking and make clean-up a breeze.
Step 2: Make the Pumpkin Filling
Next, in a small bowl, grab your canned pumpkin puree and add the brown sugar, cinnamon, ginger, nutmeg, cloves, and vanilla extract. Mix it all together until it becomes a smooth and creamy filling. The aroma wafting from this mixture will make your kitchen feel like a cozy cafe! You want a perfectly blended texture, so take your time. This filling will add delightful spice and sweetness to each bite.
Step 3: Prepare the Crescent Rolls
Unroll the crescent dough while keeping it on its original parchment. Gently separate the triangles—there will be eight in total. At the wide end of each triangle, place a generous teaspoon of that delicious pumpkin filling. Roll each triangle from the wide end towards the point, embracing the filling inside. The rolling creates a pastry pocket that encases all the gooey goodness!
Step 4: Bake to Perfection
Now it’s time to bake! Place the filled crescent rolls on your prepared baking sheet, giving them a little space to expand. Bake them in your preheated oven for about 12 to 15 minutes until they turn golden brown and puff up ever so slightly. Keep an eye on them, as the smell will make you want to dive right in! Once out of the oven, allow them to cool slightly on the baking sheet before glazing.
Step 5: Whip Up the Maple Glaze
In a small bowl, whisk together the powdered sugar, pure maple syrup, and just enough milk to create a smooth, pourable consistency. Start with a teaspoon of milk and gradually mix in more if needed. This glaze should be thick yet drizzly—perfect for coating those warm crescent bites. Trust me, this is the icing on the cake, or in this case, on the crescent bites!
Step 6: Drizzle and Serve
Finally, drizzle that luscious maple glaze generously over the warm crescent bites. This adds the perfect finishing touch! Serve them warm for the ultimate experience and watch as everyone lights up with joy. Enjoy the rewards of your hard work!
Tips for Success
- Make sure to really mix the pumpkin filling for even flavor distribution.
- If you want a thicker glaze, simply add less milk. Adjust until it’s to your liking!
- For a touch of creativity, sprinkle some chopped pecans or walnuts into the filling for added crunch.
- Do not overcrowd the baking sheet; it helps with even baking.
- Serve immediately for the best flavor and soft texture!
Equipment Needed
- Baking Sheet: A standard sheet pan will work, but a coated or non-stick one is ideal for easy release.
- Parchment Paper or Silicone Baking Mat: Either will prevent sticking and make cleanup simple.
- Mixing Bowls: A medium bowl for the filling and a small one for the glaze.
- Whisk or Fork: Perfect for blending the glaze until smooth.
- Measuring Spoons: To ensure accurate measurements, particularly for the spices and glaze ingredients.
Variations on Easy Pumpkin Maple Crescent Bites
- Add Chocolate Chips: For a decadent twist, fold in a handful of semi-sweet or dark chocolate chips into the pumpkin filling for a delightful surprise!
- Swap the Maple Glaze: Instead of a maple glaze, try a cream cheese frosting for a richer flavor that will have your guests raving!
- Make It Gluten-Free: Use gluten-free crescent roll dough available at many grocery stores to make this a gluten-free treat!
- Seasonal Spice Mix: Experiment with pumpkin spice mix instead of individual spices for a more pronounced seasonal flavor.
- Add Nuts: Toss in some finely chopped pecans or walnuts into the filling for added crunch and texture.
- Vegan Option: Use vegan crescent rolls and substitute maple syrup with a vegan-friendly sweetener for a delightful plant-based version.
Serving Suggestions
- Pair with Coffee: Enjoy these bites alongside a warm cup of coffee or chai tea for a delightful afternoon treat.
- Festive Platter: Arrange them on a colorful platter with fall-themed decorations for a beautiful presentation at gatherings!
- Ice Cream: Serve with a scoop of vanilla or cinnamon ice cream for a cozy dessert experience.
- Fresh Fruit: A side of sliced apples or pears adds a refreshing contrast to the sweet bites.
FAQs about Easy Pumpkin Maple Crescent Bites
Curious minds often have questions! Here are some common inquiries about these delightful Easy Pumpkin Maple Crescent Bites that I hope will help you in your baking adventure!
Can I make these Easy Pumpkin Maple Crescent Bites ahead of time?
Absolutely! You can prepare the pumpkin filling in advance and store it in the refrigerator for up to two days. Assemble the bites just before baking for the freshest taste!
What can I use instead of crescent rolls?
If you don’t have crescent rolls, puff pastry sheets are a great alternative! Just cut them into triangles and follow the same filling instructions for a delicious similar treat.
Can I freeze these bites after baking?
Yes! Once they’ve cooled, place them in an airtight container or freezer bag. They can be frozen for up to a month. Just reheat in the oven for a few minutes when you’re ready to enjoy them.
Are these crescent bites suitable for dietary restrictions?
They can be easily adapted! For a gluten-free version, look for gluten-free crescent roll dough. Vegan-friendly adaptations can be made using plant-based ingredients!
How should I store leftovers?
Store any leftovers in an airtight container at room temperature for up to two days. If they last longer, transfer them to the fridge to maintain freshness!
Final Thoughts
Making Easy Pumpkin Maple Crescent Bites is not just about baking; it’s about bringing warmth and joy into your home. These delightful pieces of heaven provide a cozy excuse to gather around the table, sharing stories and laughter with loved ones. Each bite filled with spiced pumpkin and topped with sweet maple glaze is a testament to the comfort of autumn flavors. Whether it’s a busy weekday or a festive gathering, these treats add a touch of magic that will leave everyone asking for seconds. So, roll up your sleeves, and let’s create some unforgettable memories together!
Print
Easy Pumpkin Maple Crescent Bites
- Total Time: 30 minutes
- Yield: 8 servings 1x
- Diet: Vegetarian
Description
Easy Pumpkin Maple Crescent Bites are delicious bites made with crescent rolls filled with a spiced pumpkin mixture and topped with a sweet maple glaze.
Ingredients
- 1 can (8 ounces) refrigerated crescent rolls
- 1/2 cup canned pumpkin puree
- 2 tablespoons packed brown sugar
- 1 teaspoon ground cinnamon
- 1/2 teaspoon ground ginger
- 1/4 teaspoon ground nutmeg
- 1/4 teaspoon ground cloves
- 1 teaspoon vanilla extract
- 1/2 cup powdered sugar
- 2 tablespoons pure maple syrup
- 1 to 2 teaspoons milk, for consistency
Instructions
- Preheat oven to 375°F. Line a baking sheet with parchment paper or a silicone baking mat.
- In a small bowl, thoroughly combine pumpkin puree, brown sugar, cinnamon, ginger, nutmeg, cloves, and vanilla extract until fully blended.
- Unroll the crescent dough and separate into 8 triangles. Place a generous teaspoon of pumpkin filling on the wide end of each triangle. Gently roll each triangle from the wide end toward the point.
- Arrange filled crescents on the prepared baking sheet. Bake in the preheated oven for 12 to 15 minutes, until golden brown. Allow to cool slightly on the baking sheet.
- In a small bowl, whisk together powdered sugar, maple syrup, and just enough milk to achieve a smooth, pourable consistency.
- Drizzle maple glaze generously over the warm crescents before serving. Enjoy while fresh and warm.
Notes
- Ensure the pumpkin puree is well mixed for even flavor.
- You can adjust the amount of milk in the glaze to achieve your desired consistency.
- Prep Time: 15 minutes
- Cook Time: 15 minutes
- Category: Dessert
- Method: Baking
- Cuisine: American
Nutrition
- Serving Size: 1 bite
- Calories: 150
- Sugar: 10g
- Sodium: 150mg
- Fat: 5g
- Saturated Fat: 1g
- Unsaturated Fat: 4g
- Trans Fat: 0g
- Carbohydrates: 22g
- Fiber: 1g
- Protein: 2g
- Cholesterol: 0mg


