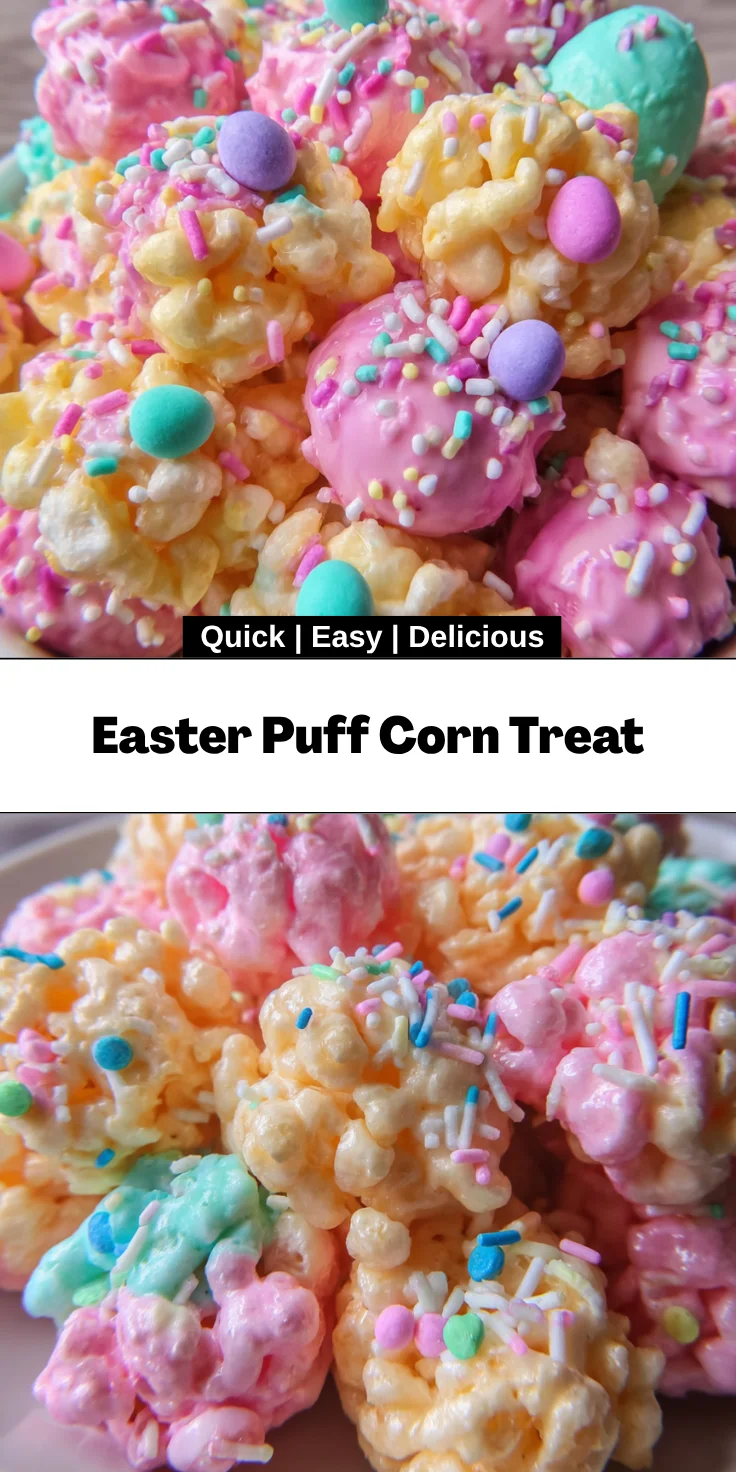
Introduction to Easter Puff Corn Treat
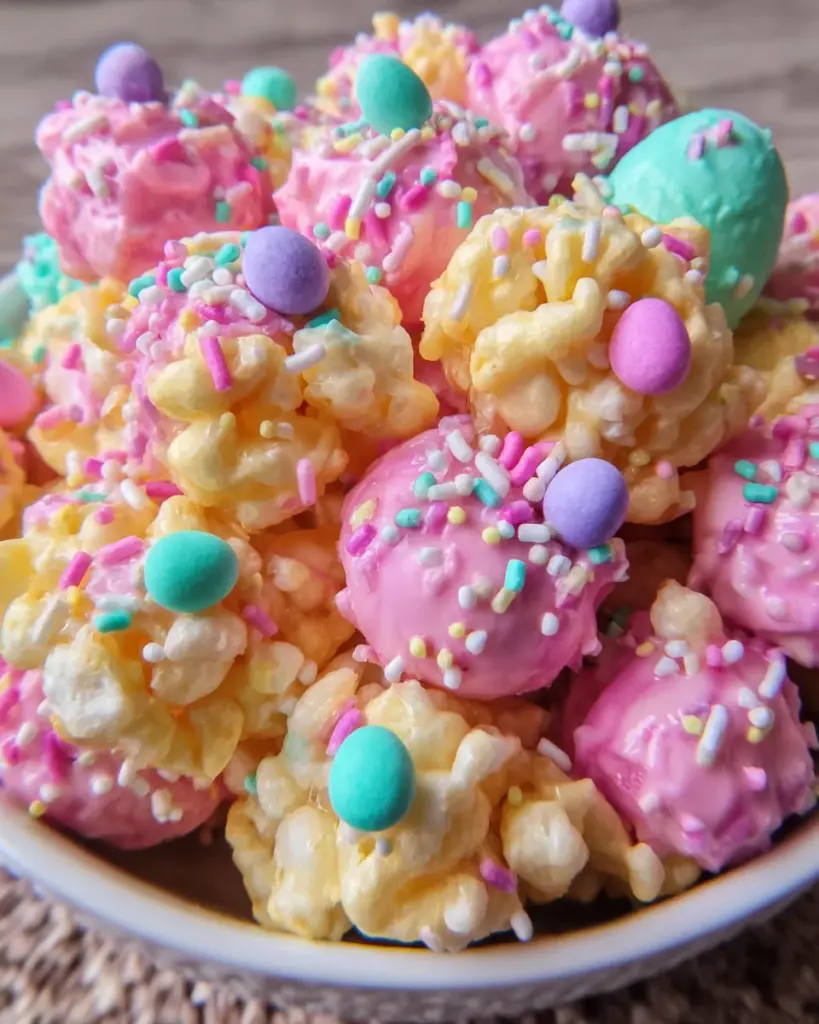
As spring blooms and Easter approaches, it’s time to whip up something delightful! I can’t think of a treat quite as fun or easy as the Easter Puff Corn Treat. When life gets busy, this recipe becomes a lifesaver—perfect for little hands to help or for those last-minute gatherings. Not only is it quick to prepare, but it’s also full of color and sweetness that’s bound to put a smile on anyone’s face. It’s not just a snack; it’s a joyful experience to create and share with family and friends!
Why You’ll Love This Easter Puff Corn Treat
This Easter Puff Corn Treat is a dream come true for busy moms like me! It’s incredibly easy to make, taking just 15 minutes from start to finish. The delightful crunch of puff corn, combined with the sweet, vibrant candy melts, creates a taste sensation that kids adore. Plus, it’s a no-bake recipe—perfect for avoiding the chaos of the oven while still delivering festive fun!
Ingredients for Easter Puff Corn Treat
Gathering the right ingredients is half the fun of making the Easter Puff Corn Treat! Here’s what you’ll need:
- Candy Melts: Vibrant pastel colors not only make the treat visually appealing but also add that sweet chocolatey flavor. Feel free to mix colors for a festive touch!
- Butter-Flavored Shortening: This little ingredient helps the candy melts achieve that smooth, drizzle-ready consistency. If you’re in a pinch, you can substitute with regular shortening.
- Puffed Corn Snack: The star of the show! This light and airy snack holds the candy coating beautifully. You can easily find it in most grocery stores.
- Easter-Themed Decorative Sprinkles: These are the fun finishing touch! They not only add texture but an extra splash of color to your treat. Get creative with your favorite shapes and colors!
You can find the exact measurements for these ingredients at the bottom of the article, where you’ll also have access to a printable version!
How to Make Easter Puff Corn Treat
Let’s get cooking! Making your Easter Puff Corn Treat is as easy as pie. Follow these simple steps to bring the fun to your kitchen.
Step 1: Prepare the Puff Corn
Start by placing the puff corn snack in a large mixing bowl. Make sure it’s evenly spread out and free of any clumps. This little detail will ensure that every piece gets coated nicely later on. I promise it makes all the difference!
Step 2: Melt the Candy Mixture
Next, grab a microwave-safe bowl and combine the candy melts with the butter-flavored shortening. Microwave this mixture in 30-second intervals. Don’t skip the stirring after each round! The goal is to achieve a smooth and creamy consistency. And let me tell you, watching that candy melt is like magic in the making!
Step 3: Coat the Puff Corn
Now it’s time to pour that dreamy melted candy over the puffed corn. If you’re feeling creative and want to use more than one color, repeat this coating step for each color. Use a spatula to stir gently. You want to make sure every piece is covered in that sweet goodness. Alternatively, cover the bowl and give it a shake—this is a fun way to engage the kids!
Step 4: Add the Fun Toppings
Here comes the best part! Spread the coated puff corn in a single layer on some wax paper. While the coating is still soft, sprinkle on those decorative Easter sprinkles! You can go wild here; the more, the merrier. This final touch not only looks festive but makes the treat so much more fun to eat.
Step 5: Set and Store
Now, let the coated puff corn sit on the wax paper until it hardens. This shouldn’t take long—maybe about 10 to 15 minutes. Once it’s set, transfer your colorful creation into an airtight container. And voilà! Your Easter Puff Corn Treat is ready for snacking and sharing. It can be stored for up to a week, although I doubt it will last that long!
Tips for Success
- Make sure your puff corn is fresh to ensure maximum crunchiness.
- Use a microwave-safe bowl that’s big enough to prevent spills during melting.
- Stir the candy melts thoroughly to avoid any lumps—smooth is key!
- Experiment with different sprinkle types for a unique touch.
- For easy cleanup, line your work surface with wax paper before starting.
Equipment Needed
- Large Mixing Bowl: Any big bowl will do! A salad bowl works perfectly.
- Microwave-Safe Bowl: Use a glass or ceramic bowl; just avoid plastic that might melt.
- Spatula: A rubber spatula makes mixing easy. A wooden spoon is a great alternative.
- Wax Paper: If you don’t have wax paper, parchment paper can work just fine!
Variations
- Chocolate Coated: Instead of candy melts, use melted chocolate for a rich, indulgent flavor. You can also mix white chocolate with food coloring for beautiful pastels!
- Nutty Mix: Add chopped nuts or seeds like almonds or sunflower seeds for extra crunch and nutrition. Just sprinkle them on before letting the coating set.
- Fruit Flavored: Use fruity flavored candy melts, like strawberry or blue raspberry, for a burst of fruity goodness that kids will love.
- Gluten-Free Option: Ensure the puff corn snack is certified gluten-free, so everyone can enjoy this treat!
- Vegan Adaptation: Swap out the butter-flavored shortening for coconut oil, and use vegan candy melts to make this treat suitable for a plant-based diet.
Serving Suggestions
- Pair your Easter Puff Corn Treat with a refreshing raspberry lemonade or iced tea for a delightful springtime beverage.
- Serve in colorful cupcake liners for an adorable presentation that adds to the festive flair.
- Consider placing them in a decorative bowl alongside other Easter treats for a vibrant dessert table.
FAQs about Easter Puff Corn Treat
Let’s tackle some common questions about this delightful treat! I know we all have a few burning queries, and I’m here to help you with all the details!
Can I make this treat in advance?
Absolutely! You can prepare the Easter Puff Corn Treat a day ahead. Just store it in an airtight container, and it’ll stay fresh for up to a week. Perfect for planning ahead!
What can I substitute for puff corn?
If you can’t find puff corn, you can use popcorn instead. Just be sure it’s unbuttered and unsalted. The texture will be a bit different, but it’s still a tasty option!
Can I use different candy colors or flavors?
Yes, feel free to get creative! You can use any colors of candy melts you like. Mixing flavors adds even more fun—imagine strawberry pink meets mint green!
Is this Easter Puff Corn Treat suitable for kids?
Definitely! This treat is not only kid-approved but also super simple for them to help make. Just watch those little hands around the melting candy—as tempting as it is!
How do I store leftovers properly?
Keep any leftovers in an airtight container at room temperature. Just ensure they are completely set before sealing. This will keep your treat fresh and crunchy for snacking!
Final Thoughts
Creating the Easter Puff Corn Treat isn’t just about the deliciousness; it’s about the joy that comes from sharing this simple yet delightful recipe with loved ones. Whether it’s a sunny spring afternoon or a cozy family gathering, this treat brings smiles and laughter. The process is quick and playful, making it a wonderful activity to involve the kids too! Remember, cooking should be fun, and with this recipe, it truly is. So, put on your apron, gather your ingredients, and enjoy every moment of making—and eating—this festive delight!
Print
Easter Puff Corn Treat
- Total Time: 15 minutes
- Yield: Approximately 4 servings 1x
- Diet: Vegetarian
Description
A delightful and easy-to-make treat for Easter using puff corn and colorful candy melts.
Ingredients
- 340 grams candy melts in preferred pastel color (optionally divided between colors)
- 2 teaspoons butter-flavored shortening
- 113 grams puffed corn snack
- Easter-themed decorative sugar sprinkles, as needed
Instructions
- Place the puffed corn snack into a large mixing bowl, ensuring it is evenly spread and free from clumps.
- In a microwave-safe bowl, combine the candy melts with the butter-flavored shortening. Microwave in 30-second intervals, thoroughly stirring after each round, until the mixture is completely smooth.
- Pour the melted candy mixture over the puffed corn. If using more than one color, repeat this coating step for each color used.
- Stir the puffed corn gently with a spatula until every piece is well coated, or cover the bowl and shake until evenly combined.
- Spread the coated puffed corn in a single layer on wax paper. Immediately sprinkle generously with decorative Easter sprinkles.
- Allow the coated puffed corn to set on the wax paper until the coating has hardened. Transfer to an airtight container for storage once fully set.
Notes
- Feel free to customize with your favorite colors of candy melts.
- This treat can be stored in an airtight container for up to one week.
- Prep Time: 10 minutes
- Cook Time: 5 minutes
- Category: Dessert
- Method: No-bake
- Cuisine: American
Nutrition
- Serving Size: 1 serving
- Calories: 200
- Sugar: 15g
- Sodium: 50mg
- Fat: 10g
- Saturated Fat: 5g
- Unsaturated Fat: 3g
- Trans Fat: 0g
- Carbohydrates: 30g
- Fiber: 1g
- Protein: 2g
- Cholesterol: 0mg