Introduction to Easter Egg Oreo Cookie Balls
Ah, Easter—when the air is filled with the scent of blooming flowers, and the excitement of egg hunts fills our hearts with joy! If you’re looking for a delightful treat that will surely impress loved ones, then these Easter Egg Oreo Cookie Balls are just the thing. Not only are they a quick solution for busy days, but they also provide a fun and engaging project to do with your kids. Plus, who doesn’t love a little something sweet during the holidays? Let’s dive into this colorful and delicious recipe!
Why You’ll Love This Easter Egg Oreo Cookie Balls
These Easter Egg Oreo Cookie Balls are a dream come true for busy moms and professionals alike. They’ll have your family buzzing with delight, all while being incredibly easy to make. With zero baking required, you can whip them up in no time. Their creamy, dreamy mix of Golden Oreos and cream cheese wrapped in colorful candy coating makes every bite a celebration. Trust me, they are perfect for any gathering!
Ingredients for Easter Egg Oreo Cookie Balls
Gathering your ingredients is the first step toward creating these colorful delights. Here’s what you need:
- Golden Oreos: The star of the show! These cookies provide a sweet and crunchy base, perfect for that delightful cookie ball texture.
- Cream Cheese: This luscious ingredient adds richness and creaminess, binding the crumbs together into a smooth mixture. Don’t forget to soften it first for easy mixing!
- White Candy Coating: Ideal for dipping, this coating transforms your cookie balls into festive treats. It melts beautifully and hardens into a delightful shell.
- Extra White Candy Coating: Useful for decorating your cookie balls, you can add some fun colors to make them more festive. Consider using gel icing colors to achieve vibrant shades!
- Gel Icing Colors: These are perfect for adding a pop of color to your candy coating. They blend well and don’t alter the texture much.
- Optional Sprinkles or Sanding Sugar: For a fun finishing touch, add sprinkles or sanding sugar to make your treats sparkle and shine. It’s an easy way to elevate your Easter egg cookie balls!
For exact measurements, check the bottom of the article, where you’ll find everything you need listed for easy printing. Happy gathering!
How to Make Easter Egg Oreo Cookie Balls
Now that you’ve gathered your ingredients, let’s roll up our sleeves and bring these Easter Egg Oreo Cookie Balls to life! This no-bake recipe is straightforward and perfect for all skill levels. Let’s create these delightful treats step by step.
Step 1: Crush the Golden Oreos
First things first, let’s crush those Golden Oreos! Toss them into a ziplock bag and use a rolling pin or your trusty hands to crush them into fine crumbs. Trust me, no large chunks here! The finer the crumbs, the better your cookie balls will hold together.
Step 2: Mix with Cream Cheese
Next, it’s time to mix! In a large bowl, combine your freshly crushed Oreo crumbs with the softened cream cheese. Use a spatula or your hands to blend them together until you achieve a smooth, dough-like mixture. This step is crucial—it should be sticky enough to form into shapes.
Step 3: Shape into Egg Ovals
Now comes the fun part! Scoop about 1½ tablespoons of the Oreo mixture and roll it between your palms to create egg-like ovals. Think of shaping tiny Easter eggs! Try to make them uniform in size for a more festive presentation.
Step 4: Refrigerate for Firmness
To ensure your cookie eggs hold their shape, you’ll need to refrigerate them. Place your shaped eggs on a plate and chill them in the refrigerator for about an hour. This step is key—it’ll make dipping much easier later!
Step 5: Melt White Candy Coating
After an hour, it’s time to melt the white candy coating. Use a microwave-safe bowl and heat it in 30-second intervals until it’s completely smooth. Once melted, dip each chilled egg into the coating, allowing any excess to drip off. You want a thick, even coat for the best look!
Step 6: Set on Parchment Paper
As you dip each egg, place them carefully on a sheet of parchment paper. This non-stick surface will keep them from sticking and allow the coating to set beautifully. Let the dipped eggs cool and harden for a while before you get to the decorating!
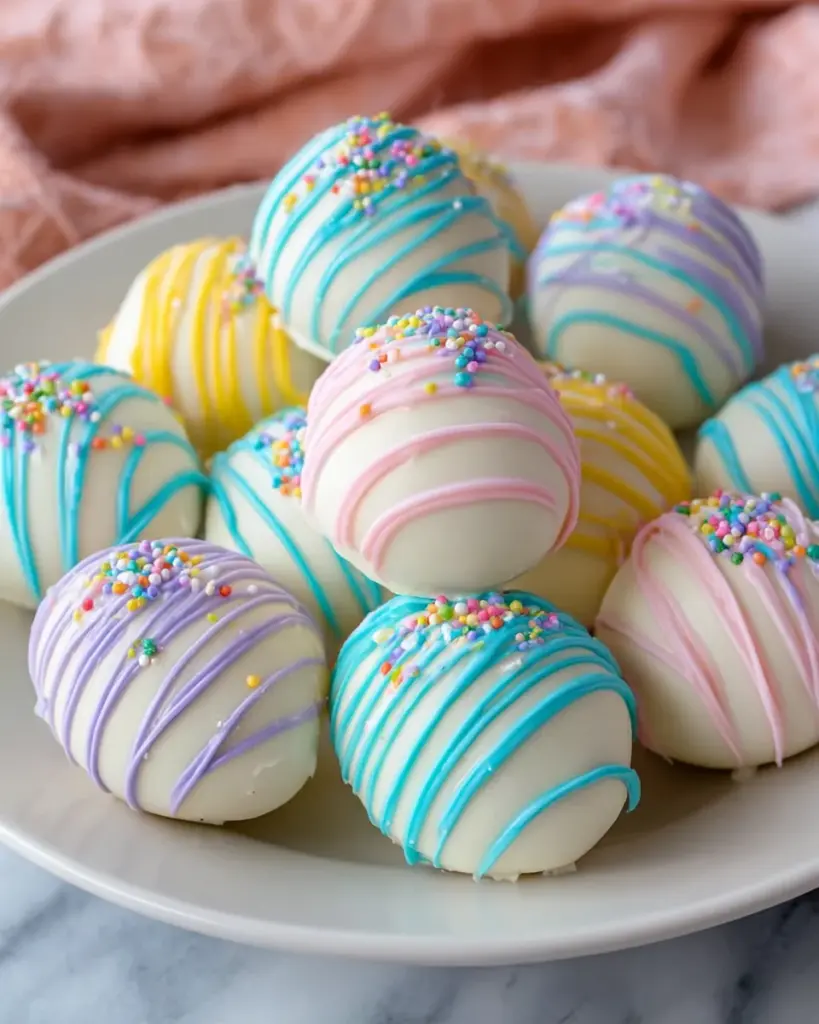
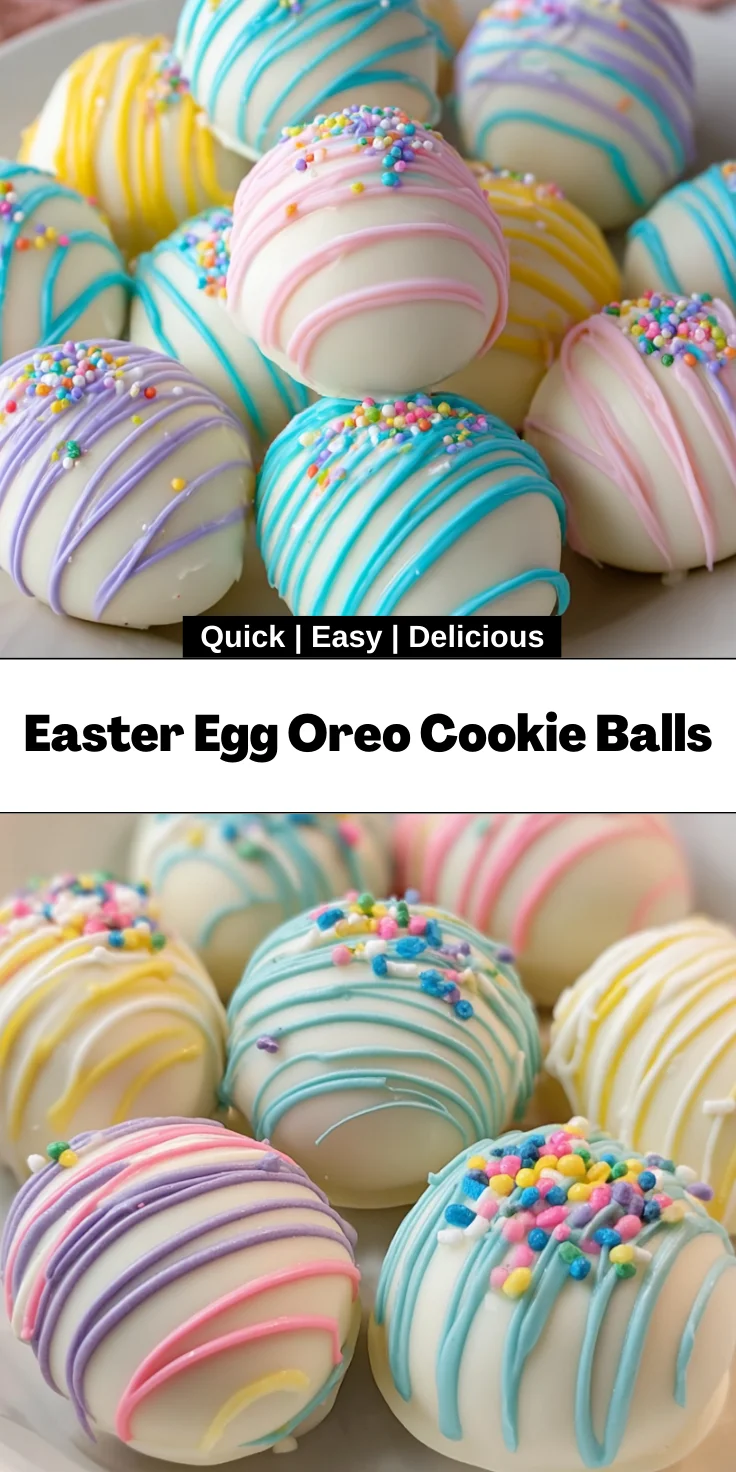
Step 7: Decorate with Coloured Coating
Now for the touch of magic! Melt any extra white candy coating in small batches and add in your gel icing colors for fun hues. Use a piping bag or a fork to drizzle or pipe the colored coating over your eggs, creating swirls and patterns. Creativity is key here—there’s no right or wrong!
Step 8: Add Sprinkles
Right before the colored coating sets, sprinkle over some festive sprinkles or sanding sugar. This extra step adds a delightful crunch and makes your cookie balls sparkle like precious Easter jewels!
Step 9: Store until Ready to Serve
Once you’ve decorated your cookie balls, they’ll need to be stored in the refrigerator until you’re ready to share them. This will help maintain the flavors and textures until everyone can bask in their deliciousness. They’re best enjoyed cold, so you can pop them out just before guests arrive!
Tips for Success
- Use softened cream cheese for easier mixing; it will make a big difference.
- Chill the shaped cookie balls well to keep their form during dipping.
- Opt for high-quality candy coating for the best flavor and finish.
- Experiment with different gel icing colors to create a rainbow of designs.
- Be creative! Use various sprinkles for added fun and texture.
Equipment Needed
- Mixing Bowl: A large bowl works best. You can even use a stand mixer if you have one.
- Rolling Pin: Any heavy object will do if you don’t have one, just to crush those Oreos.
- Piping Bag: A ziplock bag with a corner cut off can double as a piping bag for decorating.
- Parchment Paper: Use wax paper if you’re in a pinch; it’ll help with the non-stick factor.
- Microwave-Safe Bowl: Any microwave-safe bowl can be used for melting candy coating.
Variations
- Chocolate Oreo Cookie Balls: Swap Golden Oreos for classic Chocolate Oreos for a rich, chocolatey twist on flavor.
- Nut Butter Delight: Mix in a spoonful of peanut butter or almond butter with the cream cheese for an added nutty flavor.
- Vegan Option: Use vegan cream cheese and dairy-free candy coating for a tasty vegan-friendly treat.
- Fruit Flavored Coating: Experiment with fruit-flavored candy melts for a tropical vibe, adding a fun twist to traditional flavors.
- Mini Egg Versions: Shape the mixture into smaller bite-sized balls to create mini versions that are even easier to pop in your mouth!
Serving Suggestions
- Pair with a cold glass of milk for a classic treat experience that everyone loves.
- Serve on a colorful platter surrounded by fresh Easter flowers for a festive touch.
- Display them in a decorative basket with pastel-colored napkins to enhance the Easter theme.
- Offer alongside fruit salad or seasonal desserts for a delightful spread.
- Include little tags with fun facts about Easter eggs for an added touch of charm.
FAQs about Easter Egg Oreo Cookie Balls
Can I make these Oreo cookie balls ahead of time?
Absolutely! These Easter Egg Oreo Cookie Balls can be made a day or two in advance. Just keep them stored in the refrigerator to maintain their freshness.
What’s the best way to store leftover cookie balls?
Store any leftovers in an airtight container in the refrigerator. They’ll stay fresh for up to a week! Just make sure they don’t get squished.
Can I use regular Oreos instead of Golden Oreos?
Yes, you can definitely use classic Oreos! They create a richer chocolate flavor, making for a delightful twist on this Easter treat.
Can I freeze Easter Egg Oreo Cookie Balls?
Yes, these treats freeze well! Just wrap them individually in plastic wrap and store in a freezer bag. They’ll last for up to a month.
How can I modify this recipe for dietary restrictions?
To accommodate different diets, consider using low-fat cream cheese, gluten-free Oreos, or vegan cream cheese. You can make these treats suitable for various preferences!
Final Thoughts
Creating these Easter Egg Oreo Cookie Balls is more than just making a treat; it’s about sharing joy and memories with loved ones. The colorful exterior and creamy interior truly embody the spirit of Easter celebrations. Watching the smiles on my family’s faces as they indulge in these delightful bites is pure happiness. This recipe is perfect for bringing everyone together, encouraging creativity, and adding a touch of sweetness to your holiday festivities. So, roll up your sleeves and let your imagination run wild—you’ll savor not only the treat but the cherished moments spent together!
Print
Easter Egg Oreo Cookie Balls
- Total Time: 1 hour 30 minutes
- Yield: Approximately 24 egg-shaped cookie balls 1x
- Diet: Vegetarian
Description
A delightful treat for Easter celebrations, these Oreo cookie balls are shaped like eggs and decorated with colorful candy coating.
Ingredients
- 1 (14.3 oz) package Golden Oreos, finely crushed
- 8 oz cream cheese, softened
- 10 oz white candy coating for dipping
- Extra white candy coating (about 1 oz per color) for decorating
- Gel icing colors for coloring coating
- Optional: sprinkles or sanding sugar
Instructions
- Crush the Golden Oreos into fine crumbs without leaving large chunks.
- Mix the crumbs with softened cream cheese until a smooth, dough-like mixture forms.
- Scoop about 1½ tablespoons of the mixture and shape into egg-like ovals.
- Refrigerate the shaped eggs for 1 hour to firm them up.
- Melt the white candy coating and dip each chilled egg, letting excess drip off.
- Place on parchment paper and allow to set.
- Melt extra white coating in small batches, color with gel icing, and drizzle or pipe over dipped eggs.
- Add sprinkles or sanding sugar before the coating sets.
- Store the decorated cookie balls in the refrigerator until ready to serve.
Notes
- Make sure the cream cheese is softened for easier mixing.
- Allow the cookie balls to set completely before serving for best results.
- Prep Time: 30 minutes
- Cook Time: 0 minutes
- Category: Dessert
- Method: No-bake
- Cuisine: American
Nutrition
- Serving Size: 1 cookie ball
- Calories: 120
- Sugar: 8g
- Sodium: 50mg
- Fat: 7g
- Saturated Fat: 3.5g
- Unsaturated Fat: 2g
- Trans Fat: 0g
- Carbohydrates: 14g
- Fiber: 0g
- Protein: 1g
- Cholesterol: 10mg