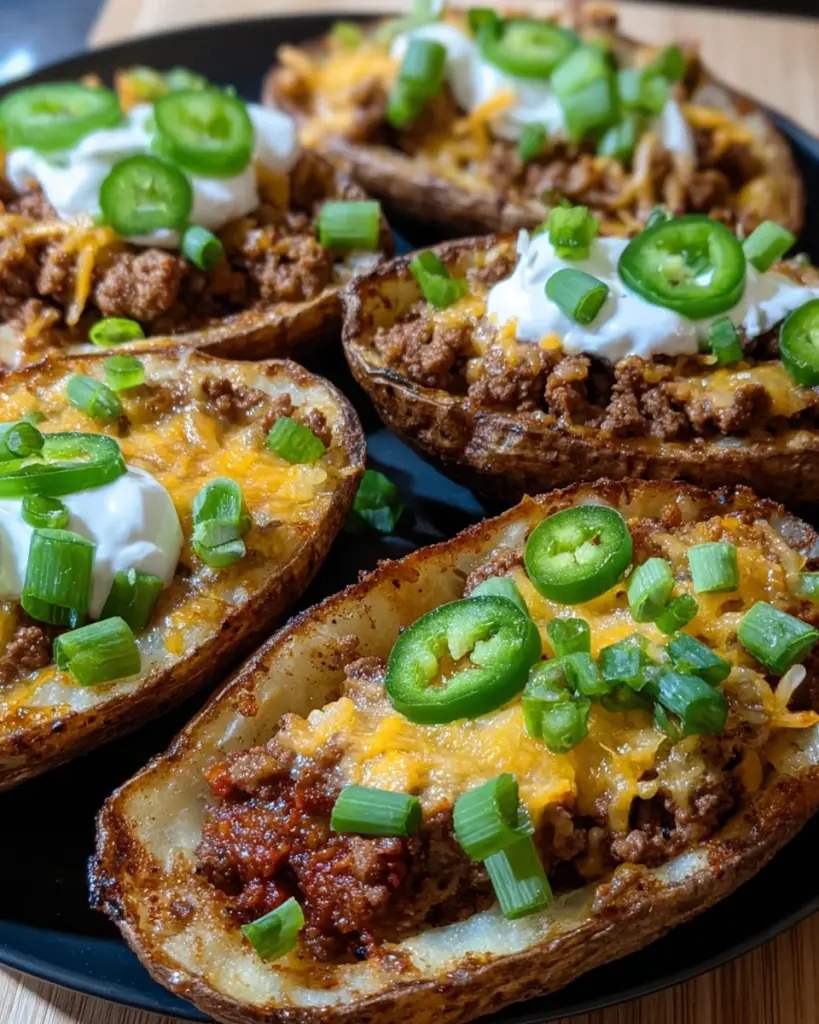
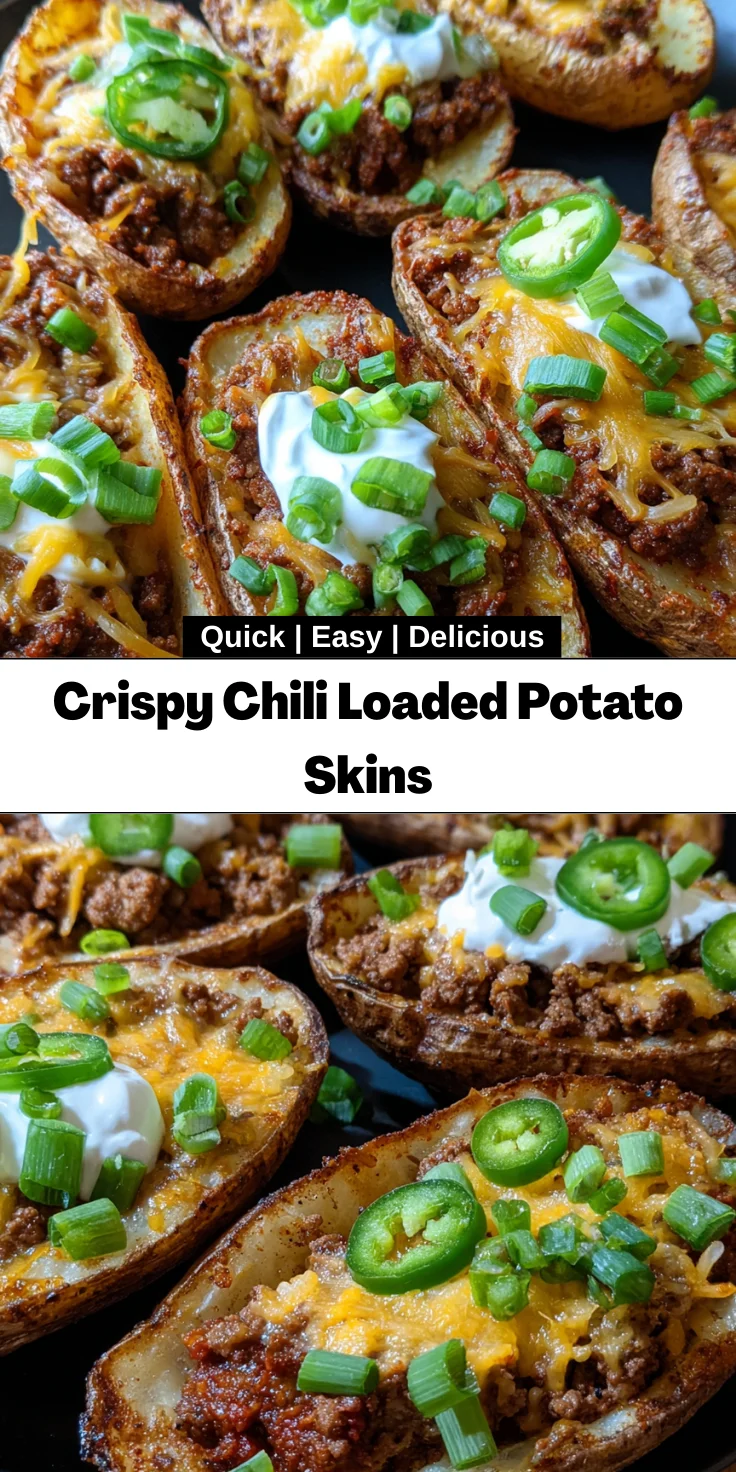
Introduction to Crispy Chili Loaded Potato Skins
Let me tell you about a dish that’s become a staple in my kitchen—Crispy Chili Loaded Potato Skins. These delightful bites are perfect for any occasion, whether it’s a busy weeknight dinner or a fun gathering with friends. They bring the warmth of home-cooked comfort straight to your plate. Plus, they’re surprisingly easy to whip up, making them a lifesaver for busy moms like us. Imagine the joy of impressing your loved ones with these crunchy, cheesy treats while knowing you spent little time in the kitchen. Sounds tempting, doesn’t it?
Why You’ll Love This Crispy Chili Loaded Potato Skins
One of the best things about these Crispy Chili Loaded Potato Skins is how effortlessly they come together. In just over an hour, you can create a mouthwatering appetizer that delights everyone. The rich, spicy chili filling pairs beautifully with the crunchy potato skins, making it a hit for family dinners or game nights. You’ll not only save time but also create a dish that everyone craves!
Ingredients for Crispy Chili Loaded Potato Skins
Gathering the right ingredients is the first step to creating the perfect Crispy Chili Loaded Potato Skins. Here’s what you’ll need:
- Russet potatoes: The star of the show! Their starchy texture makes them ideal for crisping up beautifully.
- Neutral oil: Choose oil with a high smoke point, like canola or vegetable oil. This is essential for frying your potato skins to perfection.
- Salt: Just a dash to enhance the flavors. You can adjust to taste!
- Ground beef: I love using 80/20 for flavor and juiciness. Feel free to swap it out for ground turkey or even lentils for a vegetarian alternative.
- Diced onion: It adds a subtle sweetness when sautéed, creating a more complex flavor in the chili.
- Minced garlic: Because who doesn’t love garlic? It brings warmth and depth to the dish.
- Chili powder: The heart of your chili—it’ll spice things up! Adjust according to your heat tolerance.
- Smoked paprika: Adds a delightful smoky flavor that perfectly complements the other spices.
- Ground cumin: It introduces a warm, earthy quality to the chili filling.
- Kosher salt: Use it to season the chili mixture and ensure every layer is flavorful.
- Black pepper: A pinch adds a little kick to the overall taste.
- Tomato paste: This thickens the chili and deepens its rich, tomatoey flavor.
- Crushed tomatoes: They provide the moisture and tang in the chili. Opt for quality brands for the best taste!
- Beef broth: Adds richness but feel free to use vegetable broth for a lighter version.
- Beans (optional): Optional but encouraged! Incorporating beans makes the chili heartier and adds fiber.
- Shredded cheddar cheese: The gooey topping that takes your potato skins to the next level. Don’t skimp here!
- Sour cream: A cool, creamy finish that balances the spice of the chili.
- Sliced green onions: These add a fresh crunch and vibrant color to your loaded skins.
- Pickled jalapeños (optional): For those who like an extra kick, they bring a tangy heat!
Detailed measurements for each ingredient can be found at the bottom of this article, which you can easily print for your convenience.
How to Make Crispy Chili Loaded Potato Skins
Let’s dive into creating those mouthwatering Crispy Chili Loaded Potato Skins! Follow these steps, and you’ll have a crowd-pleaser on your hands in no time. Ready? Let’s go!
Step 1: Baking the Potatoes
Start by preheating your oven to 200°C (around 400°F). Take your russet potatoes and pierce them with a fork a few times. This little trick keeps them from exploding in the oven!
Place the potatoes directly onto the oven rack and let them bake for about 45 to 55 minutes. You want them tender, so when they’re fork-ready, they’re good to go.
Once done, carefully remove the potatoes and let them cool for a few minutes. Then, cut them in half lengthwise, and scoop out the flesh, leaving about a ¼ inch shell. Keep that sweet potato goodness for another meal or dish!
Step 2: Frying the Potato Skins
Heat up 2 to 3 liters of neutral oil in a large, heavy pot until it reaches about 185°C (365°F). This is where the magic happens! Make sure your potato skins are completely dry to achieve that glorious crunch.
Fry the potato skins in batches. Start with the skin-side down for 3 to 4 minutes, then flip them and fry for another 3 to 4 minutes. They should be crispy and golden brown.
After frying, drain the skins on a wire rack. Lightly sprinkle them with salt while they’re still hot. For an extra crunch, you can give them a double fry; start at 165°C (330°F) for a couple of minutes, let them rest, and then fry them again at 190°C (375°F) for a couple more minutes.
Step 3: Preparing the Chili Filling
In a skillet over medium-high heat, add your ground beef. Cook it until browned thoroughly—this will take about 5 to 7 minutes. I always like to use an 80/20 fat blend; it adds so much flavor!
Add in the diced onions and sauté until they become soft, about 3 minutes. Next, stir in the minced garlic and let it cook for about a minute until fragrant.
Now, sprinkle in the chili powder, smoked paprika, ground cumin, kosher salt, and black pepper. Stir everything together and let it cook for 30 seconds. Your kitchen will smell like heaven!
Incorporate the tomato paste and let it cook for 1 to 2 minutes until darkened. Then, pour in the crushed tomatoes and beef broth. Simmer this for 15 to 20 minutes until it thickens. If you’re using beans, toss them in and let everything meld for another 5 minutes.
Step 4: Assembling the Loaded Potato Skins
With your fried potato skins ready and your luscious chili filling all thick and aromatic, it’s time to assemble! Preheat your broiler to high.
Lay your crispy potato skins on a baking tray. Fill each skin with 3 to 4 tablespoons of that hearty chili. Don’t hold back on the filling!
Now, sprinkle shredded cheddar cheese on top generously. This is the moment you can really create cheesy dreams!
Step 5: Broiling for Ultimate Cheese Melt
Slide that tray into the oven under the broiler for about 2 to 3 minutes. Keep an eye on them, as you want the cheese melted and bubbly. Ooey-gooey goodness is what we’re after!
Once you see that amazing cheese melt, remove the tray from the oven. Garnish your loaded potato skins with a dollop of sour cream, a sprinkle of sliced green onions, and those pickled jalapeños if you’re feeling spicy. Serve them up warm and enjoy every crunchy bite!
Tips for Success
- Always pat your potato skins dry before frying. This ensures maximum crispiness!
- Feel free to experiment with seasonings. A dash of cayenne can add a fun kick!
- Don’t skimp on the cheese—be generous for that melty, gooey finish.
- Let the fried skins cool on a wire rack to avoid sogginess.
- Prep the chili filling ahead of time for an even quicker assembly.
Equipment Needed
- Heavy pot: Ideal for frying, but a deep skillet can also work.
- Baking tray: A simple sheet pan is perfect for broiling the skins.
- Wire rack: Essential for draining fried skins, but parchment paper can do in a pinch.
- Skillet: For sautéing the chili filling; a non-stick one makes it easier.
- Meat thermometer: Useful to get the oil at the right frying temperature.
Variations of Crispy Chili Loaded Potato Skins
- Vegetarian Option: Swap out the ground beef for black beans or lentils for a hearty plant-based filling.
- Spicy Kick: Add chopped fresh jalapeños or a sprinkle of cayenne pepper in the chili for an extra layer of heat.
- Cheesy Delight: Mix different cheeses like Monterey Jack or pepper jack with the cheddar for a flavor boost.
- Smoky Flavor: Incorporate cooked bacon or smoked sausage into the chili for a rich, smoky taste.
- Herbed Twist: Top with fresh cilantro or parsley instead of green onions for a burst of freshness.
- Sweet and Savory: Drizzle with honey or balsamic glaze before serving for a delightful sweet contrast.
Serving Suggestions
- Pair these Crispy Chili Loaded Potato Skins with a light green salad for a refreshing contrast.
- Consider serving them alongside creamy guacamole or salsa for extra flavor.
- For drinks, ice-cold beer or a zesty lemonade enhance the experience.
- Present on a rustic wooden board for a fun, casual look!
FAQs about Crispy Chili Loaded Potato Skins
Can I make Crispy Chili Loaded Potato Skins ahead of time?
Absolutely! You can prepare the chili filling in advance and store it in the fridge. Fry the potato skins the same day for maximum crispiness. Assemble and broil them just before serving for that fresh taste.
What can I use instead of ground beef?
If you want a lighter option, ground turkey works beautifully. For a vegetarian twist, use black beans or lentils as filling. Both alternatives are delicious and add their unique flavors!
How do I know when the potato skins are perfectly crispy?
Perfectly crispy skins should be golden brown and feel firm to the touch. If they look pale, they might need a bit more frying. Always drain them on a wire rack to keep that crunch!
Can I bake the potato skins instead of frying?
Yes, you can bake them for a healthier version, though they won’t be as crispy. Brush the skins with oil and bake at 200°C (400°F) until golden. It’s not the traditional method, but they’ll still taste great!
What’s the best way to reheat leftovers?
To revive leftovers, reheat them in the oven at 180°C (350°F) for about 10 minutes. This will help regain some of the crispiness, making them just as enjoyable as the first time!
Final Thoughts
Crafting these Crispy Chili Loaded Potato Skins brings a delightful sense of accomplishment to my busy life. They’re more than just a dish; they’re an invitation to gather around the table, sharing laughter and good times with family and friends. Watching my loved ones dive into them, their faces lighting up with that first crispy bite, is simply priceless. Plus, the joy of knowing I whipped up something so delicious in no time makes my heart sing. This recipe is not just a meal—it’s a memory in the making, one crunchy skin at a time!
Print
Crispy Chili Loaded Potato Skins
- Total Time: 1 hour 20 minutes
- Yield: 12 servings 1x
- Diet: Carnivore
Description
Crispy Chili Loaded Potato Skins are indulgent and crunchy appetizers, filled with a delicious chili mixture and topped with cheese.
Ingredients
- 6 medium russet potatoes
- 2–3 litres neutral oil, for frying
- Salt, to taste
- 450 grams ground beef (80/20)
- 1 small onion, diced
- 3 garlic cloves, minced
- 1 tablespoon chili powder
- 1 teaspoon smoked paprika
- 1 teaspoon ground cumin
- 1 teaspoon kosher salt
- 0.5 teaspoon black pepper
- 1 tablespoon tomato paste
- 240 millilitres crushed tomatoes
- 120 millilitres beef broth
- 1 can beans, optional (approximately 400 grams)
- 180 grams shredded cheddar cheese
- 120 millilitres sour cream
- 3–4 green onions, sliced
- Pickled jalapeños, optional
Instructions
- Preheat oven to 200°C. Pierce potatoes with a fork and place directly on the oven rack. Bake for 45–55 minutes until tender. Allow to cool slightly, then halve lengthwise and scoop out the flesh, leaving a 0.5 cm shell.
- Heat oil in a heavy pot to 185°C. Pat potato skins completely dry. Fry in batches, starting skin-side down for 3–4 minutes; flip and fry an additional 3–4 minutes until crisp and golden. Drain on a wire rack and season with salt while hot.
- For extra crispiness: First fry potato skins at 165°C for 2 minutes, let rest for 5 minutes, then fry again at 190°C for 2–3 minutes.
- In a skillet over medium-high heat, brown the ground beef thoroughly. Add diced onion and sauté until softened. Stir in minced garlic and cook for 1 minute. Blend in chili powder, smoked paprika, cumin, salt, and black pepper, cooking for 30 seconds until fragrant.
- Incorporate tomato paste and cook 1–2 minutes until darkened. Add crushed tomatoes and beef broth. Reduce heat and simmer 15–20 minutes until thickened. If using beans, add and simmer for 5 minutes more.
- Preheat broiler to high. Arrange fried potato skins on a baking tray. Fill each with 3–4 tablespoons chili and top generously with shredded cheddar.
- Broil 2–3 minutes until cheese is fully melted and bubbling. Remove from oven, garnish with sour cream, sliced green onions, and pickled jalapeños as desired. Serve immediately.
Notes
- Let the fried skins cool on a wire rack to maintain their crispness.
- Beef can be substituted with ground turkey or a plant-based alternative for a different flavor.
- Feel free to customize toppings based on personal preference.
- Prep Time: 20 minutes
- Cook Time: 1 hour
- Category: Appetizer
- Method: Baking and Frying
- Cuisine: American
Nutrition
- Serving Size: 1 potato skin
- Calories: 300
- Sugar: 2g
- Sodium: 500mg
- Fat: 20g
- Saturated Fat: 8g
- Unsaturated Fat: 12g
- Trans Fat: 0g
- Carbohydrates: 25g
- Fiber: 3g
- Protein: 15g
- Cholesterol: 40mg