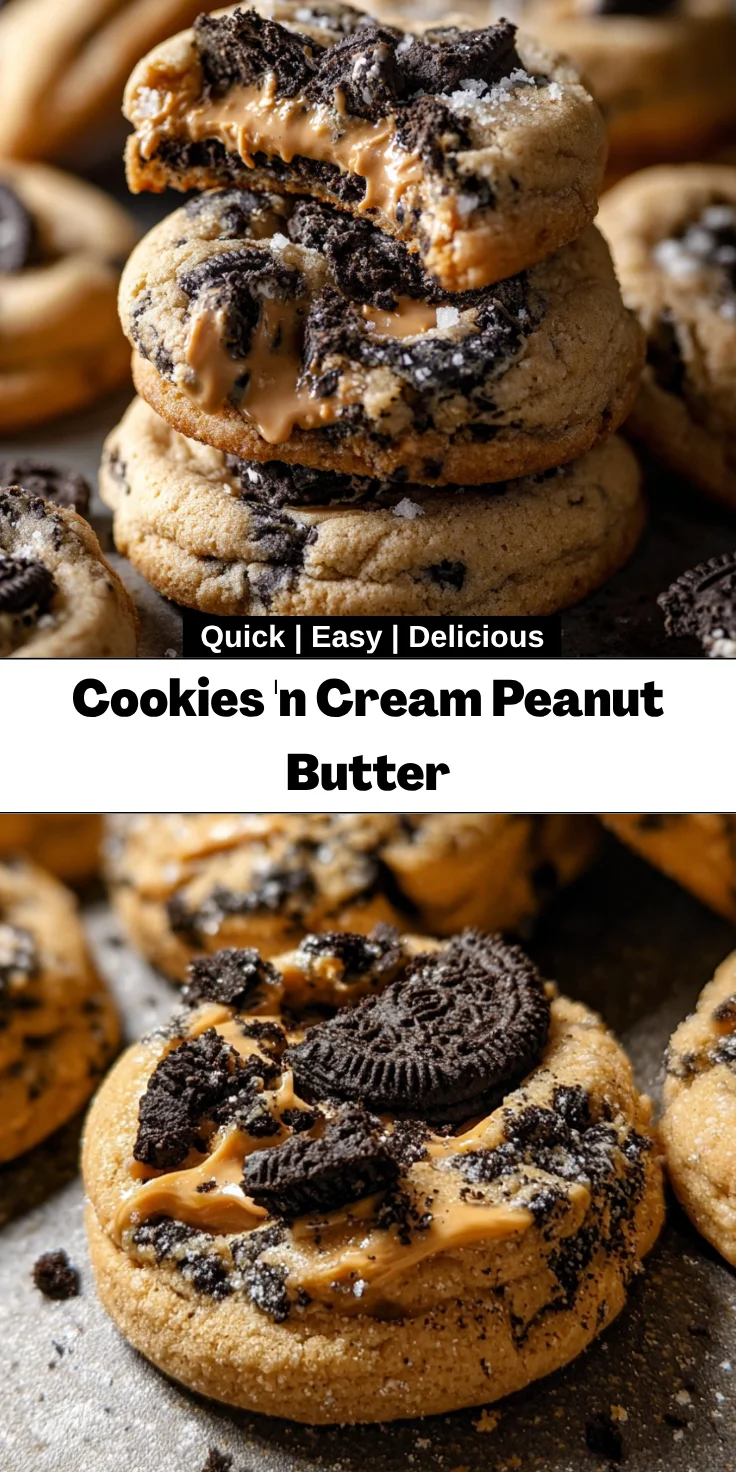
Introduction to Cookies ‘n Cream Peanut Butter
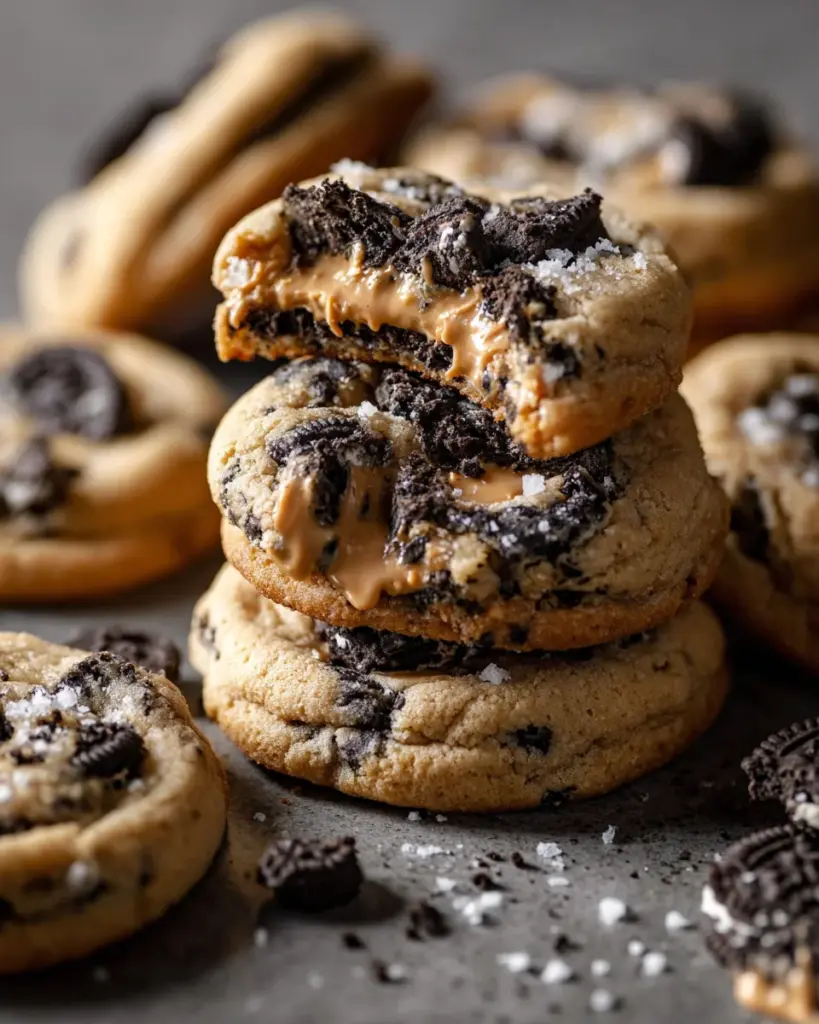
I’m a foodie at heart so there’s nothing quite like Oreo cookies fused with the smooth creaminess of peanut butter. Suitable for when you’re in a rush during the day and have a hankering for something sugary or to surprise your friends with this great combination, these cookies are just so lovable! I understand how things can get busy during the day; juggling work and looking after your family, you need fast solutions for dessert that don’t compromise on taste. Seriously, these cookies are going to become a regular in your household in just minutes!
Why You’ll Love This Cookies ‘n Cream Peanut Butter
There’s a lot to love about Cookies ‘n Cream Peanut Butter, and trust me, it’s not just the taste! These cookies are quick to whip up, taking just 25 minutes from start to finish. They’re incredibly satisfying, combining flavors that everyone adores. Plus, they hold up well, so you can share them at a gathering or enjoy them as a late-night snack. They’ll surely bring smiles to your family’s faces, just like they do in mine!
Ingredients for Cookies ‘n Cream Peanut Butter
Gathering the right ingredients for Cookies ‘n Cream Peanut Butter is the first step towards a delightful dessert adventure. Let’s take a quick look at what you’ll need:
- Unsalted butter: This adds richness and a creamy texture. Make sure it’s softened for easy mixing.
- Peanut butter: Pot for a creamy variety that’s easy to mix but avoid no-stir types. The flavor is key!
- Egg: A large egg binds your cookies and gives them a tender crumb that melts in your mouth.
- Milk: Just a splash to help combine everything smoothly. Feel free to substitute with a non-dairy option if preferred.
- Vanilla extract: This adds a warm, aromatic note that elevates the overall taste of the cookies.
- Brown sugar: It contributes moisture and a lovely caramel flavor, balancing the peanut butter perfectly.
- Granulated sugar: This gives the cookies a slight crunch on the outside while keeping the inside chewy.
- All-purpose flour: The main structure of your cookies. It holds everything together beautifully.
- Baking soda: This is your rising agent, helping the cookies spread and lift properly in the oven.
- Salt: Just a pinch enhances all the flavors and makes the sweetness pop.
- Oreo cookies: The star of this show! Chopped up, they bring in cookie crunch and a delightful chocolate element.
For those who want a twist or perhaps a bit of customization, feel free to throw in some chocolate chips or use almond butter instead of peanut butter for a nutty variation. Remember, the complete ingredient quantities are available at the bottom of this article for easy printing!
How to Make Cookies ‘n Cream Peanut Butter
Making Cookies ‘n Cream Peanut Butter is a delightful adventure that can lift your spirits. Follow these simple steps to create a batch of cookies the whole family will love.
Step 1: Preheat Your Oven
Start by preheating your oven to 350°F (175°C). This step is crucial; a hot oven ensures your cookies bake evenly and give that delicious, golden-brown finish. While the oven warms up, it’s the perfect time to line your baking trays with parchment paper or silicone mats. This helps prevent sticking and keeps your cleanup effortless!
Step 2: Cream the Butters and Sugar
In a mixing bowl, combine your softened unsalted butter and creamy peanut butter with both sugars. Using an electric mixer, beat these together until the mixture becomes light and fluffy. Aim for about 3 minutes. This textural change is important; it incorporates air and makes your cookies softer inside while maintaining a delectable crunch outside.
Step 3: Incorporate Wet Ingredients
Next, it’s time to add the wet ingredients. Crack in your large egg along with the splash of milk, vanilla extract, and baking soda. Mix these well until everything blends seamlessly together. Proper incorporation at this stage is key since it affects the final texture of your cookies. You want them to be chewy and delicious!
Step 4: Mix in the Flour and Oreos
Now, gradually add in the all-purpose flour. I recommend doing this in thirds to avoid a flour explosion. Once your dough is consistent, gently fold in the chopped Oreo cookies. This step is all about even distribution; make sure those chocolatey bites are spread throughout the dough for a delightful surprise in every bite!
Step 5: Shape and Bake the Cookies
Use a spoon or scoop to portion the dough into balls, roughly 30 grams each. Place them on your prepared baking trays, leaving some space in between because they will spread. Using a fork, create a criss-cross pattern on top of each cookie, giving them that classic look. Bake them for about 8 to 10 minutes. Remember, the key is not to overbake; soft centers make for the most delightful cookies!
Step 6: Cooling and Storing
Once your cookies are baked, let them cool on the trays for a few minutes. This is important as they will firm up a bit. After that, transfer them to a wire rack to cool completely. Once cooled, store your delectable cookies in an airtight container at room temperature for up to three days. If you want to save some for later, you can freeze them between layers of paper towels for up to one month! Trust me, they will be just as tasty when you’re ready to enjoy them again.
Tips for Success
- Make sure your butter is softened but not melted for the best mixing consistency.
- Use a cookie scoop for even-sized dough balls to ensure uniform baking.
- Don’t rush the cooling process; letting them cool helps enhance texture.
- Feel free to customize by adding extra Oreos or even a swirl of chocolate!
- Keep an eye on the cookies while baking; they can turn from perfect to overdone quickly.
Equipment Needed
- Mixing bowl: A large bowl is essential. You can use a glass or stainless steel one.
- Electric mixer: A hand mixer or stand mixer works well, but a whisk is fine too, though it’ll take longer.
- Baking trays: Use any oven-safe trays, lined with parchment paper or silicone mats.
- Cookie scoop: For uniform cookies, but a spoon works in a pinch!
- Cooling rack: Allows air circulation; if you don’t have one, a plate will suffice.
Variations
- Nut Butter Swap: Try using almond butter or cashew butter instead of peanut butter for a unique flavor twist.
- Gluten-Free Option: Substitute all-purpose flour with a gluten-free flour blend to cater to gluten sensitivities.
- Vegan Choice: Replace the egg with a flax egg (1 tablespoon of ground flaxseed combined with 2.5 tablespoons of water) and use plant-based butter.
- Chocolate Lovers: Mix in dark chocolate or white chocolate chips along with the Oreos for an extra dessert punch.
- Spiced Cookies: Add a teaspoon of cinnamon or a pinch of nutmeg to the dough for a warm, cozy flavor profile.
Serving Suggestions
- Pair your Cookies ‘n Cream Peanut Butter with a glass of cold milk for a classic treat.
- Serve them alongside a scoop of vanilla or chocolate ice cream for an indulgent dessert.
- For a fun twist, add a dollop of whipped cream on top.
- Arrange cookies on a decorative plate for a lovely presentation during gatherings.
- Enjoy them with a cup of hot coffee or tea for a cozy afternoon snack.
FAQs about Cookies ‘n Cream Peanut Butter
As you dive into making these delightful Cookies ‘n Cream Peanut Butter, you may have some questions. Here are a few common ones that often pop up:
Can I substitute crunchy peanut butter for creamy?
Absolutely! Crunchy peanut butter will add a nice texture, but make sure it’s easy to mix for the best consistency.
How do I know when the cookies are done baking?
Keep an eye on the edges of the cookies. They should be lightly browned, while the centers may still look a bit soft. They will firm up as they cool!
Can I use other types of cookies instead of Oreos?
Yes! Feel free to get creative with other sandwich cookies like Chips Ahoy or even homemade cookies. Each will bring a unique flavor to your cookies!
What’s the best way to store Cookies ‘n Cream Peanut Butter?
Store them in an airtight container at room temperature for up to three days. For longer storage, freeze them between layers of paper towels for up to one month.
Can I make the dough ahead of time?
Yes! You can prepare the dough, wrap it tightly, and refrigerate it for up to 24 hours before baking. Just let it sit at room temperature for a few minutes to soften before you scoop and bake!
Final Thoughts
Making Cookies ‘n Cream Peanut Butter is more than just a baking project; it’s a delightful experience that transforms your kitchen into a haven of scents and smiles. I love watching my family eagerly wait for the cookies to cool, their excitement palpable. Each bite offers a heavenly combination of sweet and salty, a reminder that simplicity can be extraordinary. With these cookies, you’re not just making dessert; you’re creating moments of joy. So roll up your sleeves, and let the magic happen. Trust me; it’s worth every minute spent in the kitchen!
Print
Cookies ‘n Cream Peanut Butter
- Total Time: 25 minutes
- Yield: 24 cookies 1x
- Diet: Vegetarian
Description
Delicious, creamy, and cookie-filled peanut butter cookies perfect for satisfying your sweet tooth.
Ingredients
- 113 grams unsalted butter, softened
- 200 grams peanut butter (avoid no-stir varieties)
- 1 large egg
- 15 milliliters milk
- 1 teaspoon vanilla extract
- 150 grams packed brown sugar
- 50 grams granulated sugar
- 186 grams all-purpose flour
- ½ teaspoon baking soda
- ¼ teaspoon salt
- 10–12 Oreo cookies, chopped (about 1 ¾ cups)
Instructions
- Set oven temperature to 175°C (350°F). Line two baking trays with parchment paper or silicone baking mats.
- Combine softened butter, peanut butter, brown sugar, and granulated sugar in a mixing bowl. Beat using an electric mixer fitted with a paddle attachment until the mixture is light and fluffy.
- Add the egg, vanilla extract, milk, salt, and baking soda to the creamed mixture. Mix until evenly combined.
- Gradually incorporate the all-purpose flour, mixing until a consistent dough forms. Fold in the chopped Oreo cookies gently to distribute evenly.
- Portion dough into balls approximately 30 grams each using a spoon or scoop. Place them on the prepared baking trays spaced apart. Use a fork to create a criss-cross pattern on the top of each cookie.
- Bake in the preheated oven for 8 to 10 minutes, until the cookies begin to brown lightly around the edges but remain soft in the center.
- Allow the cookies to cool completely on the baking trays before transferring them to an airtight container. Store at room temperature for up to three days or freeze between layers of paper towels for up to one month.
Notes
- Ensure the peanut butter is easy to mix for better consistency.
- Adjust the number of Oreo cookies based on personal preference.
- Storing instructions help maintain freshness longer.
- Prep Time: 15 minutes
- Cook Time: 10 minutes
- Category: Dessert
- Method: Baking
- Cuisine: American
Nutrition
- Serving Size: 1 cookie
- Calories: 150
- Sugar: 10g
- Sodium: 80mg
- Fat: 8g
- Saturated Fat: 3g
- Unsaturated Fat: 4g
- Trans Fat: 0g
- Carbohydrates: 18g
- Fiber: 1g
- Protein: 3g
- Cholesterol: 15mg


