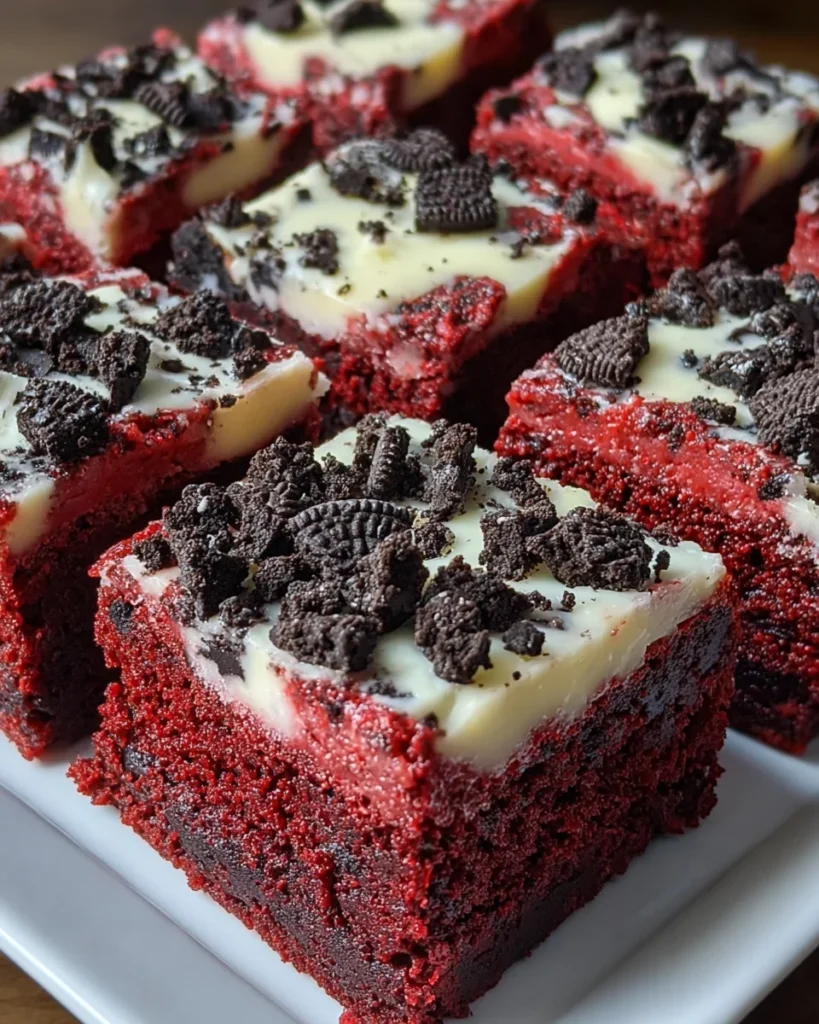
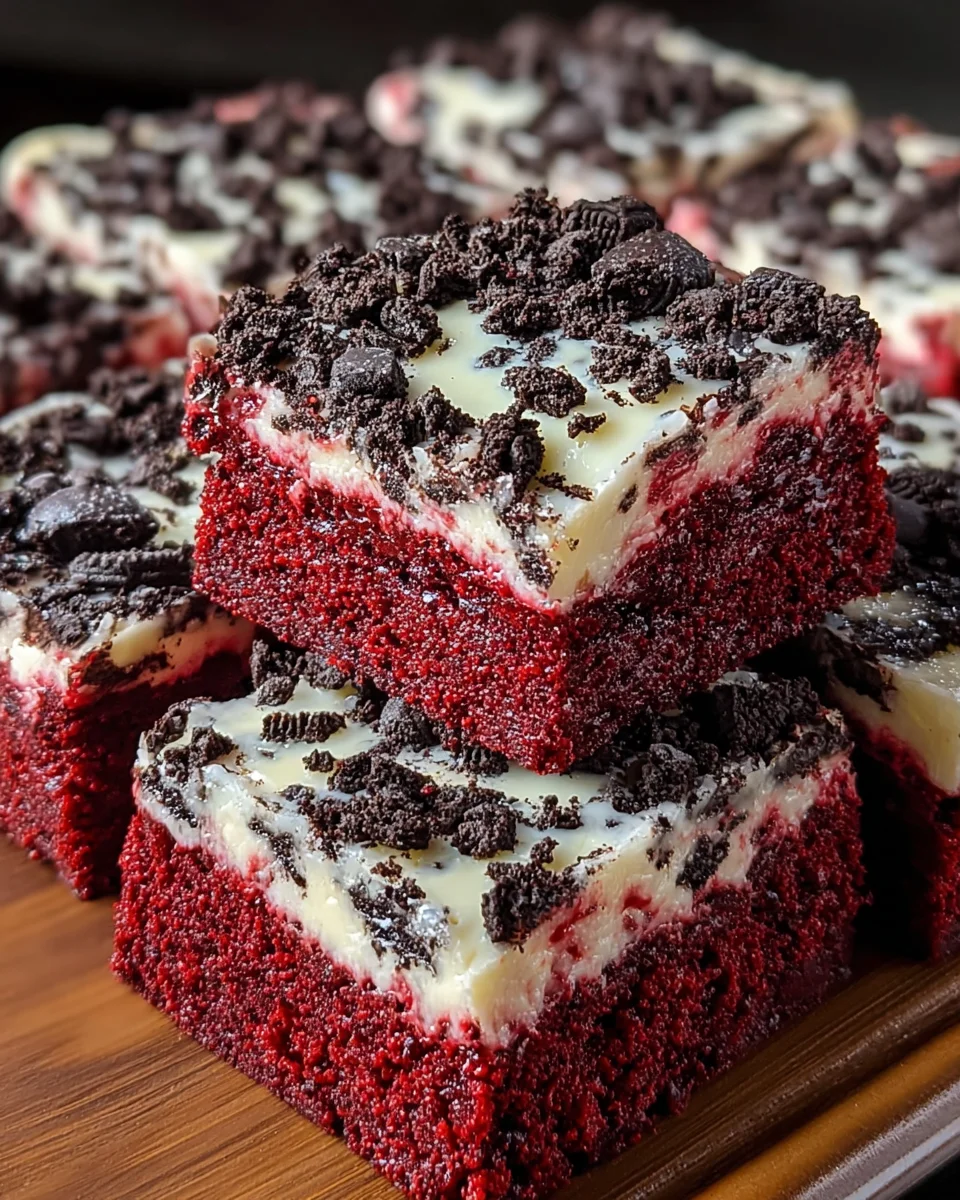
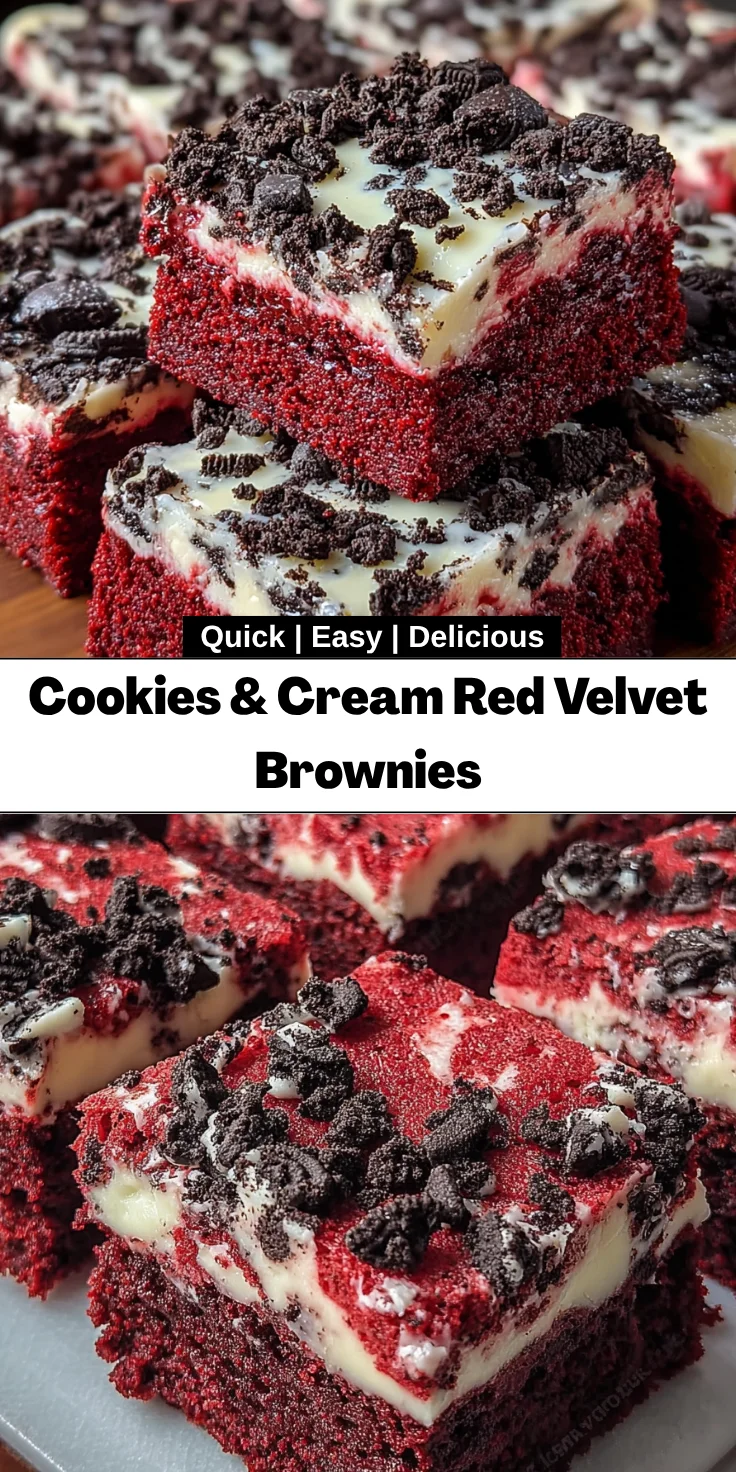
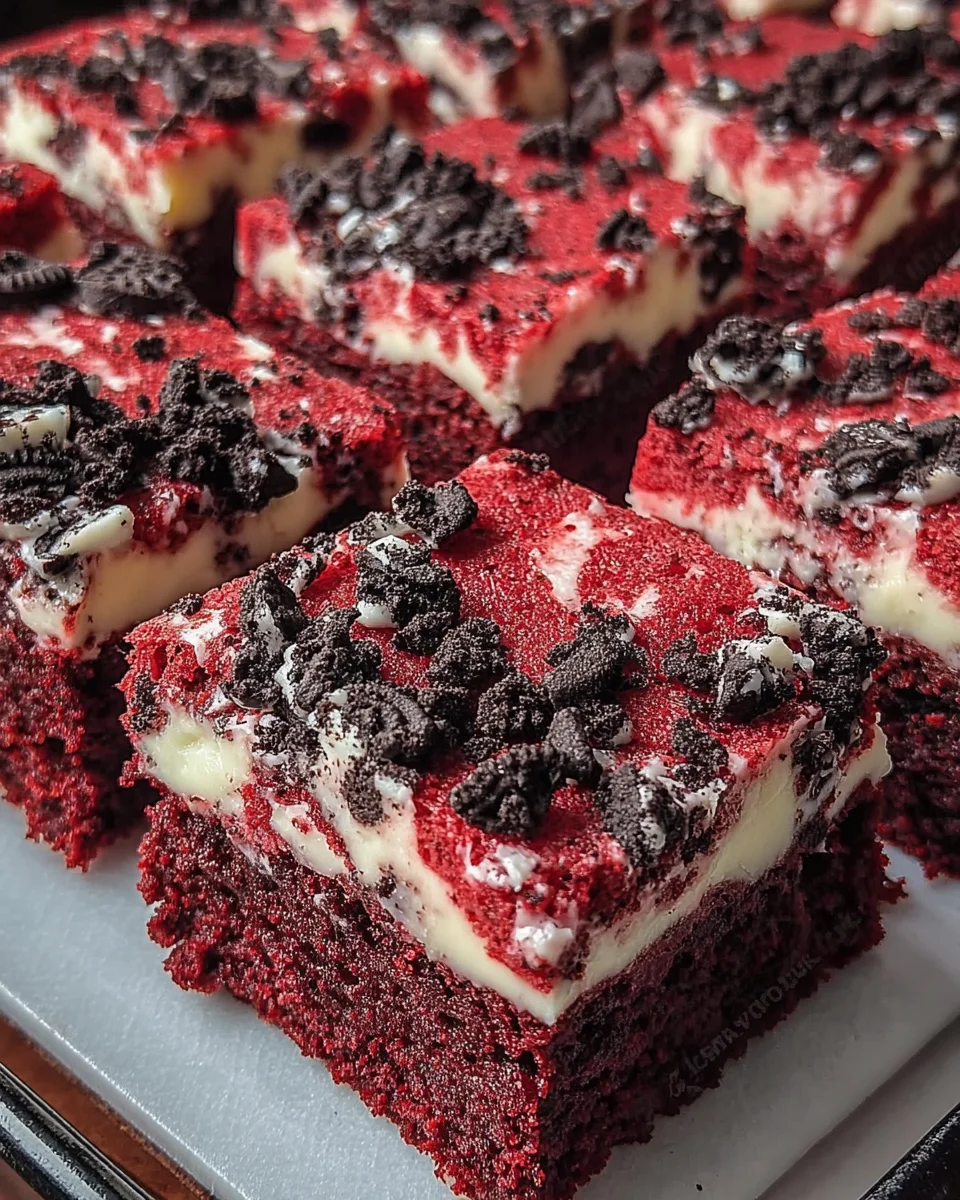
Introduction to Cookies & Cream Red Velvet Brownies
Ah, the joy of baking—there’s nothing quite like it! Today, I want to share with you my delightful Cookies & Cream Red Velvet Brownies. These scrumptious squares are perfect for busy folks like us. Imagine a rich, velvety brownie infused with white chocolate and crunchy bits of Oreo. It’s like a little taste of decadence in every bite, ready to impress your loved ones or make a hectic afternoon feel special. Whether you’re a seasoned kitchen pro or just starting out, these brownies are an easy solution for a sweet pick-me-up!
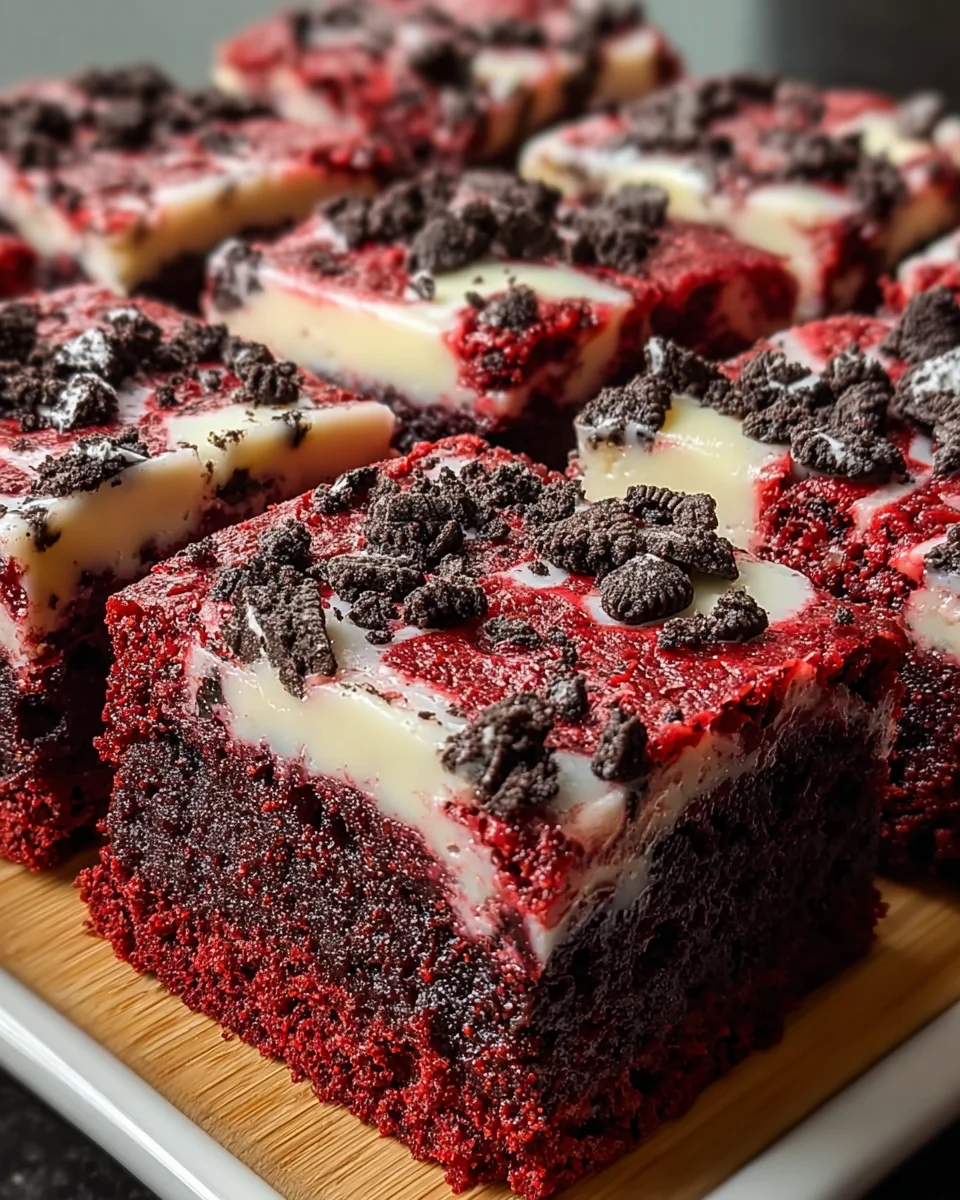
Why You’ll Love This Cookies & Cream Red Velvet Brownies
You’re going to absolutely love these Cookies & Cream Red Velvet Brownies for so many reasons! Not only are they quick and simple to whip up, but they also bring a delightful burst of flavor that satisfies any sweet tooth. These brownies bake beautifully, producing a fudgy texture that melts in your mouth. Plus, they’re perfect for family gatherings or a cozy night in—an easy treat that never fails to impress!
Ingredients for Cookies & Cream Red Velvet Brownies
Here’s what you’ll need to create these delightful Cookies & Cream Red Velvet Brownies. Each ingredient plays a vital role in bringing this recipe to life, so let’s dive in!
- Red velvet cake mix: This is the star ingredient, providing the rich color and soft texture that red velvet desserts are known for.
- Unsalted butter: Melted for a gooey richness, it adds depth to the brownies. If you’re feeling adventurous, brown butter can really enhance the flavor!
- Large eggs: Eggs contribute moisture and help bind everything together, creating a lovely, chewy consistency.
- Vanilla extract: This simple addition amplifies the flavor, making every bite more aromatic and delicious.
- White chocolate chips: These add a creamy sweetness, balancing out the rich cocoa flavor from the cake mix.
- Crushed Oreo cookies: The crunchy bits lend a fun texture and a familiar taste that elevates these brownies to new heights.
Don’t forget, all the exact measurements for these ingredients can be found at the bottom of this article, ready for you to print out! Happy baking!
How to Make Cookies & Cream Red Velvet Brownies
Now that you have all your ingredients ready, let’s delve into the exciting process of making these Cookies & Cream Red Velvet Brownies! Follow these simple steps, and you’ll soon have a tray of deliciously decadent treats perfect for any occasion.
Step 1: Preheat Your Oven
First things first, preheat your oven to 350°F (175°C). This step is crucial because it ensures that your brownies bake evenly. While the oven heats up, grease or line a 9×9-inch baking pan with parchment paper for easy removal later. Believe me, you’ll want to savor every crumb, so make sure nothing sticks!
Step 2: Mix the Dry Ingredients with Wet Ingredients
Next, it’s time to combine everything. In a large bowl, dump in your red velvet cake mix, melted butter, large eggs, and vanilla extract. Using a whisk or a big spoon, mix everything until it’s smooth and well combined. If you spot a few lumps, don’t worry—just keep stirring until you achieve a luscious batter. It should have that inviting red hue, resembling a cozy sunset.
Step 3: Incorporate White Chocolate and Cookies
Now comes the fun part! Gently fold in the white chocolate chips and crushed Oreo cookies. Use a spatula or a wooden spoon, being careful to avoid overmixing. You want those delightful cookie pieces evenly distributed throughout the batter, ensuring that every bite is indulgent. Imagine the crunch of those cookies mingling with the creamy sweetness of the white chocolate—a match made in dessert heaven!
Step 4: Bake to Perfection
Spread your beautiful red velvet batter evenly into the prepared baking pan. Slide it into your preheated oven, and bake for 25–30 minutes. Keep an eye on them! You’ll know they’re done when a toothpick inserted in the center comes out with a few moist crumbs—not wet batter. This ensures that your brownies will be deliciously fudgy. Trust your instincts; that warm, inviting aroma will guide you!
Step 5: Cool and Serve
Once baked to perfection, let the brownies cool completely in the pan on a wire rack. Patience is key here; cooling helps them set beautifully! When they’re cool, grab a sharp knife and cut them into squares. For an extra touch, dust the top with some powdered sugar or serve with a side of vanilla ice cream. Trust me, your family will be begging for seconds (and thirds)!
Tips for Success
- Measure your ingredients accurately for the best results.
- Let your butter cool slightly before adding it to avoid scrambling the eggs.
- Use a rubber spatula to improve folding without overmixing.
- Check for doneness a few minutes before the timer goes off.
- Let the brownies cool fully to enhance the fudgy texture.
- Don’t hesitate to get creative with toppings like whipped cream or sprinkles!
Equipment Needed
- Baking pan: A 9×9-inch pan works best, but you can use an 8×8-inch pan if you prefer thicker brownies.
- Mixing bowl: A large bowl is perfect, but a stand mixer can save you some elbow grease.
- Whisk or spoon: Grab any sturdy stirring tool you have on hand!
- Parchment paper: Use this for easy cleanup, or simply grease the pan generously.
- Cooling rack: If you don’t have one, a plate will do just fine to help your brownies cool.
Variations
- Nutty Twist: Add some chopped pecans or walnuts for a delightful crunch that complements the creamy texture.
- Chocolate Lovers: Swap half of the white chocolate chips with dark chocolate chips for a richer flavor.
- Minty Fresh: Stir in a few drops of mint extract and top with chocolate mint drizzle for a refreshing take.
- Gluten-Free Option: Use a gluten-free red velvet cake mix to make these brownies suitable for those with gluten sensitivities.
- Vegan Treat: Replace eggs with flaxseed meal and use a dairy-free butter alternative along with vegan white chocolate chips.
Serving Suggestions
- Enjoy these brownies warm with a scoop of vanilla ice cream for a heavenly combination.
- Pair with a rich coffee or a sweet latte to balance the flavors.
- For a pretty presentation, dust with powdered sugar or drizzle with melted white chocolate.
- Serve alongside fresh berries for a pop of color and added freshness.
- Consider packing them in a cute box as a thoughtful gift for friends!
FAQs about Cookies & Cream Red Velvet Brownies
Can I use homemade red velvet cake mix for these brownies?
Absolutely! If you love to make things from scratch, feel free to use your favorite homemade red velvet cake recipe. Just remember to adjust the other ingredients accordingly!
What can I substitute for white chocolate chips?
If white chocolate isn’t your thing, swap in semi-sweet or dark chocolate chips. They’ll create a wonderfully rich contrast with the red velvet base. Just keep in mind, it will change the overall flavor profile a bit!
How should I store leftovers?
To keep these delightful Cookies & Cream Red Velvet Brownies fresh, store them in an airtight container at room temperature for up to 3 days. You can also freeze them for up to a month—just make sure to separate layers with parchment paper!
Can I double the recipe for a larger crowd?
What toppings work well with these brownies?
Oh, there are so many delicious options! Try whipped cream, crushed Oreos on top, or even a dollop of cream cheese frosting for an extra treat. Let your creativity shine!
Final Thoughts
These Cookies & Cream Red Velvet Brownies are more than just a dessert; they’re a heartfelt way to show you care. Whether you whip them up for a family gathering or share them with friends, these brownies have a way of bringing smiles. With their rich flavor and delightful textures, every bite is a little moment of joy. Plus, the simplicity of the recipe means you can enjoy these treats without spending hours in the kitchen. So, roll up your sleeves, embrace your inner baker, and let these brownies become a treasured part of your dessert repertoire!
Print
Cookies & Cream Red Velvet Brownies
- Total Time: 45 minutes
- Yield: 16 servings 1x
- Diet: Vegetarian
Description
Delicious red velvet brownies infused with white chocolate and crushed Oreo cookies, perfect for any dessert lover.
Ingredients
- 1 box red velvet cake mix (15.25 ounces)
- 1/2 cup unsalted butter, melted
- 2 large eggs
- 1 teaspoon vanilla extract
- 1 cup white chocolate chips
- 1 cup crushed Oreo cookies (about 10–12 cookies)
Instructions
- Preheat your oven to 350°F (175°C). Grease or line a 9×9-inch baking pan with parchment paper.
- In a large bowl, combine the red velvet cake mix, melted butter, eggs, and vanilla extract. Stir until the mixture is smooth and well combined.
- Gently fold in the white chocolate chips and crushed Oreo cookies until they are evenly distributed in the batter.
- Spread the batter evenly into the prepared baking pan. Bake in the preheated oven for 25-30 minutes, or until a toothpick inserted into the center comes out with a few moist crumbs.
- Allow the brownies to cool completely in the pan on a wire rack before cutting them into squares. Serve and enjoy!
Notes
- For a richer flavor, you can use brown butter instead of regular melted butter.
- Store any leftovers in an airtight container at room temperature for up to 3 days.
- These brownies can also be frozen for up to a month.
- Prep Time: 15 minutes
- Cook Time: 30 minutes
- Category: Dessert
- Method: Baking
- Cuisine: American
Nutrition
- Serving Size: 1 brownie
- Calories: 210
- Sugar: 18g
- Sodium: 150mg
- Fat: 10g
- Saturated Fat: 6g
- Unsaturated Fat: 4g
- Trans Fat: 0g
- Carbohydrates: 28g
- Fiber: 1g
- Protein: 2g
- Cholesterol: 35mg