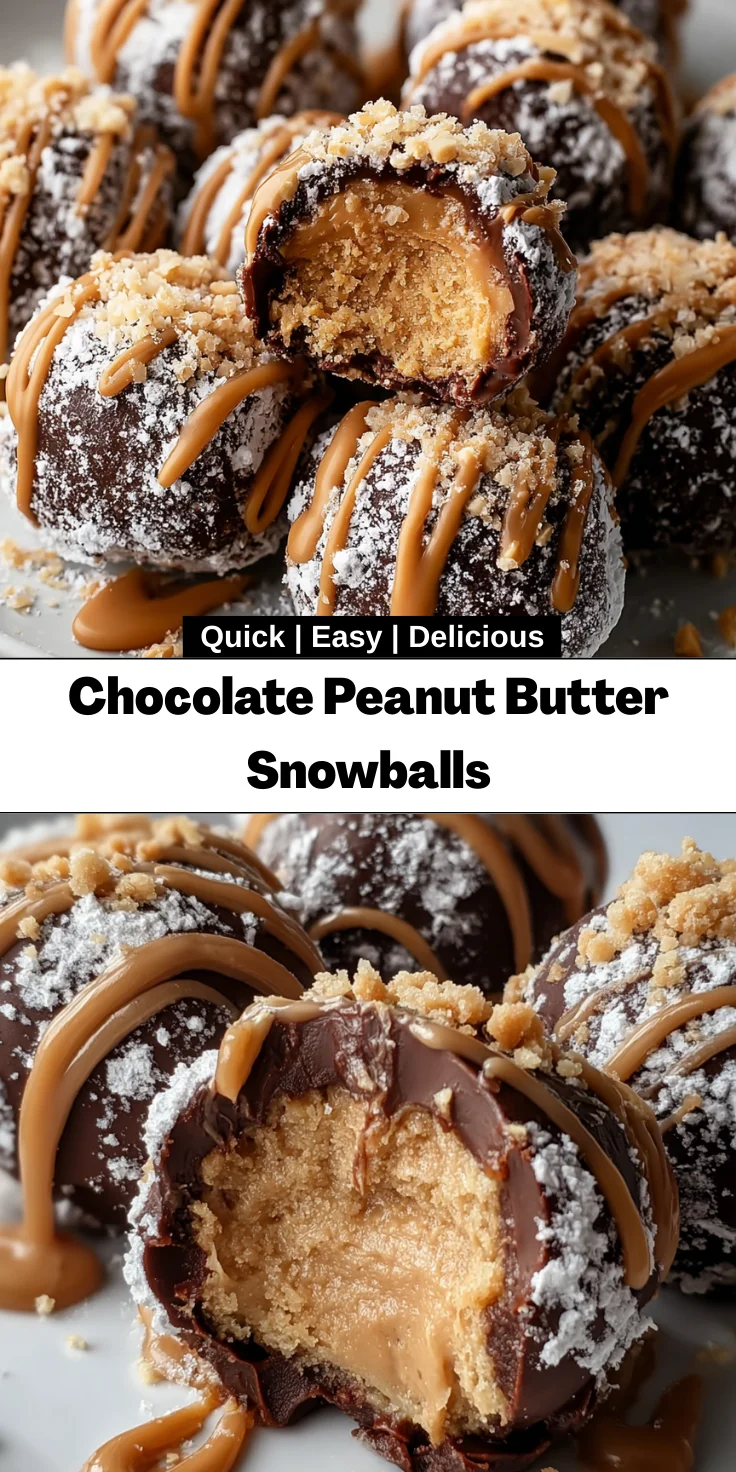
Introduction to Chocolate Peanut Butter Snowballs
There’s something magical about combining chocolate and peanut butter, isn’t there? It’s like a warm hug for your taste buds! Today, I’m excited to share my favorite sweet treat—Chocolate Peanut Butter Snowballs. These delightful bites are perfect for busy mornings or unexpected guests.
They’re simple to make and require no baking, which fits seamlessly into our hectic lives. Plus, they’re the kind of indulgence that feels special, even on a Tuesday evening. So grab your apron, and let’s start this delicious culinary journey together!
Why You’ll Love This Chocolate Peanut Butter Snowballs
If you’re a busy mom or professional, the last thing you need is a complicated recipe. Chocolate Peanut Butter Snowballs are not only quick to whip up, but they also require no baking. The creamy, chocolatey goodness melts in your mouth, making every bite a moment of bliss. Whether for a snack or dessert, these treats please everyone—from picky eaters to your most sophisticated friends!
Ingredients for Chocolate Peanut Butter Snowballs
Making Chocolate Peanut Butter Snowballs is a breeze with these simple ingredients. Each component plays a delightful role in creating that creamy, dreamy texture we all crave!
- Creamy Peanut Butter: This is the star of the show! It adds rich flavor and that creamy texture we associate with comfort food.
- Unsalted Butter: A little melted butter enhances the richness, making your snowballs extra decadent.
- Powdered Sugar: This sweetener helps bind everything together, giving those snowballs a nice sweetness. You can adjust the amount to taste.
- Vanilla Extract: A splash of vanilla elevates the flavor profile, giving your treats a wonderful aroma.
- Fine Salt: Just a pinch can enhance sweetness and balance flavors. It’s an optional but valuable add-on!
- Finely Crushed Graham Crackers: For added texture and a hint of nostalgia, mix these in! They’re completely optional but oh-so-delicious.
- Crushed Vanilla Wafers: These can be swapped in for graham crackers for a sweeter crunch.
- Powdered Milk: If you’re aiming for a unique twist, this can add creaminess and depth of flavor. It’s optional too!
- Semi-Sweet or Milk Chocolate: This is the coating that transforms your snowballs into a chocolate lover’s dream!
- Vegetable or Coconut Oil: This optional ingredient helps achieve a smoother chocolate dip. It’s a great add-on if you prefer a thinner consistency.
- Soft Caramel Candies or Caramel Sauce: Drizzling caramel adds an extra layer of sweetness that pairs beautifully with chocolate. Yum!
- Heavy Cream or Milk: Mix with caramel to ensure it’s pourable and creamy for drizzling.
- Sea Salt Flakes: A little sprinkle on top offers a delightful contrast to the sweetness.
- Crushed Peanuts: If you’re a nut lover, add these for a crunchy topping and extra flavor.
- Sprinkles: These add a festive touch! Use them for presentation or just for fun.
- White Chocolate Drizzle: Elevate your snowballs even further with a beautiful drizzle for elegance!
For exact measurements and to make this recipe easily printable, simply scroll to the bottom of the article where you’ll find all the details laid out for you. Now, let’s gather these yummy ingredients and get to work!
How to Make Chocolate Peanut Butter Snowballs
Now that we’ve gathered our ingredients, let’s dive into the steps for creating these delightful Chocolate Peanut Butter Snowballs. Each step is simple, making this a stress-free baking adventure!
Step 1: Prepare the Peanut Butter Mixture
Start by placing creamy peanut butter in a medium mixing bowl. Add melted butter and vanilla extract. Don’t forget that pinch of salt! Mix everything until it’s lovely and smooth. Now comes the fun part—gradually sift in the powdered sugar. Keep stirring until you have a thick, pliable dough that holds together. If it’s too sticky, just add a bit more powdered sugar until it’s just right!
Step 2: Incorporate Optional Ingredients
If you want to kick it up a notch, consider adding crushed graham crackers or vanilla wafers for extra texture. They don’t just provide crunch; they add a hint of nostalgia that reminds me of camping treats. Mix them in gently until they’re evenly distributed.
Step 3: Form the Snowballs
Next, it’s time to shape our sweet mixture into snowballs! Use a teaspoon or small scoop to portion out the mixture. Roll each piece between your palms to form smooth balls, about an inch in diameter. Picture little snowy delights! Place these on a baking sheet lined with parchment paper, leaving some space between them so they can chill without sticking together.
Step 4: Chill the Snowballs
Now, we need to let these little guys firm up. Pop the baking sheet in the refrigerator for at least 25 minutes. If you’re in a rush, a quick 10 to 15 minutes in the freezer works too! This step is essential, as firm centers allow for a perfect chocolate coat.
Step 5: Melt the Chocolate
While your snowballs are chilling, let’s melt the chocolate! Grab a microwave-safe bowl and place your semi-sweet or milk chocolate chips inside. Microwave in 20 to 30-second intervals, stirring after each burst until the chocolate is smooth and glossy. If it’s too thick, mix in a teaspoon of vegetable or coconut oil to create a dreamy consistency that’s perfect for dipping.
Step 6: Coat the Snowballs
Once the snowballs are firm, it’s time to dip! Using a fork or a dipping tool, submerge each snowball in the melted chocolate, letting the excess chocolate drip off. This is crucial to avoid a gooey mess! Place the coated balls back on the parchment-lined tray, creating a beautiful shimmering layer.
Step 7: Add the Caramel Drizzle
What’s better than chocolate? Caramel, of course! Melt your soft caramel candies with a splash of heavy cream or milk in the microwave, heating it in 10 to 15-second increments. Once smooth, drizzle it over your chocolate-coated snowballs using a spoon or piping bag. This adds a dreamy layer of sweetness—a true game-changer!
Step 8: Chill Again
Finally, return your tray to the refrigerator for another 15 to 20 minutes. This ensures the chocolate and caramel coatings set perfectly. Once set, your Chocolate Peanut Butter Snowballs are ready for their sweet debut!
Tips for Success
- Make sure your peanut butter is creamy for the best texture.
- Measure your powdered sugar accurately—it affects dough consistency.
- Chill your snowballs long enough for easy handling and dipping.
- Use a fork or dipping tool to coat evenly without mess.
- Get creative with toppings—mix and match for a fun twist!
Equipment Needed
- Mixing Bowl: A medium-sized bowl will do. A large bowl can work too if you’re making a double batch.
- Measuring Cups and Spoons: Essential for accuracy—use a kitchen scale for precision if you have one.
- Parchment Paper: This keeps your snowballs from sticking. Wax paper is a good alternative.
- Microwave-Safe Bowl: Necessary for melting chocolate. A glass bowl can double as a mixing bowl.
- Fork or Dipping Tool: For smooth coating. Tweezers can work in a pinch as well!
Variations
- Nut Butter Swaps: Try almond or cashew butter instead of peanut butter for a unique flavor twist.
- Sugar Substitutes: Use natural sweeteners like agave syrup or honey in place of powdered sugar for a healthier option.
- Gluten-Free Alternatives: Substitute graham crackers and vanilla wafers with gluten-free options to cater to dietary needs.
- Vegan Version: Choose dairy-free chocolate and nut butters, along with coconut oil, to make these treats vegan-friendly.
- Flavor Boost: Add a sprinkle of cinnamon or a dash of espresso powder to the peanut butter mixture for extra depth of flavor.
Serving Suggestions
- Pair your Chocolate Peanut Butter Snowballs with a hot cup of coffee or tea for a delightful afternoon treat.
- Serve with fresh fruit like strawberries or bananas for a refreshing balance to the sweetness.
- Presentation matters! Place snowballs in decorative cupcake liners for a lovely display at parties.
- Add them to a dessert platter alongside brownies and cookies for an inviting dessert spread.
- For kids, these treats make a fun addition to lunch boxes or after-school snacks!
FAQs about Chocolate Peanut Butter Snowballs
Can I make these snowballs ahead of time?
Absolutely! Chocolate Peanut Butter Snowballs can be made a few days in advance. Store them in an airtight container in the refrigerator. For longer storage, you can freeze them for up to three months. Just allow them to thaw before serving for the best texture!
Are there gluten-free options?
Yes, you can easily adapt this recipe for gluten-free diets. Simply choose gluten-free graham crackers and vanilla wafers. Most brands will have options that maintain the same delightful flavor and crunch, making them perfect for everyone to enjoy!
How can I make them healthier?
If you want to lighten up your snowballs, consider using natural sweeteners like maple syrup or agave instead of powdered sugar. You can also swap out half of the peanut butter for a mashed banana for extra flavor while reducing fat!
Final Thoughts
Creating Chocolate Peanut Butter Snowballs is more than just making a treat; it’s about bringing joy into everyday moments. The blend of flavors dances on your palate, creating pure bliss. Imagine the smiles on your family’s faces as they indulge in these little delights. With no baking required, you can whip them up anytime for a quick sweet escape. Each snowball is a reminder that life’s sweetest moments often come from simple pleasures. So, gather your loved ones, make a batch together, and let the laughter and chocolatey goodness fill your kitchen. These snowballs are sure to become a cherished favorite!
Print
Chocolate Peanut Butter Snowballs
- Total Time: 45 minutes
- Yield: 24 snowballs 1x
- Diet: Vegetarian
Description
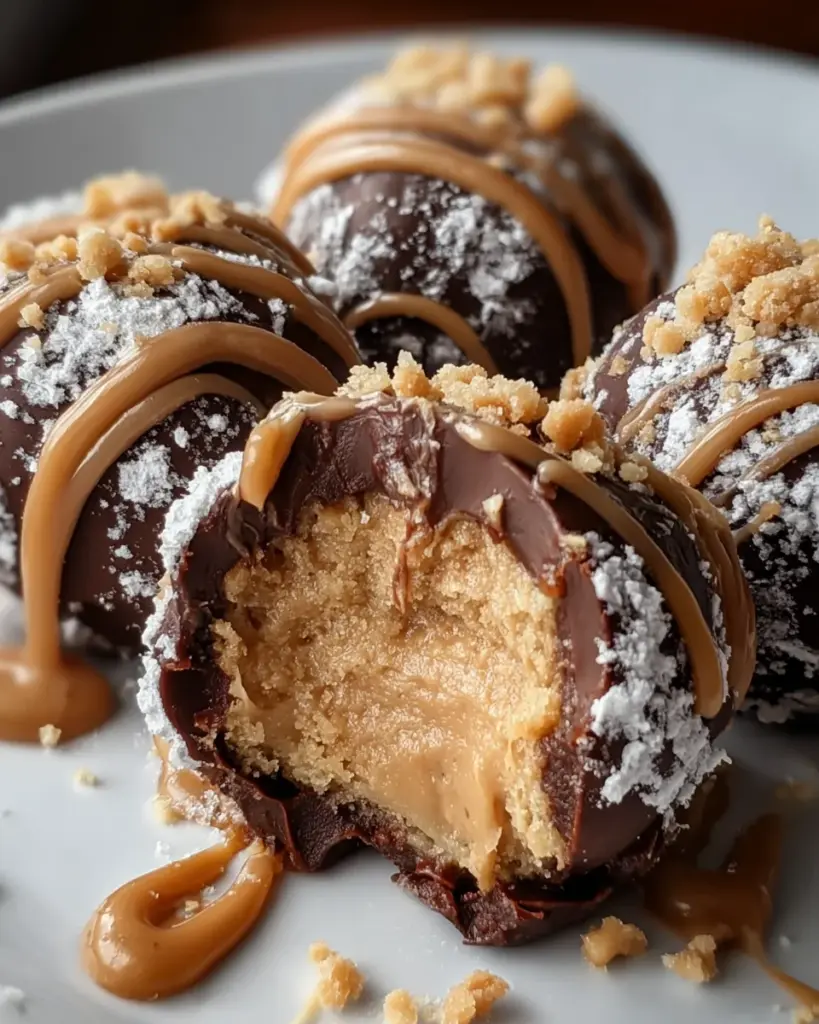
Delicious and creamy Chocolate Peanut Butter Snowballs coated in chocolate and drizzled with caramel for a sweet treat.
Ingredients
- 1 cup creamy peanut butter
- 2 tablespoons unsalted butter, melted
- 1 1/2 to 2 cups powdered sugar, sifted
- 1/4 teaspoon vanilla extract
- Pinch fine salt (optional)
- 1/2 cup finely crushed graham crackers (optional)
- 1/2 cup crushed vanilla wafers (optional)
- 1/4 cup powdered milk (optional)
- 12 ounces semi-sweet or milk chocolate melting wafers or chips
- 1 teaspoon vegetable or coconut oil (optional)
- 1/4 cup soft caramel candies or caramel sauce
- 1 teaspoon heavy cream or milk
- Sea salt flakes (for decoration)
- Crushed peanuts (for decoration)
- Sprinkles (for decoration)
- White chocolate drizzle (for decoration)
Instructions
- In a medium mixing bowl, blend peanut butter, melted butter, vanilla extract, and a pinch of salt until smooth. Gradually incorporate sifted powdered sugar until a thick, pliable dough forms, adjusting powder as needed for a firm, non-sticky texture.
- If desired, mix in crushed graham crackers, vanilla wafers, or powdered milk for added structure and flavor.
- Line a baking sheet with parchment paper. Portion dough using a teaspoon or small scoop, then roll between palms to form smooth balls, approximately 1 inch in diameter. Arrange on prepared tray.
- Place tray in the refrigerator for a minimum of 25 minutes, or freeze for 10 to 15 minutes, to ensure centers are firm before coating.
- In a microwave-safe bowl, melt chocolate in 20 to 30 second intervals, stirring after each, until fully smooth. Blend in oil if a thinner consistency is needed. Alternatively, use a double boiler over low heat.
- Remove centers from refrigeration. Using a fork or dipping tool, submerge each ball in melted chocolate, allowing excess to drip off. Place coated balls back on parchment-lined tray.
- Melt caramels with heavy cream or milk in a microwave-safe bowl, heating in 10 to 15 second intervals and stirring until fluid and smooth.
- Pipe or spoon melted caramel in thin lines over chocolate-coated balls. If using, immediately add sea salt flakes, crushed peanuts, sprinkles, or white chocolate drizzle before coatings set.
- Return tray to the refrigerator for 15 to 20 minutes until chocolate and caramel are fully firm. Transfer finished snowballs to an airtight container for storage.
Notes
- Store in an airtight container in the refrigerator.
- Can be frozen for longer shelf-life.
- Add your favorite toppings for personalization.
- Prep Time: 15 minutes
- Cook Time: 20 minutes
- Category: Dessert
- Method: No-bake
- Cuisine: American
Nutrition
- Serving Size: 1 snowball
- Calories: 120
- Sugar: 10g
- Sodium: 50mg
- Fat: 7g
- Saturated Fat: 3g
- Unsaturated Fat: 4g
- Trans Fat: 0g
- Carbohydrates: 12g
- Fiber: 1g
- Protein: 3g
- Cholesterol: 5mg