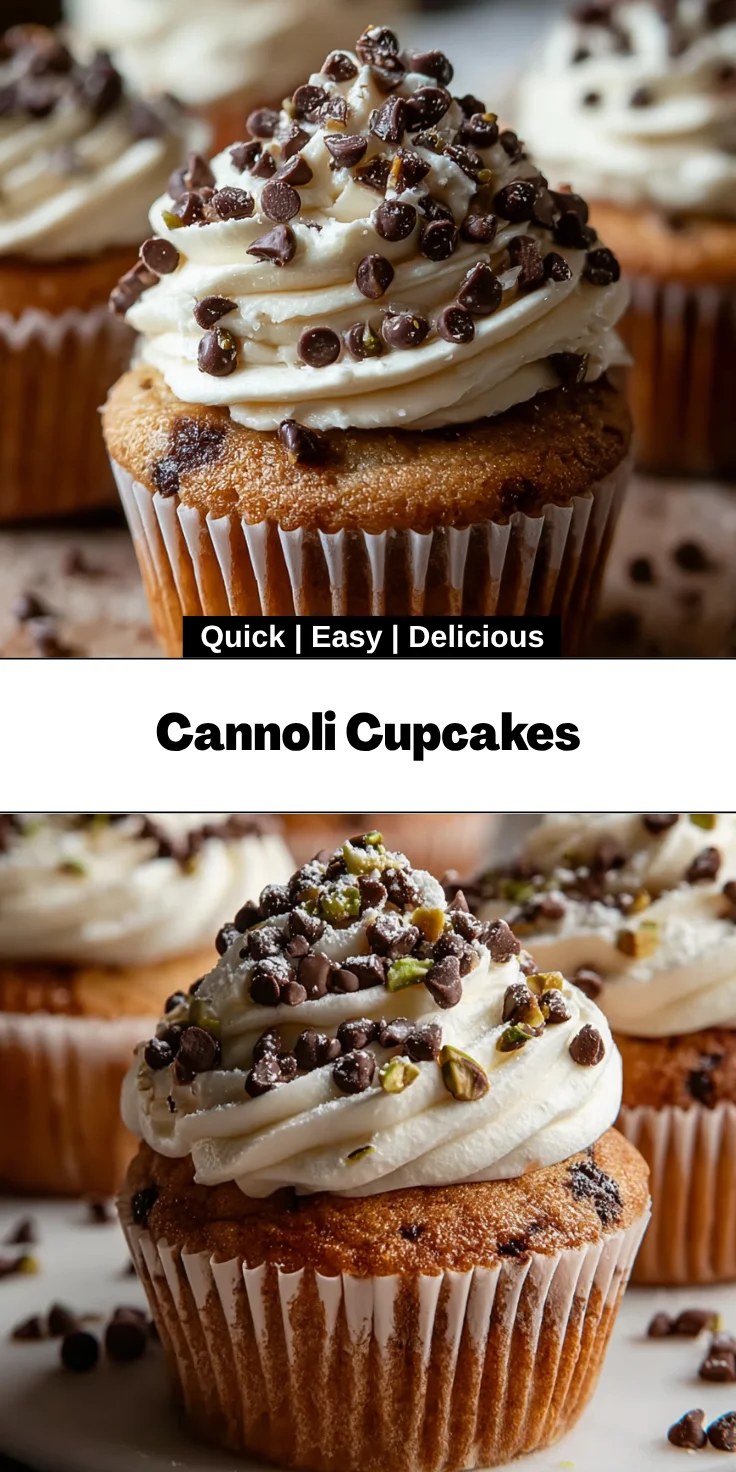
Introduction to Cannoli Cupcakes
Ah, Cannoli Cupcakes! They’re like a cozy hug from a beloved Italian grandmother, mixing tradition with a sweet twist. As a busy mom, I know how precious time can be, yet we all crave something special to brighten our days. These delightful cupcakes bring the classic flavors of cannoli into a soft, moist treat that’s perfect for any occasion. Whether it’s a birthday, an afternoon pick-me-up, or a last-minute potluck, these cupcakes will impress everyone—leaving you with a smile and a well-deserved moment of indulgence.
Why You’ll Love This Cannoli Cupcakes
These Cannoli Cupcakes capture the rich, creamy essence of the classic dessert, but with a much simpler and quicker approach. They bake up beautifully moist and fluffy, and the combination of flavors will make your taste buds dance with joy. Plus, making these treats can be a fun family activity, allowing your kids to join in the kitchen chaos while creating mouthwatering memories together. It’s the perfect blend of ease, speed, and deliciousness!
Ingredients for Cannoli Cupcakes
Gathering the right ingredients is crucial for making these Cannoli Cupcakes truly special. Each one plays a key role in delivering that classic taste. Here’s what you’ll need:
- All-purpose flour: The base of our cupcakes, giving them structure and a soft crumb.
- Baking powder: This little miracle worker helps the cupcakes rise, making them light and fluffy.
- Salt: Just a pinch enhances all the flavors, creating that delicious balance we crave.
- Unsalted butter: Softened to room temperature, it adds richness and moisture, creating a tender bite.
- Granulated sugar: Sweetness, of course! It helps to create that lovely golden crust and adds flavor.
- Large eggs: These bind everything together and contribute to the overall texture.
- Vanilla extract: A splash of this fragrant essence elevates the flavor profile, making it more irresistible.
- Whole milk: Adding moisture and richness, it keeps the cupcakes nice and tender.
- Sour cream: This creamy ingredient brings a slight tang, enhancing the cupcake’s flavor and texture.
- Ricotta cheese: The star ingredient! It gives a creamy filling that captures the essence of classic cannoli.
- Powdered sugar: Used in the filling, this sweetener blends perfectly, creating a smooth texture.
- Mini chocolate chips: Little bursts of chocolate in each bite that harmonize wonderfully with the ricotta.
- Chopped pistachios (optional): For a delightful crunch and a touch of color, these can be added to the filling.
- Heavy cream: This luscious cream is whipped to a cloud-like topping that complements the cupcakes perfectly.
- More powdered sugar for whipped cream: This adds sweetness, balancing the rich flavors of the cupcakes.
- More vanilla extract for topping: A little extra vanilla in the whipped cream ties all the flavors together.
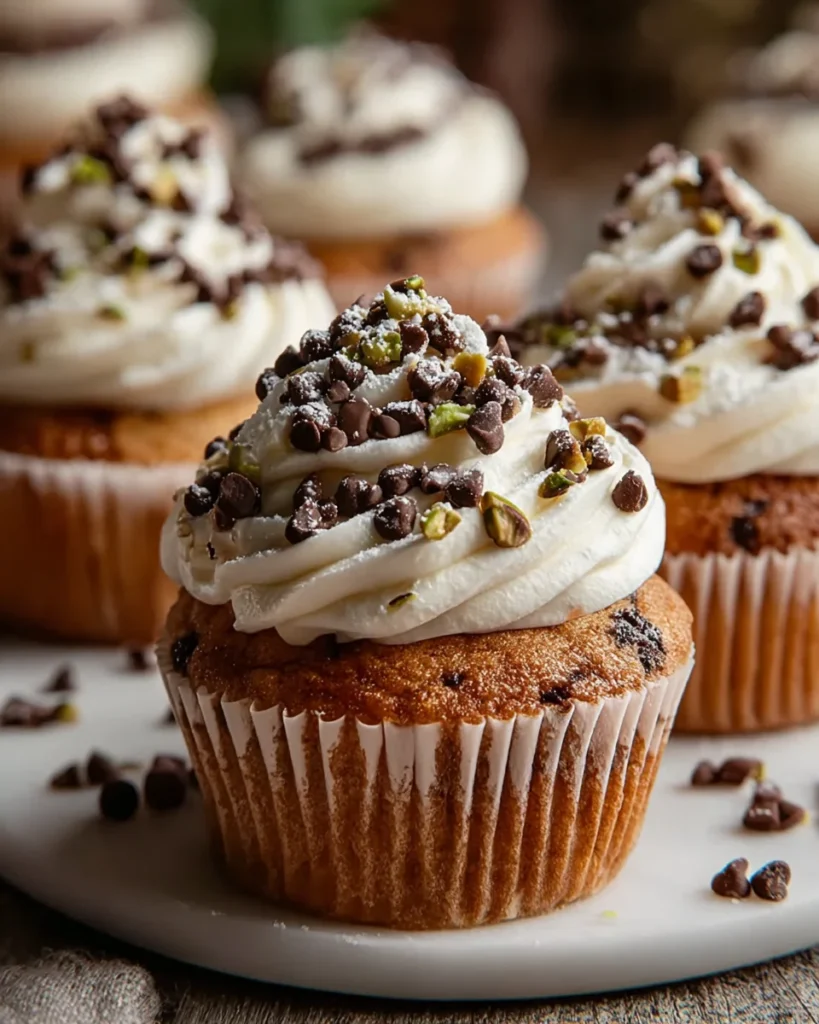
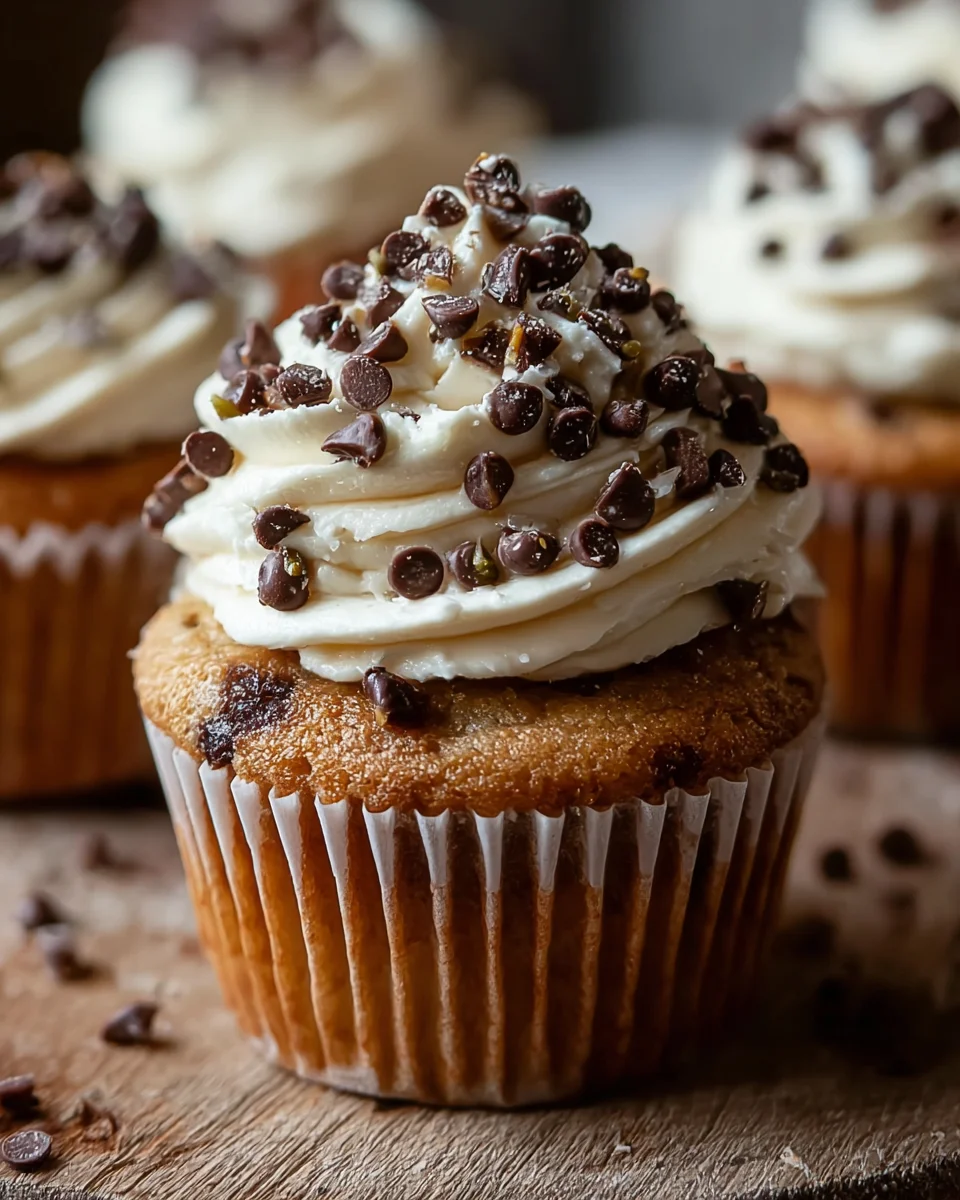
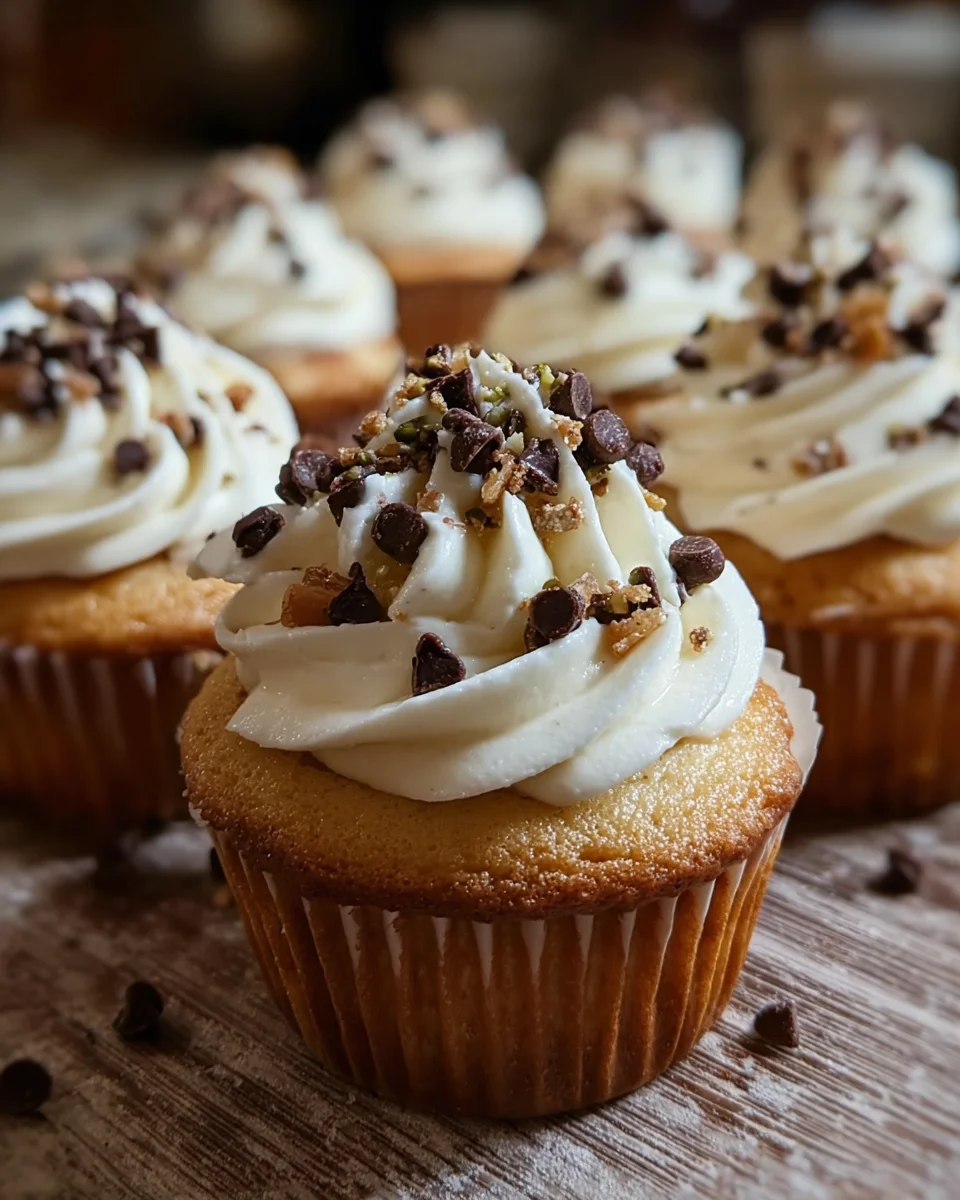
- Mini chocolate chips and chopped pistachios (for garnish): These toppings not only look appealing, but they also intensify the flavor.
Make sure to check the bottom of the article for specific quantities of each ingredient, which you can print out for easy reference.
How to Make Cannoli Cupcakes
Step 1: Preheat and Prepare
To kick things off, preheat your oven to 350°F (175°C). While it warms up, grab a 12-cup muffin tin and line it with cupcake liners. These lovely little liners not only make the cupcakes easy to remove, but they also add a dash of color to your presentation. I always pick bright colors to brighten up the dessert table. With the oven ready and the tin lined, you’re well on your way to creating these delightful Cannoli Cupcakes!
Step 2: Mix Dry Ingredients
In a medium bowl, whisk together the all-purpose flour, baking powder, and salt. This mixture is your dry ingredient base, so take a moment to mix them thoroughly. It’s important to incorporate air into the flour, ensuring that the cupcakes rise beautifully. I often think of this step as giving your cupcakes a little extra love, setting them up for success. Set this bowl aside while you work on the next steps.
Step 3: Cream Butter and Sugar
Now comes the fun part! In a large mixing bowl, cream together your softened unsalted butter and granulated sugar. Use a hand mixer or stand mixer on medium speed until the mixture is light and fluffy—about 2 to 3 minutes. You want it to look pale and dreamy! This step is crucial for achieving that moist texture. Just like whipping up a sweet dream, pretend you’re whisking all your worries away. Add eggs one at a time, mixing well to combine before moving on.
Step 4: Combine Ingredients
Next up, it’s time to bring life to the batter. Gradually add in your dry ingredients, alternating with the whole milk and sour cream. I recommend starting and ending with the dry mixture. Mix until everything is just combined. Trust me, it’s better to leave some lumps than to overmix! Overmixing can lead to dense cupcakes, and nobody wants that. Picture those fluffy, airy bites—it’s worth the patience!
Step 5: Bake the Cupcakes
It’s time to bake! Divide the lovely batter evenly between your cupcake liners—fill them about two-thirds full. Pop the muffin tin in your preheated oven and bake for 18 to 20 minutes. Stick a toothpick in the center of a cupcake; if it comes out clean, they’re done! Once baked, let the cupcakes cool in the tin for about 5 minutes before transferring them to a wire rack. Allow them to cool completely; patience pays off in flavor and texture!
Step 6: Prepare the Filling
While the cupcakes are cooling, whip up the creamy filling. In a medium bowl, combine the drained ricotta cheese, powdered sugar, and vanilla extract. Mix until it’s smooth and creamy. You want a luscious filling that’s reminiscent of traditional cannoli! For extra flavor, fold in mini chocolate chips and chopped pistachios if you’re feeling adventurous. This filling is the magic layer that makes these Cannoli Cupcakes shine!
Step 7: Make Whipped Cream Topping
Now let’s create that heavenly whipped cream topping! In a separate bowl, beat the heavy cream along with the extra powdered sugar and vanilla extract at medium-high speed until soft peaks form. This means when you lift the beaters, the peaks of cream gently droop down—that’s how you know it’s ready. This fluffy cloud of sweetness will complement the rich flavors of your cupcakes beautifully.
Step 8: Fill and Decorate
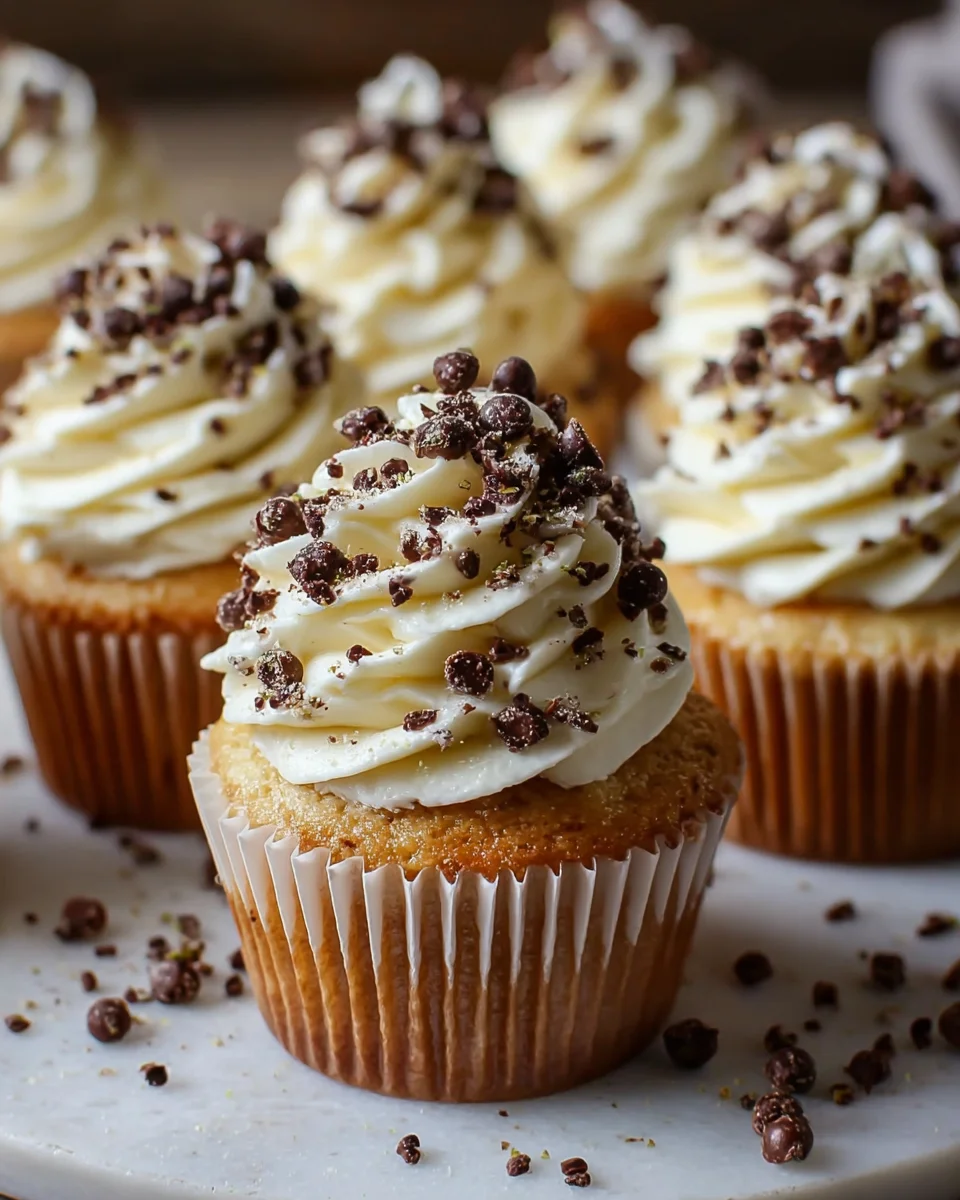
Once your cupcakes are cool, it’s time to fill them with that delightful ricotta filling. Use a small knife or a cupcake corer to remove a little plug from the center of each cupcake. Don’t worry—a bit of a “cupcake excavation” can be quite satisfying! Fill each one generously with the creamy mixture, then pipe or spoon that whipped cream on top like a fluffy cloud. Finally, don’t forget to garnish! Sprinkle extra mini chocolate chips and chopped pistachios for that decorative touch—your Cannoli Cupcakes deserve it!
Tips for Success
- Always drain the ricotta cheese well to avoid a watery filling.
- Keep your butter at room temperature for easier creaming.
- Measure flour by spooning it into your measuring cup to avoid packing it down.
- Let the cupcakes cool completely before filling for the best results.
- Have fun decorating—get the kids involved for extra giggles!
Equipment Needed for Cannoli Cupcakes
- 12-cup muffin tin (or a silicone muffin pan for easy removal)
- Cupcake liners (paper or silicone for a fun flair)
- Mixing bowls (both medium and large sizes)
- Whisk (or an electric mixer for less elbow grease)
- Knife or cupcake corer (to create filling space)
- Spatula (for scraping the sides of the bowls)
Variations on Cannoli Cupcakes
- Gluten-Free Option: Substitute all-purpose flour with a gluten-free blend for a delicious gluten-free Cannoli Cupcake.
- Vegan Variation: Use vegan butter, flax eggs (1 tablespoon ground flaxseed mixed with 2.5 tablespoons water per egg), and dairy-free milk to create a vegan-friendly treat.
- Chocolate Cannoli Cupcakes: Incorporate cocoa powder into the batter for a chocolate twist, and use chocolate ricotta for the filling.
- Fruit-Infused Fillings: Add fresh berries or citrus zest to the ricotta mixture for a fruity flavor explosion.
- Different Nut Toppings: Swap pistachios for chopped almonds or hazelnuts to switch up the texture and taste.
Serving Suggestions for Cannoli Cupcakes
- Pair with a strong espresso or a creamy cappuccino for a delightful coffee break.
- Serve alongside fresh berries for a burst of color and flavor.
- Present on a colorful cake stand to elevate your dessert table.
- Dust with a sprinkle of powdered sugar for an elegant touch.
- Enjoy them with a scoop of vanilla gelato for an indulgent treat.
FAQs about Cannoli Cupcakes
Can I make Cannoli Cupcakes ahead of time?
Absolutely! You can bake the cupcakes a day in advance and store them in an airtight container. Just hold off on filling and frosting them until you’re ready to serve. This ensures they stay fresh and delicious.
What can I use instead of ricotta cheese?
If you’re in a pinch, cream cheese can be a great substitute for ricotta. Just soften it, then mix in some powdered sugar and a splash of vanilla to mimic that creamy texture and flavor.
How do I store leftover Cannoli Cupcakes?
Store any uneaten cupcakes in an airtight container in the refrigerator for up to three days. To keep the whipped cream topping fresh longer, you might want to store it separately until serving.
Can I freeze Cannoli Cupcakes?
Yes, you can freeze the cupcakes before frosting them. Just wrap each one tightly in plastic wrap and then place them in a freezer-safe bag. They’ll stay good for about a month. Thaw them in the fridge overnight before frosting and serving!
What’s the secret to making these cupcakes extra fluffy?
The key to fluffy Cannoli Cupcakes is not to overmix your batter and to incorporate enough air when creaming the butter and sugar. Each step is a dance, preparing your cupcakes to rise and shine!
Final Thoughts
Baking these Cannoli Cupcakes isn’t just about satisfying a sweet tooth; it’s a celebration of creativity and togetherness in the kitchen. Every step—from mixing the batter to piping the fluffy cream—allows us to create something delicious with our hands and hearts. As I watch my family indulge in these delightful treats, I’m reminded of the joy simple things can bring. The happiness of sharing a cupcake, filled with love and laughter, transforms any day into a special occasion. I hope you find as much joy in making these sweet bites as I have in sharing them.
Print
Cannoli Cupcakes
- Total Time: 40 minutes
- Yield: 12 cupcakes 1x
- Diet: Vegetarian
Description
Cannoli Cupcakes are a delightful twist on the traditional Italian dessert, combining the flavors of cannoli in a soft and moist cupcake form.
Ingredients
- 1 ½ cups all-purpose flour
- 1 ½ tsp baking powder
- ¼ tsp salt
- ½ cup unsalted butter, softened
- 1 cup granulated sugar
- 2 large eggs
- 1 tsp vanilla extract
- ½ cup whole milk
- ¼ cup sour cream
- 1 cup ricotta cheese, drained
- ½ cup powdered sugar
- 1 tsp vanilla extract
- ¼ cup mini chocolate chips
- 2 tbsp chopped pistachios (optional)
- 1 cup heavy cream
- 2 tbsp powdered sugar
- 1 tsp vanilla extract
- Mini chocolate chips (for garnish)
- Chopped pistachios (optional, for garnish)
Instructions
- Preheat your oven to 350°F (175°C). Line a 12-cup muffin tin with cupcake liners.
- In a medium bowl, whisk together the flour, baking powder, and salt. In a separate large bowl, cream together the softened butter and sugar until light and fluffy. Add the eggs one at a time, mixing well after each addition. Stir in the vanilla extract.
- Gradually add the dry ingredients to the wet mixture, alternating with the milk and sour cream. Begin and end with the dry ingredients. Mix until just combined. Be careful not to overmix.
- Divide the batter evenly among the cupcake liners, filling each about 2/3 of the way full. Bake for 18-20 minutes, or until a toothpick inserted into the center comes out clean. Let the cupcakes cool in the tin for a few minutes, then transfer to a wire rack to cool completely.
- While the cupcakes are cooling, make the filling. In a medium bowl, combine the ricotta cheese, powdered sugar, and vanilla extract. Mix until smooth and creamy. Fold in the mini chocolate chips and chopped pistachios (if using).
- In a separate bowl, beat the heavy cream, powdered sugar, and vanilla extract on medium-high speed until soft peaks form.
- Once the cupcakes have cooled, use a small knife or a cupcake corer to remove a small portion from the center of each cupcake. Fill each cupcake with the cannoli filling, then pipe or spoon whipped cream on top of each one.
- Garnish with more mini chocolate chips and chopped pistachios if desired. Serve and enjoy the delicious cannoli-inspired treat!
Notes
- Make sure to drain the ricotta cheese well before using it to avoid a watery filling.
- You can make the cupcakes ahead of time and assemble them just before serving for the best texture.
- Prep Time: 20 minutes
- Cook Time: 20 minutes
- Category: Dessert
- Method: Baking
- Cuisine: Italian
Nutrition
- Serving Size: 1 cupcake
- Calories: 320
- Sugar: 22g
- Sodium: 150mg
- Fat: 18g
- Saturated Fat: 10g
- Unsaturated Fat: 4g
- Trans Fat: 0g
- Carbohydrates: 38g
- Fiber: 1g
- Protein: 4g
- Cholesterol: 55mg