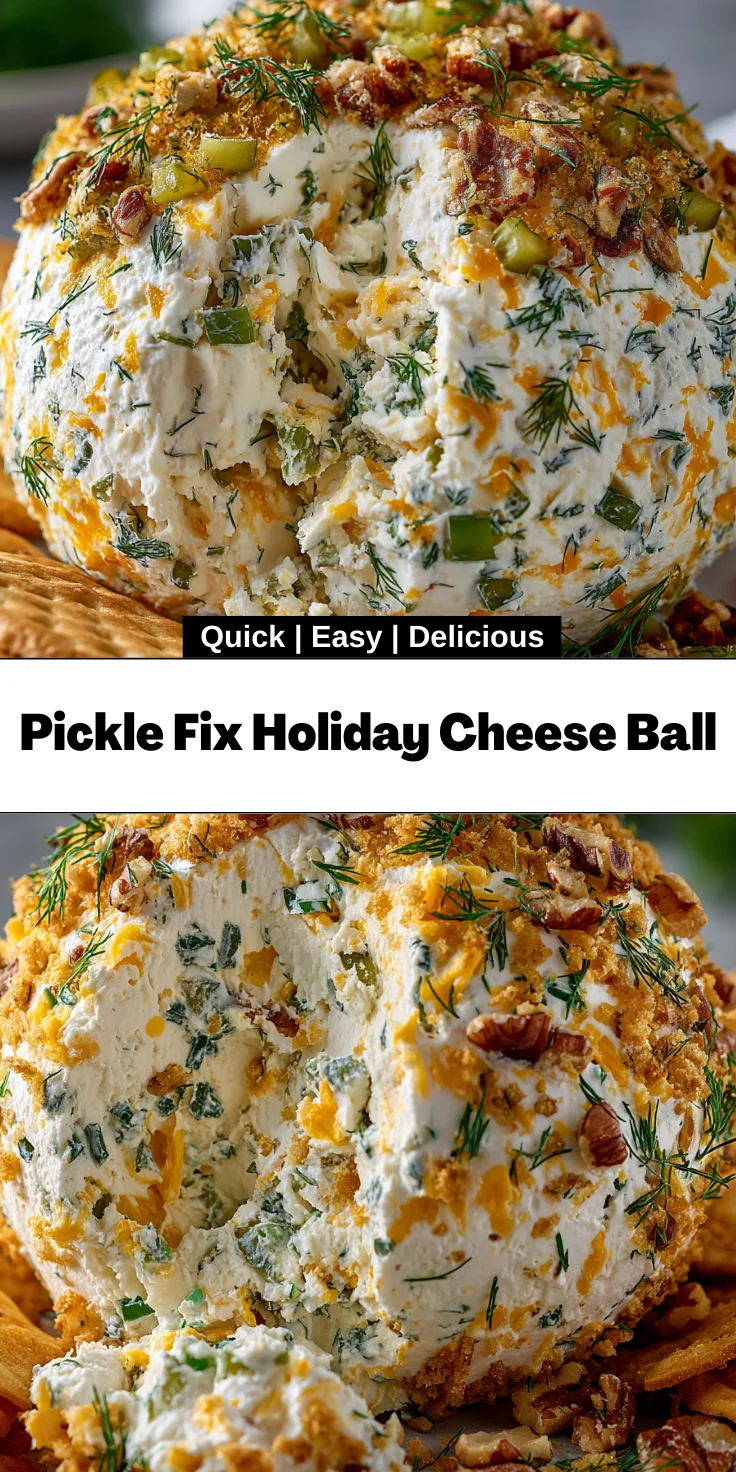
Introduction to Pickle Fix Holiday Cheese Ball
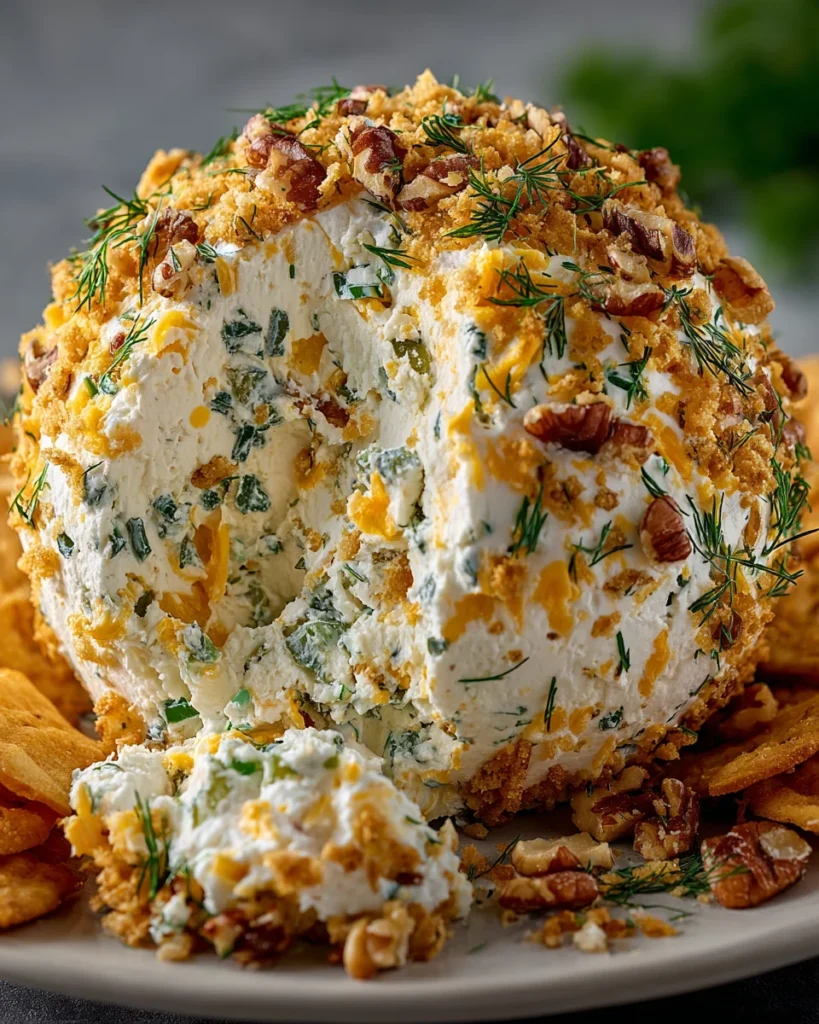
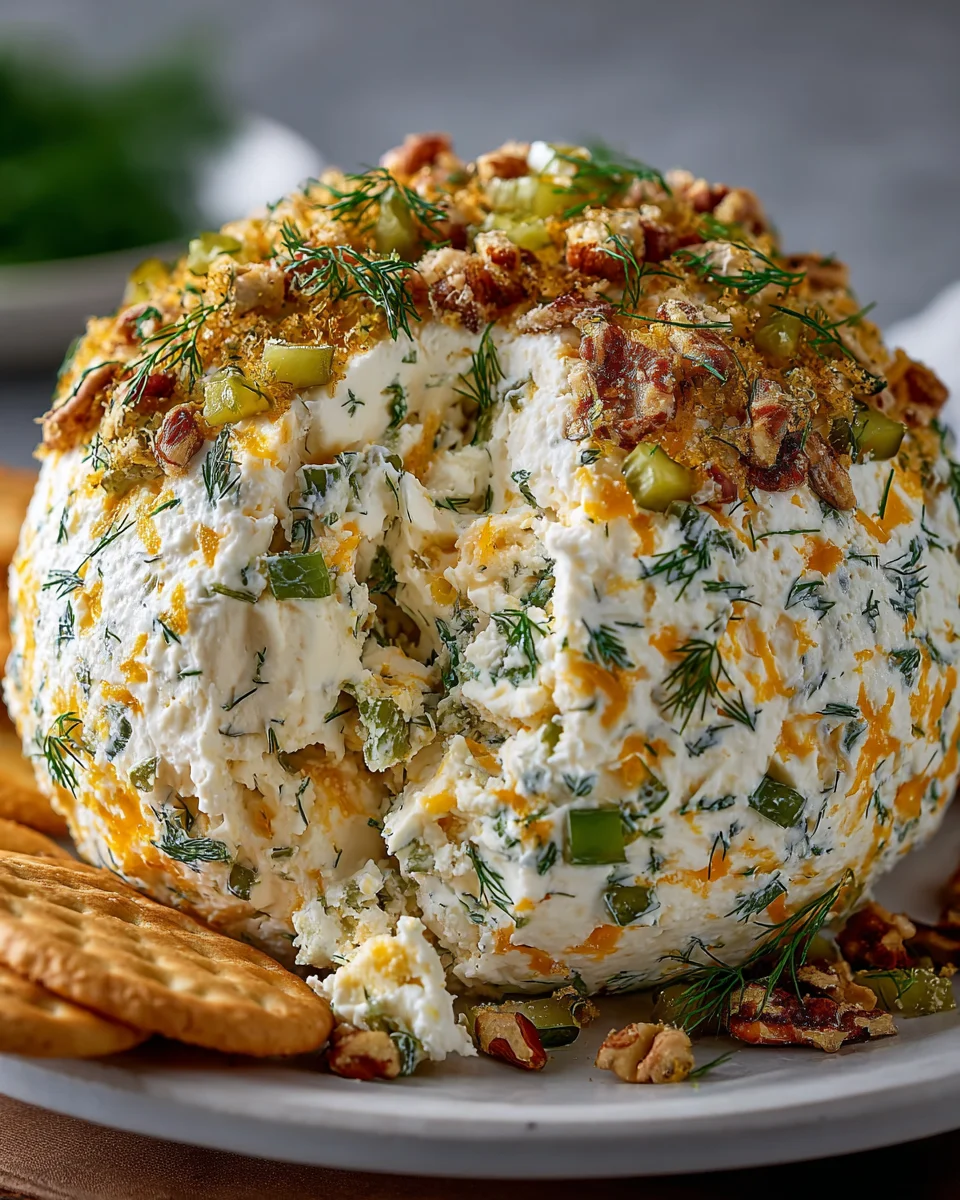
As the holiday season approaches, we all feel the excitement in the air, don’t we? The Pickle Fix Holiday Cheese Ball is just the thing to impress your loved ones and spark joy at gatherings. It’s festive, flavorful, and easy to whip up, even on the busiest of days. Imagine a delicious cheese ball infused with dill pickles and coated in crunchy pecans—every bite is a delightful mix of creamy and crunchy. This recipe makes entertaining a breeze and will have your guests coming back for seconds (or thirds!). Let’s dive into this tasty treat!
Why You’ll Love This Pickle Fix Holiday Cheese Ball
This Pickle Fix Holiday Cheese Ball is not just a dish; it’s a lifesaver. It combines convenience and flavor, making it perfect for busy moms like me. In just 20 minutes, you can create a delightful appetizer that’s sure to please. Whether you’re hosting a festive gathering or just need a quick snack, this cheese ball delivers on taste without the fuss. Trust me, you’ll want it on your holiday table!
Ingredients for Pickle Fix Holiday Cheese Ball
Gathering the right ingredients is the first step to success in crafting the delicious Pickle Fix Holiday Cheese Ball. This flavorful concoction has a blend of textures and tastes that will appeal to everyone. Here’s what you’ll need:
- Cream cheese: The silky base that brings richness to our cheese ball. Make sure it’s softened for easy mixing.
- Sharp cheddar cheese: This adds depth and a delightful tang, making every bite memorable.
- Sour cream: Offers a smooth, creamy texture and balances richness with a slight tartness.
- Dill pickles: The star ingredient provides that signature dill flavor and crunch. Choose your favorite brand or even homemade!
- Green onions: Finely sliced, these lend a mild onion flavor and a pop of color.
- Fresh dill: For that unmistakable herby touch, fresh dill elevates the pickle flavor to new heights.
- Worcestershire sauce: Just a dash adds a savory depth that rounds out the flavor profile beautifully.
- Garlic powder: A pinch of this brings aromatic warmth without overpowering the other flavors.
- Onion powder: Like garlic, it contributes a subtle flavor burst, enhancing the overall taste.
- Black pepper: Freshly ground, it adds the perfect touch of heat and contrast.
- Pecans: Chopped for coating, they offer a delightful crunch and nutty flavor that complements the creaminess.
- Fresh parsley: Adds a burst of color and a hint of freshness to the outer layer.
- Extra dill pickles: These are for coating the cheeese ball! They bring additional crunch and dill goodness.
For exact quantities, scroll down to the end of the article where you’ll find a handy printable recipe. Ready to get started? Let’s move on to creating this festive delight!
How to Make Pickle Fix Holiday Cheese Ball
Now, let’s jump into the fun part—making your delicious Pickle Fix Holiday Cheese Ball! It’s a step-by-step journey packed with flavor and joy. Follow these simple instructions, and you’ll have a crowd-pleaser ready in no time!
Combine the Cheeses
Start by mixing the cream cheese, sharp cheddar, and sour cream. This is crucial because these three create a creamy base that will hold all the flavors together. If your cream cheese is soft, use a hand mixer or a sturdy spatula. Blend until smooth and there are no lumps. Trust me, this creamy base is the secret behind a delightful cheese ball!
Fold in the Pickles and Seasonings
Next, gently fold in the chopped dill pickles, green onions, fresh dill, Worcestershire sauce, garlic powder, onion powder, and black pepper. It’s like a flavor hug! Make sure each ingredient is evenly distributed throughout the mixture. This step guarantees that every bite packs a pop of flavor. Don’t rush; take your time to incorporate everything!
Shape the Cheese Ball
Once everything is mixed, it’s time to shape this tasty treat. On a large sheet of plastic wrap, spoon the cheese mixture into the center. Use the wrap to help mold it into a compact ball—like a big, cheesy snowball! This technique makes handling so much easier, and it looks amazing when served.
Chill the Mixture
Now comes the important part: chilling! Wrap the cheese ball tightly with the plastic wrap. Refrigerate it for at least one hour, or even up to 24 hours if you want to prep ahead. Chilling helps firm it up and allows the flavors to meld beautifully. I promise, patience is key here!
Prepare the Coating
While your ball is chilling, let’s prepare the coating. In a shallow dish, mix together the chopped pecans, fresh parsley, and additional dill pickles. This coating not only looks gorgeous but adds a crunchy texture to each bite. Your kitchen will smell divine at this point—get ready for the grand finale!
Roll and Serve
After chilling, unwrap your cheese ball and roll it in the coating mixture. Press gently to ensure it hugs every side evenly. It’s all about that beautiful presentation! When coated, transfer it to a serving platter. Serve it alongside crackers, pretzels, or fresh veggies for dipping. Your guests will be clamoring for more!
Tips for Success
- Keep your cream cheese at room temperature for smoother mixing.
- Use a sturdy spatula to combine ingredients without overmixing.
- Chill your cheese ball overnight for even better flavor melding.
Simple Kitchen Hacks
- Freeze the pecans for a few minutes before chopping; this prevents them from turning oily.
- To soften cream cheese quickly, microwave it in 10-second intervals, checking frequently.
- Use a cookie scoop for uniform cheese ball sizes when shaping.
Equipment Needed
- Mixing bowl: A large bowl works best; you can also use a stand mixer.
- Hand mixer or sturdy spatula: Helpful for blending cheeses smoothly; a regular spoon will work in a pinch.
- Plastic wrap: Essential for shaping the cheese ball; parchment paper can be an alternative.
- Shallow dish: Useful for preparing the coating; any flat plate will do!
- Serving platter: To present your finished cheese ball; a cutting board adds a rustic touch.
Variations of Pickle Fix Holiday Cheese Ball
Want to switch things up with the Pickle Fix Holiday Cheese Ball? Here are some variants that can add a twist to this festive favorite. Whether you’re looking to spice things up or accommodate dietary needs, I’ve got you covered!
Spicy Flavor Additions
- Add a pinch of cayenne pepper or crushed red pepper flakes to the cheese mixture for a spicy kick.
- Incorporate chopped jalapeños for a zesty, fiery flavor that’ll wake up your taste buds.
- Mix in some hot sauce with the Worcestershire sauce for an extra kick.
Dietary Alternatives
- For a gluten-free option, simply ensure that all your added ingredients are labeled gluten-free, especially the Worcestershire sauce.
- To make it vegan, swap out the cream cheese for a plant-based cream cheese and use dairy-free cheese shreds.
- Replace sour cream with coconut yogurt or a dairy-free alternative for a creamy texture.
Serving Suggestions
- Pair the cheese ball with a variety of crackers for delightful crunch and flavor contrast.
- Add fresh pretzels for an enjoyable twist that complements the creaminess.
- Serve with raw vegetables like celery, carrots, or bell peppers for a fresh, healthy option.
- A sprinkle of extra fresh parsley on top makes for a lovely presentation touch.
- Accompany it with your favorite holiday cocktail for a festive vibe!
FAQs about Pickle Fix Holiday Cheese Ball
Can I make the Pickle Fix Holiday Cheese Ball in advance?
Absolutely! You can prepare the cheese ball a day ahead of your gathering. Just shape it and refrigerate; the flavors will meld beautifully.
What can I serve with this cheese ball?
This festive cheese ball pairs wonderfully with crackers, pretzels, and fresh vegetables. Feel free to get creative with your serving options!
Can I substitute the dill pickles for something else?
Sure! If you’re not a fan of dill pickles, you can use sweet pickles or even olives for a unique twist on this delicious appetizer.
How long does the cheese ball last in the fridge?
It will typically stay fresh for up to five days in the fridge. Just make sure it’s stored in an airtight container to maintain its flavor.
Is the Pickle Fix Holiday Cheese Ball suitable for vegetarians?
Yes, this cheese ball is 100% vegetarian! It includes no meat products, making it a delightful choice for your veggie-loving friends.
Final Thoughts
The joy of making the Pickle Fix Holiday Cheese Ball is truly something special. It’s more than just a recipe; it’s a chance to gather and create memories with loved ones. This creamy, crunchy delight is perfect for any occasion, adding a festive touch to your table. Every bite brings smiles, laughter, and stories shared over good food. And let’s be honest, there’s something magical about watching friends and family dig in with delight. So, as you prepare this cheese ball, remember: it’s not just about the flavors, but the connections it helps to nurture.
Print
Pickle Fix Holiday Cheese Ball
- Total Time: 1 hour 20 minutes (including refrigeration)
- Yield: 1 cheese ball serving 8-10 1x
- Diet: Vegetarian
Description
A festive and flavorful cheese ball infused with dill pickles and coated in crunchy pecans.
Ingredients
- 16 oz cream cheese, softened
- 2 cups sharp cheddar cheese, shredded
- 1/2 cup sour cream
- 3/4 cup dill pickles, finely chopped
- 1/4 cup green onions, finely sliced
- 2 tablespoons fresh dill, chopped
- 1 tablespoon Worcestershire sauce
- 1 teaspoon garlic powder
- 1/2 teaspoon onion powder
- 1/4 teaspoon freshly ground black pepper
- 1/2 cup pecans, finely chopped
- 1/4 cup fresh parsley, chopped
- 2 tablespoons dill pickles, finely chopped for coating
Instructions
- Combine the softened cream cheese, shredded sharp cheddar, and sour cream in a large mixing bowl. Beat until smooth and creamy using a hand mixer or sturdy spatula.
- Gently fold in the finely chopped dill pickles, green onions, fresh dill, Worcestershire sauce, garlic powder, onion powder, and black pepper. Ensure the mixture is evenly blended.
- Transfer the blended mixture onto a large sheet of plastic wrap. Use the wrap to shape the mixture into a compact ball.
- Refrigerate the wrapped cheese ball for a minimum of 1 hour, or up to 24 hours, to allow the mixture to firm up.
- In a shallow dish, mix together the chopped pecans, fresh parsley, and additional chopped dill pickles for the exterior coating.
- Remove the chilled cheese ball from the plastic wrap. Roll it in the prepared coating mixture, pressing gently to ensure an even layer on all sides.
- Transfer the finished cheese ball to a serving platter and present it with crackers, pretzels, or raw vegetables.
Notes
- For a spicier version, add a pinch of cayenne pepper to the cheese mixture.
- This recipe can be prepared a day in advance for convenience.
- Ensure all ingredients are at room temperature for easier mixing.
- Prep Time: 20 minutes
- Cook Time: 0 minutes
- Category: Appetizer
- Method: No-cook
- Cuisine: American
Nutrition
- Serving Size: 1 oz
- Calories: 120
- Sugar: 1g
- Sodium: 200mg
- Fat: 10g
- Saturated Fat: 4g
- Unsaturated Fat: 5g
- Trans Fat: 0g
- Carbohydrates: 3g
- Fiber: 0g
- Protein: 4g
- Cholesterol: 25mg