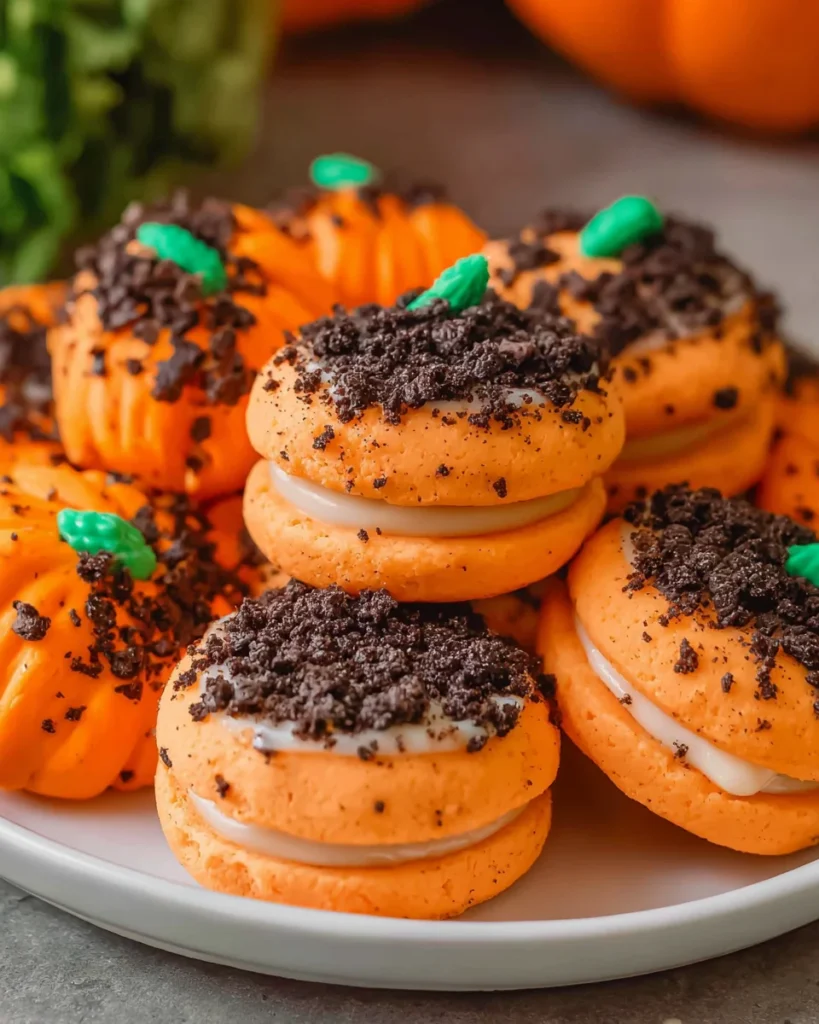
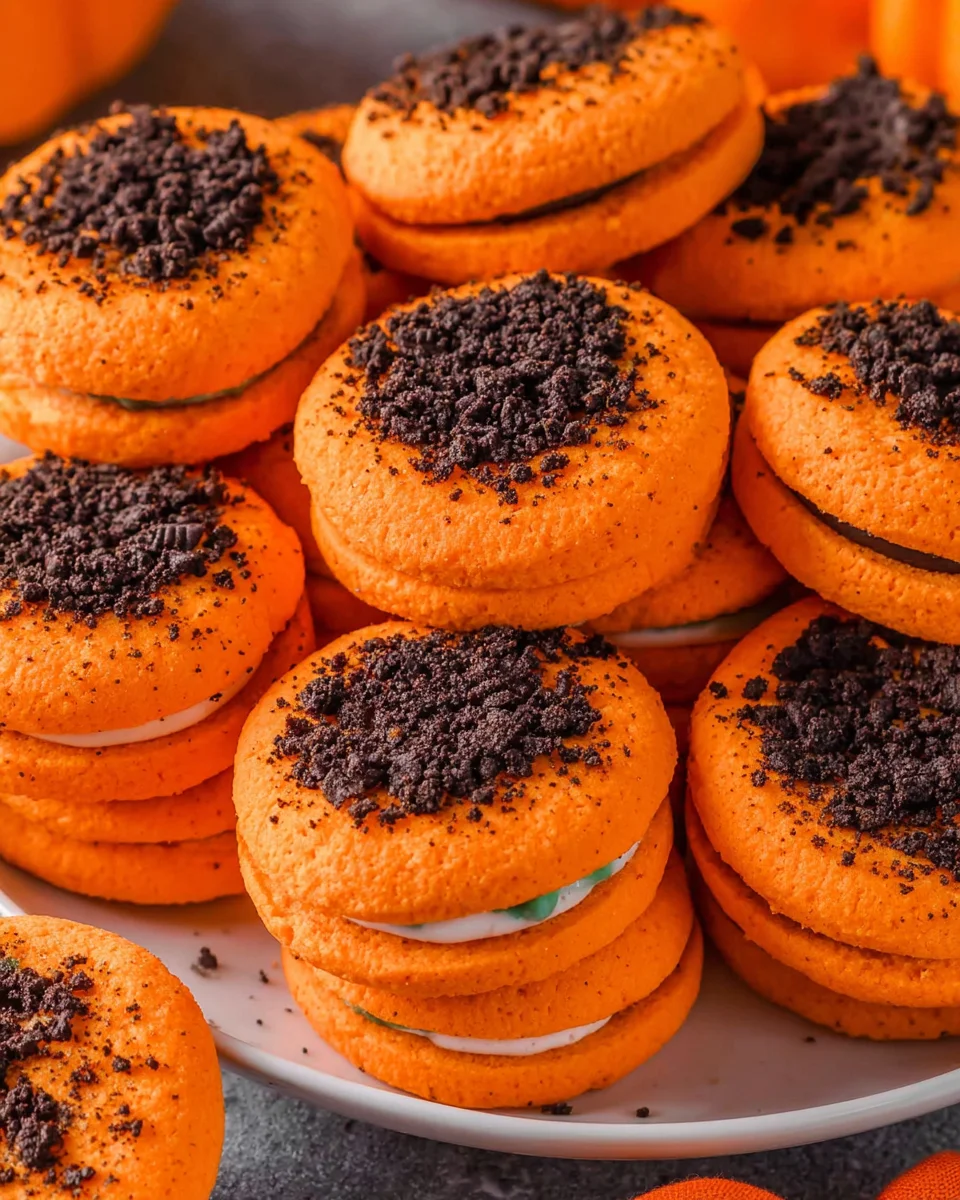
Introduction to Pumpkin Patch Cookies
There’s something magical about the flavors of fall that make my heart skip a beat. One recipe that truly captures that warmth and joy are these delightful Pumpkin Patch Cookies. They not only look festive but also taste oh-so-good! As a busy mom, I know how important it is to have quick, fun treats that can impress the family without taking up too much time. Whether you’re preparing for a Halloween party or a cozy evening at home, these easy cookies are the perfect solution for your sweet cravings!
Why You’ll Love This Pumpkin Patch Cookies
These Pumpkin Patch Cookies are a breeze to make, perfect for those of us juggling busy schedules! With just a handful of ingredients, you’ll whip them up in no time, all while creating memories with your kids. The delightful chocolate and seasonal pumpkin flavor combo will have everyone asking for seconds. Plus, they make for a great Halloween treat that’s both fun and festive! What’s not to love?
Ingredients for Pumpkin Patch Cookies
Let’s gather our ingredients to create these delightful Pumpkin Patch Cookies! Here’s what you’ll need to get started:
- Oreos: You can use regular chocolate Oreos or go for golden ones for a festive look. They’re the perfect base and add a great crunch!
- White melting chocolate: This sweet coating binds everything together and creates that delicious, creamy texture. Choose good-quality melting chocolate for the best flavor.
- Orange food coloring: This adds the vibrant orange hue reminiscent of pumpkins. Feel free to adjust the shade according to your preference!
- Mellowcreme pumpkin candies: These treats are the cherry on top! They give the finishing touch to your cookies while bringing that fall spirit alive.
You’ll find all the exact quantities at the bottom of the article, making it easy for you to print the recipe and have it on hand while you bake.

How to Make Pumpkin Patch Cookies
Step 1 – Prepare Your Baking Station
First things first, let’s create a tidy workspace. Line a baking sheet with parchment paper. This step is crucial, as it keeps the cookies from sticking. Gather all your ingredients so they’re easily accessible. Trust me; it makes everything smoother as you whip this recipe up!
Step 2 – Crumble the Oreos
Now it’s time for some Oreo fun! Take 2-3 Oreos and twist them apart to remove the sweet cream filling. Set the cream aside (or devour it!). Crush the cookie halves into a fine powder and place them in a bowl. This crumbly wonder will become a delightful topping!
Step 3 – Melt the Chocolate
In a microwave-safe bowl, add your white melting chocolate. Heat it in 15-second bursts, stirring in between. This helps prevent the chocolate from burning. Once melted and silky smooth, you’re ready to create magic with your Pumpkin Patch Cookies. Keep an eye on it—you don’t want any chocolate disasters!
Step 4 – Add Color to the Chocolate
To achieve that festive pumpkin look, here comes the fun part! Slowly add drops of orange food coloring to your melted chocolate. Stir well, gauging the color until you reach your desired shade. Remember, it’s easier to add more color than to take it away—so go easy at first!
Step 5 – Coat the Oreos
Now, let’s dip those Oreos in your vibrant chocolate! Submerge each Oreo, making sure both sides are coated. Let the excess chocolate drip off and neatly place them on the parchment paper. It’s like dressing your cookies in a cozy chocolate blanket—perfectly festive!
Step 6 – Decorate and Chill
While the chocolate remains wet, sprinkle your crushed Oreos on top generously. Then, nestle a mellowcreme pumpkin candy right in the center of each cookie. Pop the tray in the refrigerator for about 10-15 minutes to let the chocolate set. It’s like a mini adventure waiting for you!
Tips for Success
- Keep all your ingredients ready before you start to simplify the process.
- Ensure the chocolate is smooth and melted evenly without overheating.
- Add a few drops of orange food coloring, mixing until you achieve the right hue.
- For a creative touch, consider using different shapes of candies instead of pumpkins!
- Refrigerate cookies until chocolate hardens for the best texture and taste.
Equipment Needed
- Baking sheet: A sturdy one is best, but any flat pan will do.
- Parchment paper: This helps prevent sticking; wax paper is a good alternative.
- Microwave-safe bowl: Any microwaveable dish works; just ensure it’s deep enough for melting chocolate.
- Mixing bowl: Use any medium bowl for crumbling Oreos.
- Spoon or fork: For stirring and coating your cookies—for fun, use a skewer for dipping!
Variations of Pumpkin Patch Cookies
- Nutty Surprise: Add crushed nuts like almonds or pecans for a delightful crunch in your cookies.
- Gluten-Free Option: Swap out Oreos for gluten-free cookies to cater to dietary restrictions.
- Chocolate Drizzle: After the chocolate coating, drizzle with dark chocolate for an extra layer of decadence.
- Spicy Kick: Mix in a touch of pumpkin spice to your melted chocolate for that autumn warmth!
Serving Suggestions for Pumpkin Patch Cookies
- Pair these cookies with a warm cup of spiced chai or pumpkin spice latte for a cozy fall snack.
- Serve them on a festive platter garnished with mini pumpkins and autumn leaves for a seasonal touch.
- For a fun family treat, include a selection of other Halloween goodies along with the cookies.
FAQs about Pumpkin Patch Cookies
You might be wondering about a few things before diving into these delightful treats. Let’s address some common questions about Pumpkin Patch Cookies to ease your baking journey!
Can I store Pumpkin Patch Cookies?
Absolutely! These cookies can be stored in an airtight container in the refrigerator for a few days. They’ll retain their deliciousness, but they’re best enjoyed fresh.
What can I use instead of mellowcreme pumpkin candies?
If you can’t find mellowcreme pumpkin candies, feel free to use candy corn or chocolate-covered pretzels instead. Both add a fun touch to your Cookie Patch!
How do I prevent chocolate from hardening too quickly?
One simple trick is to keep your workspace warm! You can melt the chocolate just before you’re ready to coat the Oreos. If chocolate hardens, just give it a quick zap in the microwave for a few seconds.
Can I make these cookies in advance for a party?
Definitely! You can prepare them a day or two ahead. Just chill them in the fridge before serving to keep that chocolate coating nice and firm.
Are Pumpkin Patch Cookies suitable for kids?
Yes, they’re perfect for kids! These cookies are fun and simple to make, offering a delightful activity. Plus, who can resist a cookie dressed up like a pumpkin?
Final Thoughts
Baking these Pumpkin Patch Cookies is not just about the end result; it’s all about the joy and laughter along the way. The kids love getting involved—whether it’s dipping Oreos or adding the finishing touches. Each bite offers a delightful crunch combined with a splash of sweetness, instantly transporting me to cozy autumn days. These cookies aren’t just treats; they’re memories waiting to be made. So, gather your family and let the spirit of fall inspire your kitchen adventures. Trust me, these cheerful cookies will bring a smile to everyone’s face!
Print
Pumpkin Patch Cookies
- Total Time: 45 minutes
- Yield: 18 cookies 1x
- Diet: Vegetarian
Description
Enjoy these delightful Pumpkin Patch Cookies, perfect for fall with their festive appearance and delicious taste.
Ingredients
- 18 Oreos (chocolate or golden)
- 8 ounces white melting chocolate (two 4-ounce baking bars)
- Orange food coloring
- 18 mellowcreme pumpkin candies
Instructions
- Line a baking sheet with parchment paper and set aside.
- Take 2-3 Oreos and remove the cream from between the cookies. Crush the cookies into a powder and place in a bowl.
- In a small microwaveable bowl, melt the 8 ounces of chocolate, stirring every 15 seconds until fully melted.
- Add orange food coloring to the melted chocolate a few drops at a time until the desired color is reached.
- Submerge each Oreo into the orange-colored chocolate, ensuring both sides are covered. Remove excess chocolate and place on the parchment paper.
- While the chocolate is still wet, sprinkle the chocolate cookie crumbs on top and place a pumpkin candy in the middle.
- Refrigerate the cookies for 10-15 minutes or until the chocolate hardens, then serve.
Notes
- Ensure not to overheat the chocolate while melting.
- You can adjust the amount of orange food coloring to achieve your desired shade.
- These cookies are best enjoyed fresh, but can be stored in an airtight container in the refrigerator for a few days.
- Prep Time: 30 minutes
- Cook Time: 15 minutes
- Category: Dessert
- Method: No-bake
- Cuisine: American
Nutrition
- Serving Size: 1 cookie
- Calories: 120
- Sugar: 10g
- Sodium: 35mg
- Fat: 7g
- Saturated Fat: 4g
- Unsaturated Fat: 2g
- Trans Fat: 0g
- Carbohydrates: 15g
- Fiber: 1g
- Protein: 1g
- Cholesterol: 0mg