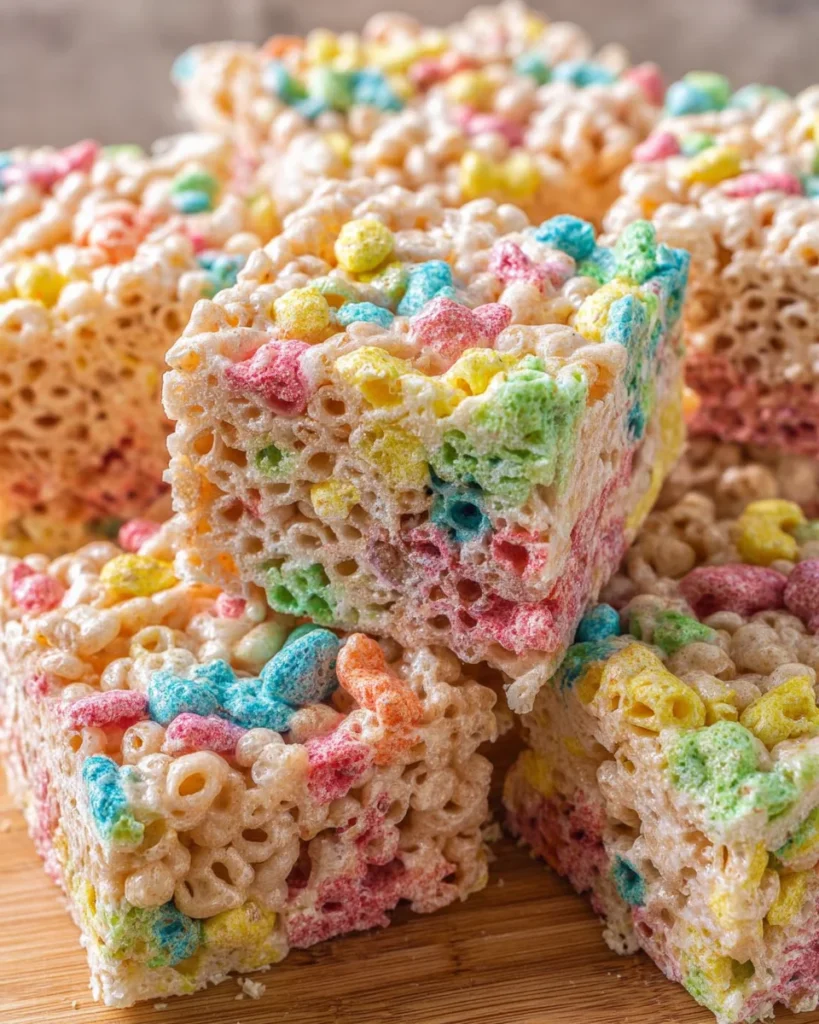
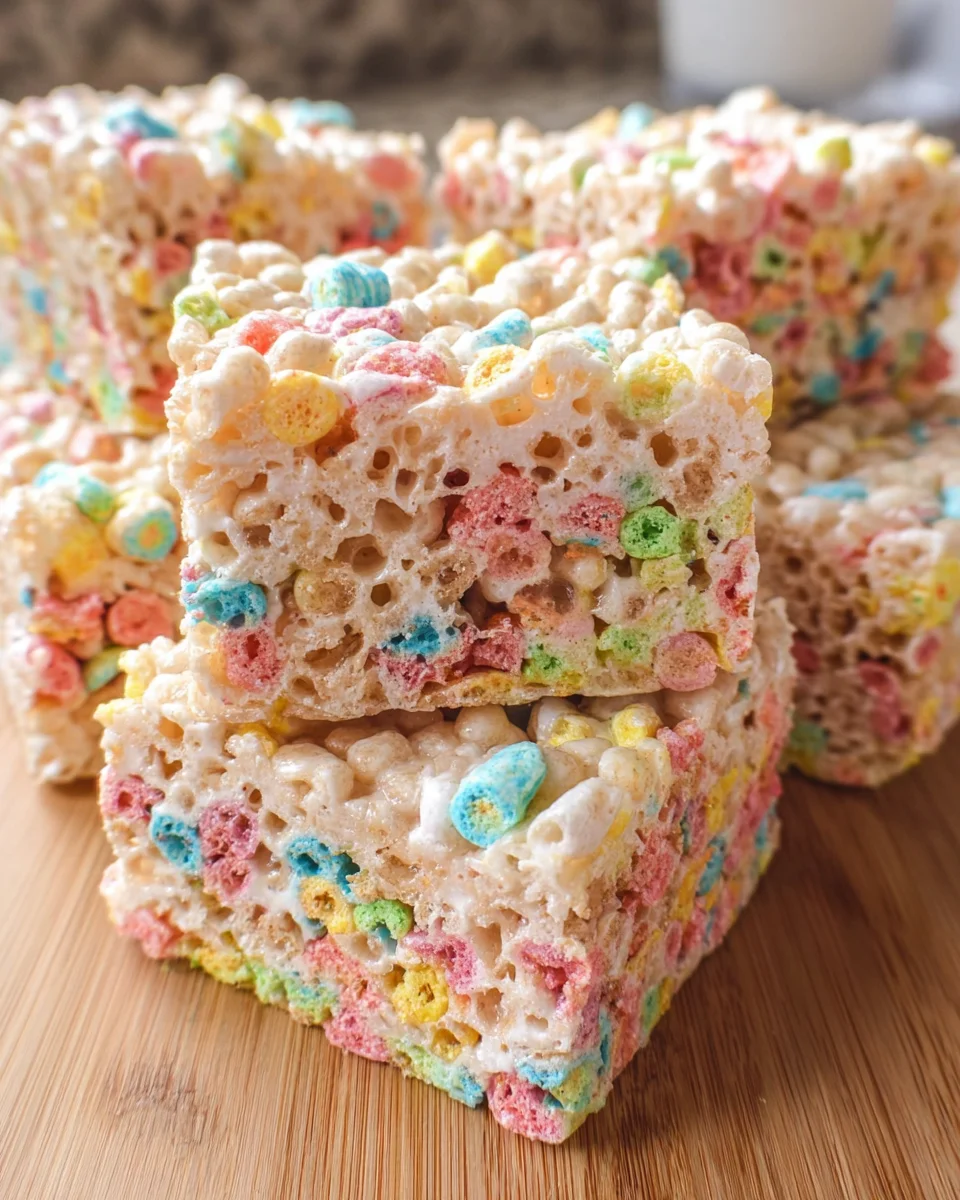
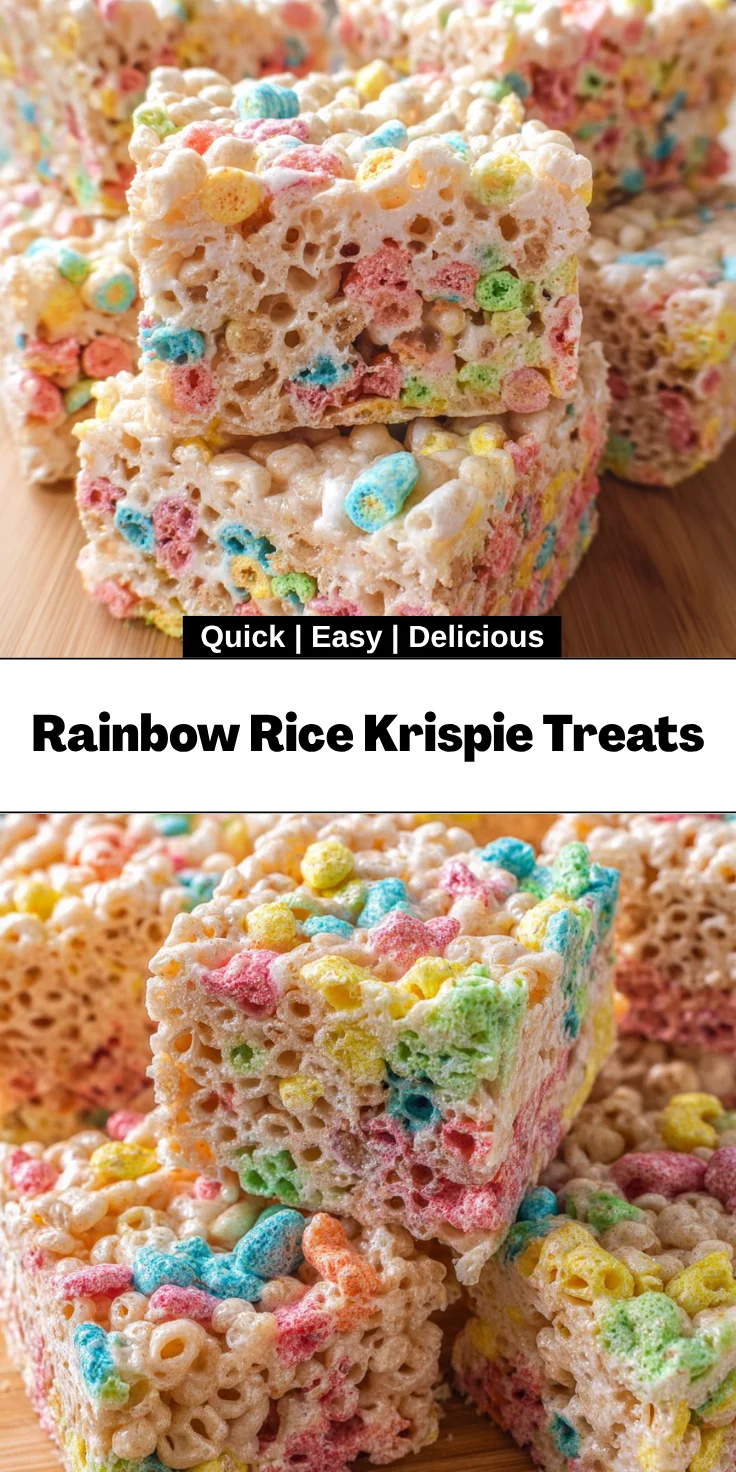
Introduction to Rainbow Rice Krispie Treats
Welcome to my colorful world of Rainbow Rice Krispie Treats! As a busy mom and home cook, I know the struggle of finding quick, delightful treats that light up my family’s faces. These vibrant, gooey treats are not only super easy to whip up but also a total crowd-pleaser for kids and adults alike. Imagine gathering around the kitchen, laughter filling the air as you sink your hands into sweet, sticky goodness. With just a few simple ingredients, you can create something truly special that brings joy to every occasion!
Why You’ll Love This Rainbow Rice Krispie Treats
Let me tell you, these Rainbow Rice Krispie Treats are the epitome of simplicity and deliciousness! They’re quick to make, taking just around 15 minutes of hands-on time, perfect for busy days. Plus, the whimsical colors and sweet, crunchy texture deliver a delightful flavor explosion in every bite. Whether it’s a family gathering, a school treat, or just a fun snack, these treats bring smiles and colorful joy, making any moment brighter!
Ingredients for Rainbow Rice Krispie Treats
Get ready to dive into the magical world of flavors with these fun and vibrant treats! Here’s what you’ll need:
- Salted butter: This brings richness and depth to the Rice Krispie mixture, making every bite feel indulgent.
- Marshmallows: The star ingredient! They melt down to create that signature gooeyness we all adore. Fresh marshmallows work best, so pick up a bag from the store!
- Salt: Even a pinch of kosher or sea salt enhances the sweetness, balancing the flavors beautifully.
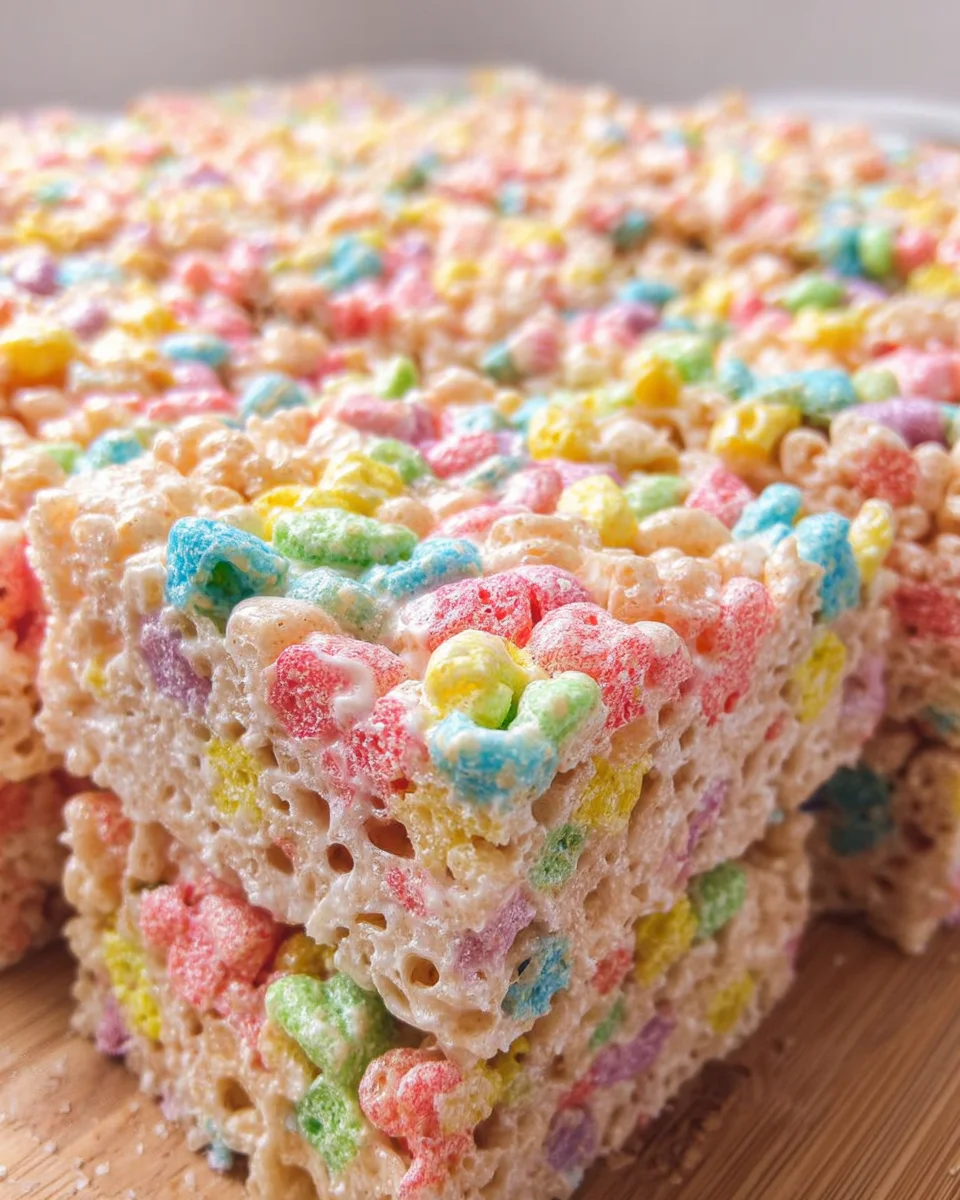
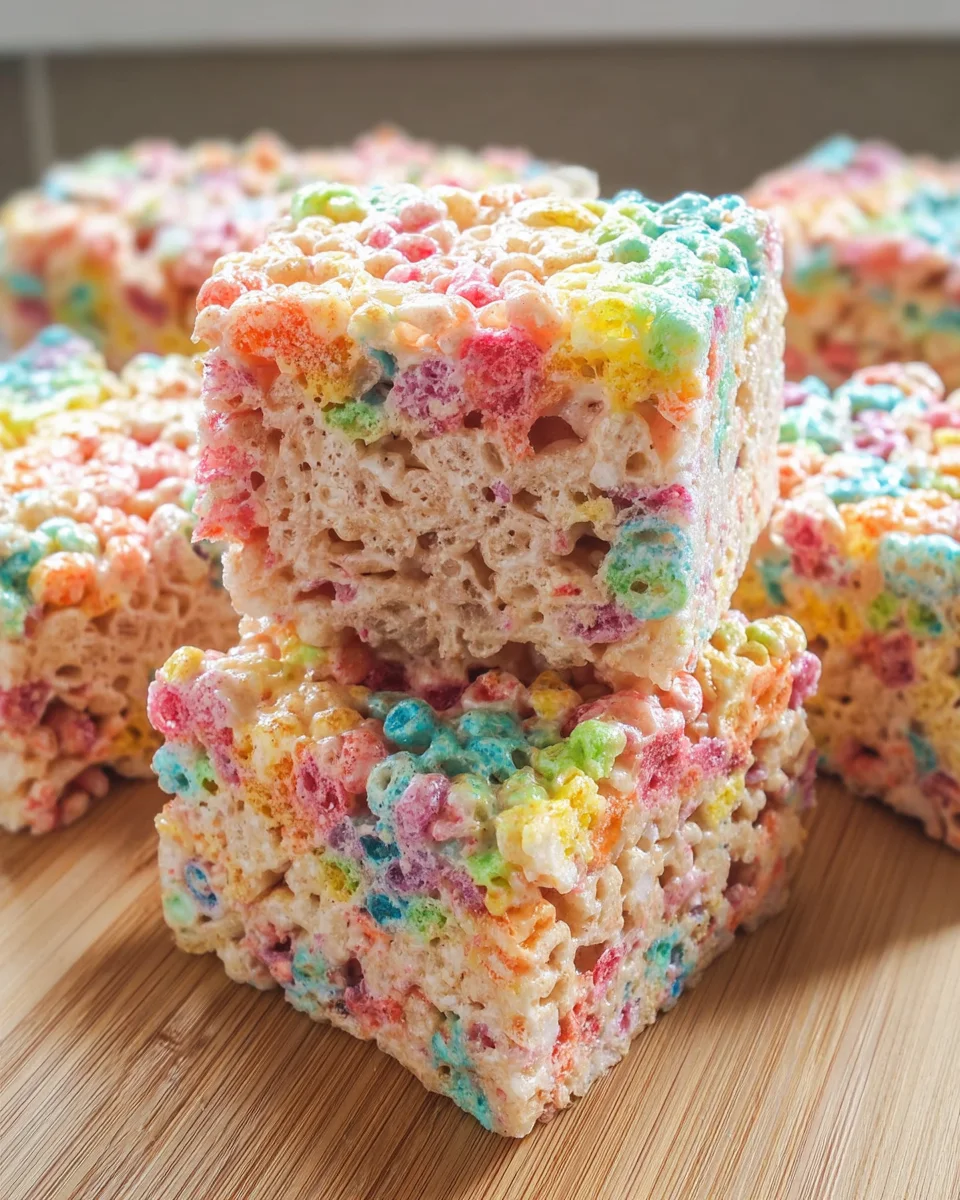
- Rice Krispies cereal: This classic cereal provides the crunch and texture that holds everything together, creating that satisfying bite.
- Fruity Pebbles with marshmallows cereal: Adding a splash of colorful fun along with extra sweetness, this cereal is a playful twist. You can swap it for any other colorful cereal if you like!
For those exploring flavor options, feel free to toss in chocolate chips or nuts for added crunch and richness. Remember, if you need exact measurements, check out the bottom of the article—they’re all set for printing, just for you!
How to Make Rainbow Rice Krispie Treats
Creating Rainbow Rice Krispie Treats is as simple as can be! Follow these steps to ensure your treats turn out perfectly every time. Let’s get started!
Step 1: Prepare the Baking Dish
First things first, grab a 9×9-inch baking dish. Line it with parchment paper, allowing the edges to hang over the sides. This little trick makes it easy to lift the treats out later without making a mess. A quick spray of cooking spray will ensure nothing sticks!
Step 2: Melt the Butter
Now, let’s get to the buttery goodness! In a large saucepan over medium-low heat, melt the butter, stirring gently. It should be just melted and not browned. This is crucial because browning can change the flavor. We want that creamy, rich taste to enhance our Rice Krispie Treats!
Step 3: Mix in the Marshmallows
Once the butter is melted, it’s time to add the marshmallows! Stir them into the butter until completely melted and smooth. Keep an eye out for any little lumps—they should vanish. That glossy, gooey mixture is exactly what we’re after; it will bond our cereals beautifully!
Step 4: Combine with Cereals
Now, it’s time for the fun part! Remove the saucepan from the heat and carefully mix in the Rice Krispies and Fruity Pebbles. Make sure everything gets coated with that marshmallow mixture. Do this gently but thoroughly. The right texture is essential, as we want a chewy but crunchy treat!
Step 5: Press into the Dish
Dump the yummy cereal mixture into your prepared baking dish. Use a silicone spatula or your hands (just be careful because it’s sticky!) to press it down into an even layer. Don’t rush this step! Press firmly but gently to ensure the treats hold together well and don’t crumble when cut.
Step 6: Let it Cool
Patience is key! Allow the treats to cool at room temperature for about an hour. This cooling time is not just a waiting game; it ensures they set up properly, holding their shape when you slice them into squares. You’ll be rewarded with perfectly chewy and colorful treats!
Tips for Success
- Always use fresh marshmallows for the best texture and flavor.
- Pot for salted butter—it enhances the sweet and buttery taste wonderfully!
- Don’t rush the mixing process; ensure all cereals are evenly coated for a perfect bite.
- Use a lightly oiled spatula when pressing down the mixture to prevent sticking.
- Store leftovers in an airtight container for maximum freshness and chewiness.
Equipment Needed
- 9×9-inch baking dish: This is essential for setting your treats. A similar-sized pan works too!
- Large saucepan: You need this for melting butter and marshmallows. A medium pot can also do the trick.
- Silicone spatula: Perfect for mixing and pressing down the mixture. A wooden spoon can be a good alternative.
- Parchment paper: Crucial for easy removal. If you don’t have it, just use a light coating of cooking spray.
- Measuring cups: Useful for precise ingredient portions; however, you can use a regular cup too if you’re feeling adventurous!
Variations for Rainbow Rice Krispie Treats
- Chocolate Drizzle: Drizzle melted chocolate over the top for a rich twist. White, dark, or milk chocolate all work beautifully!
- Cereal Swap: Experiment with different colorful cereals like Trox or Lucky Charms for a unique flavor profile and even more vibrant colors.
- Add-Ins: Toss in mini chocolate chips, dried fruit, or even nuts to add texture and additional flavors. It’s a great way to customize your treats!
- Dietary Options: For a gluten-free version, ensure you use gluten-free Rice Krispies. Dairy-free butter and marshmallows are also available for an allergy-friendly treat.
- Seasonal Themes: Incorporate seasonal sprinkles or themed cereals for holidays. Think pastel colors for Easter or red and green for Christmas fun!
Serving Suggestions
- Pair these colorful Rainbow Rice Krispie Treats with fresh fruit salad for a refreshing contrast.
- Serve alongside a tall glass of creamy milk or a fun fruit punch to keep the playful theme alive.
- For parties, cut them into fun shapes using cookie cutters for an exciting twist!
- Display them on a colorful platter or in clear jars to show off their vibrant colors.
FAQs about Rainbow Rice Krispie Treats
As with any fun recipe, I’m sure you have some questions about these delightful Rainbow Rice Krispie Treats. Here are a few common queries that I often get, plus my tried-and-true answers!
Can I make these treats in advance?
Absolutely! In fact, they store wonderfully. You can make them a day ahead and keep them in an airtight container. Just be sure to let them cool completely before cutting.
What can I do if my treats are too sticky?
If your Rainbow Rice Krispie Treats are overly sticky, try pressing them down more firmly to help them hold their shape better. Using a lightly oiled spatula also helps with sticking!
Can I use different types of cereal?
Yes, yes, and yes! Feel free to swap out the fruity pebbles with any colorful cereal you like. This is a fun way to mix flavors and keep things exciting!
How do I store leftover treats?
To keep your treats fresh and chewy, store them in an airtight container at room temperature. They should stay delicious for about a week, if they last that long!
Can I freeze Rice Krispie Treats?
You sure can! Just wrap them tightly in plastic wrap and then place them in a freezer bag. They can be frozen for up to three months. Simply thaw at room temperature before enjoying!
Final Thoughts
As you dive into the world of Rainbow Rice Krispie Treats, you’ll discover a delightful experience wrapped in vibrant colors and sweet flavors. Making these treats not only brings joy to your loved ones but also creates cherished memories in the kitchen. I hope you find the same happiness I do when watching those colorful squares disappear in a matter of moments! Whether it’s a simple family snack or a festive treat for a party, they never fail to bring smiles and laughter. Enjoy the sweet moments they create, and happy cooking!
Print
Rainbow Rice Krispie Treats
- Total Time: 1 hour 25 minutes
- Yield: 16 servings 1x
- Diet: Vegetarian
Description
Delightful and easy to make Rainbow Rice Krispie Treats, perfect for kids and adults alike.
Ingredients
- 4 tablespoons salted butter
- 1 bag (12 ounces) marshmallows
- ½ teaspoon salt (I use kosher salt or sea salt)
- 4½ cups rice krispies cereal
- 2½ cups fruity pebbles with marshmallows cereal
Instructions
- Line a 9×9-inch square baking dish with parchment paper and spray it lightly with cooking spray. Set aside.
- In a large saucepan, over medium-low heat, melt the butter.
- Once the butter has melted, stir in the marshmallows and salt. Continue heating over medium-low heat, stirring continuously, until the marshmallows are completely melted and smooth.
- Remove the pan from the heat and gently stir in the rice krispies cereal and fruity pebbles with marshmallows cereal. Make sure to mix completely until all the cereal is mixed and combined well with the marshmallow mixture.
- Dump the mixture into the prepared pan and gently (but firmly) press it into an even layer with a silicone spatula or your hands.
- Allow the treats to cool and set at room temperature before cutting into squares. This takes about 1 hour.
Notes
- Make sure to use fresh marshmallows for best results.
- You can substitute fruity pebbles with other colorful cereals as desired.
- Store leftovers in an airtight container to keep them fresh.
- Prep Time: 15 minutes
- Cook Time: 10 minutes
- Category: Dessert
- Method: Stovetop
- Cuisine: American
Nutrition
- Serving Size: 1 square
- Calories: 150
- Sugar: 10g
- Sodium: 50mg
- Fat: 5g
- Saturated Fat: 3g
- Unsaturated Fat: 2g
- Trans Fat: 0g
- Carbohydrates: 24g
- Fiber: 0g
- Protein: 1g
- Cholesterol: 15mg