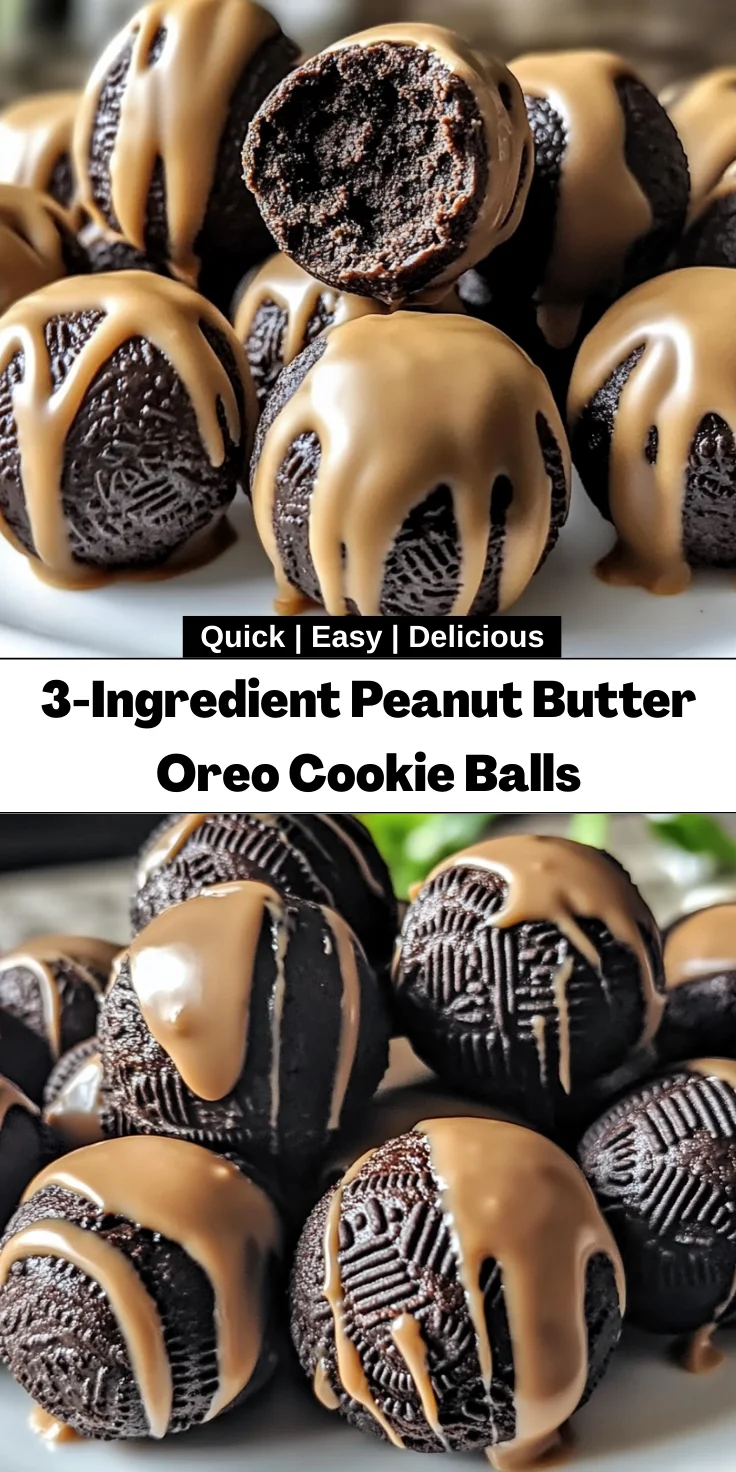
Introduction to 3-Ingredient Peanut Butter Oreo Cookie Balls
Hey there, fellow food lovers! If you’re anything like me, you know that life can get pretty hectic. Between juggling work, family, and everything in between, finding time to whip up a delicious treat can feel impossible. That’s where these 3-Ingredient Peanut Butter Oreo Cookie Balls come in! They’re not just easy to make; they’re a delightful way to impress your loved ones without spending hours in the kitchen. With just three simple ingredients, you’ll have a sweet, no-bake dessert that’s perfect for any occasion. Trust me, your taste buds will thank you!
Why You’ll Love This 3-Ingredient Peanut Butter Oreo Cookie Balls
These 3-Ingredient Peanut Butter Oreo Cookie Balls are a game-changer for busy moms and professionals alike. They come together in just 15 minutes, making them a quick solution for unexpected guests or a sweet treat after a long day. Plus, the combination of creamy peanut butter and rich chocolate is simply irresistible. You’ll love how easy they are to make and how quickly they disappear!
Ingredients for 3-Ingredient Peanut Butter Oreo Cookie Balls
Let’s dive into the deliciousness! Here’s what you’ll need to create these delightful 3-Ingredient Peanut Butter Oreo Cookie Balls. Each ingredient plays a vital role in making this treat a hit!
- Oreo cookies: The star of the show! These chocolate sandwich cookies provide a rich, sweet base. You can also experiment with different flavors, like mint or peanut butter Oreos, for a fun twist.
- Creamy peanut butter: This adds a luscious, nutty flavor and helps bind the cookie mixture together. If you prefer a healthier option, natural peanut butter works well too, just ensure it’s creamy for easy mixing.
- Chocolate chips: Whether you choose milk, dark, or white chocolate, these chips create a decadent coating that takes these cookie balls to the next level. Feel free to use sugar-free chocolate chips if you’re looking for a lighter option.
For exact measurements, check the bottom of the article where you can find everything listed for easy printing. Now, let’s get cooking!
How to Make 3-Ingredient Peanut Butter Oreo Cookie Balls
Now that we have our ingredients ready, let’s get to the fun part—making these 3-Ingredient Peanut Butter Oreo Cookie Balls! Follow these simple steps, and you’ll have a delightful treat in no time.
Step 1: Crush the Oreos
First things first, we need to turn those Oreos into crumbs. You can use a food processor for this task. Just toss the cookies in and pulse until they’re finely crushed. If you don’t have a food processor, no worries! Place the Oreos in a Ziploc bag and crush them with a rolling pin. It’s a great way to relieve some stress, too!
Step 2: Mix with Peanut Butter
Next, grab a large mixing bowl and combine the crushed Oreos with the creamy peanut butter. Stir it all together until you achieve a thick, dough-like consistency. It should be sticky but manageable. If it feels too dry, add a bit more peanut butter. This mixture is where the magic happens!
Step 3: Shape the Balls
Now comes the fun part—shaping the cookie balls! Roll the mixture into 1-inch balls using your hands. Don’t worry about making them perfect; a little imperfection adds character. Once shaped, arrange them on a parchment-lined baking sheet. This will make it easier to transfer them later.
Step 4: Melt the Chocolate
In a microwave-safe bowl, melt the chocolate chips. Heat them in 20-second intervals, stirring in between until smooth. Be careful not to overheat the chocolate, as it can seize up. If you prefer, you can also use a double boiler for this step. Just make sure it’s melted and ready for dipping!
Step 5: Dip and Coat
Time to coat those cookie balls! Dip each one into the melted chocolate, ensuring it’s fully covered. Tap off any excess chocolate before placing them back on the parchment-lined sheet. This step is where you can get creative—feel free to sprinkle some crushed nuts or colorful sprinkles on top before the chocolate sets!
Step 6: Chill
Once all the cookie balls are coated, it’s time to chill them. Pop the baking sheet in the refrigerator for about 30 minutes. If you’re in a hurry, you can also freeze them for a quicker set. This will help the chocolate harden and keep everything together.
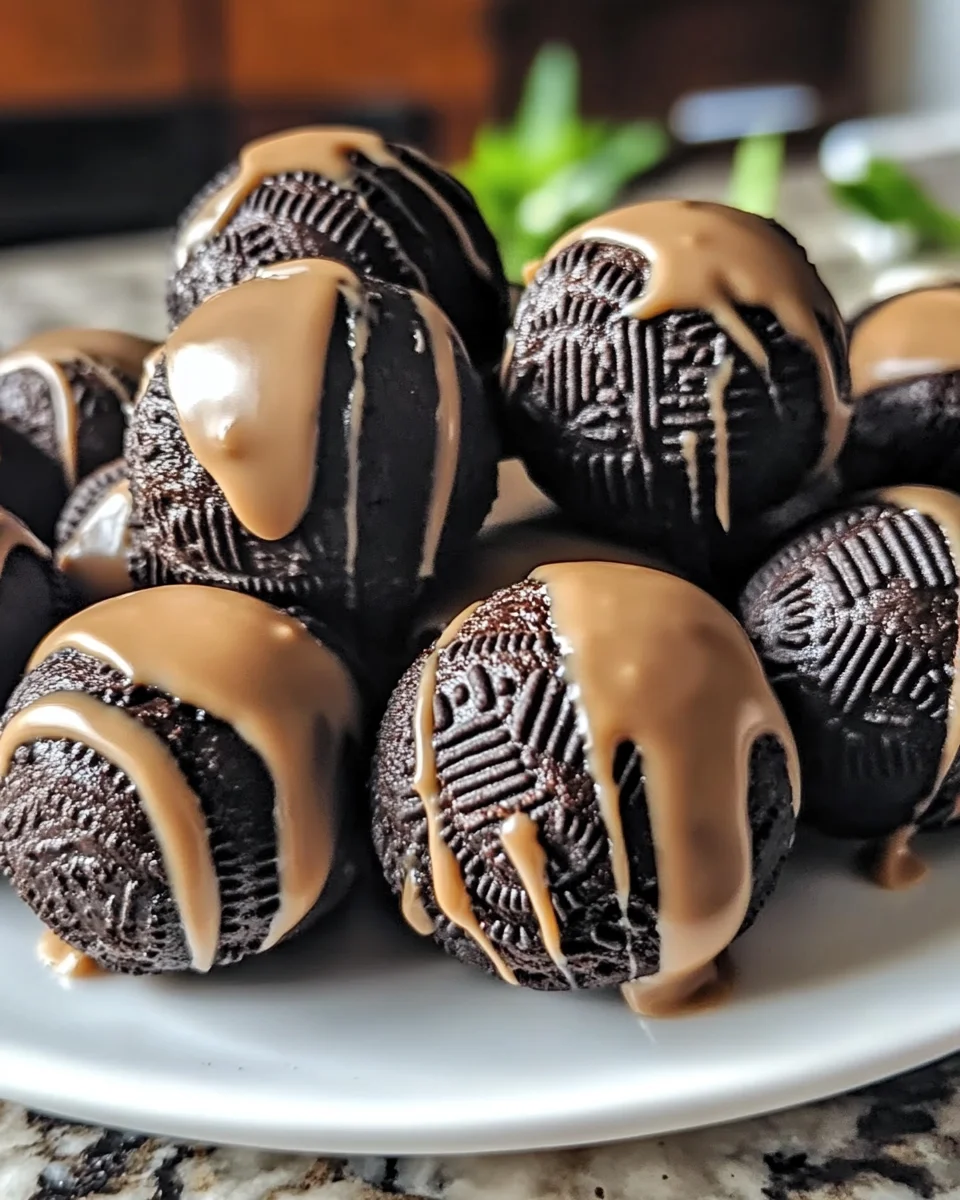
Step 7: Serve
Finally, once the chocolate has hardened, it’s time to enjoy your delicious creations! Serve them at room temperature or straight from the fridge. Trust me, these 3-Ingredient Peanut Butter Oreo Cookie Balls will be a hit with everyone!
Tips for Success
- Use room temperature peanut butter for easier mixing.
- For a smoother chocolate coating, add a teaspoon of vegetable oil to the melted chocolate.
- Keep your hands slightly damp when rolling the balls to prevent sticking.
- Experiment with different cookie flavors for unique variations.
- Store any leftovers in an airtight container in the fridge for up to a week.
Equipment Needed
- Food processor: For quick crushing of Oreos. A rolling pin and Ziploc bag work too!
- Mixing bowl: Any large bowl will do for combining ingredients.
- Parchment paper: Essential for easy cleanup. Wax paper is a good alternative.
- Microwave-safe bowl: For melting chocolate. A double boiler can be used as well.
Variations of 3-Ingredient Peanut Butter Oreo Cookie Balls
- Flavored Oreos: Switch things up by using different flavored sandwich cookies, like mint or birthday cake Oreos, for a unique twist.
- Nut Butters: Try almond or cashew butter instead of peanut butter for a different nutty flavor.
- Chocolate Coating: Experiment with white chocolate or dark chocolate for a change in taste and presentation.
- Healthier Options: Use sugar-free Oreos and dark chocolate chips for a lighter version of these treats.
- Mix-ins: Add mini chocolate chips, crushed nuts, or dried fruit to the mixture for added texture and flavor.
Serving Suggestions for 3-Ingredient Peanut Butter Oreo Cookie Balls
- Pair these cookie balls with a glass of cold milk for a classic treat.
- Serve them on a decorative platter for a stunning presentation at parties.
- For a fun twist, drizzle some melted chocolate or caramel over the top before serving.
- These cookie balls also make a great addition to dessert tables at celebrations.
FAQs about 3-Ingredient Peanut Butter Oreo Cookie Balls
Got questions about these delightful 3-Ingredient Peanut Butter Oreo Cookie Balls? I’ve got you covered! Here are some common queries that might pop up as you whip up this sweet treat.
Can I use gluten-free Oreos?
Absolutely! Gluten-free Oreos are a fantastic option for those with dietary restrictions. They’ll work just as well in this recipe, ensuring everyone can enjoy these delicious cookie balls.
How long do these cookie balls last?
When stored in an airtight container in the fridge, these cookie balls can last up to a week. But trust me, they’ll likely be gone long before that!
Can I freeze the cookie balls?
Yes, you can freeze them! Just place the cookie balls in a single layer on a baking sheet until frozen, then transfer them to an airtight container. They’ll keep for about a month in the freezer.
What can I use instead of chocolate chips?
If you’re not a fan of chocolate, you can coat the cookie balls in melted white chocolate or even colorful candy melts for a fun twist. The flavor will still be delicious!
Can I make these cookie balls ahead of time?
Definitely! These 3-Ingredient Peanut Butter Oreo Cookie Balls are perfect for making ahead of time. Just prepare them and store them in the fridge until you’re ready to serve. They’ll be a hit at any gathering!
Final Thoughts
Making these 3-Ingredient Peanut Butter Oreo Cookie Balls is more than just a cooking experience; it’s a delightful journey filled with joy and creativity. Each bite is a sweet reminder of how simple ingredients can come together to create something truly special. Whether you’re sharing them with family or indulging in a quiet moment for yourself, these treats bring smiles all around. Plus, the ease of preparation means you can whip them up anytime you need a little sweetness in your life. So go ahead, treat yourself and your loved ones to this delicious adventure!
Print
3-Ingredient Peanut Butter Oreo Cookie Balls
- Total Time: 45 minutes
- Yield: 24 cookie balls 1x
- Diet: Vegetarian
Description
Hey there, fellow food lovers! If you’re anything like me, you know that life can get pretty hectic. Between juggling work, family, and everything in between, finding time to whip up a delicious treat can feel impossible. That’s where these 3-Ingredient Peanut Butter Oreo Cookie Balls come in! They’re not just easy to make; they’re a delightful way to impress your loved ones without spending hours in the kitchen. With just three simple ingredients, you’ll have a sweet, no-bake dessert that’s perfect for any occasion. Trust me, your taste buds will thank you!
Ingredients
- 1 package (15.25 oz) Oreo cookies (or similar sandwich cookies)
- 1 cup creamy peanut butter
- 1 1/2 cups chocolate chips (milk, dark, or white chocolate)
Instructions
- Crush the Oreos: Place the Oreos in a food processor and pulse until they’re finely crushed into crumbs. Alternatively, put them in a Ziploc bag and crush with a rolling pin.
- Mix with Peanut Butter: In a large mixing bowl, combine the crushed Oreos with the peanut butter. Stir until well mixed into a thick, dough-like consistency.
- Shape the Balls: Roll the mixture into 1-inch balls and arrange them on a parchment-lined baking sheet.
- Melt the Chocolate: In a microwave-safe bowl, melt the chocolate chips in 20-second intervals, stirring until smooth.
- Dip and Coat: Dip each ball into the melted chocolate, ensuring full coverage. Tap off the excess chocolate and place them back on the parchment-lined sheet.
- Chill: Refrigerate for 30 minutes or freeze for a quicker set.
- Serve: Once the chocolate hardens, serve and enjoy!
Notes
- For a fun twist, try using different flavored sandwich cookies.
- Store leftovers in an airtight container in the refrigerator.
- Prep Time: 15 minutes
- Cook Time: 0 minutes
- Category: Dessert
- Method: No-Bake
- Cuisine: American
Nutrition
- Serving Size: 1 cookie ball
- Calories: 150
- Sugar: 10g
- Sodium: 50mg
- Fat: 8g
- Saturated Fat: 4g
- Unsaturated Fat: 2g
- Trans Fat: 0g
- Carbohydrates: 18g
- Fiber: 1g
- Protein: 3g
- Cholesterol: 0mg