Introduction to Teriyaki Chicken Casserole
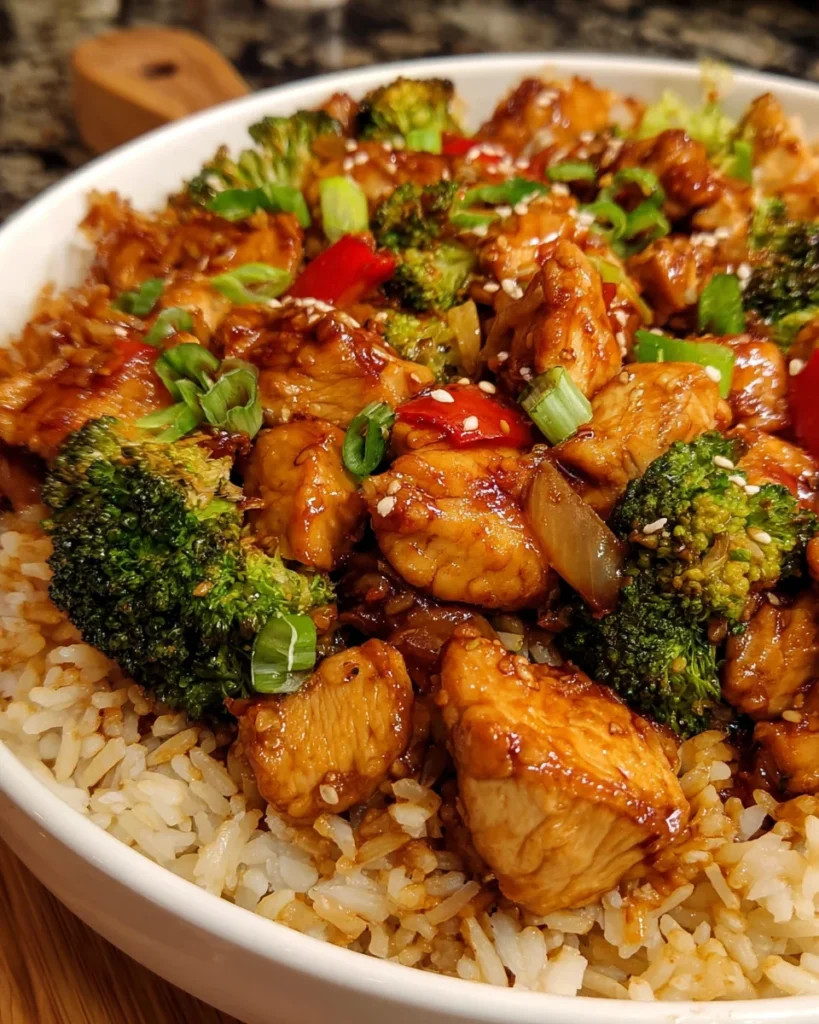
As a busy mom, I often find myself tangled in the whirlwind of daily tasks. Between juggling work, homework, and family time, quick yet delicious meals can feel like a distant dream. Enter the Teriyaki Chicken Casserole—a lifesaver in my kitchen! This flavorful dish combines tender chicken, vibrant vegetables, and fluffy jasmine rice, all wrapped up in a savory teriyaki sauce. It’s not just an easy recipe; it’s a comforting dinner option that brings my family together, even on the busiest nights. Trust me, this casserole makes weeknight meals a joyous affair!
Why You’ll Love This Teriyaki Chicken Casserole
This Teriyaki Chicken Casserole is your new go-to dinner solution! Not only is it a breeze to make, but it’s also packed with flavor that will have your family singing praises. With just one dish to clean, you’ll save time in the kitchen. Plus, the combination of tender chicken, fresh veggies, and jasmine rice means everyone will be satisfied. It’s a delightful dinner option that fits right into your busy schedule!
Ingredients for Teriyaki Chicken Casserole
Gathering the right ingredients is like laying the foundation for a wonderful meal. For this Teriyaki Chicken Casserole, you’ll need:
- Boneless skinless chicken breasts: The star of the casserole! They become tender and juicy after baking.
- Low sodium soy sauce: This adds depth and saltiness without overwhelming flavors.
- Water: Used for the sauce and to create a cornstarch slurry, helping thicken our delightful sauce.
- Light brown sugar: Balances the savory elements with a touch of sweetness, giving the casserole its delicious flavor.
- Seasoned rice wine vinegar: It enhances the sauce with a tart note that complements the sweetness.
- Fresh garlic and ginger: These aromatics bring a burst of flavor. Use freshly grated for the best results!
- Sesame oil: A splash of this fragrant oil adds a lovely nuttiness to the dish.
- Cornstarch: This helps to thicken the teriyaki sauce, making it glossy and rich.
- Frozen stir-fry vegetables: No hassle, just steam, add, and enjoy the crunch and color!
- Jasmine rice: Soft, fluffy, and ready to soak up all that teriyaki goodness; it’s the perfect base.
Feel free to get creative! You can mix and match vegetables based on your family’s favorites or even substitute chicken with tofu for a vegetarian version. For those who crave a little heat, consider adding red pepper flakes to the sauce. You can find the exact quantities for everything at the bottom of this article, ready for printing!

How to Make Teriyaki Chicken Casserole
Now that you have all the ingredients, let’s dive into the delightful process of making your Teriyaki Chicken Casserole. This is where the magic happens! Each step is simple, and I promise it won’t take too long. Ready? Let’s get started!
Prepare the Baking Dish and Chicken
First things first, preheat your oven to 350°F. While it warms up, grab a 9×13-inch baking dish and spray it with non-stick cooking spray. This little step ensures that your casserole doesn’t stick.’
Now, take those boneless skinless chicken breasts and place them neatly in the dish. Make sure they’re laid out evenly. This allows for even cooking. It’s their time to shine, and trust me, the end result will be so worth it!
Make the Teriyaki Sauce
Let’s whip up that tasty teriyaki sauce! In a medium saucepan over medium-high heat, combine the low sodium soy sauce, ⅔ cup of water, and light brown sugar. Stir in the seasoned rice wine vinegar, grated garlic, grated ginger, and sesame oil. Bring it all to a gentle boil. Oh, the aroma in your kitchen will be heavenly!
Cooking tip: If you want a richer flavor, let your sauce simmer for a few extra minutes. It deepens the taste and makes the dish even more unforgettable.
Thicken the Sauce with Cornstarch
While the sauce is heating up, grab a small bowl and whisk together the remaining 2 tablespoons of water with the cornstarch. This slurry is your secret weapon!
Once your sauce has reached a boil, add the cornstarch slurry to the pan. Whisk constantly for about 30-45 seconds. You’ll notice the sauce becoming thick and glossy. This texture is key to coating that chicken beautifully!
Bake the Chicken
Now, pour a cup of your freshly made teriyaki sauce over the chicken breasts in the baking dish. Cover it tightly with aluminum foil and pop it in the preheated oven. Bake for 30-35 minutes, or until the chicken reaches an internal temperature of 165°F. This step is super important; juicy chicken is a happy chicken!
To check for doneness, I always suggest using a meat thermometer. It’s the best way to ensure everything is perfectly cooked. No one wants dry chicken in their casserole!
Shred the Chicken
Once that timer rings, it’s time for some fun! Carefully take the baking dish out of the oven and remove the foil. It’s hot, so use oven mitts! Take two forks and shred the chicken directly in the dish. It’s quick, easy, and oh-so-satisfying.
Just be careful, because the dish will be steamy. Don’t burn your fingers! This is a great moment to let kids help if they can. They’ll love pulling the chicken apart.
Combine Ingredients and Bake Again
Now, the exciting part! Add the steamed stir-fry vegetables, cooked jasmine rice, and any leftover teriyaki sauce to the chicken. Stir everything together with love. It’s all about getting those vibrant colors and flavors mixed!
Once combined, spread the mixture evenly in the dish. Return it to the oven and bake uncovered for an additional 10-15 minutes. This step ensures everything is warmed through, and flavors meld beautifully!
Feel free to drizzle any reserved teriyaki sauce on top before serving. The finish will be sheer perfection on your plate!
Tips for Success
- Prep your ingredients beforehand—it saves time and helps the cooking process run smoothly.
- Adjust the sauce to your taste. If you prefer a sweeter or tangier flavor, tweak the brown sugar or vinegar.
- Use a meat thermometer to check chicken doneness; it’s the best way to prevent dryness.
- Experiment with vegetables; you can use what’s in your fridge!
- Let the casserole sit for a couple of minutes before serving. It enhances the flavors!
Equipment Needed
- 9×13-inch baking dish: A must-have for this casserole. A smaller dish may work, but you’ll need to adjust cooking time.
- Medium saucepan: Essential for making your tasty teriyaki sauce. Any pot will do!
- Whisk: Helps combine your sauce ingredients smoothly. A fork can serve in a pinch.
- Meat thermometer: Useful for checking chicken doneness; a knife can help if you don’t have one.
- Forks: For shredding the chicken. Using two makes it easier and more efficient!
Variations
- Vegetarian Version: Swap the chicken for tofu or tempeh. This option absorbs all those delicious teriyaki flavors!
- Spicy Kick: Add red pepper flakes or a dash of sriracha to the sauce for a flavorful heat that gives it edge.
- Quinoa Substitute: Replace jasmine rice with quinoa for a protein-packed twist. It’s gluten-free and very nutritious!
- Different Veggies: Experiment with bell peppers, snap peas, or mushrooms based on your family’s tastes. The more colorful, the better!
- Low-Carb Option: Swap out the rice for cauliflower rice for a lighter take that’s still full of flavor.
Serving Suggestions
- Pair your Teriyaki Chicken Casserole with a crisp, fresh cucumber salad for a refreshing contrast.
- A side of steamed edamame adds a healthy crunch and complements the Asian flavors.
- For drinks, serve with iced green tea or a light white wine.
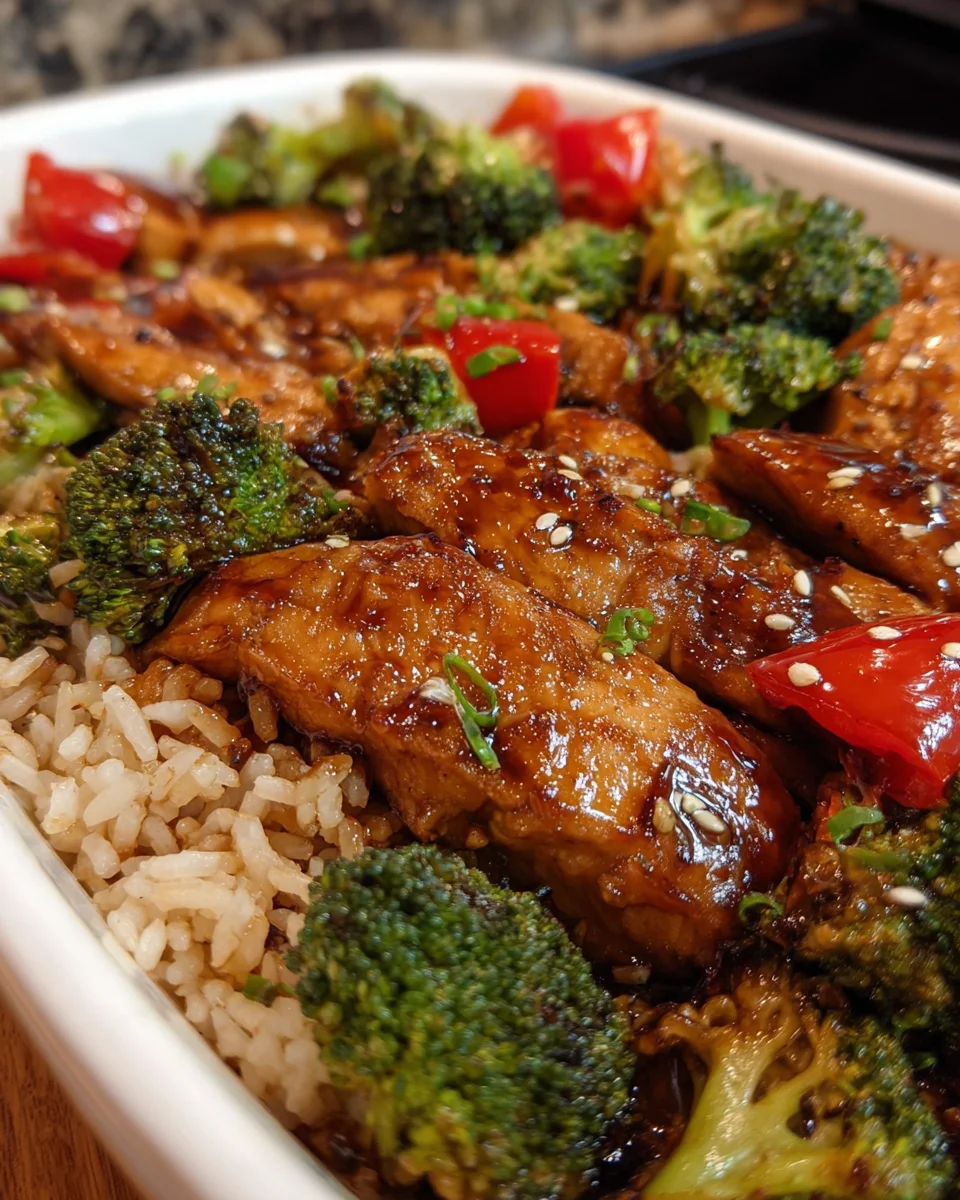
- Garnish with sesame seeds and sliced green onions for an inviting presentation.
FAQs about Teriyaki Chicken Casserole
Can I use fresh vegetables instead of frozen?
Absolutely! Fresh vegetables work beautifully in this casserole. Just ensure they’re cut into similar sizes for even cooking. Broccoli, bell peppers, and snap peas would make lovely additions!
How do I store leftovers?
To store leftovers, simply place the casserole in an airtight container. It will keep in the fridge for about 3-4 days. You can reheat in the oven for a warm meal anytime!
Can I make this casserole in advance?
Yes, you can prepare it a day ahead! Assemble everything, cover, and refrigerate. Just adjust the baking time if it’s cold from the fridge. A little extra time in the oven will do the trick!
What can I use instead of jasmine rice?
If you’re not a fan of jasmine rice, feel free to substitute it with brown rice, quinoa, or even cauliflower rice for a lower-carb option. Each brings its unique flavor and texture!
Is the teriyaki sauce gluten-free?
Yes! As long as you use gluten-free soy sauce, your Teriyaki Chicken Casserole will be gluten-free. There are plenty of tasty options available in stores nowadays!
Final Thoughts
Cooking this Teriyaki Chicken Casserole is more than just preparing a meal; it’s about creating warm memories around the dinner table. The rich flavors and vibrant ingredients come together in harmony, making every bite a delight. I love how it fills my home with a cozy aroma that invites everyone in. Plus, it’s an easy dish that brings smiles to busy faces after a long day. As you savor this casserole, I hope you feel the love and joy that stems from a good home-cooked meal. Enjoy every moment with your loved ones and this delightful dinner!
Print
Teriyaki Chicken Casserole
- Total Time: 1 hour 5 minutes
- Yield: 6 servings 1x
- Diet: Gluten Free
Description
A flavorful and easy-to-make Teriyaki Chicken Casserole that combines tender chicken, steamed vegetables, and jasmine rice in a savory teriyaki sauce, perfect for a delicious dinner.
Ingredients
- 1 pound boneless skinless chicken breasts (approximately 2 large breasts)
- ⅔ cup low sodium soy sauce
- ⅔ cup + 2 tablespoons water (⅔ cup for sauce, 2 tablespoons for cornstarch slurry)
- ½ cup packed light brown sugar
- 2 tablespoons seasoned rice wine vinegar
- 2 teaspoons grated fresh garlic
- 2 teaspoons grated fresh ginger
- 1 teaspoon sesame oil
- 2 tablespoons cornstarch
- 28.8 ounces (2 14.4-ounce bags) frozen stir-fry vegetables (steamed according to package directions)
- 3 cups cooked white jasmine rice (cooked according to package directions)
Instructions
- Preheat oven to 350°F. Spray a 9×13-inch baking dish with non-stick cooking spray. Place boneless skinless chicken breasts into the prepared baking dish and set aside.
- In a medium saucepan over medium-high heat, combine low sodium soy sauce, ⅔ cup water, light brown sugar, seasoned rice wine vinegar, grated garlic, grated ginger, and sesame oil. Bring to a boil.
- While the sauce is heating, whisk the remaining 2 tablespoons of water and cornstarch in a small bowl to form a slurry.
- Add the cornstarch slurry to the boiling sauce and whisk constantly. Cook for 30-45 seconds until thick and glossy. Remove from heat.
- Pour 1 cup of the prepared teriyaki sauce over the chicken breasts in the baking dish. Cover the dish with aluminum foil and bake for 30-35 minutes, or until the chicken reaches an internal temperature of 165°F.
- Remove the baking dish from the oven and discard aluminum foil. Using two forks, shred the chicken directly in the dish. Be cautious as the dish will be hot.
- Add steamed stir-fry vegetables, cooked jasmine rice, and the remaining teriyaki sauce to the baking dish. Stir carefully to combine and spread mixture evenly.
- Return the dish to the oven and bake uncovered for an additional 10-15 minutes, or until warmed through. Optionally, drizzle reserved teriyaki sauce over the top before serving.
Notes
- For a spicier kick, add red pepper flakes to the sauce.
- Feel free to mix and match the stir-fry vegetables based on your preference.
- Let the casserole cool slightly before serving to allow flavors to meld.
- Prep Time: 15 minutes
- Cook Time: 50 minutes
- Category: Dinner
- Method: Baking
- Cuisine: Asian
Nutrition
- Serving Size: 1/6 of the casserole
- Calories: 380
- Sugar: 8g
- Sodium: 800mg
- Fat: 8g
- Saturated Fat: 2g
- Unsaturated Fat: 6g
- Trans Fat: 0g
- Carbohydrates: 54g
- Fiber: 2g
- Protein: 24g
- Cholesterol: 70mg