Introduction to Strawberry Poke Cake
As a passionate home cook, I love whipping up something sweet and delightful, especially on those busy days. Enter the Strawberry Poke Cake—a showstopper that’s as easy as it is delicious! This cake combines fluffy vanilla goodness with a luscious strawberry filling, making it the perfect treat for family gatherings or simple weeknight desserts. Whether you’re a busy mom trying to satisfy picky eaters or a professional looking for a quick dessert hack, this cake has got your back. So, let’s dive into this delightful recipe that will impress your loved ones!
Why You’ll Love This Strawberry Poke Cake
This Strawberry Poke Cake is not just a dessert; it’s a lifesaver in the kitchen! It’s incredibly easy to make, requiring minimal prep time, so you can whip it up even on your busiest days. The combination of creamy strawberry layers and fluffy cake is a taste bud explosion. Plus, it’s a crowd-pleaser that turns any everyday meal into a special occasion without adding stress to your plate!
Ingredients for Strawberry Poke Cake
Gathering the right ingredients is crucial for creating this indulgent Strawberry Poke Cake. Here’s what you’ll need:
- Vanilla or white cake mix: This provides the fluffy base of the cake. You can also opt for a gluten-free cake mix if needed.
- Egg whites: These help to create a light texture. You could use egg substitutes if you’re looking for a lower-cholesterol option.
- Water: Simple and essential, it helps to combine your cake mix ingredients.
- Vegetable oil: This adds moisture, making your cake rich and delicious. Canola oil is a great alternative.
- White chocolate chips: This creamy element brings sweetness and a smooth texture to the filling. Try milk or dark chocolate chips if you prefer.
- Sweetened condensed milk: Thick and creamy, it’s the secret to a luscious filling that melts in your mouth.
- Boiling water: Needed to dissolve the gelatin perfectly.
- Strawberry-flavored gelatin: This brings that vibrant strawberry flavor. You can swap it with raspberry or cherry gelatin for a different twist.
- Strawberry pie filling: A convenient choice that adds a fruity layer to your cake. You can use homemade for a fresher taste!
- Whipped topping: This adds a light, airy finish. You can use homemade whipped cream as an alternative for a fresher flavor.
- Fresh strawberries: These garnish the cake beautifully, adding freshness and vibrant color. Frozen strawberries can be used in a pinch!
For the exact measurements, check the bottom of the article, where you’ll find everything needed for printing. Now that you have all the ingredients prepped, let’s get cooking!
How to Make Strawberry Poke Cake
Step 1: Preheat and Prepare the Baking Pan
Your journey begins with preheating the oven to 350°F. This temperature sets the stage for your cake to rise beautifully. While the oven warms, grab a 9×13 baking pan and spray it thoroughly with Baker’s Joy or a generic baking spray. This non-stick coating will ensure your cake slides out easily when it’s time to serve. Trust me, the last thing you want is for your gorgeous creation to stick to the pan!
Step 2: Mix the Cake Batter
In a medium-sized mixing bowl, combine the boxed cake mix, water, vegetable oil, and egg whites. Use a whisk or an electric mixer to combine them until smooth. Take care not to overmix; just blend until there are no lumps. This step is key for your cake’s fluffy texture. If the batter feels thick, that’s okay! It’ll bake up light and airy. Now, you’re ready to pour this delicious mixture into your prepared baking pan—what a treat!
Step 3: Bake the Cake
Pop that cake into the preheated oven and bake for 28 to 30 minutes. As it bakes, your kitchen will fill with the heavenly scent of vanilla. To check for doneness, insert a toothpick in the center. If it comes out clean, your cake is ready! If not, give it a few more minutes and check again. Once done, the cake should be golden brown and spring back when touched lightly. Ah, can you smell that? Pure bliss!
Step 4: Poke the Cake
Once your cake cools for about 10 minutes, it’s time to unleash the poking! Using a fork or the handle of a wooden spoon, poke holes spaced about one inch apart across the surface of the cake. This step is essential for allowing the delicious filling to seep in. After poking, let the cake cool completely. Patience is key here, as the filling needs to marry beautifully with the cake!
Step 5: Prepare the White Chocolate Filling
In a medium heat-safe bowl, toss in the white chocolate chips and sweetened condensed milk. Microwave this mixture for 40 seconds, then stir it gently until smooth and creamy. Keep an eye on it to avoid burning the chocolate! This luscious filling adds a scrumptious layer that melts in your mouth. In just a few moments, you’ll have a decadent filling that complements the strawberry flavor perfectly. Now, you’re almost there!
Step 6: Mix the Strawberry Gelatin
In a small heat-safe bowl, pour the boiling water over the strawberry-flavored gelatin. Stir until the gelatin fully dissolves. This will take just a minute or two. The vibrant color and sweet aroma of the gelatin will make your kitchen feel like summer! Once done, you’re ready to combine this fruity mixture with the white chocolate filling.
Step 7: Combine and Chill
Now, it’s time to bring those two mixtures together! Pour the dissolved gelatin over the white chocolate filling and stir until well combined. Take your time here, ensuring there’s a beautiful consistency. Once it’s mixed, pour this delightful mixture evenly over the cooled cake, smoothing it gently with a spatula. Cover your cake and chill it in the refrigerator for at least 20 minutes to help everything set perfectly.
Step 8: Add the Toppings
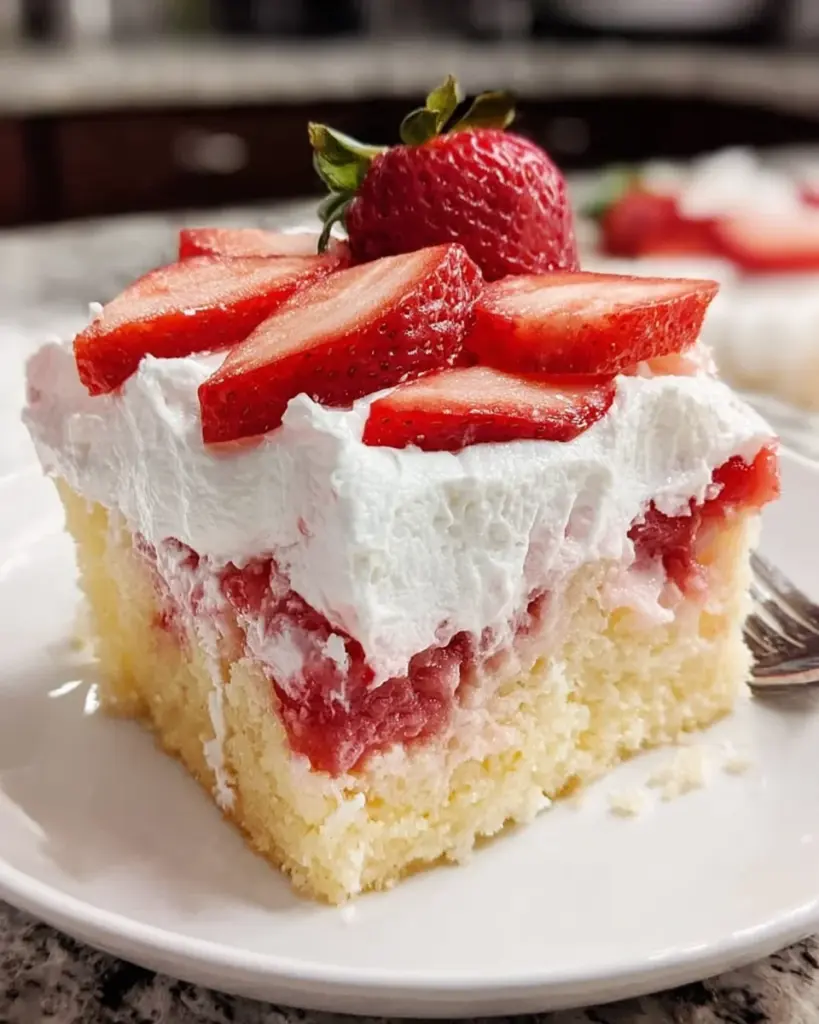
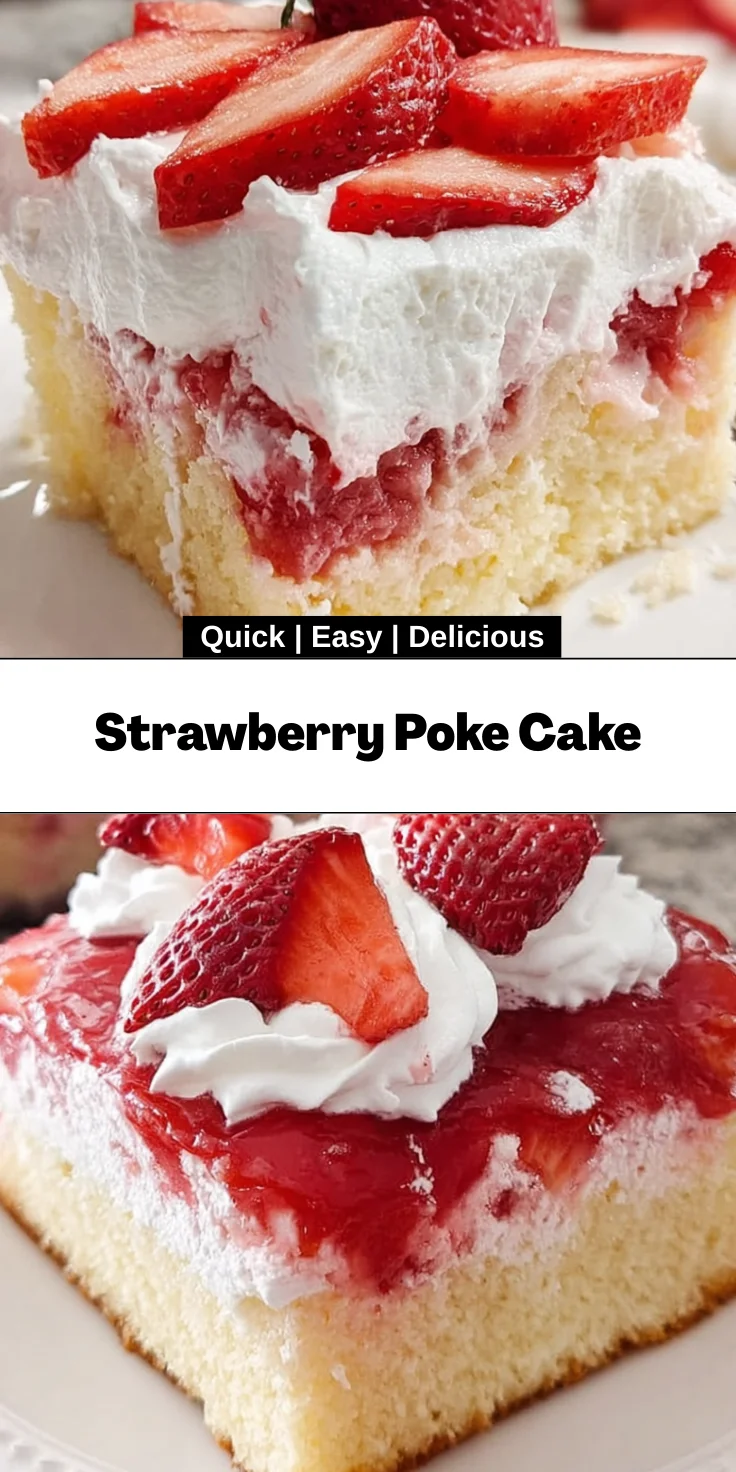
After chilling, spread the strawberry pie filling generously over the top of the white chocolate layer. This adds a vibrant touch and bursts of juicy flavor. Then, cover the cake back up and let it chill for at least four hours, or overnight for the best results. When it’s time to serve, spread the whipped topping over the cake and arrange your sliced fresh strawberries on top. You did it! Now, slice it into squares and watch everyone’s faces light up as they take that first bite.
Tips for Success
- Always let your cake cool completely before adding the filling to avoid melting it.
- For a vibrant look, layer your fresh strawberries just before serving.
- If you’re short on time, use store-bought strawberry pie filling.
- Chill the cake overnight for the best flavor infusion.
- Feel free to customize with other fruits or flavored gelatin!
Equipment Needed for Strawberry Poke Cake
- 9×13 baking pan: Essential for baking; can also use a glass dish.
- Mixing bowls: A few will help keep things organized; plastic or glass works great.
- Whisk or electric mixer: For mixing the batter; a handheld whisk does the trick.
- Fork or wooden spoon: Needed for poking holes in the cake.
- Spatula: To smooth out fillings; use a rubber spatula for easy scraping.
Variations of Strawberry Poke Cake
- Chocolate Strawberry Poke Cake: Substitute the vanilla cake mix with chocolate cake mix for a richer flavor. Pairing chocolate and strawberry is a classic combination that’s sure to please!
- Gluten-Free Option: Use a gluten-free cake mix to cater to dietary restrictions while keeping all the delicious flavors intact!
- Fruity Twist: Swap out the strawberry pie filling for peach or blueberry filling for a refreshing change. Each fruit brings its own unique sweetness.
- Vegan Version: Use a plant-based cake mix, replace egg whites with aquafaba (chickpea water), and choose a dairy-free whipped topping for a guilt-free delight.
- Nutty Fun: Add crushed nuts like almonds or pecans on top for a delightful crunch that contrasts perfectly with the creamy layers!
Serving Suggestions
- Pair with Ice Cream: A scoop of vanilla or strawberry ice cream adds an extra creamy touch that perfectly complements the cake.
- Fresh Mint Leaves: Garnish each slice with a sprig of fresh mint for a pop of color and flavor.
- Sparkling Water: Serve with a glass of sparkling water for a refreshing, light drink option.
- Perfect for Picnics: This cake is delicious chilled, making it ideal for summer picnics or potlucks!
FAQs about Strawberry Poke Cake
Can I make Strawberry Poke Cake ahead of time?
Absolutely! In fact, making this Strawberry Poke Cake a day in advance actually enhances the flavors. Just store it in the refrigerator, covered until you’re ready to serve it. The longer it chills, the better it tastes!
Can I use frozen strawberries instead of fresh?
Definitely! Feel free to use frozen strawberries if fresh ones aren’t available. Just make sure to thaw and slice them before topping your cake. They’ll add that lovely strawberry flavor, even in a pinch!
Can I use different flavors of gelatin?
Yes! While strawberry-flavored gelatin enhances this cake, you can substitute it for raspberry or even cherry gelatin for a delightful twist. Each flavor will bring its own unique taste to the cake!
How should I store leftover cake?
Store any leftover Strawberry Poke Cake in an airtight container in the refrigerator. It will stay fresh for about 3-4 days. Trust me, it’s just as delicious the next day!
What can I do to make the topping more special?
If you want to elevate your topping, consider adding a touch of vanilla extract or some lemon zest to your whipped topping. It adds a refreshing flavor that beautifully complements the strawberries!
Final Thoughts
Creating this Strawberry Poke Cake is more than just baking; it’s an experience filled with joy and sweet memories. Whether it’s served at a family gathering or enjoyed with your loved ones on a quiet evening, each bite brings smiles and happiness. The fluffy cake, creamy layers, and fresh strawberries create a delightful harmony that’s simply irresistible. Plus, the excitement in your kitchen as it all comes together is priceless! I hope this cake finds its way into your home and creates moments you cherish for years to come. Happy baking!
Print
Strawberry Poke Cake
- Total Time: 5 hours
- Yield: 12 servings 1x
- Diet: Vegetarian
Description
A delicious and easy dessert that combines a fluffy vanilla cake with a creamy strawberry filling and a whipped topping, garnished with fresh strawberries.
Ingredients
- 15.25 ounces vanilla cake mix or white cake mix
- 4 egg whites
- 1 cup water
- ½ cup vegetable oil
- 1 cup white chocolate chips
- 14 ounces sweetened condensed milk
- ⅓ cup boiling water
- 3 ounces strawberry-flavored gelatin
- 21 ounces strawberry pie filling
- 12 ounces whipped topping, thawed
- 12 fresh strawberries, washed, capped, and sliced thin
Instructions
- Preheat the oven to 350°F and spray a 9×13 baking pan with Baker’s Joy or a generic baking spray.
- In a medium-sized mixing bowl, whisk together the boxed cake mix, water, vegetable oil, and egg whites until combined.
- Pour the cake batter into the prepared baking dish and bake for 28 to 30 minutes until a toothpick inserted comes out clean.
- Once baked, poke holes in the warm cake with a fork or the handle of a wooden spoon, spacing 1 inch apart, and allow to cool completely.
- In a medium heat-safe bowl, combine the white chocolate chips and sweetened condensed milk, microwaving for 40 seconds and stirring until smooth.
- In a small heat-safe bowl, mix the boiling water and strawberry-flavored gelatin, stirring until dissolved.
- Pour the gelatin over the white chocolate mixture and stir until combined.
- Evenly pour the white chocolate mixture over the cooled cake and smooth with a spatula.
- Chill the cake in the refrigerator for 20 minutes.
- Spread strawberry pie filling over the top of the white chocolate layer, cover, and chill for 4 hours to overnight.
- Remove the cake from the refrigerator, spread the whipped topping over the cake, and lay sliced strawberries on top.
- Slice the cake into 2×2 pieces and serve.
Notes
- The cake can be refrigerated overnight for the best flavor.
- Ensure the cake is completely cooled before adding the topping.
- You can use fresh or frozen strawberries for topping.
- Prep Time: 30 minutes
- Cook Time: 30 minutes
- Category: Dessert
- Method: Baking
- Cuisine: American
Nutrition
- Serving Size: 1 slice
- Calories: 320
- Sugar: 25g
- Sodium: 200mg
- Fat: 10g
- Saturated Fat: 4g
- Unsaturated Fat: 6g
- Trans Fat: 0g
- Carbohydrates: 51g
- Fiber: 1g
- Protein: 4g
- Cholesterol: 25mg