Introduction to Strawberries and Cream Dream Layer
Welcome to my cozy kitchen, where the sweet aroma of baking fills the air! Today, I’m thrilled to share my Strawberries and Cream Dream Layer. This dessert isn’t just a feast for the eyes; it’s a symphony of flavors that will impress even the pickiest of eaters. Perfect for those chaotic days when you need a quick go-to treat, this layered delight combines rich red velvet cake with creamy cheesecake and fresh strawberries. Whether it’s a family gathering or a sweet surprise for the kids, this recipe brings joy and indulgence right to your table!
Why You’ll Love This Strawberries and Cream Dream Layer
This Strawberries and Cream Dream Layer is the perfect solution for busy moms and professionals alike. Not only is it easy to prepare, but it also combines delightful flavors that your family will crave. With its vibrant appearance and luscious texture, it transforms ordinary moments into special ones. Plus, who doesn’t love a show-stopping dessert that fits right into your schedule? This treat can be whipped up in no time!
Ingredients for Strawberries and Cream Dream Layer
Before we dive into making our Strawberries and Cream Dream Layer, let’s gather our ingredients. Each element plays a crucial role in creating this delightful dessert:
- Red velvet cake mix: The base of our dessert, it brings a rich color and flavor that pairs beautifully with creamy fillings.
- Eggs, oil, and water: These are essential as they activate the cake mix. Make sure to follow the instructions on the box for a moist cake.
- Vanilla extract (optional): A splash of vanilla adds depth to the sweet flavors. Opt for high-quality if possible.
- Cream cheese: The star of our no-bake cheesecake filling! Choose a full-fat variety for creamy consistency.
- Granulated sugar: Sweetens the cheesecake and balances the tanginess of the cream cheese.
- Lemon juice: Adds brightness and enhances flavors in both the cheesecake filling and strawberry compote.
- Heavy cream: When whipped, it gives our cheesecake a light, airy texture that makes every bite melt in your mouth.
- Fresh strawberries: These juicy gems are not just for taste but also add freshness and color. Use them when they’re ripe for the best flavor!
- Additional sugar for strawberry preparation: Helps macerate the strawberries, drawing out their juices for a delightful topping.
- Diced strawberries: Used in the compote, they provide a burst of intense strawberry flavor.
- Cornstarch: Thickens the strawberry compote, giving it that luscious, glossy finish.
- Fresh sliced strawberries for topping: These not only beautify the cake, they also add a refreshing crunch.
- Whipped cream (optional): For those who wish to add a piped decoration, whipped cream creates a stunning finish.
- Cream cheese frosting (optional): If you want an extra indulgence, this frosting pairs wonderfully with the red velvet cake.
You’ll find the specific quantities for each ingredient at the bottom of this article, so you can easily print the recipe for your next baking adventure!
How to Make Strawberries and Cream Dream Layer
Now that we have all our ingredients ready, let’s embark on the delicious journey of creating our Strawberries and Cream Dream Layer. This is where the magic happens, and trust me, it’s simpler than you might think!
Step 1: Baking the Red Velvet Cake
First, preheat your oven according to the instructions on the cake mix box. If you’re like me, preheating is a cue to tidy up the kitchen, so it’s a win-win!
Next, grease and line two cake pans with parchment paper. This step ensures your cakes will pop out easily.
In a large mixing bowl, combine the red velvet cake mix with the required eggs, oil, and water. If you fancy a flavor upgrade, add a teaspoon of vanilla extract. It’s a small touch, but oh-so-delicious.
Mix until all ingredients are well combined. Divide the batter equally between the prepared pans. Bake as per package instructions. Once done, allow the cakes to cool in their pans for about 10 minutes. Then, flip them onto a wire rack to cool completely. Level the tops with a serrated knife for clean stacking. A little precision goes a long way!
Step 2: Preparing the Strawberries
As our cake layers cool, let’s prepare the strawberries. In a mixing bowl, toss the sliced strawberries with 2 tablespoons of sugar. This magic moment allows the strawberries to macerate, enhancing their natural sweetness. Set them aside for about 10–15 minutes.
While waiting, let’s make the strawberry compote! In a small saucepan, mix diced strawberries, 1/3 cup sugar, and a tablespoon of lemon juice. Cook over medium heat until the strawberries soften and release their juices, about 5 minutes.
Thicken this mixture by stirring in the cornstarch mixed with water. Keep simmering until glossy, about 2 to 3 minutes. Once thickened, remove from heat and let it cool completely. Your taste buds are in for a treat!
Step 3: Making the Cheesecake Filling
For the creamy filling, it’s time to whip up our no-bake cheesecake! Using a stand or hand mixer, beat the softened cream cheese until it’s smooth and luscious.
Add in 1 cup of granulated sugar, lemon juice, and vanilla extract. Mix until combined and creamy. In a separate bowl, whip the cold heavy cream until you achieve stiff peaks. This step is critical for that dreamy texture!
Now, gently fold the whipped cream into the cream cheese mixture. We want a fluffy filling, so handle it with care! Keep this delightful concoction chilled until you’re ready to use it.
Step 4: Assembling the Layers
Here comes the fun part—assembly! Start by placing the first cooled cake layer on a flat serving board or a springform pan for easy handling.
Brush away any loose crumbs. This helps ensure a neat appearance when serving. Spread a generous layer of cheesecake filling, about 1/3 to 1/2 inch thick, over the cake layer using an offset spatula.
Next, distribute the macerated strawberries evenly on top of the cheesecake layer. This ensures every slice burst with the essence of juicy strawberries.
Spoon on the shiny strawberry compote, spreading it out for even moisture and flavor. Layer another thick helping of cheesecake filling atop this layer. Finally, place the remaining cake layer gently on top, pressing lightly to set. It’s really coming together!
Step 5: Chilling the Dessert
The last step, but just as important, is chilling your dessert. Cover the assembled cake with plastic wrap and refrigerate for at least 4 hours, or overnight if you can hold off. This allows the flavors to meld beautifully and gives that cheesecake filling time to firm up.
When you’re ready to serve, slice it with a sharp knife for those perfect clean layers. Your Strawberries and Cream Dream Layer is ready to shine at your gathering!
Tips for Success
- Ensure your cream cheese is completely softened to avoid lumps in your filling.
- Use high-quality vanilla extract for a deeper flavor in both the cake and cheesecake.
- Let your cakes cool completely before layering to prevent the filling from melting.
- For easier slicing, use a sharp knife dipped in hot water.
- Chilling overnight is best for flavor integration.

Equipment Needed for Strawberries and Cream Dream Layer
- Mixing bowls: A set of varying sizes will help you easily manage your ingredients.
- Measuring cups and spoons: Essential for accuracy in your recipe.
- Stand or hand mixer: For whipping cream and mixing your cheesecake filling with ease.
- Spatula: An offset spatula is perfect for spreading your cheesecake filling smoothly.
- Springform pan or cake pans: Use a springform pan for easy removal, or standard cake pans for layering.
Variations of Strawberries and Cream Dream Layer
- Gluten-Free Option: Substitute the red velvet cake mix with a gluten-free cake mix, ensuring everyone can indulge.
- Fruit Swaps: Try mixing in other berries like blueberries or raspberries for a different flavor profile.
- Dairy-Free Version: Use dairy-free cream cheese and whipped coconut cream for a lactose-free delight.
- Chocolate Layer: Add a layer of chocolate ganache between the cheesecake and strawberries for a decadent twist.
- Nutty Crunch: Incorporate crushed nuts or granola between the layers for added texture and a delightful crunch.
Serving Suggestions for Strawberries and Cream Dream Layer
- Pair your dessert with a dollop of whipped cream for added indulgence.
- Serve alongside a refreshing mint tea or a crisp glass of sparkling lemonade.
- For a festive touch, garnish each slice with fresh mint leaves.
- Consider a scoop of vanilla ice cream for a delicious contrast.
- Arrange slices on a beautiful platter for an appetizing presentation.
FAQs about Strawberries and Cream Dream Layer
Can I make this dessert ahead of time?
Absolutely! In fact, making your Strawberries and Cream Dream Layer a day in advance is a great idea. It gives the flavors time to meld and the cheesecake filling to set perfectly.
What can I substitute for cream cheese?
If you prefer a lighter option, you can use Greek yogurt or mascarpone cheese in place of cream cheese. This will change the flavor profile slightly, but it will still be delicious!
Can I use frozen strawberries instead of fresh?
While fresh strawberries are ideal, you can use frozen ones. Just make sure to thaw and drain them properly before use to avoid excess moisture in your layers.
How do I store leftovers?
Store any leftovers in an airtight container in the refrigerator. It should be fine for about 3 to 4 days, though it’s likely to disappear much faster!
Can I replace the red velvet cake with another flavor?
Definitely! This recipe is versatile. You can experiment with classic flavors like vanilla or chocolate cake. Just remember that each base will bring its unique taste to the Strawberries and Cream Dream Layer.
Final Thoughts
Creating the Strawberries and Cream Dream Layer is more than just baking; it’s about sharing joy and love through food. This delightful dessert transforms everyday occasions into memorable celebrations, bringing friends and family together around the table. The combination of rich red velvet cake, velvety cheesecake, and fresh strawberries creates an experience that dances on your palate.
Each slice tells a story, whether it’s a birthday celebration or a simple family dinner. So why not indulge in this heavenly treat? I promise it will bring smiles and sweet moments that linger long after the last bite!
Print
Strawberries and Cream Dream Layer
- Total Time: 4 hours 30 minutes
- Yield: Serves 10-12 1x
- Diet: Vegetarian
Description
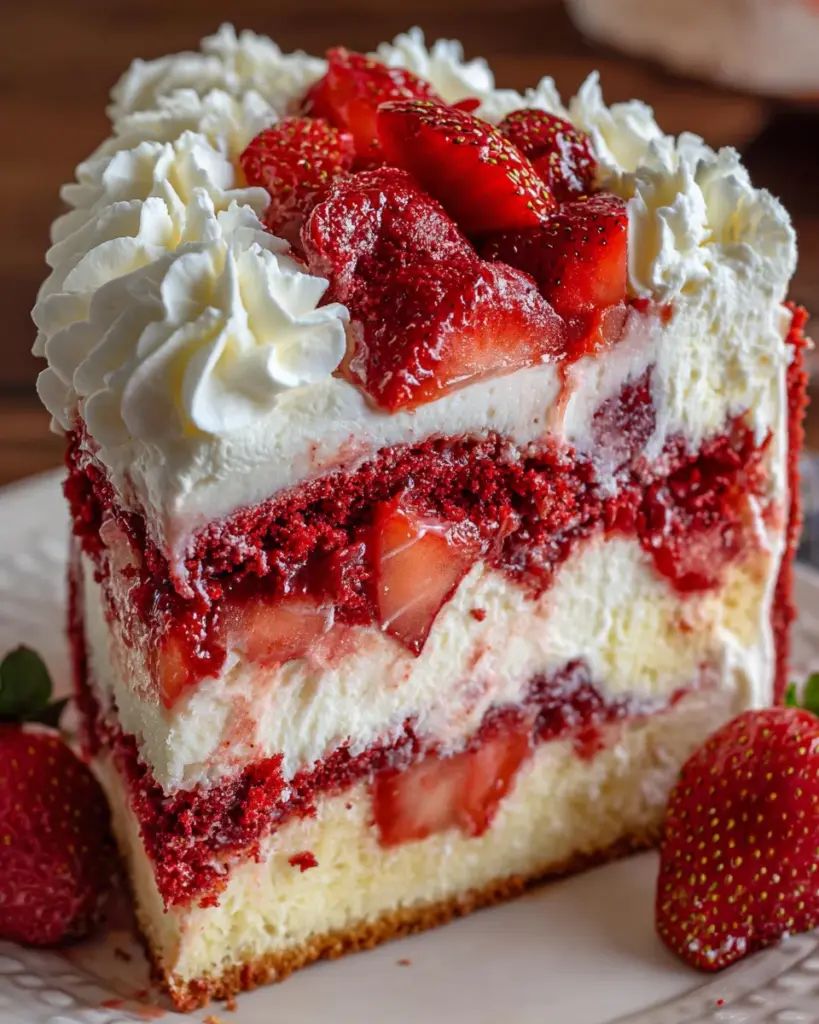
A delightful dessert combining layers of red velvet cake, no-bake cheesecake, fresh strawberries, and strawberry compote, perfect for indulging your sweet tooth.
Ingredients
- 1 box red velvet cake mix
- Eggs, oil, and water as called for on cake mix box
- 1 teaspoon vanilla extract (optional)
- 24 ounces cream cheese, softened
- 1 cup granulated sugar
- 1 tablespoon lemon juice
- 1 teaspoon vanilla extract
- 2 cups heavy cream, cold
- 2 cups fresh strawberries, hulled and sliced
- 2 tablespoons granulated sugar
- 2 cups strawberries, diced
- 1/3 cup granulated sugar
- 1 tablespoon lemon juice
- 1 tablespoon cornstarch mixed with 2 tablespoons water
- Fresh sliced strawberries for topping
- Whipped cream for piping (optional)
- Cream cheese frosting (optional)
Instructions
- Preheat oven as indicated on cake mix package. Grease and line two cake pans with parchment paper. Make cake batter using ingredients listed on cake mix box, incorporating the vanilla extract if desired. Divide batter equally between pans and bake according to package directions. Allow cakes to cool 10 minutes in pans, then turn onto wire rack to cool completely. Once cooled, level the tops with a serrated knife for even stacking.
- Place sliced strawberries in a bowl. Sprinkle with 2 tablespoons sugar and toss lightly. Let sit at room temperature for 10 to 15 minutes to allow juices to release.
- In a small saucepan, combine diced strawberries, 1/3 cup sugar, and 1 tablespoon lemon juice. Cook over medium heat until berries soften and release juices, about 5 minutes. Stir in the cornstarch slurry and continue simmering until mixture thickens and turns glossy, 2 to 3 minutes more. Remove from heat and allow to cool completely.
- Using a stand mixer or hand mixer, beat softened cream cheese until smooth. Add 1 cup sugar, lemon juice, and vanilla extract; mix until combined and creamy. In a separate bowl, beat cold heavy cream to stiff peaks. Gently fold whipped cream into the cream cheese mixture, preserving volume for a mousse-like texture. Keep mixture chilled until ready to use.
- Arrange cooled cake layers, cheesecake filling, macerated strawberries, and strawberry compote at your station. Use a springform pan or place first cake layer on a flat serving board.
- Place one cake layer on the serving board or inside the springform pan. Brush away loose crumbs.
- Spread a thick, even layer of cheesecake filling—approximately 1/3 to 1/2 inch—over the cake layer using an offset spatula.
- Distribute macerated strawberry slices evenly on top of the cheesecake layer to achieve balanced texture across the cake.
- Spoon and spread a thin, glossy layer of strawberry compote over the strawberries to enhance moisture and flavor.
- Add another thick layer of cheesecake filling atop the compote. Smooth surface gently.
- Place the remaining cake layer on top and press very gently to set the layers.
- Cover the top cake layer with a final layer of cheesecake filling. Garnish with fresh sliced strawberries and more strawberry compote if desired. Pipe whipped cream around the border or add decorative cream cheese frosting, if using.
- Cover assembled cake and refrigerate at least 4 hours, preferably overnight, so the cheesecake filling firms and the layers meld. Slice with a sharp knife for clean layers when serving.
Notes
- For a richer flavor, use high-quality vanilla extract.
- Make sure the cream cheese is fully softened to avoid lumps in the cheesecake filling.
- Refrigerating overnight allows the flavors to meld beautifully.
- Use fresh strawberries for garnishing to enhance presentation.
- Prep Time: 30 minutes
- Cook Time: 30 minutes
- Category: Dessert
- Method: Baking and No-Bake
- Cuisine: American
Nutrition
- Serving Size: 1 slice
- Calories: 450
- Sugar: 35g
- Sodium: 300mg
- Fat: 30g
- Saturated Fat: 15g
- Unsaturated Fat: 10g
- Trans Fat: 0g
- Carbohydrates: 45g
- Fiber: 2g
- Protein: 5g
- Cholesterol: 80mg