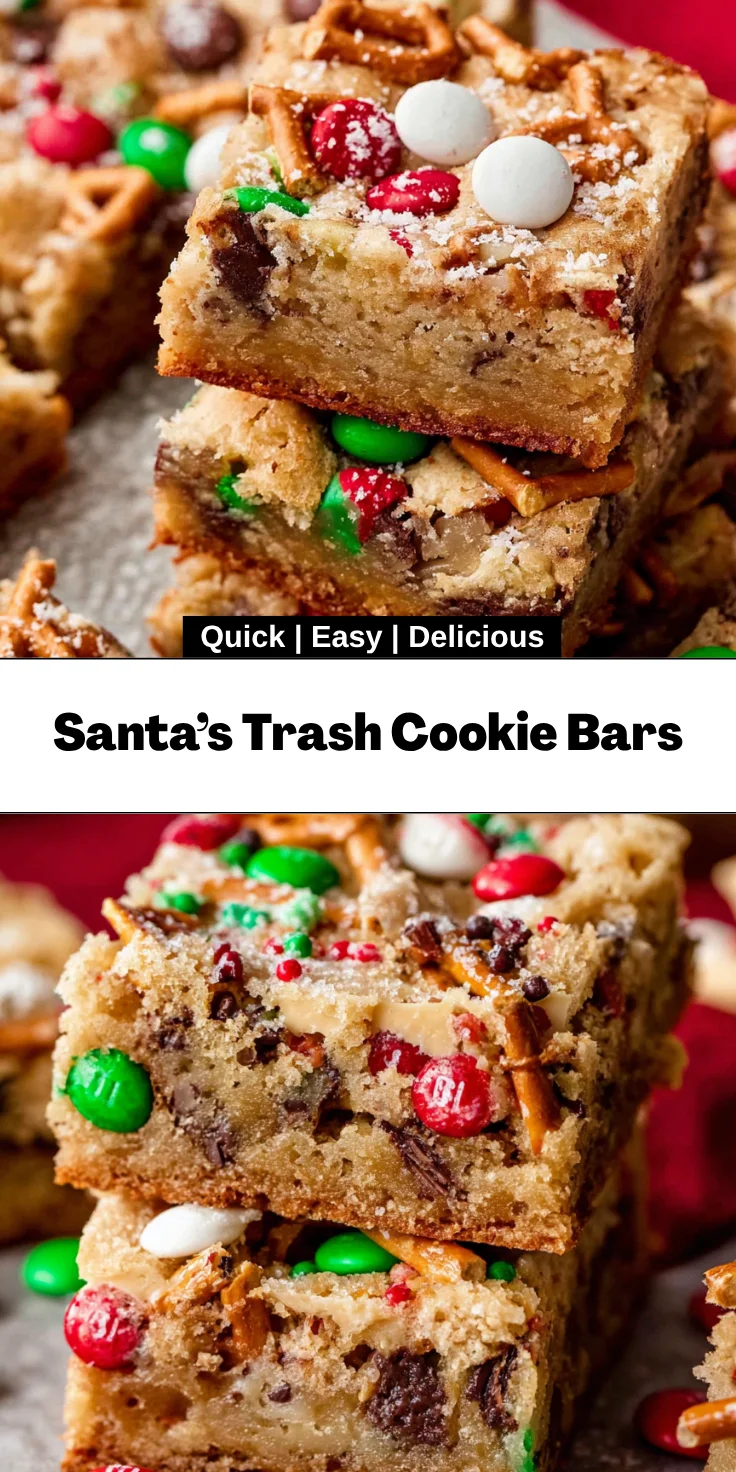
Introduction to Santa’s Trash Cookie Bars
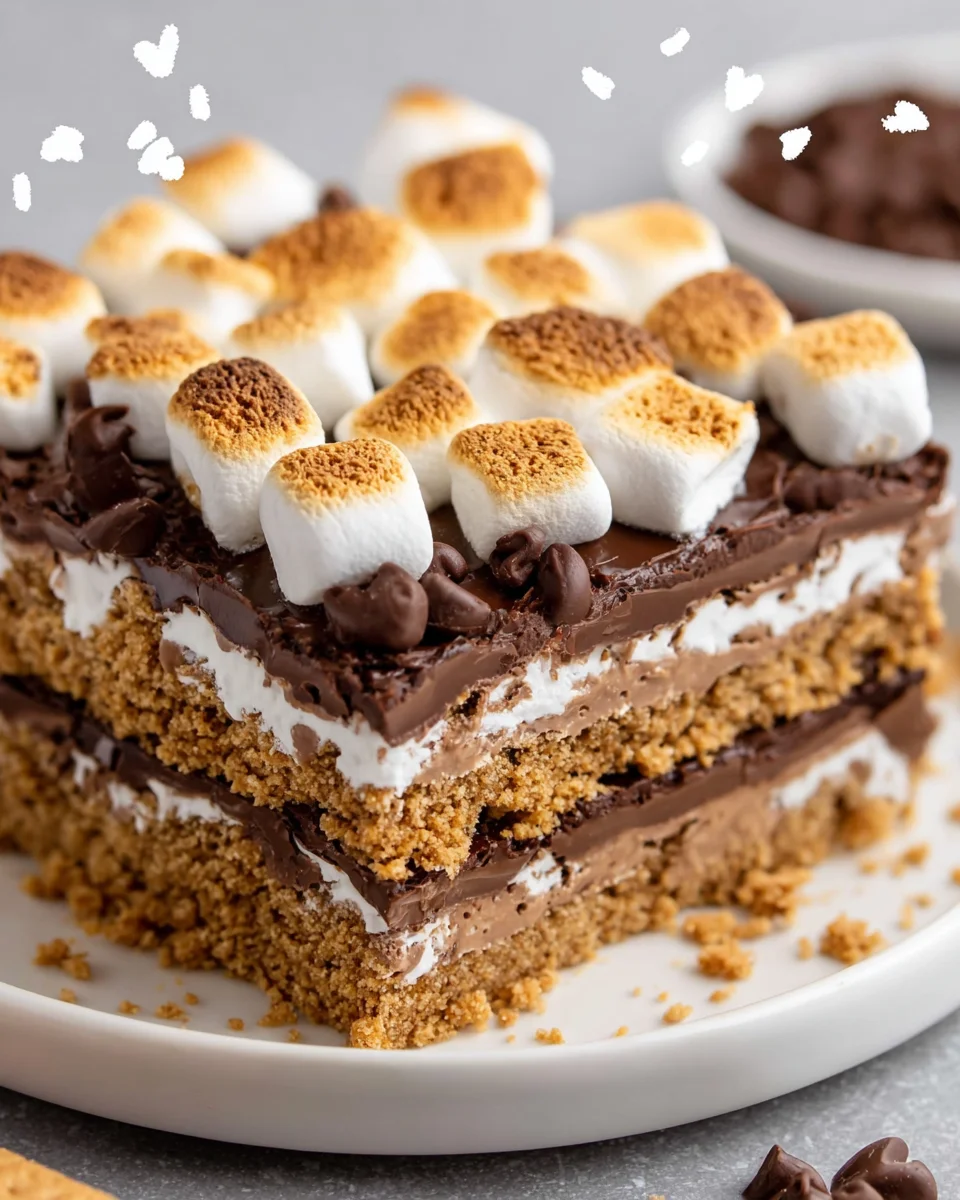
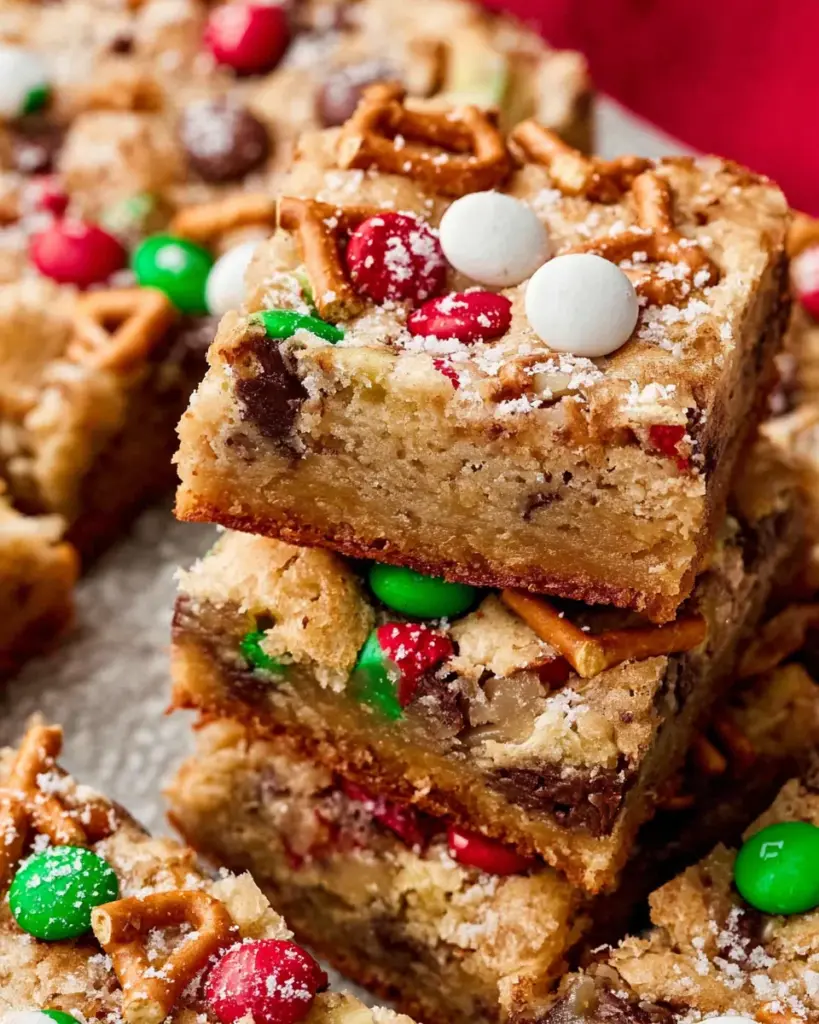
As the holiday season rolls in, I find myself craving treats that capture the spirit of this joyful time. That’s where Santa’s Trash Cookie Bars come into play! With their delightful blend of sweet and salty flavors, they are a true crowd-pleaser.
Perfect for family gatherings or last-minute gifts, these cookie bars are a quick solution when you’re juggling a busy schedule. Imagine the smiles on your loved ones’ faces as they indulge in this festive treat. Let me show you just how easy it is to whip up a batch that even Santa would love!
Why You’ll Love This Santa’s Trash Cookie Bars
These Santa’s Trash Cookie Bars are a game changer for busy moms like me! They come together in just about 40 minutes, making them perfect for those hectic holiday nights. The combination of sweet, salty, and crunchy creates an explosion of flavors that will leave your taste buds dancing. Plus, they’re so easy to make that even your little helpers can join in on the fun. What’s not to love?
Ingredients for Santa’s Trash Cookie Bars
Gathering the right ingredients for Santa’s Trash Cookie Bars is half the fun! Here’s what you’ll need:
- Cornstarch: This helps create a chewy texture that balances the crunchiness of the bars.
- Baking soda: A leavening agent that gives the bars their rise, keeping them soft and fluffy.
- Salt: Tiny but mighty, it enhances the flavors and balances the sweetness perfectly.
- Unsalted butter: Creaming this with sugars creates a rich base for the cookie bars.
- Granulated sugar: Adds sweetness and contributes to a delightful texture.
- Light brown sugar: Not just for sweetness, it also adds moisture and a hint of caramel flavor.
- Vanilla extract: This heavenly aroma elevates the cookie bars, making them irresistible.
- Large eggs: Essential for binding, they help create that soft and tender crumb.
- Potato chips: Surprised? These add a salty crunch that beautifully contrasts the sweetness.
- Pretzels: More crunchy goodness! They infuse a fun knotty twist to each bite.
- Chocolate chips: Because who doesn’t love chocolate? They melt into gooey pockets of joy!
- Christmas M&Ms: Festive and colorful, these candies add a pop of color and extra sweetness.
- Christmas sprinkles: Optional but recommended, they bring a dose of fun and holiday cheer to the bars.
For exact measurements, you can check at the bottom of the article, where I’ve listed everything for easy printing.
How to Make Santa’s Trash Cookie Bars
Making Santa’s Trash Cookie Bars is as simple as it gets! I promise, once you get started, you’ll see how each step builds excitement for this festive treat. Let me guide you through the process with some helpful tips along the way.
Preheat and Prepare the Pan
First things first, preheat your oven to 350 degrees F. This is crucial for the perfect bake!
While that’s heating up, prepare your 9-inch × 13-inch cake pan. Line it with aluminum foil or parchment paper, leaving some overhang for easy removal later. This step helps prevent sticking, making slicing the bars a breeze.
Mix the Dry Ingredients
In a medium bowl, grab your whisk and combine the flour, cornstarch, baking soda, and salt.
Whisking these together is important, as it evenly distributes the leavening agents. This will ensure that your cookie bars rise beautifully. Set this bowl aside; we’ll return to it soon!
Cream the Butter and Sugars
In a large bowl, it’s time to cream together the softened butter, granulated sugar, brown sugar, and vanilla extract.
Using a hand mixer or stand mixer, mix these ingredients until they become light and fluffy. This step incorporates air, helping your cookie bars achieve that delightful texture we all crave.
Incorporate the Eggs
Now for the magic ingredient! Add the eggs one at a time, mixing for about 10 seconds after each addition.
This method allows each egg to blend smoothly into the batter, ensuring a consistent mixture. Trust me, it makes a difference!
Combine Wet and Dry Ingredients
Now, it’s time to marry the two mixtures. Slowly add the dry ingredients to the butter mixture, mixing until just combined.
You want to avoid overmixing at this stage. After everything is mixed, gently fold in the crushed potato chips, pretzels, chocolate chips, M&Ms, and most of the sprinkles. The excitement builds as you see those colorful additions!
Spread Batter and Add Toppings
Take the cookie dough and spread it evenly into the prepared pan. Use a spatula to make sure every corner is filled.
Don’t forget to top the mixture with the remaining M&Ms, chocolate chips, crushed pretzels, and sprinkles. This is where your cookie bars get that extra festive flair!
Bake to Perfection
Pop your cookie bars into the oven and let them bake for 22 to 25 minutes.
Look for the edges to turn a lovely golden brown. You can also insert a toothpick into the center; if it comes out with a few moist crumbs, you’re all set! Once done, remove the pan and let it cool on a wire rack. Cooling for at least an hour will allow them to set properly.
Tips for Success
- Always use room temperature ingredients for better mixing.
- Don’t overmix the batter to keep your bars nice and soft.
- Experiment with different mix-ins like nuts or dried fruits for extra flavor!
- Let the bars cool completely before slicing for cleaner cuts.
- For an even layer, use a spatula to spread the dough uniformly.
Equipment Needed
- 9-inch × 13-inch cake pan (or any sturdy baking dish).
- Mixing bowls (opt for glass or stainless steel for durability).
- Hand mixer or stand mixer (a whisk works if you enjoy a workout!).
- Spatula (a silicone one is great for scraping!).
- Measuring cups and spoons for accuracy.
Variations of Santa’s Trash Cookie Bars
- For a nutty twist, add chopped walnuts or pecans to the mix. They complement the sweet and salty flavors perfectly.
- Switch out the chocolate chips for white chocolate or peanut butter chips to create a different flavor profile.
- Make it a gluten-free treat by using a gluten-free flour blend instead of regular flour.
- For a lower-sugar alternative, use coconut sugar in place of granulated and brown sugars.
- Add dried cranberries or cherries for a tart contrast to the sweetness.
Serving Suggestions for Santa’s Trash Cookie Bars
- Pair with a warm cup of hot cocoa or spiced holiday tea for the perfect cozy treat.
- Serve on a festive platter topped with extra sprinkles for an eye-catching presentation.
- Add a scoop of vanilla ice cream on the side for an indulgent dessert experience.
FAQs about Santa’s Trash Cookie Bars
There are always a few questions that pop up when making Santa’s Trash Cookie Bars. Let me take a moment to answer some of the most common ones to make this holiday baking even easier for you!
Can I make Santa’s Trash Cookie Bars ahead of time?
Absolutely! These cookie bars can be baked a day or two in advance. Just store them in an airtight container at room temperature to keep them fresh. You can even freeze bars for later enjoyment!
What can I substitute for the potato chips?
If you’re not a fan of potato chips, feel free to swap them out with corn chips or crispy rice cereal. Both alternatives will still give you that delightful crunch and salty bite.
Is it possible to make these cookie bars vegan?
Yes! You can make a vegan version by using plant-based butter, replacing the eggs with flax eggs (1 tablespoon flaxseed meal mixed with 2.5 tablespoons water per egg), and choosing vegan chocolate chips.
How do I know when the cookie bars are done baking?
Look for the edges to be a lovely golden brown, while the center should be soft but not jiggly. A toothpick inserted in the middle should come out with a few moist crumbs attached—this means you’re good to go!
Can I use different mix-ins besides M&Ms?
Absolutely! Feel free to get creative with your mix-ins. You can use chopped nuts, mini marshmallows, or even different types of candies based on your preference. The possibilities are endless!
Final Thoughts on Santa’s Trash Cookie Bars
Making Santa’s Trash Cookie Bars is more than just baking; it’s about creating sweet memories. Whether you’re gathered around the kitchen with your kids or surprising a neighbor with a festive treat, the joy is truly in the journey.
These cookie bars bring a delightful mix of textures and flavors that embody the holiday spirit. I hope this recipe inspires laughter, love, and a sprinkle of magic during your celebrations. So, roll up your sleeves, and embark on this sweet adventure. You’ll be amazed at just how much happiness a simple cookie bar can bring!
Print
Santa’s Trash Cookie Bars
- Total Time: 40 minutes
- Yield: 24 cookie bars 1x
- Diet: Vegetarian
Description
Santa’s Trash Cookie Bars are a fun and festive treat perfect for the holiday season, combining sweet and salty flavors in a delicious cookie bar form.
Ingredients
- 1 tablespoon cornstarch
- 1 teaspoon baking soda
- 1 teaspoon salt
- 1 cup unsalted butter, softened
- ¾ cup granulated sugar
- ¾ cup light brown sugar, packed
- 1 teaspoon vanilla extract
- 2 large eggs
- ¾ cup potato chips, crushed
- ¾ cup pretzels, crushed
- ¾ cup chocolate chips
- ¾ cup Christmas M&Ms
- 2 tablespoons Christmas sprinkles
Instructions
- Preheat the oven to 350 degrees F and line a 9-inch × 13-inch cake pan with aluminum foil or parchment paper and set aside.
- In a medium bowl, whisk together the flour, cornstarch, baking soda, and salt. Set aside.
- In a large bowl with a hand mixer or in a stand mixer fitted with a paddle attachment, cream together the butter, sugar, brown sugar, and vanilla until light and fluffy.
- Add the eggs one at a time, mixing after each addition for about 10 seconds.
- Add the dry ingredients to the butter mixture and mix just until combined. Fold in the chips, crushed pretzels, chocolate chips, M&M’s, and most of the sprinkles.
- Spread the cookie dough out evenly in the cake pan and top with extra M&M’s, chocolate chips, chips, pretzels, and the remaining sprinkles.
- Bake the cookie bars for 22 to 25 minutes until the edges are golden brown. Remove from the oven and place on a wire rack.
- Allow the bars to cool for at least 1 hour in the pan before removing and slicing them into squares.
Notes
- For a more festive look, use holiday-themed sprinkles.
- Store any leftovers in an airtight container at room temperature.
- Prep Time: 15 minutes
- Cook Time: 25 minutes
- Category: Dessert
- Method: Baking
- Cuisine: American
Nutrition
- Serving Size: 1 bar
- Calories: 200
- Sugar: 15g
- Sodium: 150mg
- Fat: 10g
- Saturated Fat: 6g
- Unsaturated Fat: 3g
- Trans Fat: 0g
- Carbohydrates: 28g
- Fiber: 1g
- Protein: 2g
- Cholesterol: 30mg