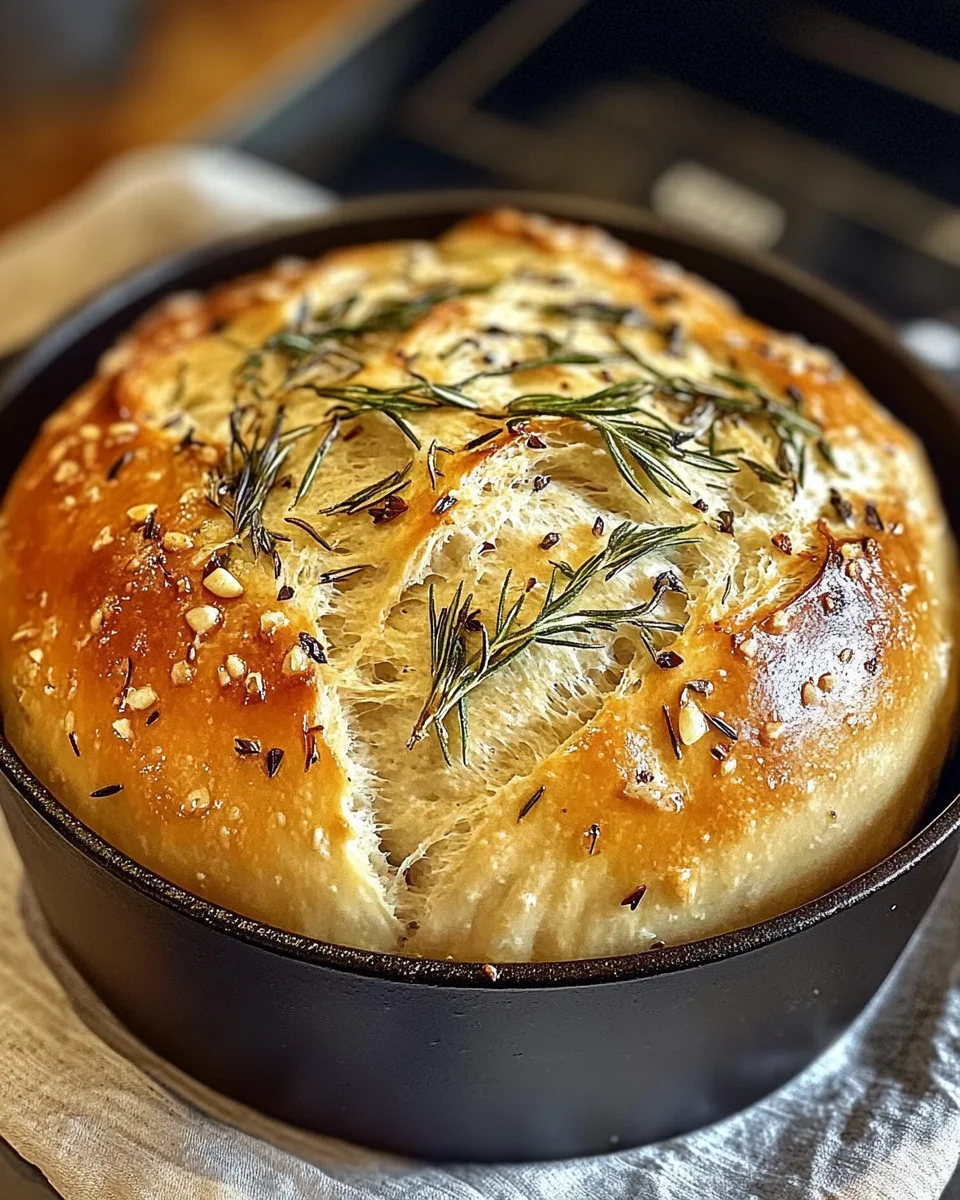
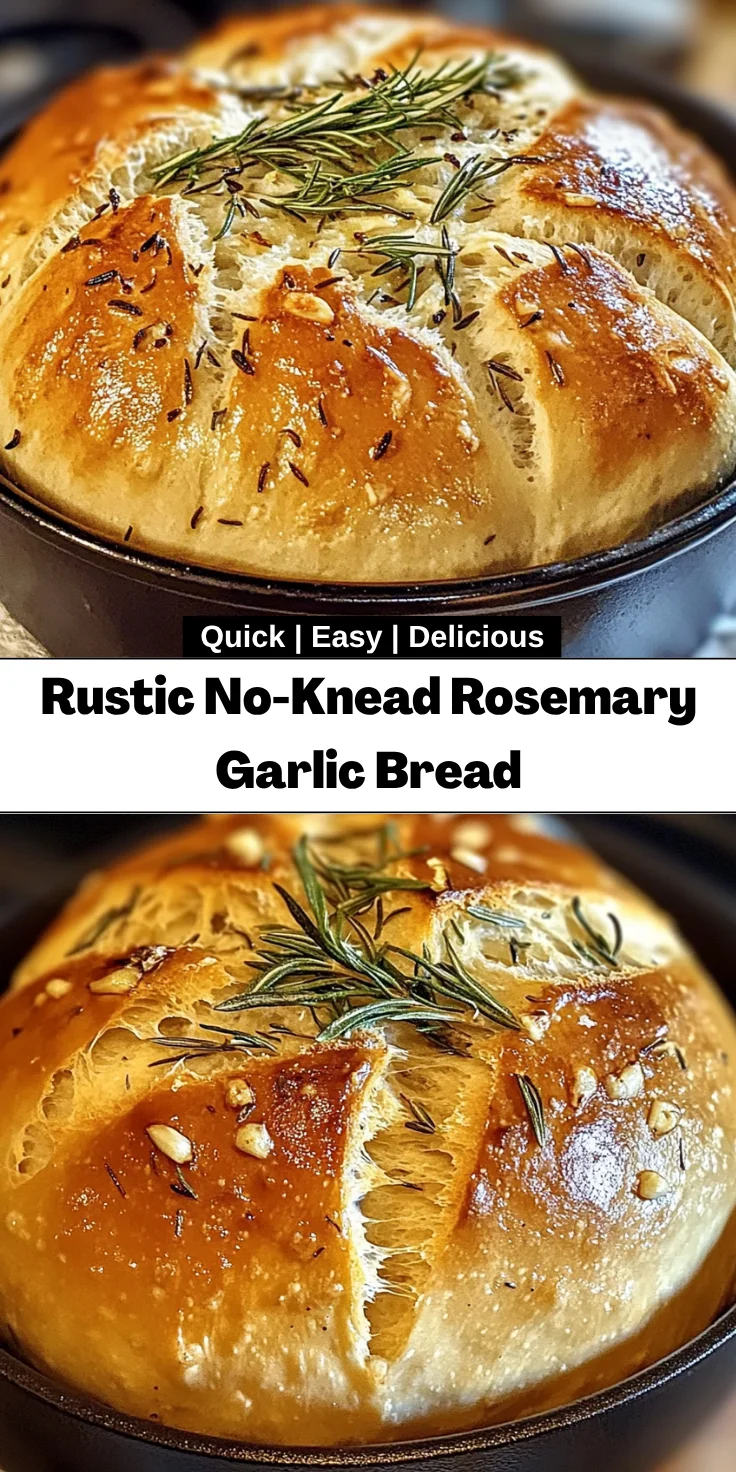
Introduction to Rustic No-Knead Rosemary Garlic Bread
There’s something magical about the smell of freshly baked bread wafting through your home, isn’t there? When it comes to making my Rustic No-Knead Rosemary Garlic Bread, I feel like I’ve created a little piece of heaven. This recipe is not just delicious; it’s quick and stress-free, perfect for those busy days when time is of the essence. Imagine gathering your loved ones around the table, sharing slices of warm, fragrant bread that make even the simplest meal feel special. Trust me, this bread will be a showstopper at any occasion!
Why You’ll Love This Rustic No-Knead Rosemary Garlic Bread
This Rustic No-Knead Rosemary Garlic Bread is your new best friend in the kitchen! It’s astonishingly simple yet offers such rich flavors. The beauty of this recipe lies in its minimal effort; mix, wait, and bake! No kneading is required, making it perfect for busy days. Plus, the fragrant rosemary and garlic elevate ordinary meals into something extraordinary, tempting even the pickiest eaters at your table.
Ingredients for Rustic No-Knead Rosemary Garlic Bread
Gathering the right ingredients is a journey in itself, and it’s one of my favorite parts of baking! For this Rustic No-Knead Rosemary Garlic Bread, you’ll need:
- All-purpose flour: The foundation of your bread, providing structure and chewiness. You can swap in whole wheat flour for added nutrition.
- Salt: Essential for flavor, salt enhances the bread’s taste. Don’t skip it; it makes a world of difference!
- Instant yeast: This magical ingredient helps your bread rise quickly. You can also use active dry yeast, but you’ll need to proof it first.
- Warm water: Activates the yeast and hydrates the flour. Aim for about 110°F to avoid killing the yeast.
- Fresh rosemary: The star of the show! Its aromatic qualities bring a wonderful flavor. If you can’t find fresh, dried rosemary works well.
- Garlic: Minced cloves add a savory punch. Who doesn’t love the scent of garlic mingling with bread? Feel free to adjust based on your garlic love!
- Olive oil: Adds moisture and richness, making each bite delightful. If you’re looking for a twist, try flavored oils.
- Black pepper (optional): A sprinkle of this can give your bread a nice kick. It’s entirely up to your taste buds!
- Extra flour for dusting: Keep your surface and hands floured to prevent sticking. It’s a simple but important step!
For exact quantities of each ingredient, check the bottom of the article where they’re conveniently listed for you to print out. Happy baking!
How to Make Rustic No-Knead Rosemary Garlic Bread
Now that we’ve gathered our ingredients, it’s time to dive into the process. Making this Rustic No-Knead Rosemary Garlic Bread is as simple as one, two, three. I promise it’s not complicated at all. Just follow these steps, and you’ll be rewarded with a beautiful loaf that fills your home with a mouthwatering aroma!
Step 1: Mix the Ingredients
Start by grabbing a large mixing bowl. Combine your all-purpose flour, salt, and instant yeast. Don’t forget the chopped rosemary and minced garlic! Stir everything together until the dry ingredients are well mixed. Then, pour in the warm water and olive oil. This is where the magic begins! Use a wooden spoon to mix until a sticky dough forms. It might feel a bit messy — trust the process!
Step 2: Allow the Dough to Rise
Once your dough looks like a shaggy mess, cover the bowl with plastic wrap. It’s time to let it rest and rise. Leave it at room temperature for 12 to 18 hours. Yes, this is what gives the bread its unique texture! You’ll know it’s ready when the dough has doubled in size and is bubbly on top. Patience pays off here, so take a deep breath, and enjoy the wait!
Step 3: Shape the Dough
Okay, your dough has risen beautifully! Now, lightly flour a clean surface. Turn the dough out onto the floured area and gently shape it into a round loaf. Keep it simple — don’t over-handle it, or you might deflate all that lovely air. Just a few gentle folds to create a nice shape will do. It’s like tucking a little blanket around your bread!
Step 4: Preheat the Oven
This is where the excitement builds! While your dough rests, preheat your oven to 450°F (230°C). Place your Dutch oven inside the oven to heat up as well. This step is crucial for achieving that perfect crust. Allow the Dutch oven to warm for about 30 minutes. Trust me, this little detail makes a world of difference!
Step 5: Bake the Bread
Finally, the moment of truth! Carefully transfer the shaped dough onto a piece of parchment paper. Lower it into the hot Dutch oven, and cover it with the lid. Bake for 30 minutes. The bread steams beautifully in this environment, creating an unreal taste. After that, remove the lid and bake for an additional 10 to 15 minutes until the crust turns a glorious golden brown. Just try not to eat it before it cools!
Once done, let the bread cool on a wire rack for at least 15 minutes before slicing. Patience is key. You want those warm, inviting, fluffy slices – trust me!
Tips for Success
- Always measure your flour accurately. Too much can lead to dry bread.
- Let the dough rise in a warm spot, like near a sunny window.
- Use a kitchen scale for precise measurements if possible.
- Experiment with different herbs for unique flavors.
- For extra flavor, brush the crust with olive oil before baking.
Equipment Needed
- Large mixing bowl: A basic bowl will work, but a large, sturdy one makes mixing easier.
- Wooden spoon: Ideal for mixing, but any spoon will do.
- Plastic wrap: Use a clean kitchen towel if you don’t have plastic wrap.
- Dutch oven: A heavy pot with a lid is perfect; a regular oven-safe pot can work too.
- Parchment paper: If unavailable, you can lightly grease your Dutch oven instead.
Variations
- Herb Medley: Mix in other fresh herbs like thyme or basil for diverse flavor profiles.
- Cheesy Delight: Add shredded cheese like cheddar or mozzarella to the dough for a savory twist.
- Sundried Tomato: Incorporate chopped sundried tomatoes for an Italian flair.
- Olive Boost: Toss in chopped olives for a briny, rich addition to your bread.
- Gluten-Free Option: Experiment with gluten-free flour blends that work for your dietary needs.
Serving Suggestions
- Pair your Rustic No-Knead Rosemary Garlic Bread with a fresh garden salad for a light meal.
- Serve it alongside a warm bowl of soup, like tomato basil or minestrone.
- Try it with a spread of herbed butter or olive tapenade for added flavor.
- Enjoy with a glass of dry red wine to elevate your dining experience.

FAQs about Rustic No-Knead Rosemary Garlic Bread
As I’ve shared my love for this Rustic No-Knead Rosemary Garlic Bread, I often get the same questions. Here are the answers to help you feel more confident in your baking adventure!
Can I use different herbs in this bread?
Absolutely! This recipe is quite versatile. Feel free to swap rosemary for thyme, dill, or even oregano. Each herb will add its own unique flavor. Get creative!
What if I don’t have a Dutch oven?
No worries! If you don’t own a Dutch oven, you can use a heavy oven-safe pot with a lid. Alternatively, a baking sheet can work, but the crust won’t turn out quite the same. Just keep an eye on it!
How do I know when the bread is fully baked?
The bread should be golden brown on top and sound hollow when tapped on the bottom. Use a food thermometer if you’re unsure. It should reach around 200°F (93°C) internally.
Can I freeze the bread?
Yes! After cooling, wrap the bread tightly in plastic wrap and then in aluminum foil. It will keep well in the freezer for up to three months. Just thaw it at room temperature when you’re ready to enjoy!
How long does the bread last?
This delightful bread is best enjoyed fresh. However, it can last for about 3-4 days at room temperature when stored in a paper bag. For extended freshness, see the freezing option above!
Final Thoughts
Making Rustic No-Knead Rosemary Garlic Bread is more than just following a recipe; it’s about creating an experience filled with warmth and comfort. Each loaf tells a story, filled with the scents of rosemary and garlic that wrap around you like a cozy blanket. Whether you share it with family, friends, or just enjoy it alone, this bread turns ordinary moments into cherished memories. Plus, the ease of preparation means you can savor these delightful experiences even on your busiest days. I hope you feel inspired to create your own loaf and taste the joy it brings!
Print
Rustic No-Knead Rosemary Garlic Bread
- Total Time: 12-18 hours (including rising time)
- Yield: 1 loaf 1x
- Diet: Vegetarian
Description
A delicious and easy Rustic No-Knead Rosemary Garlic Bread recipe perfect for any occasion.
Ingredients
- 3 ½ cups all-purpose flour
- 1 ½ teaspoons salt
- ½ teaspoon instant yeast
- 1 ¾ cups warm water (about 110°F)
- 2 tablespoons fresh rosemary, chopped (or 1 tablespoon dried)
- 3 cloves garlic, minced
- 2 tablespoons olive oil
- ½ teaspoon black pepper (optional)
- Extra flour for dusting
Instructions
- In a large mixing bowl, combine flour, salt, yeast, rosemary, garlic, and black pepper. Add warm water and olive oil, stirring until a sticky dough forms.
- Cover with plastic wrap and let sit at room temperature for 12-18 hours, until doubled in size and bubbly.
- Lightly flour a surface, turn out the dough, and gently shape it into a round loaf. Avoid over-handling.
- Place on floured parchment paper, cover, and let rest for 30-45 minutes while the oven preheats.
- Heat oven to 450°F (230°C), placing a Dutch oven inside for 30 minutes.
- Carefully transfer the dough (on parchment paper) into the hot Dutch oven. Cover and bake for 30 minutes.
- Remove the lid and bake for 10-15 more minutes until golden brown.
- Let the bread cool on a wire rack for at least 15 minutes before slicing.
Notes
- This bread works well with other herbs or spices for different flavor variations.
- Ensure the water temperature is warm but not hot to activate the yeast properly.
- For a crunchier crust, place a dish of water in the oven while baking.
- Prep Time: 15 minutes
- Cook Time: 45 minutes
- Category: Bread
- Method: No-Knead
- Cuisine: American
Nutrition
- Serving Size: 1 slice
- Calories: 150
- Sugar: 0g
- Sodium: 300mg
- Fat: 3g
- Saturated Fat: 0.5g
- Unsaturated Fat: 2.5g
- Trans Fat: 0g
- Carbohydrates: 28g
- Fiber: 1g
- Protein: 4g
- Cholesterol: 0mg