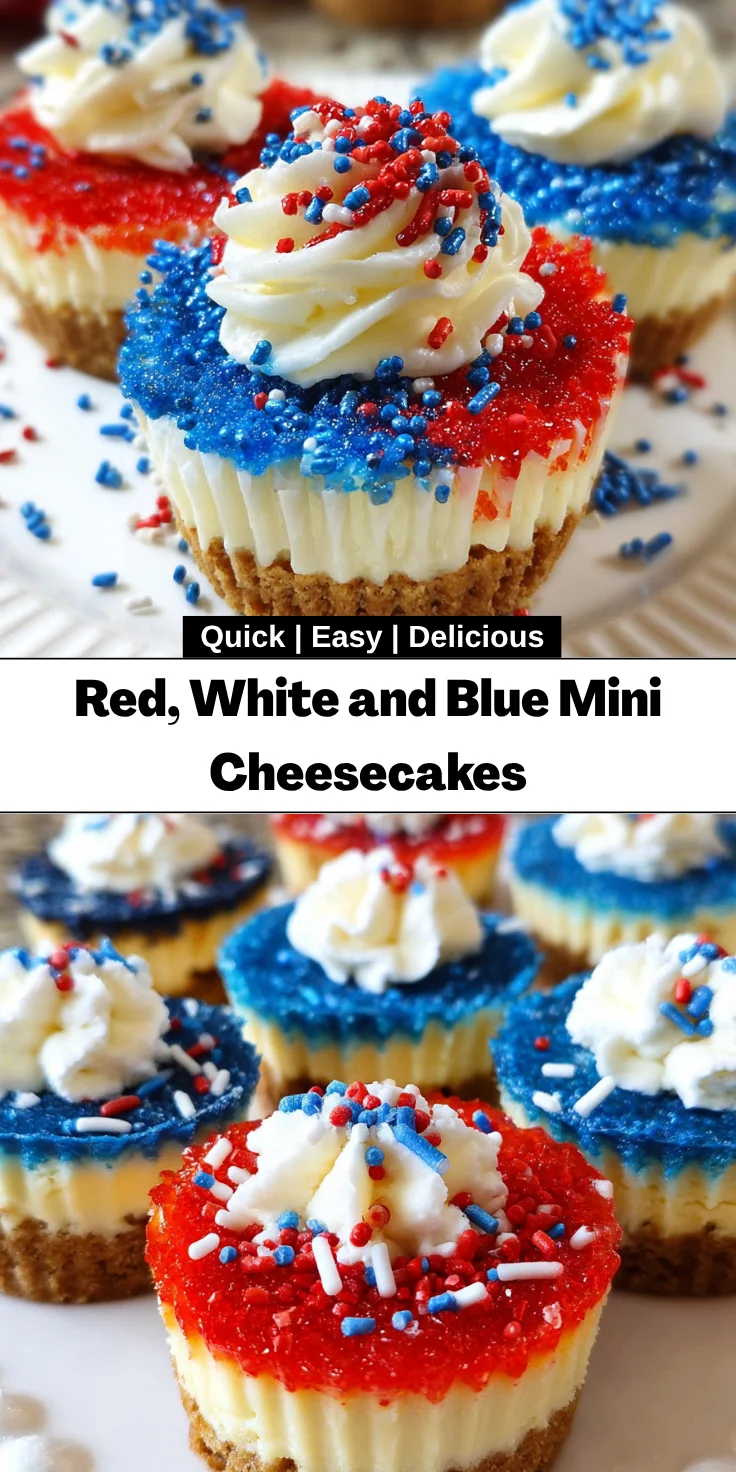
Introduction to Red, White and Blue Mini Cheesecakes
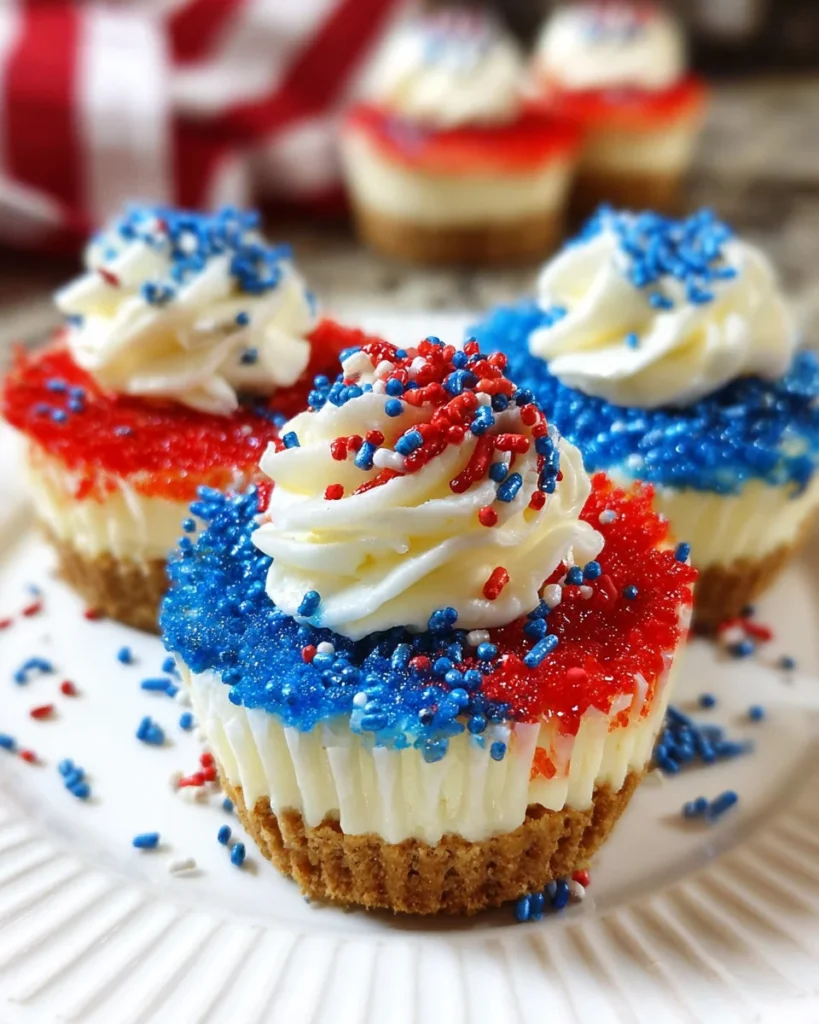
Welcome to a delightful journey into the world of sweet treats! Today, I’m excited to share my recipe for Red, White and Blue Mini Cheesecakes. These little bites of perfection are not only visually stunning but also incredibly easy to whip up. They make for a great solution when you’re short on time but want to impress your guests. Perfect for summer barbecues or festive gatherings, these mini cheesecakes will add a splash of color and flavor to any occasion. Let’s dive in and discover how to make these extraordinary treats together!
Why You’ll Love This Red, White and Blue Mini Cheesecakes
These Red, White and Blue Mini Cheesecakes are a true game-changer! They’re simple to make, taking only about an hour from start to finish. The vibrant colors and delicious taste will capture hearts at any gathering. Plus, the individual portions mean less fuss and a stylish presentation. Trust me, these mini delights will be the star of your dessert table, leaving everyone wanting more!
Ingredients for Red, White and Blue Mini Cheesecakes
Gathering the right ingredients is key to creating these colorful, tasty mini cheesecakes. Most of them are pantry staples, making this recipe both accessible and rewarding. Let’s take a peek at what you’ll need:
- Vanilla wafer cookie crumbs: These crunchy cookies form the delicious base. You can substitute with graham cracker crumbs if you prefer a different flavor.
- Sugar: This sweetener brings balance to the creaminess of the cheese. You can use brown sugar for a hint of molasses flavor.
- Butter: Melted butter binds the crust together. If you’re looking for a healthier choice, coconut oil can work, but it will slightly alter the taste.
- Cream cheese: The star of the show! Make sure it’s at room temperature for a smooth filling. A Neufchâtel cheese can be used for a lighter version.
- Sour cream: This adds a tangy richness. Greek yogurt can be a suitable substitute if you’re aiming for a healthier option.
- Vanilla extract: Pure vanilla enhances the flavor complexity. For an alternative, you can use almond extract sparingly for a unique twist.
- Eggs: These provide the necessary structure. If you’re avoiding animal products, you can experiment with flax eggs for a vegan version though the texture may vary.
- Gel icing colors: Red and blue create the festive look. I recommend using gel rather than liquid colors for more vibrancy without watering down the batter.
- Heavy whipping cream: This is essential for the whipped topping. Look for a cream labeled as “heavy” to achieve those luscious peaks.
- Powdered sugar: Added to the whipped cream for sweetness and stability. If you’re in a pinch, you can blend granulated sugar until fine.
- Sprinkles: Just for fun! They add that cheerful touch that makes these cheesecakes irresistible.
Full ingredient measurements can be found at the bottom of the article and are available for printing. Now, let’s get ready to make these delightful mini cheesecakes!
How to Make Red, White and Blue Mini Cheesecakes
Ready to create a stunning dessert that turns heads? Let me guide you through the steps to make these delightful Red, White and Blue Mini Cheesecakes. We’ll keep it simple, so anyone can join in the fun. Let’s roll up our sleeves and get started!
Step 1: Preheat and Prepare
First things first, preheat your oven to 325°F (162°C). As it warms up, line your cupcake pan with liners. This makes it easy to remove the cheesecakes later. Saving clean-up time is a mom’s secret weapon!
Step 2: Make the Crust
Next, it’s crust-making time! In a mixing bowl, combine those delicious vanilla wafer cookie crumbs with sugar and melted butter. Mix until it resembles damp sand. Spoon about two tablespoons of this mixture into each cupcake liner and press it down firmly. This little base needs to hold all the cheesecake goodness!
Step 3: Bake the Crust
Pop the crusts in the oven and bake for just 5 minutes. You want them lightly golden and fragrant, not fully baked. Remove them from the oven and let them cool while you whip up the filling. They’ll set up as they cool, making a perfect base for the cheesecakes.
Step 4: Prepare the Filling
Now, let’s get to the creamy part! In a large bowl, combine the room-temperature cream cheese, sugar, and flour. Use a mixer on low speed until everything is well combined. Scrape down the bowl with a spatula to ensure no lumps remain. Trust me, a smooth filling equals delicious cheesecakes!
Step 5: Incorporate Sour Cream and Vanilla
Next up, add the sour cream and vanilla extract to your mixture. This will give your cheesecakes a lovely richness and aroma. Beat on low speed until fully combined. The anticipation is building, and it already smells wonderful!
Step 6: Add Eggs
Now, it’s time for the eggs! Add them one at a time, mixing slowly after each addition. This gentle approach helps create that smooth, velvety texture we all crave. Scrape the bowl again for good measure—every bit counts!
Step 7: Color the Batter
Divide your cheesecake filling evenly into three separate bowls. Keep one bowl plain (the white layer), then color one red and the other blue using gel icing colors. A couple of drops will do the trick. This is where the fun begins; you can actually see the holiday spirit come alive!
Step 8: Layer the Cheesecakes
Time to build our beautiful layers! Start with a tablespoon of the white batter in each cupcake liner. Follow this with a tablespoon of red batter, and then one of blue. Fill them up, but don’t overflow! Each layer adds to the stunning visual appeal and delicious flavor.
Step 9: Bake the Cheesecakes
Now, gently place your cupcake pan back in the oven. Bake the cheesecakes for 18-20 minutes until just set. You’ll notice they might puff up a bit—that’s normal! When they’re done, turn off the oven but leave them inside with the door closed for another 10 minutes. This slow cooling helps prevent cracks.
Step 10: Cool Properly
After 10 minutes, crack the oven door open to allow the cheesecakes to cool for about 15-20 minutes. This gentle cooling helps them set perfectly. Once cooled, move them to the fridge to chill completely. Patience, my friend—it’ll be worth it!
Step 11: Make the Whipped Cream Topping
Let’s add a fluffy, sweet finishing touch! In a large mixer bowl, combine the cold heavy whipping cream, powdered sugar, and a splash of vanilla extract. Whip on high speed until stiff peaks form. This is the cloud-like goodness that will crown your cheesecakes, making them even more irresistible!
Step 12: Assemble and Serve
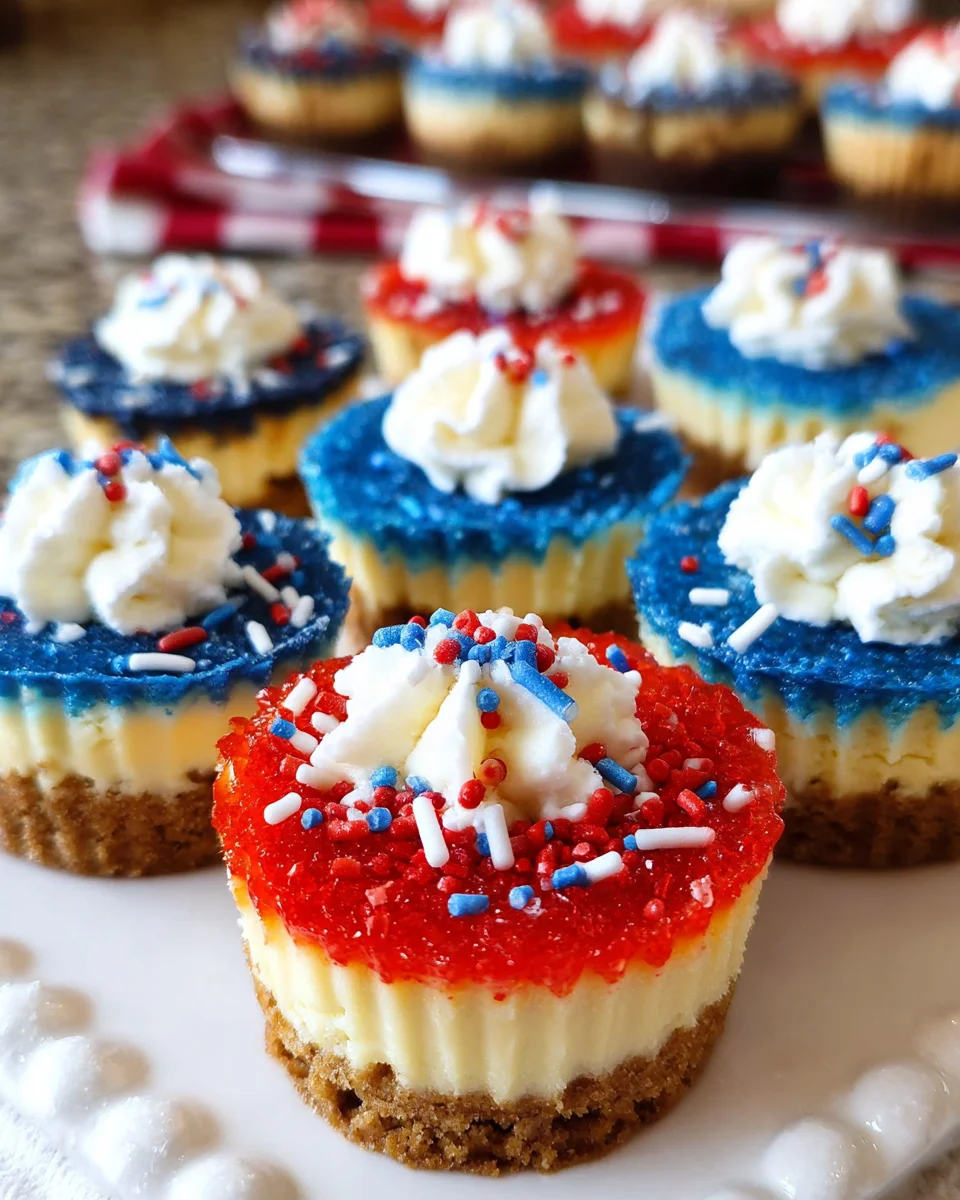
Finally, it’s showtime! Pipe the beautiful whipped cream onto the tops of your cooled cheesecakes, and don’t forget the sprinkles. They add that extra festive flair! Store these mini delights in an airtight container in the fridge until you’re ready to impress your guests. Enjoy every delicious bite!

Tips for Success
- Use room-temperature cream cheese for a smoother filling.
- Don’t overmix the batter to avoid cracks in your cheesecakes.
- Let the cheesecakes cool slowly in the oven to prevent sinking.
- Chill your whipped cream ingredients for better texture and stability.
- For easy removal, ensure your crusts are cool before adding filling.
Equipment Needed
- Oven: Essential for baking your mini cheesecakes; a toaster oven can work in a pinch.
- Cupcake pan: Use a standard or silicone cupcake pan for easy release.
- Mixing bowls: Any size will do, but a large bowl is ideal for the filling.
- Hand mixer: A stand mixer can also be used for convenience.
- Piping bag: This is great for whipping cream; a ziplock bag can substitute in a hurry!
Variations
- Chocolate Drizzle: For a decadent twist, drizzle melted chocolate over the whipped cream topping.
- Nutty Crust: Swap vanilla wafer crumbs with crushed almonds or pecans for a crunchy alternative.
- Fruit Topping: Fresh berries, like strawberries or blueberries, can replace sprinkles for a refreshing finish.
- Gluten-Free Option: Use gluten-free cookie crumbs to make the crust suitable for gluten-sensitive guests.
- Vegan Version: Substitute cream cheese with a vegan alternative and replace eggs with flaxseed meal mixed with water.
Serving Suggestions
- Pair your mini cheesecakes with fresh fruit like strawberries or raspberries for a lovely contrast.
- Serve alongside a dollop of whipped cream on the plate for an elegant presentation.
- Consider a refreshing lemonade or iced tea as a perfect drink complement.
- Use colorful serving platters to enhance the festive theme.
- For gatherings, arrange on a tiered cake stand to showcase their beauty appealingly.
FAQs about Red, White and Blue Mini Cheesecakes
Can I make Red, White and Blue Mini Cheesecakes a day ahead?
Absolutely! In fact, making them a day in advance can enhance their flavor. Just store them in the refrigerator in an airtight container until you’re ready to serve. They’ll be just as delightful the next day!
What can I use instead of cream cheese for a lighter version?
If you’re looking for a lighter alternative, consider using Neufchâtel cheese. It has the same creamy texture but with less fat. You can also opt for a dairy-free cream cheese for a vegan option!
How can I adjust the sweetness of the cheesecake filling?
Want to reduce sweetness? Simply cut back the sugar in the filling by a couple of tablespoons. You might even replace granulated sugar with a sugar substitute, but just keep in mind that the flavor could vary slightly.
Are Red, White and Blue Mini Cheesecakes suitable for gluten-free diets?
Yes! For a gluten-free version, just swap the vanilla wafer cookie crumbs for gluten-free cookie crumbs. This way, everyone can enjoy these festive mini cheesecakes at your gathering!
How should I store the mini cheesecakes?
Your cheesecakes should be kept in an airtight container in the fridge. They’ll stay fresh for about 2-3 days, making them a fantastic treat to enjoy over a few days!
Final Thoughts
Making these Red, White and Blue Mini Cheesecakes is like adding a splash of joy to your celebrations. Each colorful bite is a reminder of summer gatherings and festive moments with loved ones. Whether you’re sharing them at a BBQ or enjoying a quiet evening at home, these little treats bring smiles and happiness. I hope you feel inspired to create your own batch and watch as they steal the show. Trust me, the laughter and compliments will flow just as sweetly as the flavors. Happy baking, and may your kitchen be filled with love and delight!
Print
Red, White and Blue Mini Cheesecakes
- Total Time: 1 hour
- Yield: 12 mini cheesecakes 1x
- Diet: Vegetarian
Description
Delicious Red, White and Blue Mini Cheesecakes perfect for impressing guests with a festive look.
Ingredients
- 1 cup (134g) vanilla wafer cookie crumbs
- 2 tbsp (26g) sugar
- 4 tbsp (56g) butter, melted
- 12 ounces (339g) cream cheese, room temperature
- 1/2 cup (104g) sugar
- 3 tbsp (24g) flour
- 1/2 cup (115g) sour cream
- 1 1/2 tsp vanilla extract
- 2 eggs
- Blue gel icing color
- Red gel icing color
- 1/2 cup (120ml) heavy whipping cream, cold
- 5 tbsp (36g) powdered sugar
- 1/2 tsp vanilla extract
- Sprinkles
Instructions
- Preheat oven to 325°F (162°C). Add cupcake liners to a cupcake pan.
- Combine the vanilla wafer cookies crumbs, sugar and melted butter. Divide the mixture between the cupcake liners (about 2 tablespoons per cup) and press into the bottoms.
- Bake the crusts for 5 minutes then remove from oven. Allow to cool while you make the filling.
- To make the filling, reduce oven to 300°F (148°C). In a large bowl, mix the cream cheese, sugar, and flour until combined (Use low speed to keep less air from getting into the batter, which can cause cracks). Scrape down the sides of the bowl.
- Add the sour cream and vanilla extract. Beat on low speed until well combined.
- Add the eggs one at a time, beating slowly and scraping the sides of the bowl after each addition.
- Divide the batter evenly into three bowls. Leave one as is and color one red and the other blue.
- Layer the colored batter into the crusts, starting with a tablespoon of white batter in each cup, then a tablespoon of red, then a tablespoon of blue. The cups should be mostly full.
- Bake the cheesecakes for 18-20 minutes, then turn off the oven and leave the door closed for another 10 minutes.
- Crack the oven door and allow cheesecakes to cool for 15-20 minutes, then put in the fridge to finish cooling.
- When cheesecakes are cooled, remove them from the pan.
- To make the whipped cream topping, add the heavy whipping cream, powdered sugar and vanilla extract to a large mixer bowl. Whip on high speed until stiff peaks form.
- Pipe the whipped cream onto the tops of the cheesecakes and add sprinkles.
- Refrigerate the cheesecakes in an airtight container until ready to serve. Cheesecakes are best for 2-3 days.
Notes
- Use cold ingredients for the whipped cream topping for better results.
- These cheesecakes can be made a day in advance and stored in the refrigerator.
- For a more vibrant color, use gel colors rather than liquid food coloring.
- Prep Time: 30 minutes
- Cook Time: 30 minutes
- Category: Dessert
- Method: Bake
- Cuisine: American
Nutrition
- Serving Size: 1 mini cheesecake
- Calories: 200
- Sugar: 15g
- Sodium: 150mg
- Fat: 12g
- Saturated Fat: 7g
- Unsaturated Fat: 3g
- Trans Fat: 0g
- Carbohydrates: 22g
- Fiber: 1g
- Protein: 3g
- Cholesterol: 50mg