Introduction to Red Velvet Oreo Roll
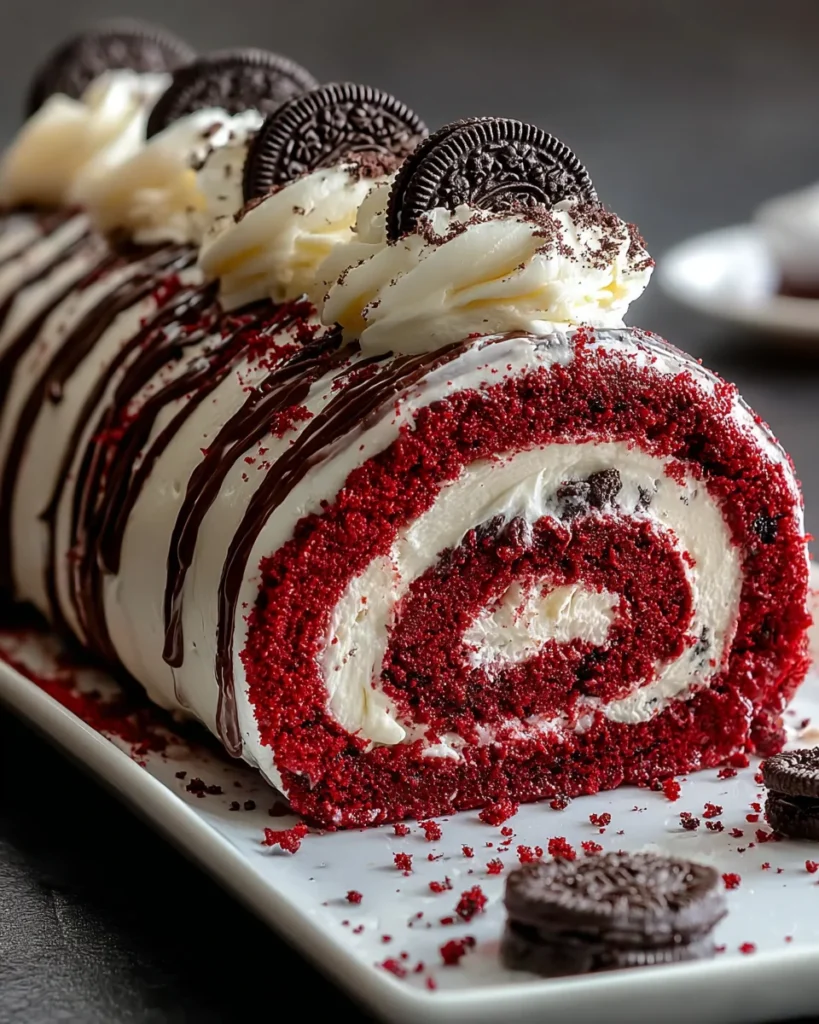
Have you ever craved a dessert that brings a sprinkle of joy to your busy day? Well, let me introduce you to the Red Velvet Oreo Roll! This delightful dessert is a showstopper, combining the classic richness of red velvet cake with a creamy Oreo filling. Perfect for impressing guests or treating your family after a hectic week, it’s as simple to make as it is heavenly to eat. Trust me, once you serve this roll, you’ll be the culinary hero of your household. So, grab your apron, and let’s make some magic in the kitchen!
Why You’ll Love This Red Velvet Oreo Roll
This Red Velvet Oreo Roll is not just a dessert; it’s a hug on a plate. You’ll appreciate how quickly it comes together, making it ideal for those chaotic weeknights or spontaneous celebrations. The moist red velvet cake pairs beautifully with the creamy Oreo filling, creating a dessert that sings with flavor. Plus, it’s a great way to enjoy a classic twist, and your family will adore it!
Ingredients for Red Velvet Oreo Roll
Gathering the right ingredients is half the fun of creating this mouthwatering Red Velvet Oreo Roll. Here’s what you’ll need:
- All-purpose flour: This is your foundation, giving the cake its lovely structure.
- Unsweetened cocoa powder: Adds that deep chocolate flavor you crave without the excess sweetness.
- Baking powder: This leavening agent helps the cake rise beautifully, keeping it light.
- Salt: Just a pinch elevates all the flavors, enhancing the sweetness in contrast.
- Large eggs: Room temperature eggs whip up to give you a fluffy, airy cake.
- Granulated sugar: Sweetens the cake and balances the cocoa’s bitterness perfectly.
- Vegetable oil: Keeps the cake moist and tender, contributing to its irresistible texture.
- Vanilla extract: A dash of vanilla enriches the flavor profile, making each bite more delightful.
- Red food coloring: This key ingredient adds that signature red hue, making the cake visually stunning.
- Powdered sugar: For that lovely dusting on top, it gives a charming finish.
- Cream cheese: The creamy base of your filling, lending richness and a hint of tanginess.
- Whipped cream: Lightens the filling, giving it a fluffy consistency that makes it heavenly.
- Crushed Oreo cookies: These sweet bits not only add crunch but infuse that beloved cookie flavor.
- Semi-sweet chocolate chips: Creates a luscious, glossy ganache that coats your roll perfectly.
- Heavy cream: This rich cream is key for a smooth ganache; it adds that melt-in-your-mouth texture.
- Crushed Oreo cookies for topping: A delightful way to garnish your roll, adding a bit of flair.
- Whipped cream (optional): For extra creaminess on the side—always a welcome addition!
You can find exact measurements for these ingredients at the bottom of the article, along with a printer-friendly version. Let’s gather these goodies and get ready for some baking magic!
How to Make Red Velvet Oreo Roll
Now that we have our ingredients ready, let’s dive into the steps to create this beautiful Red Velvet Oreo Roll. Follow along, and don’t worry—I’ll share plenty of tips to ensure you nail it!
Preparing the Cake
First, let’s get our oven preheating to 350°F (175°C). This helps ensure the cake bakes evenly. While that’s heating up, line a jelly roll pan with parchment paper. This will make it much easier to roll your cake later.
Next, grab a bowl and sift together the all-purpose flour, cocoa powder, baking powder, and salt. Sifting helps to eliminate lumps and ensures a light, fluffy cake. Trust me, it’s worth the extra step!
Mixing the Batter
Now onto the fun part! In a separate bowl, beat the room temperature eggs and granulated sugar using an electric mixer. Whisk until the mixture is thick and pale—this can take about 3 to 5 minutes.
Add the vegetable oil, vanilla extract, and red food coloring to this golden mix. Stir until combined, then gently fold in the dry ingredients you’ve sifted earlier. Remember, be gentle to keep that lovely airiness!
Baking the Cake
Pour the batter into your prepared jelly roll pan and spread it evenly. Pop it into the oven for about 12-15 minutes. When done, the cake should spring back when touched lightly. The scent of chocolate will fill your kitchen like a warm hug!
Once baked, remove it from the oven, and let it cool for a minute. Then, flip the cake onto a clean kitchen towel dusted with powdered sugar. Roll it up in the towel and let it cool completely. This helps the cake keep its shape when we add the filling!
Preparing the Filling
While the cake cools, let’s prepare the luscious filling. In a mixing bowl, beat the softened cream cheese until it’s smooth. Add the powdered sugar and vanilla extract, mixing until it’s combined.
Carefully fold in the whipped cream for that fluffy texture, and then add in the crushed Oreo cookies. This filling is like a dreamy cookie cloud—you’ll want to dive right in!
Assembling the Roll
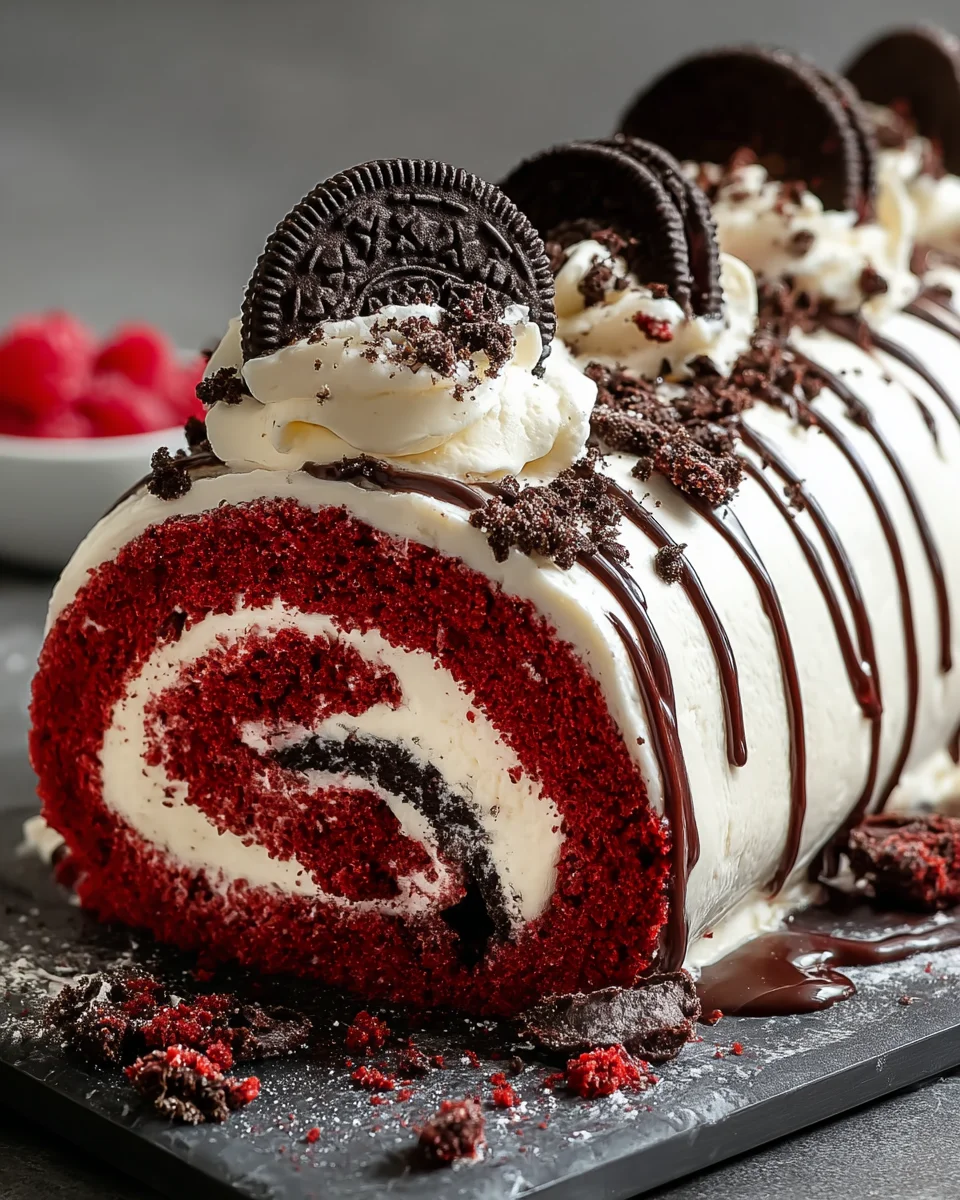
Once the cake has cooled completely, unroll it gently from the towel. Spread the creamy Oreo filling evenly over the cake. Now, it’s time to re-roll it! Start from one end, rolling tightly but carefully, like wrapping a gift with love.
Wrap the rolled cake in plastic wrap and refrigerate it for at least an hour. This helps it firm up, making it easier to slice. Plus, the flavors meld beautifully!
Making the Ganache
Let’s whip up that rich chocolate ganache! In a small saucepan, simmer the heavy cream over low heat until it’s just about to boil. Then, take it off the heat and pour it over the semi-sweet chocolate chips in a bowl.
Give it a good stir until the chocolate is completely melted and the mixture is smooth. This glossy ganache will make your Red Velvet Oreo Roll look even more irresistible!
Final Touches
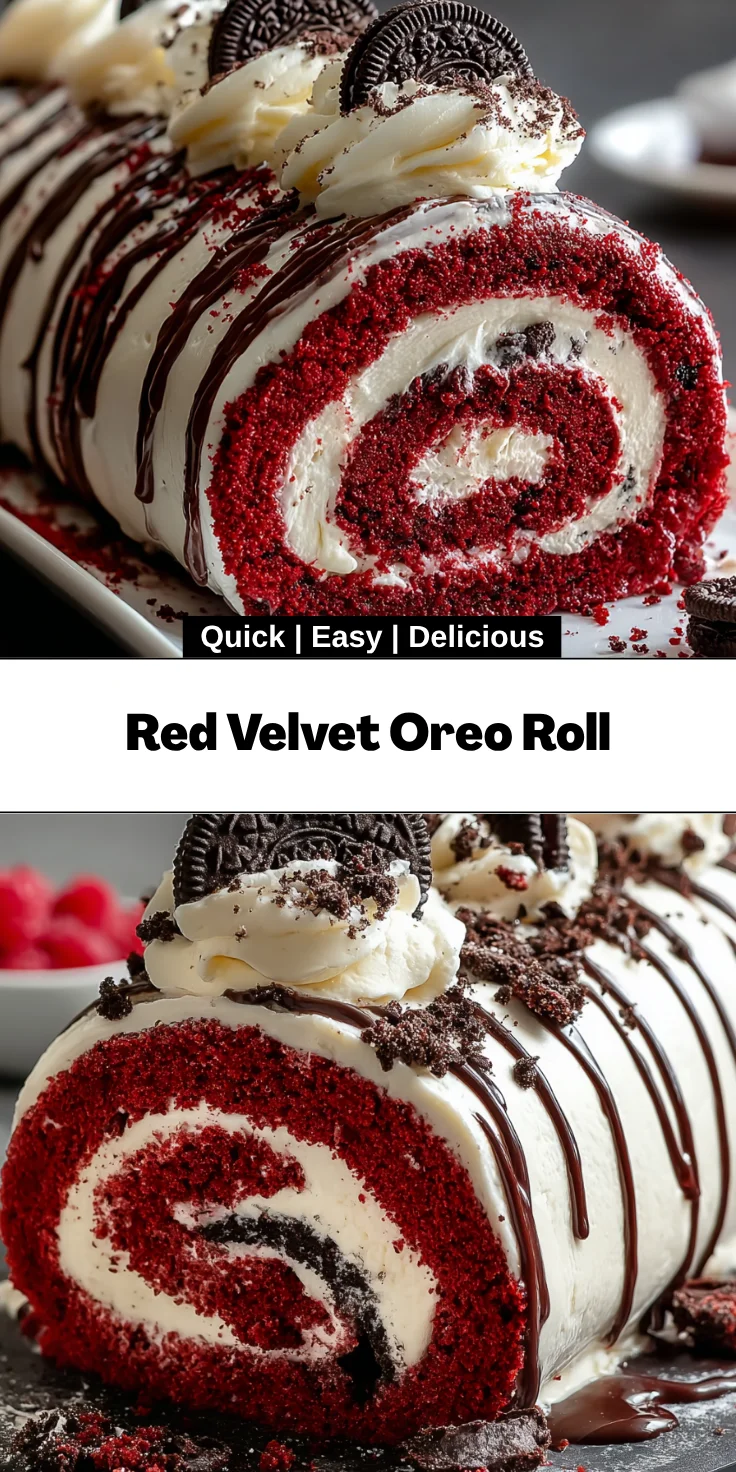
After your cake has chilled, unwrap it and place it on a serving platter. Pour the luscious ganache over the roll, letting it cascade down the sides. Sprinkle crushed Oreo cookies on top for that extra crunch and visual appeal!
If you’re feeling extra generous, add a dollop of whipped cream next to each slice when serving. It’s like the cherry on top of a fantastic dessert!
Tips for Success
- Always preheat your oven. It ensures an even bake for your Red Velvet Oreo Roll.
- Use room temperature eggs; they whip better, giving you a fluffier cake.
- Let the cake cool completely before unrolling to avoid cracks.
- Don’t skip the sifting step! It creates a lighter and airier cake.
- For a shinier ganache, let it sit for a few minutes before spreading.
Equipment Needed
- Jelly roll pan: A standard baking sheet works too, but a jelly roll pan helps create the right thickness.
- Parchment paper: If you don’t have it, use a silicone baking mat to prevent sticking.
- Mixing bowls: Any size will do; just grab what you have on hand!
- Electric mixer: A whisk can work if you’re feeling strong and fearless!
- Spatula: Ideal for folding in ingredients and spreading fillings smoothly.
Variations for Red Velvet Oreo Roll
- Gluten-Free Option: Substitute the all-purpose flour with a gluten-free baking blend. It’s easy to find and works beautifully!
- Dairy-Free Delight: Use non-dairy cream cheese and coconut whipped cream for a dairy-free version of this delectable treat.
- Red Velvet Swirl: Add a swirl of white chocolate or cream cheese frosting into the cake batter before baking for a fun twist!
- Chocolate Lovers’ Upgrade: Fold in mini chocolate chips with the crushed Oreos for an extra chocolatey burst.
- Seasonal Flavors: For a festive change, try adding peppermint extract during the holidays, or a hint of cinnamon for a cozy fall flavor.
Serving Suggestions for Red Velvet Oreo Roll
- Pair it with a scoop of vanilla ice cream for a delightful contrast in temperature and flavor.
- Serve with fresh berries like strawberries or raspberries to add a pop of color and tartness.
- A dollop of whipped cream enhances its creamy texture—always a favorite!
- Enjoy with a warm cup of coffee or a rich hot chocolate for a cozy dessert experience.
- Garnish with extra crushed Oreos for an eye-catching finish that guests will love!

FAQs about Red Velvet Oreo Roll
Can I make the Red Velvet Oreo Roll ahead of time?
Absolutely! You can prepare the cake roll a day in advance. Just be sure to store it tightly wrapped in the fridge to keep it fresh. The flavors will deepen, making it even more delicious!
What can I substitute for cream cheese?
If you’re not a fan of cream cheese, mascarpone cheese or Greek yogurt can be great alternatives. They provide a similar creamy texture and flavor for the filling!
Can I use store-bought whipped cream?
Yes, you can! Pre-made whipped cream saves time, especially on busy days. Just fold it in gently to keep that airy texture intact.
How should I store leftovers?
Store any leftovers in an airtight container in the refrigerator. It should last for about 3-4 days—if it lasts that long!
Is it possible to freeze the Red Velvet Oreo Roll?
Yes! Freeze the roll before adding the ganache. Wrap it tightly in plastic wrap and foil. Just thaw it in the fridge overnight before serving, then add the ganache for a fresh look!
Final Thoughts
Creating your own Red Velvet Oreo Roll is not just about baking; it’s about crafting delightful moments. Imagine surprising your family with this luscious dessert after dinner, their smiles lighting up the room. The combination of rich red velvet, creamy filling, and decadent chocolate ganache makes each bite an experience to savor. This recipe is more than a treat; it’s a memory in the making. So, whether it’s a special occasion or a simple weekend, let this Red Velvet Oreo Roll bring joy, warmth, and sweetness to your kitchen. Happy baking!
Print
Red Velvet Oreo Roll
- Total Time: 45 minutes
- Yield: 8 servings 1x
- Diet: Vegetarian
Description
A delightful dessert combining red velvet cake with a creamy Oreo filling, all topped with rich chocolate ganache.
Ingredients
- ¾ cup all-purpose flour
- ¼ cup unsweetened cocoa powder
- 1 tsp baking powder
- ½ tsp salt
- 4 large eggs, room temperature
- ¾ cup granulated sugar
- 2 tbsp vegetable oil
- 1 tsp vanilla extract
- 1 tbsp red food coloring
- Powdered sugar for dusting
- 1 (8 oz) package cream cheese, softened
- 1 cup powdered sugar
- 1½ cups whipped cream
- 1 tsp vanilla extract
- 12–15 crushed Oreo cookies
- 1 cup semi-sweet chocolate chips
- ½ cup heavy cream
- Crushed Oreo cookies for topping
- Whipped cream (optional)
Instructions
- Preheat oven to 350°F (175°C) and line a jelly roll pan with parchment paper.
- Sift together flour, cocoa powder, baking powder and salt. In a separate bowl, whip eggs and sugar until thick. Stir in oil, vanilla and red food coloring. Then stir in dry ingredients.
- Transfer to pan and bake for 12-15 minutes. Turn out onto a powdered sugar-sprinkled towel and roll up. Cool completely.
- Beat cream cheese, then add powdered sugar and vanilla. Fold in whipped cream and crushed Oreo cookies.
- Unroll cooled cake, spread with filling, and re-roll. Refrigerate.
- Simmer heavy cream, pour over chocolate chips and mix until melted.
- Spread ganache over cake roll and sprinkle with crushed Oreos. Serve with optional whipped cream.
Notes
- Ensure the eggs are at room temperature for better volume when whipped.
- Cool the cake completely before unrolling to prevent breaking.
- For a richer flavor, let the ganache sit for a few minutes before spreading.
- Prep Time: 30 minutes
- Cook Time: 15 minutes
- Category: Dessert
- Method: Baking
- Cuisine: American
Nutrition
- Serving Size: 1 slice
- Calories: 350
- Sugar: 25g
- Sodium: 150mg
- Fat: 20g
- Saturated Fat: 10g
- Unsaturated Fat: 5g
- Trans Fat: 0g
- Carbohydrates: 40g
- Fiber: 2g
- Protein: 5g
- Cholesterol: 70mg