Introduction to Peanut Butter Icebox Cake
As an on-the-go mom with so much work and family to attend to and everything ‘fun’ toddlers throw at you – the last thing you have time for is a complex dessert. Well, it has to be me-friendly in terms of preparation, and, naturally, mouth-watering. Here’s why I’m head over heels for this Peanut Butter Icebox Cake: It’s a no-bake miracle that combines layers of creamy peanut butter and chocolate pudding with plenty of crunch for total food bliss. This cake is great for wowing loved ones or any other day one may have a craving after a long day. You have to believe me; you and your family are going to love this yummy treat!
Why You’ll Love This Peanut Butter Icebox Cake
This Peanut Butter Icebox Cake is a game-changer for anyone craving a quick dessert. With minimal effort and no baking involved, it’s as easy as pie! You can layer rich flavors that dance on your taste buds, providing a blissful end to any meal. Plus, it’s a hit with kids and adults alike—who doesn’t love peanut butter and chocolate? This cake will surely become a family favorite in no time!
Ingredients for Peanut Butter Icebox Cake
Gathering the right ingredients is half the fun! Here’s what you’ll need to create your own Peanut Butter Icebox Cake. Don’t worry about the exact measurements now; you can find those at the bottom of the article ready for printing.
- Crushed Chocolate Sandwich Cookies: The star of the crumbly base! They add a delightful chocolatey crunch that complements the creamy layers.
- Salted Sweet Cream Butter: Mmm, this melts into the cookie crumbs and binds them together. The touch of salt enhances the overall flavor.
- Instant Chocolate Pudding Mix: This is what brings the rich, chocolate flavor to life without any baking. A quick stir is all it takes!
- Whole Milk: This adds creaminess to the pudding. For a richer twist, you can use half-and-half.
- Whipped Topping: Here, we’re using a thawed version to make our cake light and fluffy. Perfect for marrying our creamy layers!
- Miniature Reese’s Peanut Butter Cups: Ah, the ultimate treat! These little gems bring that peanut butter goodness right where it belongs—throughout the cake.
- Cream Cheese: Softened and mixed into the peanut butter layer, it adds a nice tang that cuts down the sweetness.
- Creamy Peanut Butter: This is where the magic happens! The classic taste of peanut butter will make you swoon.
- Powdered Sugar: A light sweetness that helps balance out the cream cheese and peanut butter.
- Chocolate Magic Shell: The cherry on top! This hardening chocolate sauce adds an indulgent finishing touch and a glossy finish.
Now that you have a snapshot of what you’ll need, let’s dive into the rest of the recipe, where the real fun begins!
How to Make Peanut Butter Icebox Cake
Let’s roll up our sleeves and get started on this delightful Peanut Butter Icebox Cake! Making it is a breeze, and I promise you’ll have fun layering these delicious flavors together. Here’s how to do it, step by step.
Prepare the Baking Dish
First things first, grab a 9×13 baking dish and give it a light spray with nonstick cooking spray. This simple step ensures that our cake will come out clean and intact when it’s time to serve. Trust me, you don’t want a sticky situation on your hands!
Make the Base Layer
Now let’s create that scrumptious base! In a medium-sized bowl, combine 2¼ cups of crushed chocolate sandwich cookies with melted butter. Stir until all the cookie crumbs are perfectly coated. Once combined, press this mixture firmly into the bottom of your baking dish. This will form your solid foundation—a bit like building a house, but much tastier!
Prepare the Chocolate Pudding Layer
Next up, we’re going to make the chocolate pudding layer. In a large mixing bowl, add the instant chocolate pudding mix and whole milk. Use a handheld mixer on low speed to beat the mixture until it starts to thicken. This shouldn’t take long! Once it’s creamy and smooth, fold in 2 cups of thawed whipped topping for an even richer texture. Your pudding will be thick and luscious—absolutely irresistible!
Layer the Peanut Butter Cups
Let’s get ready for the fun part! Spread half of that delicious pudding mixture over the cookie crumb base. Next, sprinkle 2 cups of halved Miniature Reese’s peanut butter cups on top. Yeah, you heard it right—peanut butter cups galore! Finish this layer with 1½ cups of crushed chocolate sandwich cookies. These layers are already looking fabulous!
Make the Cream Cheese Mixture
In a medium bowl, mix softened cream cheese, creamy peanut butter, and sifted powdered sugar together until smooth. I find using a handheld mixer on medium-high speed really helps achieve that velvety consistency. And here’s the secret—fold in 2 cups of whipped topping to keep everything fluffy and light. This dreamy mixture will truly elevate your icebox cake!
Assemble the Icebox Cake
Now, let’s assemble this masterpiece! Spread the cream cheese peanut butter mixture evenly over the layer of crushed cookies. Then sprinkle the remaining cookie crumbs on top, followed by the rest of your chocolate pudding mixture. Almost done! Drizzle the chocolate magic shell over the pudding layer and use an offset spatula to smooth it out. Voilà, picture-perfect!
Chill and Serve
Cover your creation with plastic wrap and pop it into the refrigerator. You’ll want to chill it for at least 4 hours—or better yet, overnight. This helps everything set beautifully, creating those easy-to-cut slices. When you’re ready to serve, slice it up and enjoy the cheers around the table as everyone digs in!
Tips for Success
- Chill your cake overnight for the best texture and flavor.
- For a gluten-free version, swap chocolate sandwich cookies for gluten-free alternatives.
- Make ahead of time for easy entertaining; the flavors only get better!
- Use a sharp knife to cut clean slices, wiping it between cuts for neat edges.
- Add crushed nuts or extra chocolate drizzle on top for a decorative touch.
Equipment Needed for Peanut Butter Icebox Cake
- Baking Dish: A 9×13 inch dish is ideal, but any similar-sized container works!
- Mixing Bowls: Two medium-sized bowls will suffice, or use large bowls if preferred.
- Handheld Mixer: A handheld mixer simplifies mixing, but you can use a whisk for arm workout!
- Spatula: An offset spatula helps spread layers evenly; any spatula will do.
- Plastic Wrap: For covering your cake while it chills, or use a lid if available.
Variations of Peanut Butter Icebox Cake
- Dark Chocolate Delight: Swap out the regular chocolate pudding for dark chocolate pudding for a more intense chocolaty flavor.
- Nutty Banana Bliss: Add sliced bananas between the layers for a delightful banana and peanut butter combination. It complements the flavors beautifully!
- Healthier Option: Substitute Greek yogurt for whipped topping and use low-fat cream cheese to cut down on calories without sacrificing taste.
- No-Bake Cheesecake Twist: Mix some cheesecake flavoring into the cream cheese layer for a unique twist, merging the best of both desserts.
- Vegan Version: Use coconut cream instead of whipped topping, and choose vegan chocolate cookies for a plant-based treat everyone can enjoy!
Serving Suggestions for Peanut Butter Icebox Cake
- Fresh Berries: Serve with a side of strawberries or raspberries for a burst of color and flavor that balances the richness of the cake.
- Ice Cream: A scoop of vanilla or chocolate ice cream compliments the creamy texture perfectly.
- Presentation: Drizzle extra magic shell or chocolate sauce on plates for a restaurant-style look.
- Coffee or Milk: Pair with a warm cup of coffee or a cold glass of milk to enhance the treat!
FAQs about Peanut Butter Icebox Cake
You’re probably bubbling with questions about this delightful Peanut Butter Icebox Cake. Here are some common queries I’ve encountered—let’s dive in!
Can I make this cake ahead of time?
Absolutely! In fact, making it a day or two ahead enhances the flavor. Just store it tightly covered in the fridge.
What if I can’t find Miniature Reese’s peanut butter cups?
No worries! You can chop up regular-sized Reese’s cups or even use other chocolate and peanut butter candies as a substitute.
How long can I store leftover Peanut Butter Icebox Cake?
The cake can be stored in the refrigerator for up to 5 days. Just cover it well to maintain freshness!
Can I freeze this cake?
Yes, you can! Wrap individual slices in plastic wrap and then place them in an airtight container. Thaw in the fridge before enjoying.
What can I use instead of whipped topping?
If you prefer to steer clear of whipped topping, homemade whipped cream or whipped coconut cream are great alternatives!
Final Thoughts
Creating this luscious Peanut Butter Icebox Cake was not just about making dessert; it was about sharing smiles and sweet moments with my family. As I layered the rich flavors, I felt the anticipation build for the joy it would bring at the table. There’s something magical about the combination of chocolate and peanut butter that sparks happiness in everyone. Knowing I could craft such a delightful treat with minimal effort makes cooking feel less like a chore and more like a joyful experience. I hope it brings as much happiness to your home as it has to mine!
Print
Peanut Butter Icebox Cake
- Total Time: 4 hours 30 minutes
- Yield: 15 servings 1x
- Diet: Vegetarian
Description
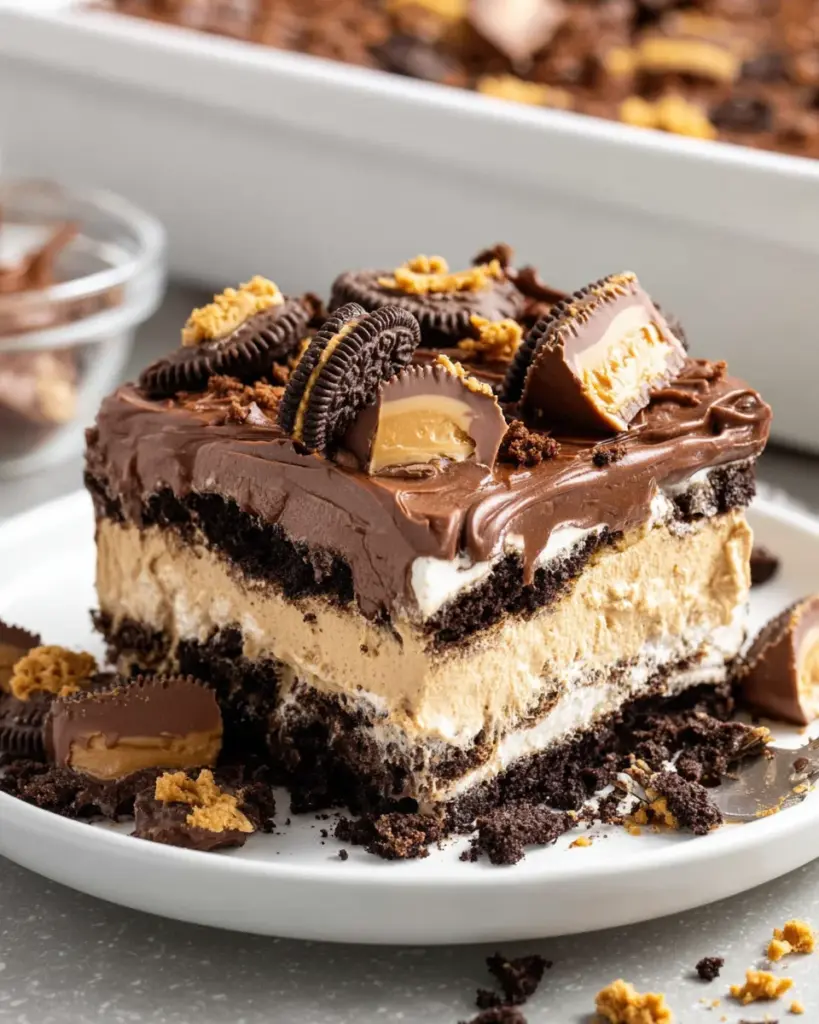
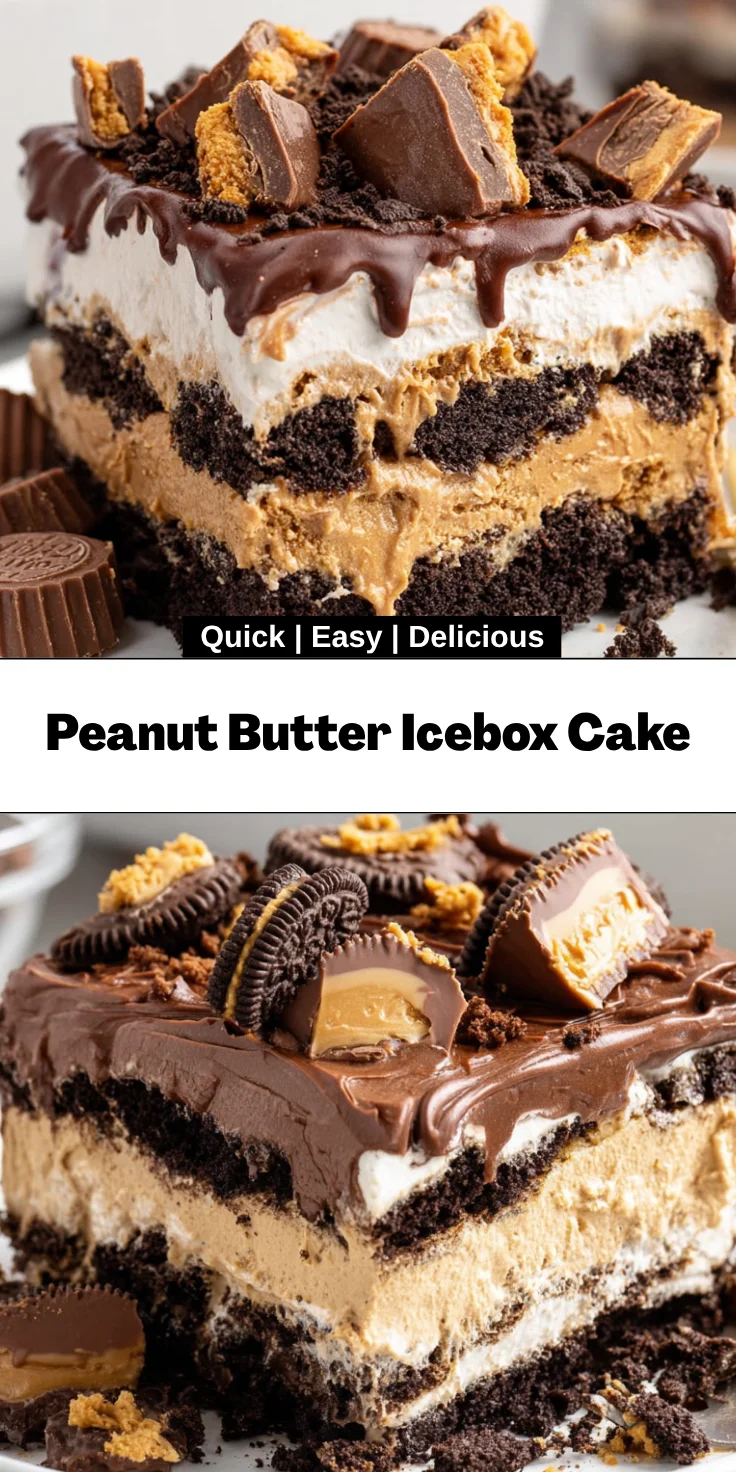
Peanut Butter Icebox Cake is a no-bake dessert that layers creamy peanut butter and chocolate pudding with crunchy chocolate sandwich cookies and Reese’s peanut butter cups.
Ingredients
- 19.1 ounces crushed chocolate sandwich cookies (divided into 2¼ cups, 1½ cups and 1½ cups)
- ⅓ cup salted sweet cream butter, melted
- 7.8 ounces instant chocolate pudding mix (two 3.9-ounce boxes)
- 2¾ cups whole milk
- 2 cups whipped topping, thawed
- 5 cups Miniature Reese’s peanut butter cups, unwrapped and halved (divided into 2 cups and 3 cups)
- 8 ounces cream cheese, softened
- 1 cup creamy peanut butter
- 1½ cups powdered sugar, sifted
- 7.25 ounces chocolate magic shell
Instructions
- Lightly spray a 9×13 baking dish with nonstick spray. Set it aside.
- Add the 2¼ cups of crushed chocolate sandwich cookies to a medium size bowl. Pour the melted butter over the cookie crumbs. Stir to coat the cookie crumbs completely. Press into the bottom of the prepared baking dish. Set it aside.
- Add the pudding mix and milk to a large mixing bowl. Use a handheld mixer on low to beat the pudding mix and milk until it begins to thicken.
- Fold in 2 cups of thawed whipped topping.
- Spread ½ of the pudding mixture over the bottom layer of buttered cookie crumbs.
- Sprinkle 2 cups of the halved peanut butter cups.
- Sprinkle 1 ½ cups of crushed sandwich cookies on top of the layer of peanut butter cups.
- Add the softened cream cheese, creamy peanut butter, and powdered sugar to a medium-sized mixing bowl. Use a handheld mixer on medium-high speed and mix until smooth, about 1½ to 2 minutes.
- Fold in 2 cups of thawed whipped topping.
- Spread all of the cream cheese peanut butter mixture over the layer of crushed chocolate sandwich cookies.
- Sprinkle the remaining 1½ cups of crushed chocolate sandwich cookies on top of the peanut butter layer.
- Evenly spread the remaining chocolate pudding mixture over the crushed chocolate cookie layer.
- Drizzle the magic shell over the top of the pudding layer. Use an offset spatula or spoon to smooth the magic shell over the pudding.
- Sprinkle the remaining 3 cups of halved peanut butter cups over the chocolate pudding. Cover and chill in the refrigerator for at least 4 hours to overnight. Slice 3 slices x 5 slices.
Notes
- Make sure to chill the cake for the recommended time for better texture.
- You can substitute the chocolate sandwich cookies with another type of cookie if desired.
- Use a handheld mixer for best results when mixing the cream cheese and peanut butter mixture.
- Prep Time: 30 minutes
- Cook Time: 0 minutes
- Category: Dessert
- Method: No-Bake
- Cuisine: American
Nutrition
- Serving Size: 1 slice
- Calories: 320
- Sugar: 24g
- Sodium: 200mg
- Fat: 18g
- Saturated Fat: 8g
- Unsaturated Fat: 10g
- Trans Fat: 0g
- Carbohydrates: 36g
- Fiber: 2g
- Protein: 6g
- Cholesterol: 30mg


