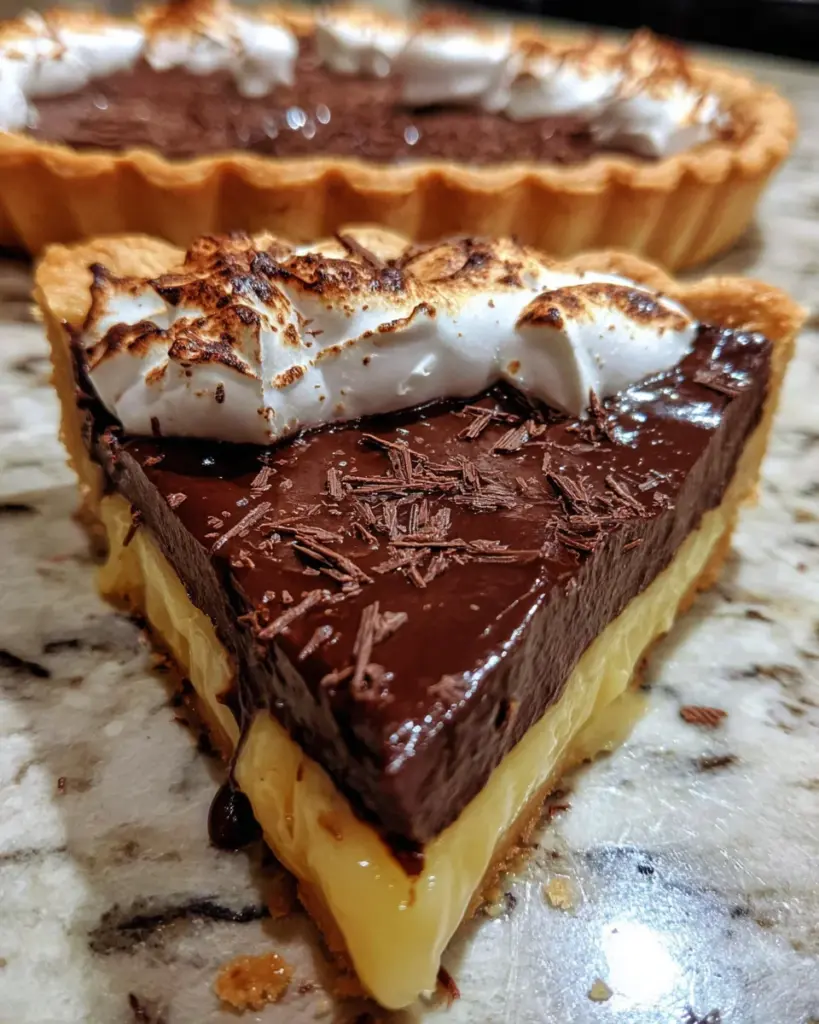
Introduction to Old-Fashioned Chocolate Pie
There’s something truly comforting about a slice of Old-Fashioned Chocolate Pie. It’s one of those desserts that whisks me back to my childhood kitchen, where the sweet, decadent aroma danced through the air. If you’re a busy mom or a professional juggling a thousand tasks, this pie is an easy solution to delight your family or impress guests. It’s rich, chocolaty, and a crowd-pleaser, making it perfect for any occasion. Whether it’s a birthday celebration or a cozy family dinner, this recipe is bound to bring joy and smiles to the table.
Why You’ll Love This Old-Fashioned Chocolate Pie
This Old-Fashioned Chocolate Pie is a slice of happiness that comes together in just a flash. It’s so easy to prepare, making it ideal for even the busiest of schedules. The rich chocolate flavor is truly irresistible and will satisfy any sweet tooth. Plus, it’s a timeless classic that brings back warm memories of family gatherings, making every bite a nostalgic treat you won’t want to miss!
Ingredients for Old-Fashioned Chocolate Pie
Gathering the right ingredients is the first step to creating an unforgettable Old-Fashioned Chocolate Pie. Here’s what you’ll need:
- Granulated sugar: This sweetener is the backbone of our filling, giving it a lovely sweetness that balances the rich chocolate.
- Unsweetened cocoa powder: A key player in deepening the chocolate flavor, this adds that classic taste we all adore.
- All-purpose flour: This helps to thicken the filling, giving it that pudding-like consistency we crave in a pie.
- Fine sea salt: A dash of salt enhances all the flavors, highlighting the sweetness of the sugar and cocoa.
- Large egg yolks: These add richness and creaminess to the filling, creating a luscious texture that melts in your mouth.
- Whole milk: This creamy ingredient contributes to the pie’s silky filling and balances the richness of the yolks.
- Pure vanilla extract: This aromatic addition elevates the flavor, adding a warm depth that pairs beautifully with chocolate.
- Unsalted butter: It brings richness and helps create that glossy finish we all love in a perfect chocolate filling.
- Pre-baked pie crust: A flaky, buttery foundation for our luscious filling. You can use store-bought or make your own!
For a twist on flavor, consider swapping in dark chocolate cocoa powder for a more intense chocolate experience. And don’t forget, all these ingredients are conveniently listed with exact measurements at the bottom, ready for your printing pleasure!
How to Make Old-Fashioned Chocolate Pie
Now that we’ve gathered our ingredients, it’s time to roll up our sleeves and dive into making this delightful Old-Fashioned Chocolate Pie. Follow these simple steps, and you’ll have a rich, chocolatey masterpiece that will wow your family and friends!
Step 1: Whisk Dry Ingredients
Start by grabbing a medium saucepan. In it, combine granulated sugar, unsweetened cocoa powder, all-purpose flour, and fine sea salt. Whisk everything together until it’s lump-free and well-mixed. This step ensures your filling is smooth, with no surprises later on. Set this aside, and let the dry ingredients mingle for a bit.
Step 2: Prepare Egg-Milk Mixture
In a separate mixing bowl, whisk together the egg yolks and whole milk until fully blended and creamy. It should look smooth and inviting; this mixture is what will bring our pie filling to life! Make sure you take your time here; a good blend sets the stage for a silky texture later.
Step 3: Combine Mixtures
Now it’s time to unite our two mixtures! Gradually pour the egg and milk blend into the saucepan with the dry ingredients. As you pour, whisk continuously to prevent lumps from forming. This step is crucial for that luxurious filling we crave in an Old-Fashioned Chocolate Pie!
Step 4: Cook the Filling
Place the saucepan over medium heat, stirring constantly. You’ll want to keep it moving! Watch as the mixture thickens—this should take about 7 to 10 minutes. You know it’s ready when it’s pudding-like and coats the back of a spoon. That’s the magic moment when your kitchen will start to smell truly divine!
Step 5: Add Butter and Vanilla
Remove the saucepan from the heat. Add both the unsalted butter and pure vanilla extract into the hot filling. Stir gently until the butter melts entirely and the mixture is glossy and vibrant. This isn’t just about taste; it’s about that delightful sheen that screams “I’m a perfect pie!”
Step 6: Pour into Crust
Carefully pour your warm filling into the pre-baked pie crust. Use a spatula to smooth the surface and ensure every corner is filled with chocolatey goodness. This is the moment your pie starts to take its final shape—all those hard work and delicious smells are about to pay off!
Step 7: Chill and Serve
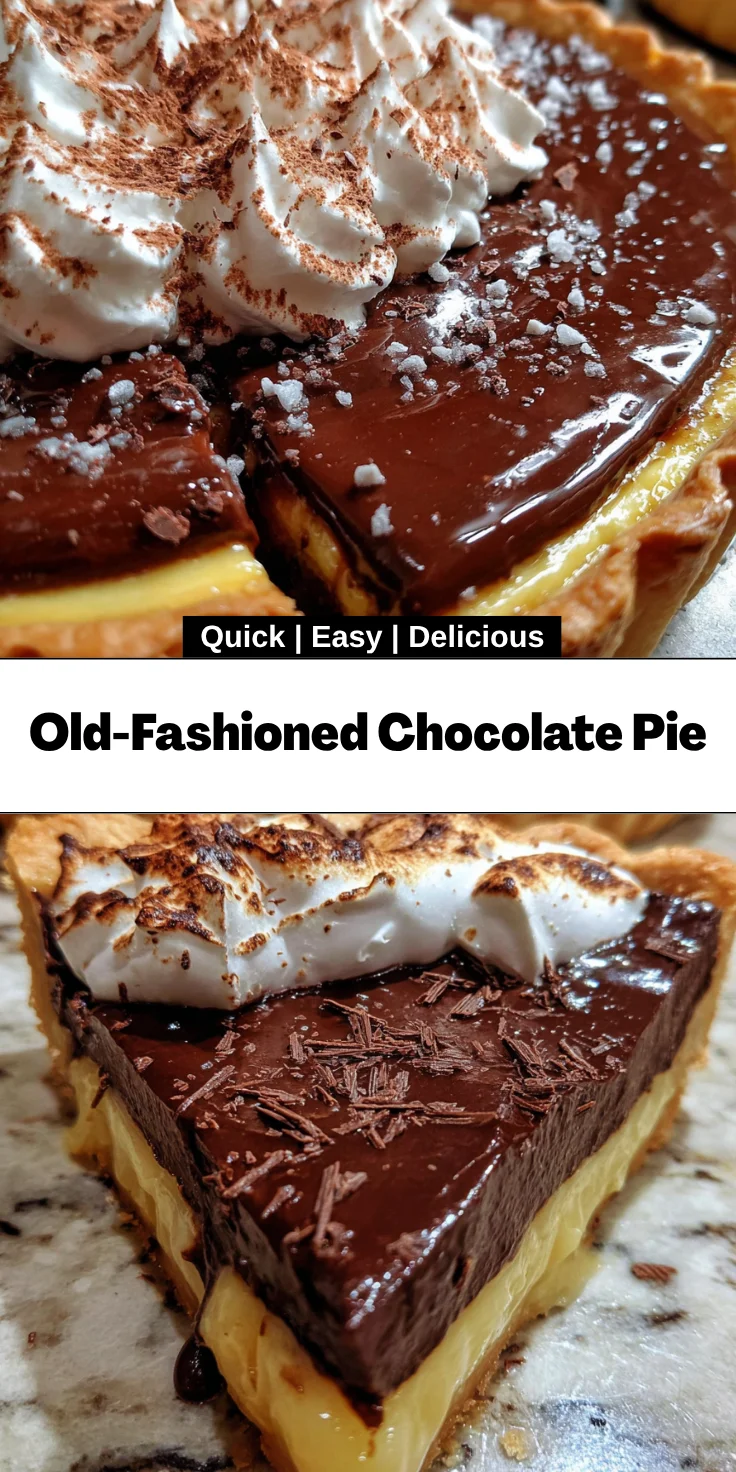
Allow the pie to cool at room temperature before transferring it to the refrigerator. Chill for at least 3 to 4 hours or until set. Patience is key here! Once chilled, slice into pieces, and serve cold. For that extra special touch, top with whipped cream or chocolate shavings. Enjoy every delightful bite of your Old-Fashioned Chocolate Pie!
Tips for Success
- Always pre-bake your pie crust for a flaky base that won’t get soggy.
- Use a whisk instead of a spoon for a lump-free filling.
- Stir constantly while cooking the filling to avoid burning.
- Let the pie cool completely before refrigerating to ensure the best texture.
- For a festive touch, add a sprinkle of sea salt on top before serving!
Equipment Needed
- Medium saucepan: A heavy-bottomed one works best to prevent burning. If unavailable, any saucepan will do.
- Whisk: Essential for mixing smoothly. A fork can be a good substitute in a pinch.
- Mixing bowls: Use any size, as long as they’re large enough to hold your ingredients.
- Spatula: Useful for transferring your filling into the pie crust. A spoon can suffice if you don’t have one.
- Refrigerator: Required for chilling the pie. Keep it cold and delicious!
Variations of Old-Fashioned Chocolate Pie
- Dark Chocolate Delight: Swap unsweetened cocoa powder with dark chocolate cocoa powder for a richer flavor that chocolate lovers will adore.
- Nutty Chocolate Pie: Add toasted nuts like pecans or walnuts to the filling for a delightful crunch and unique texture.
- Vegan Option: Replace egg yolks with silken tofu blended until smooth and use almond or coconut milk instead of whole milk for a dairy-free version.
- Chocolate Mint Pie: Incorporate a few drops of peppermint extract into the filling for a refreshing minty twist that’s perfect for holidays.
- Spiced Chocolate Pie: Add a pinch of cinnamon or espresso powder to the dry ingredients for an extra layer of warmth and depth in flavor.
Serving Suggestions for Old-Fashioned Chocolate Pie
- Top with freshly whipped cream for a light and airy contrast to the rich filling.
- Serve with a scoop of vanilla ice cream to enhance the chocolate experience.
- Pair with a side of fresh berries for a pop of color and tartness.
- Drizzle with chocolate sauce for an indulgent touch that chocolate lovers will adore.
- Garnish with chocolate shavings or a sprinkle of sea salt for visual appeal.
FAQs about Old-Fashioned Chocolate Pie
Can I make the Old-Fashioned Chocolate Pie ahead of time?
Absolutely! This pie can be made a day in advance. Just ensure it’s well-covered and chilled in the refrigerator. It will taste even better the next day as the flavors meld beautifully!
How do I get a smooth filling for my pie?
To achieve a silky texture, whisk the dry ingredients thoroughly and keep stirring while cooking. If you notice lumps, you can strain the mixture before pouring it into the crust.
What can I substitute for the egg yolks?
If you need to skip the egg yolks, try using silken tofu blended until smooth. It’s a fantastic alternative that maintains the creamy texture, making it ideal for a vegan version of the Old-Fashioned Chocolate Pie.
Can I use a store-bought pie crust?
Yes, using a store-bought pie crust is a great time-saver! Just make sure it’s fully pre-baked to ensure a perfectly flaky base for your pie.
How should I store any leftovers?
Store any leftover pie in the refrigerator, covered with plastic wrap or in an airtight container. It’ll stay fresh and delicious for up to three days!
Final Thoughts
Baking an Old-Fashioned Chocolate Pie isn’t just about making dessert; it’s creating a moment of joy. I love watching my family’s eyes light up when I pull this pie from the fridge, its glossy chocolate filling catching the light. Each slice is a tradition carried from my childhood kitchen to my own. This pie tells a story of love and laughter, making it the perfect sweet ending to any meal. So, whether it’s a casual weeknight or a festive gathering, this recipe is sure to fill your home with warmth and happiness. Enjoy every rich, chocolaty bite!
Print
Old-Fashioned Chocolate Pie
- Total Time: 4 hours 30 minutes
- Yield: 8 servings 1x
- Diet: Vegetarian
Description
A classic dessert featuring a rich chocolate filling in a flaky pie crust, perfect for any occasion.
Ingredients
- 200 grams granulated sugar
- 30 grams unsweetened cocoa powder
- 32 grams all-purpose flour
- 1 gram fine sea salt
- 3 large egg yolks
- 480 millilitres whole milk
- 5 millilitres pure vanilla extract
- 28 grams unsalted butter
- 1 pre-baked 23-centimetre pie crust
Instructions
- In a medium saucepan, whisk together the granulated sugar, unsweetened cocoa powder, all-purpose flour, and salt until homogenous and lump-free.
- In a separate mixing bowl, whisk the egg yolks and whole milk until fully combined and smooth.
- Gradually pour the egg-milk blend into the saucepan with the dry ingredients, whisking continuously to avoid lumps.
- Place the saucepan over medium heat and cook, stirring constantly, until the mixture thickens to a pudding-like consistency, approximately 7 to 10 minutes.
- Remove the saucepan from the heat. Add unsalted butter and vanilla extract, stirring until the custard is glossy and smooth.
- Pour the warm filling into the pre-baked pie crust. Smooth the surface and allow to cool to room temperature, then refrigerate for 3 to 4 hours or until fully set.
- Once thoroughly chilled, cut into slices and serve cold. Garnish with whipped cream or chocolate shavings if desired.
Notes
- For a richer flavor, use dark chocolate cocoa powder.
- Ensure the pie crust is fully pre-baked to avoid a soggy bottom.
- This dessert pairs well with a scoop of vanilla ice cream.
- Prep Time: 20 minutes
- Cook Time: 10 minutes
- Category: Dessert
- Method: Stovetop and Refrigeration
- Cuisine: American
Nutrition
- Serving Size: 1 slice
- Calories: 300
- Sugar: 22 grams
- Sodium: 150 milligrams
- Fat: 14 grams
- Saturated Fat: 8 grams
- Unsaturated Fat: 4 grams
- Trans Fat: 0 grams
- Carbohydrates: 36 grams
- Fiber: 1 gram
- Protein: 5 grams
- Cholesterol: 80 milligrams

