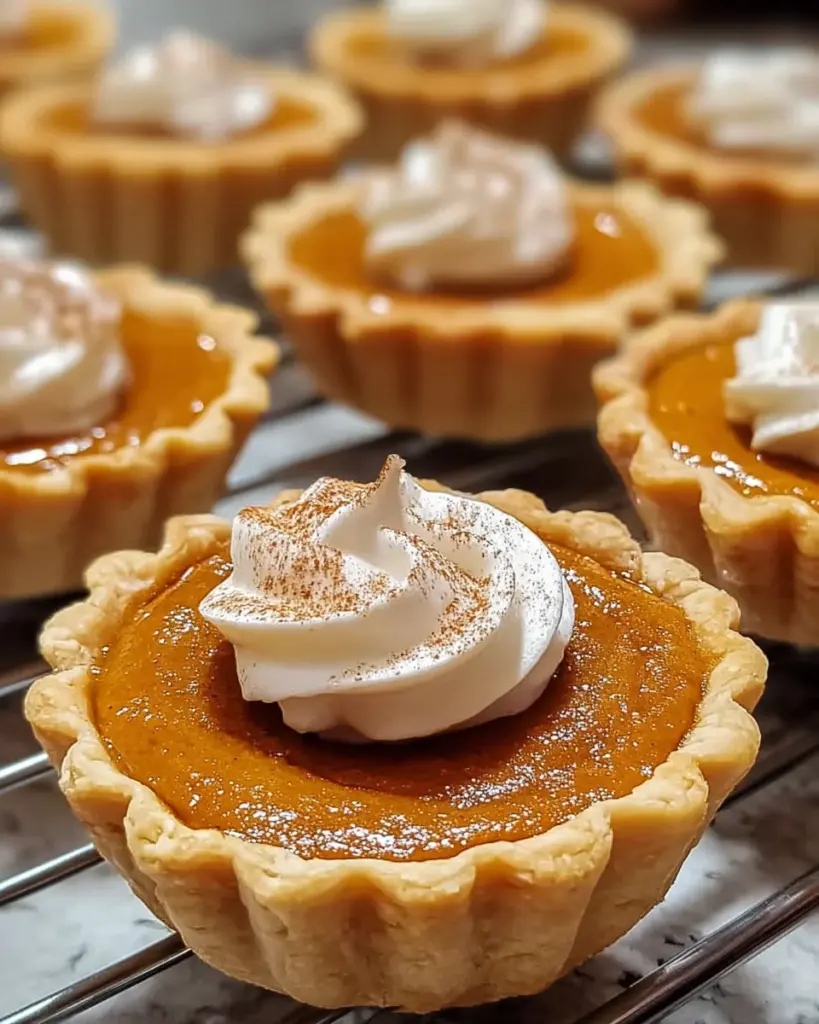
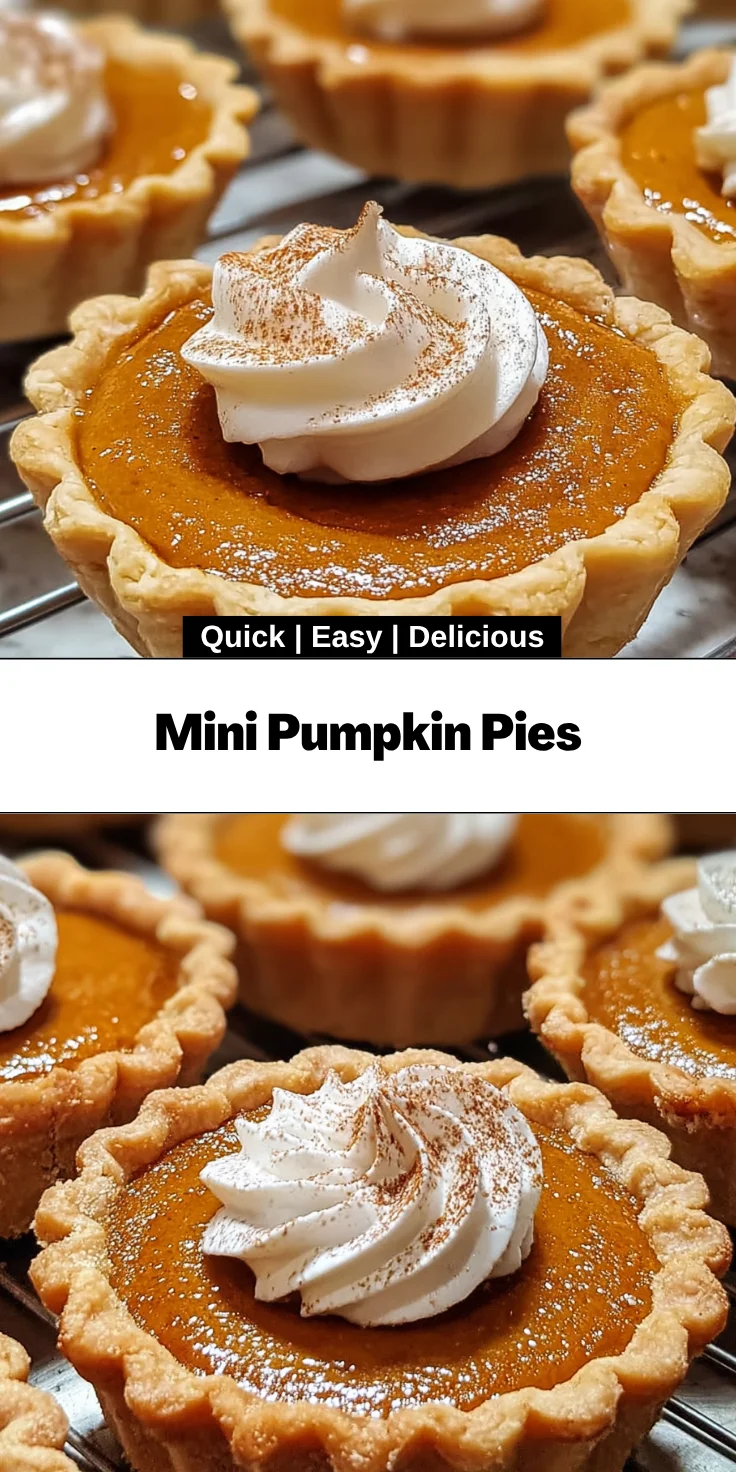
Introduction to Mini Pumpkin Pies
As the leaves begin to turn and the air turns crisp, I can’t help but crave my favorite fall treat: Mini Pumpkin Pies. These delightful little pies are a quick solution for busy days, bringing the comforting flavors of autumn right to your table. Whether you’re hosting a holiday gathering or just need a sweet snack, making these mini pies is an effortless way to impress loved ones. Plus, the aroma that fills your kitchen while they bake? Pure magic! Trust me, these bites of goodness will warm your heart and satisfy your sweet tooth.
Why You’ll Love This Mini Pumpkin Pies
These Mini Pumpkin Pies are not just delicious; they’re incredibly easy to whip up. With just a handful of ingredients and minimal prep time, you can create a mouthwatering dessert that’s perfect for any occasion. The burst of pumpkin flavor, combined with warm spices, makes each bite a cozy experience. Plus, they’re the ideal size for sharing or enjoying solo, so you don’t have to feel guilty indulging a little!
Ingredients for Mini Pumpkin Pies
Gathering the right ingredients is key to creating these delightful Mini Pumpkin Pies. Here’s what you’ll need:
- Unbaked pie crusts: These form the flaky base. You can use pre-made crusts for convenience or make your own if you’re feeling adventurous.
- Brown sugar: It adds a rich sweetness and depth of flavor. Feel free to substitute with coconut sugar for a healthier alternative.
- Granulated sugar: This will sweeten the filling just right, balancing the spices and pumpkin.
- Pumpkin pie spice: A must-have blend that includes cinnamon, nutmeg, and ginger. If you don’t have it, mix your own using those spices!
- Salt: Just a pinch enhances all the flavors and brings everything together.
- Canned pumpkin puree: The star of the show! Make sure to use pure pumpkin puree, not pumpkin pie filling.
- Evaporated milk: This gives the filling a creamy texture. For a dairy-free option, try coconut or almond milk.
- Large egg: It helps bind the filling. You can swap it with a flax egg for a vegan version.
- Vanilla extract: A splash adds warmth to the pie’s flavor profile.
Don’t worry; the exact quantities for each ingredient are detailed at the bottom of this article, so you can easily print the recipe and get started!
How to Make Mini Pumpkin Pies
Now that you’ve gathered your ingredients, let’s dive into creating these scrumptious Mini Pumpkin Pies. The process is as enjoyable as tasting the final product! Follow these clear steps, and soon you’ll have a delightful dessert that can’t be resisted.
Step 1: Preheat the Oven
First, you’ll want to preheat your oven to 400°F (200°C). Preheating the oven is crucial! This ensures that your mini pies bake evenly and develop that golden, crispy crust we all love.
Step 2: Prepare the Pie Crusts
Next, roll out your unbaked pie crusts on a floured surface. Use a cookie cutter to cut out circles that fit in your muffin pan slots. This is where the magic happens, and your mini pies start taking shape! Once cut out, gently place each crust circle into the muffin pan. To keep them fresh, pop them in the refrigerator while you prepare the filling.
Step 3: Make the Pumpkin Filling
In a mixing bowl, combine the brown sugar, granulated sugar, pumpkin pie spice, and salt. Whisk them together until blended. Then add in the canned pumpkin puree, evaporated milk, beaten egg, and vanilla extract. Stir until everything is smooth and well combined. At this point, the fragrance of spices and pumpkin will whet your appetite.
Step 4: Fill the Crusts
Now it’s time to fill those crusts! Carefully spoon about 2 tablespoons of the pumpkin mixture into each crust, being careful not to overfill. This ensures they don’t spill over while baking. Just imagine each pie brimming with that delightful pumpkin goodness!
Step 5: Bake the Mini Pies
Slide your muffin pan into the oven and bake for 16-20 minutes. Keep an eye on them! You’ll know they’re done when the tops are set and the edges turn lightly golden. This is the moment when your kitchen starts to smell heavenly, making it hard to wait!
Step 6: Cool and Store
Once baked, allow the mini pies to cool on a wire rack for at least 30 minutes. This cooling period helps them set up nicely. After they’ve cooled, transfer them to an airtight container and store them in the fridge. They make for a delightful treat over the next few days. Trust me, they won’t last long!
Tips for Success
- Always preheat your oven to ensure even baking.
- Chill your pie crusts before filling to prevent them from shrinkage.
- Don’t overfill the crusts; 2 tablespoons is just right!
- Use fresh pumpkin pie spice for the best flavor.
- Let mini pies cool completely before storing to maintain texture.
Equipment Needed for Mini Pumpkin Pies
- Muffin pan: Essential for shaping your mini pies. If you don’t have one, a mini tart pan can work, too.
- Rolling pin: For rolling out your pie crusts. A wine bottle can substitute in a pinch!
- Cookie cutter: To cut out your crusts. A glass can serve as an alternative.
- Mixing bowl: For blending the filling, any bowl will do!
- Whisk or fork: To mix the filling ingredients thoroughly; both are effective!
Variations of Mini Pumpkin Pies
- Gluten-Free Mini Pumpkin Pies: Use a gluten-free pie crust or make an almond flour crust for a tasty alternative.
- Vegan Pumpkin Pies: Replace the egg with a flax egg and use coconut or almond milk in place of evaporated milk.
- Chocolate Chip Mini Pumpkin Pies: Stir in mini chocolate chips to the pumpkin filling for a delicious twist.
- Maple Pumpkin Pies: Substitute the brown sugar with pure maple syrup for a deeper, richer flavor.
- Nuts or Seeds: Top the mini pies with chopped pecans or pumpkin seeds for added crunch.
Serving Suggestions for Mini Pumpkin Pies
- Whipped Cream: A dollop of freshly whipped cream adds a luxurious touch to each pie.
- Spiced Coffee: Serve alongside a warm spiced coffee or chai to complement the pumpkin flavors.
- Garnish: Dust with a sprinkle of cinnamon or nutmeg for an extra festive presentation.
- Ice Cream: Vanilla or cinnamon ice cream pairs wonderfully with the mini pies.
- Fruit Platter: Consider a side of sliced apples or pears for a refreshing contrast.
FAQs about Mini Pumpkin Pies
Can I make Mini Pumpkin Pies ahead of time?
Absolutely! In fact, these mini pies can be made a day in advance. Just bake them, let them cool, and store them in the fridge. This makes for an easy dessert solution for busy days.
Can I use fresh pumpkin instead of canned?
Certainly! If you prefer fresh pumpkin, roast it, scoop out the flesh, and puree it until smooth. Just be sure to use the right amount so the texture remains consistent with the canned version.
What can I do if my pie crusts shrink while baking?
To prevent shrinkage, chill your pie crusts before filling them. Also, avoid stretching the dough too much when fitting it into the muffin pan. This keeps them looking fabulous!
How should I store leftover Mini Pumpkin Pies?
Store any leftovers in an airtight container in the refrigerator. They’re best enjoyed within three days for maximum freshness. Trust me, they’ll disappear quickly!
Can I freeze Mini Pumpkin Pies?
Yes, you can freeze them! Just wrap each mini pie in plastic wrap and place them in a freezer-safe container. They’ll stay good for up to two months. Just thaw and enjoy!
Final Thoughts
Creating these Mini Pumpkin Pies is like capturing a slice of autumn in every single bite. The process is simple, yet the joy they bring to gatherings is immense. Whether it’s a festive holiday or a cozy weeknight treat, these little delights spark happy moments. I love watching my loved ones savor each bite, their faces lighting up with delight. Plus, there’s something incredibly satisfying about sharing homemade treats. So roll up your sleeves, and let these Mini Pumpkin Pies bring warmth and joy to your kitchen and heart, one scrumptious pie at a time!
Print
Mini Pumpkin Pies
- Total Time: 40 minutes
- Yield: 12 mini pies 1x
- Diet: Vegetarian
Description
These Mini Pumpkin Pies are a delightful treat that bring the flavors of fall right to your table. They’re perfect for holiday gatherings or a sweet snack any time of year.
Ingredients
- 2 unbaked pie crusts (9-inch)
- 1/3 cup brown sugar
- 2 tablespoons granulated sugar
- 1 ½ teaspoons pumpkin pie spice
- 1/4 teaspoon salt
- 1 cup canned pumpkin puree
- 3/4 cup evaporated milk
- 1 large egg, beaten
- 1/2 teaspoon vanilla extract
Instructions
- Preheat your oven to 400°F (200°C).
- Roll out the pie crusts on a floured surface and cut out circles using a cookie cutter.
- Fit each crust circle into muffin pan slots and refrigerate while preparing the filling.
- In a mixing bowl, whisk together sugars, spices, salt, pumpkin puree, evaporated milk, egg, and vanilla until smooth.
- Fill each crust with approximately 2 tablespoons of the pumpkin mixture.
- Bake for 16-20 minutes until the tops are set and edges are lightly golden.
- Allow to cool on wire racks for at least 30 minutes before transferring to an airtight container in the fridge.
Notes
- Use pre-made pie crusts for a quicker option.
- Adjust the spices according to your taste preference.
- These pies can be stored in the refrigerator for up to 3 days.
- Prep Time: 20 minutes
- Cook Time: 20 minutes
- Category: Dessert
- Method: Baking
- Cuisine: American
Nutrition
- Serving Size: 1 mini pie
- Calories: 150
- Sugar: 10g
- Sodium: 120mg
- Fat: 5g
- Saturated Fat: 1g
- Unsaturated Fat: 4g
- Trans Fat: 0g
- Carbohydrates: 22g
- Fiber: 1g
- Protein: 2g
- Cholesterol: 30mg