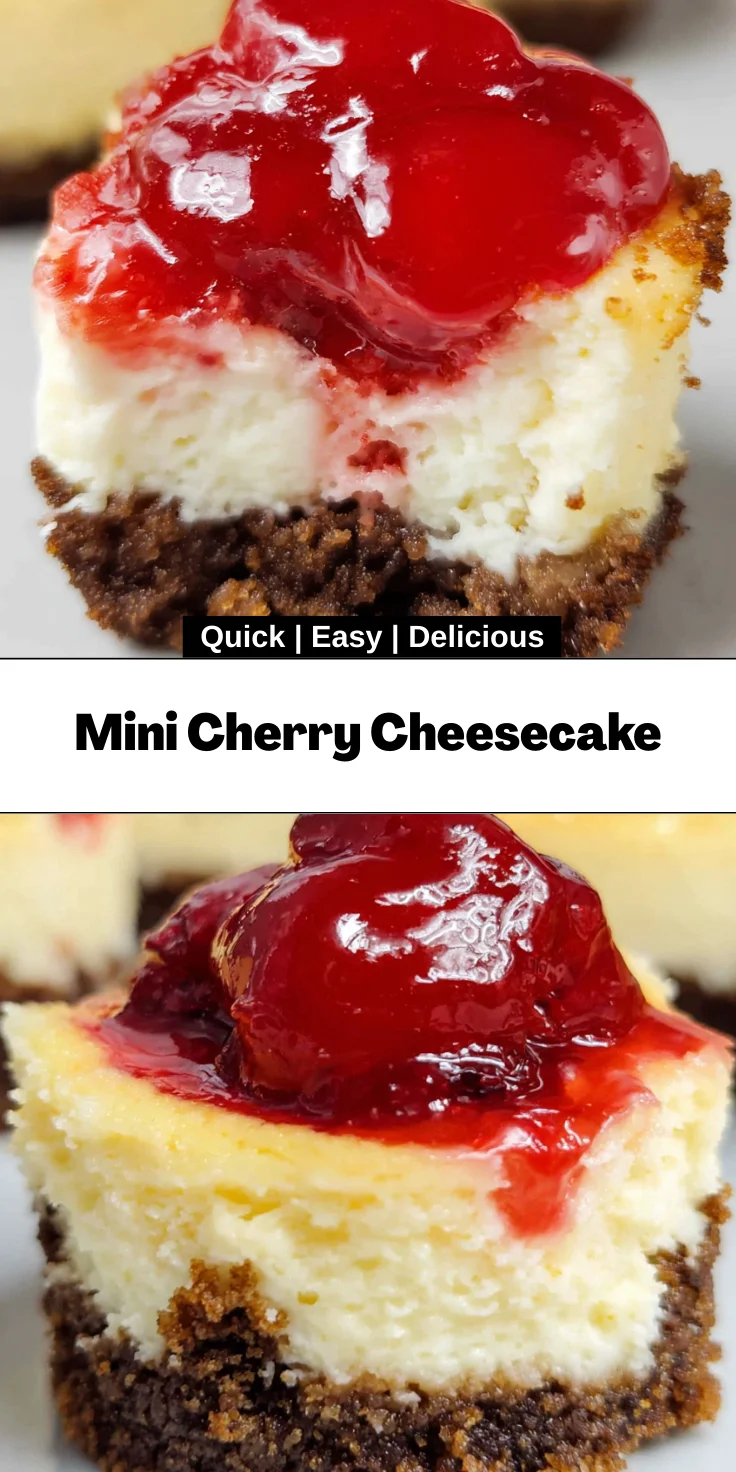
Introduction to Mini Cherry Cheesecake
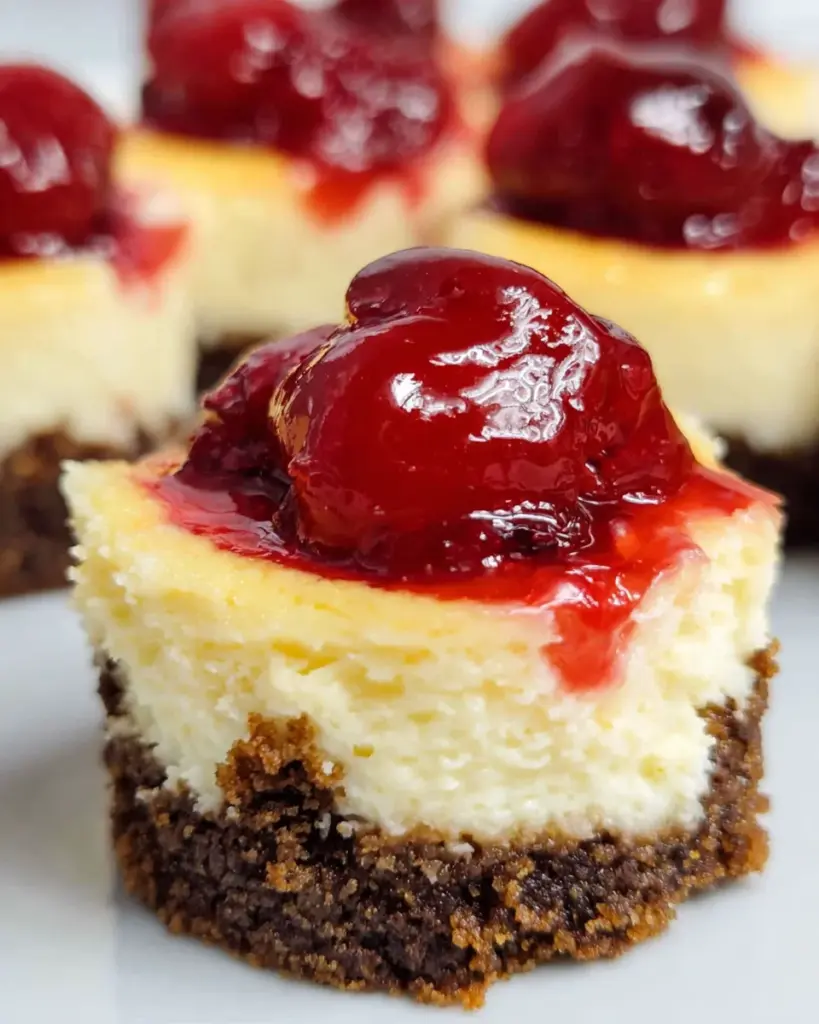
Are you searching for a delightful dessert that impresses without demanding hours of your time? Look no further! These Mini Cherry Cheesecakes are pure joy in bite-sized form. They combine a creamy, dreamy cheesecake filling with a sweet, luscious cherry topping. Whether you’re hosting a gathering or simply treating yourself, these mini delights effortlessly bring a smile. Plus, they’re quick enough to whip up on a busy day, making them perfect for busy moms or professionals like us. Trust me, this recipe is your new go-to for any occasion!
Why You’ll Love This Mini Cherry Cheesecake
Who doesn’t adore a dessert that’s as easy to make as it is to devour? These Mini Cherry Cheesecakes don’t just taste amazing; they also come together in a flash. Perfectly portioned for guilt-free indulgence, they feature a creamy filling that melts in your mouth, topped with a sweet cherry punch. Plus, they’re a fantastic way to impress guests without the fuss. Truly, this recipe is a busy cook’s dream!
Ingredients for Mini Cherry Cheesecake
Gathering your ingredients is half the fun! Here’s what you’ll need to create these delightful mini treats. The exact measurements are noted at the end of the article for your convenience. Let’s take a quick look at each ingredient:
- Unsalted butter: This will add richness to your crust. You can use salted butter too, but remember to adjust the salt in your recipe.
- Graham cracker crumbs: The base of your cheesecake! These add a sweet, crunchy texture. If you’re feeling adventurous, consider using crushed digestive biscuits or even Oreo crumbs for a twist.
- Cream cheese: The star of the show! Make sure it’s softened to create that luscious, creamy filling. Neufchâtel cheese is a lighter alternative if you’re watching calories.
- White sugar: This sweetness balances the tanginess of the cream cheese. You can substitute with brown sugar for a deeper flavor, or experiment with a sweetener of your choice.
- Large eggs: Eggs are essential for a smooth, firm texture. If you prefer to make these cheesecakes egg-free, consider using a flax egg or applesauce.
- Sour cream: This adds tang and creaminess to the filling. Plain yogurt works just as well, lending a slight tartness.
- Vanilla extract: A splash of vanilla elevates the flavor profile. For a fun twist, try using almond extract instead!
- All-purpose flour: This helps stabilize the filling, ensuring it holds its shape. If gluten is a concern, a gluten-free flour blend can do the trick.
- Cherry pie filling: The finishing touch! Go for store-bought for convenience, or try homemade if you have time to spare. Fresh cherries can also be a beautiful substitute during cherry season.
With all these delightful ingredients, you’re well on your way to creating a show-stopping dessert that’s sure to impress. Let’s dive into the next steps!
How to Make Mini Cherry Cheesecake
Now that we have our ingredients ready, let’s dive into the fun part! Making Mini Cherry Cheesecakes is easier than you might think. Just follow these simple steps, and soon you’ll have a delicious dessert that’s sure to delight everyone.
Step 1: Preheat Your Oven
Start by preheating your oven to 350°F. This is crucial! A properly heated oven ensures even baking, helping our cheesecakes set perfectly. While you do this, take a moment to enjoy the cozy warmth as it fills your kitchen.
Step 2: Prepare Muffin Tin
Next, line 18 muffin tins with foil-lined wrappers. This little trick makes removing the cheesecakes a breeze later on. Plus, the shiny foil helps them bake evenly. Set your lined muffin tin aside while you whip up the crust.
Step 3: Create the Crust
In a medium bowl, combine melted butter and graham cracker crumbs until they’re well mixed. This mixture should resemble wet sand. Press about one tablespoon of this mixture into the bottom of each cupcake wrapper, forming a solid base. This crust is the foundation of our Mini Cherry Cheesecakes, lending that delightful crunch!
Step 4: Mix the Cheesecake Filling
Grab a large mixing bowl and beat the softened cream cheese with the white sugar until it’s smooth. Scrape down the sides of the bowl often to ensure a consistent texture. Then, one at a time, beat in the eggs. Once combined, add the sour cream, vanilla extract, and flour. Keep mixing until everything is smooth and silky. Your cheesecake filling should look fluffy and inviting!
Step 5: Fill the Cupcake Wrappers
Now comes the fun part! Use a scoop or spoon to fill each cupcake wrapper with the cheesecake mixture. Be careful not to overfill; leave about half an inch at the top. This allows them room to rise slightly while baking. Seeing those beautifully filled wrappers will spark joy, trust me!
Step 6: Bake and Cool
It’s time to bake! Place the muffin tin in your preheated oven and bake for 20 to 25 minutes. Your Mini Cheesecakes are ready once they’re slightly jiggly in the center. Removing them too early may lead to soggy cheesecakes, so keep an eye on them! Let them cool in the pan for about 20 minutes. Then, transfer them to the fridge for at least two hours. Chilling helps set that creamy texture we all love.
Step 7: Add Cherry Topping
Finally, it’s time for the pièce de resistance: the cherry topping! Once your Mini Cherry Cheesecakes have cooled completely, add a generous scoop of cherry pie filling on each one. This explosion of color and flavor will not only make them look stunning but also add that sweet cherry punch. Now, they’re ready to impress!
Tips for Success
- Ensure your cream cheese is at room temperature for easy mixing.
- Don’t skip cooling them in the fridge! This step enhances the texture.
- Overfilling can lead to messy cheesecakes, so stick to the recommended height.
- Use fresh cherry pie filling if possible for a burst of flavor.
- Test doneness with a toothpick; it should come out clean with just a slight wobble.
Equipment Needed
- Muffin tin: Essential for baking your mini cheesecakes. If unavailable, a cupcake pan works just as well.
- Mixing bowls: You’ll need both a medium and a large bowl. Using glass or stainless steel helps with even mixing.
- Electric mixer: A hand mixer makes it easy, but a whisk can work too—just be prepared for a workout!
- Spoon or scoop: For filling the wrappers. A cookie scoop can make this task mess-free!
- Spatula: Great for scraping down the bowl and serving your mini treats.
Variations on Mini Cherry Cheesecake
- Chocolate Mini Cherry Cheesecake: Add cocoa powder to the cream cheese mixture for a chocolatey twist, or use chocolate cookie crumbs for the crust.
- Berry Bliss: Swap out the cherry pie filling for blueberry or raspberry for a tangy flavor. Fresh berries on top add a beautiful touch!
- Gluten-Free Option: Use gluten-free graham cracker crumbs or crushed nuts for the crust. It’s just as delightful!
- Vegan Mini Cherry Cheesecake: Replace cream cheese with silken tofu blended until smooth and use a vegan sour cream alternative.
- Nutty Delight: Incorporate crushed nuts like walnuts or pecans into the crust for an added crunch and flavor profile.
Serving Suggestions with Mini Cherry Cheesecake
- Pair with Coffee: A rich cup of coffee complements the creamy cheesecakes beautifully.
- Garnish with Mint: Add a sprig of fresh mint on top for a pop of color.
- Serve with Whipped Cream: A dollop of whipped cream adds elegance and extra sweetness.
- Mix with Fruit Salad: Serve alongside a fresh fruit salad for a refreshing balance.
- Elegant Plating: Arrange on a colorful platter for a stunning presentation at gatherings.
FAQs about Mini Cherry Cheesecake
How long can I store Mini Cherry Cheesecakes?
You can store these delightful treats in an airtight container in the fridge for up to five days. Just make sure to add the cherry topping right before serving to keep them fresh and delicious!
Can I freeze Mini Cherry Cheesecakes?
Absolutely! These miniature beauties freeze wonderfully. Just make sure they’re completely cooled and set, then wrap each one tightly in plastic wrap. They can last in the freezer for up to two months. Thaw them overnight in the fridge before serving.
Can I use fresh cherries instead of cherry pie filling?
Yes, fresh cherries can absolutely shine on these cheesecakes! Just pit and slice them, then layer them on top before serving for a fresher and more vibrant flavor. You can even drizzle a bit of honey for extra sweetness.
What’s the best way to serve Mini Cherry Cheesecakes?
Serve these mini delights chilled, topped with a generous scoop of cherry pie filling. For added flair, consider garnishing with whipped cream or a sprinkle of crushed graham crackers. Presentation can really wow your guests!
Can I make these Mini Cherry Cheesecakes ahead of time?
Definitely! These cheesecakes can be made a day in advance, which is perfect for busy moms or professionals like us. Just remember to add the cherry topping before serving for a fresh, delicious vibe.
Final Thoughts on Mini Cherry Cheesecake
Whipping up these Mini Cherry Cheesecakes is more than just baking; it’s about creating moments of joy in our busy lives. Each bite offers a sweet escape, a delightful reminder of simple pleasures. Whether you’re enjoying them with a cup of coffee or sharing them with loved ones, they bring smiles to the table. Plus, their ease of preparation means you won’t stress while making them. So, gather your ingredients and make some magic happen. Trust me, once you dive into these mini delights, you’ll find yourself making them time and again. Happy baking!
Print
Mini Cherry Cheesecake
- Total Time: 2 hours 40 minutes
- Yield: 18 mini cheesecakes 1x
- Diet: Vegetarian
Description
Mini Cherry Cheesecakes are delightful bite-sized desserts perfect for cherry lovers, featuring a creamy cheesecake filling topped with sweet cherry pie filling.
Ingredients
- ½ cup unsalted butter (melted)
- 1½ cups graham cracker crumbs
- 16 ounces cream cheese (softened)
- 1 cup white sugar
- 2 large eggs
- ⅓ cup sour cream
- 1 teaspoon vanilla extract
- 1 tablespoon all-purpose flour
- 1 can cherry pie filling
Instructions
- Preheat oven to 350°F.
- Fill 18 muffin tins with foil-lined wrappers. The wrappers with the inside foil lining peel better from this dessert.
- In a medium bowl, stir together melted butter and graham cracker crumbs until mixed.
- Press about 1 tablespoon of graham cracker crumb and butter mixture in the bottom of each cupcake wrapper.
- In a large bowl, beat the cream cheese with the white sugar until smooth. Scrape down the sides of the bowl often.
- Beat in the eggs until well mixed. Again, scrape down the sides of the bowl often.
- Beat in the sour cream, vanilla, and flour until well mixed.
- Scoop the cheesecake mixture into each cupcake wrapper. Fill until each is filled to about ½ inch from the top. They will rise a bit while baking, so don’t overfill.
- Bake for 20 to 25 minutes. They’re done when still just slightly jiggly in the middle.
- Remove from oven and let cool for 20 minutes before placing in fridge to cool completely. These will need to cool in fridge for at least two hours before serving.
- Top each with a scoop of cherry pie filling before serving.
Notes
- Ensure the cream cheese is softened for easier mixing.
- Be careful not to overfill the cupcake liners.
- Cool in the fridge for at least two hours before serving for the best texture.
- Prep Time: 15 minutes
- Cook Time: 25 minutes
- Category: Dessert
- Method: Baking
- Cuisine: American
Nutrition
- Serving Size: 1 mini cheesecake
- Calories: 210
- Sugar: 18g
- Sodium: 180mg
- Fat: 12g
- Saturated Fat: 7g
- Unsaturated Fat: 4g
- Trans Fat: 0g
- Carbohydrates: 25g
- Fiber: 1g
- Protein: 3g
- Cholesterol: 50mg


