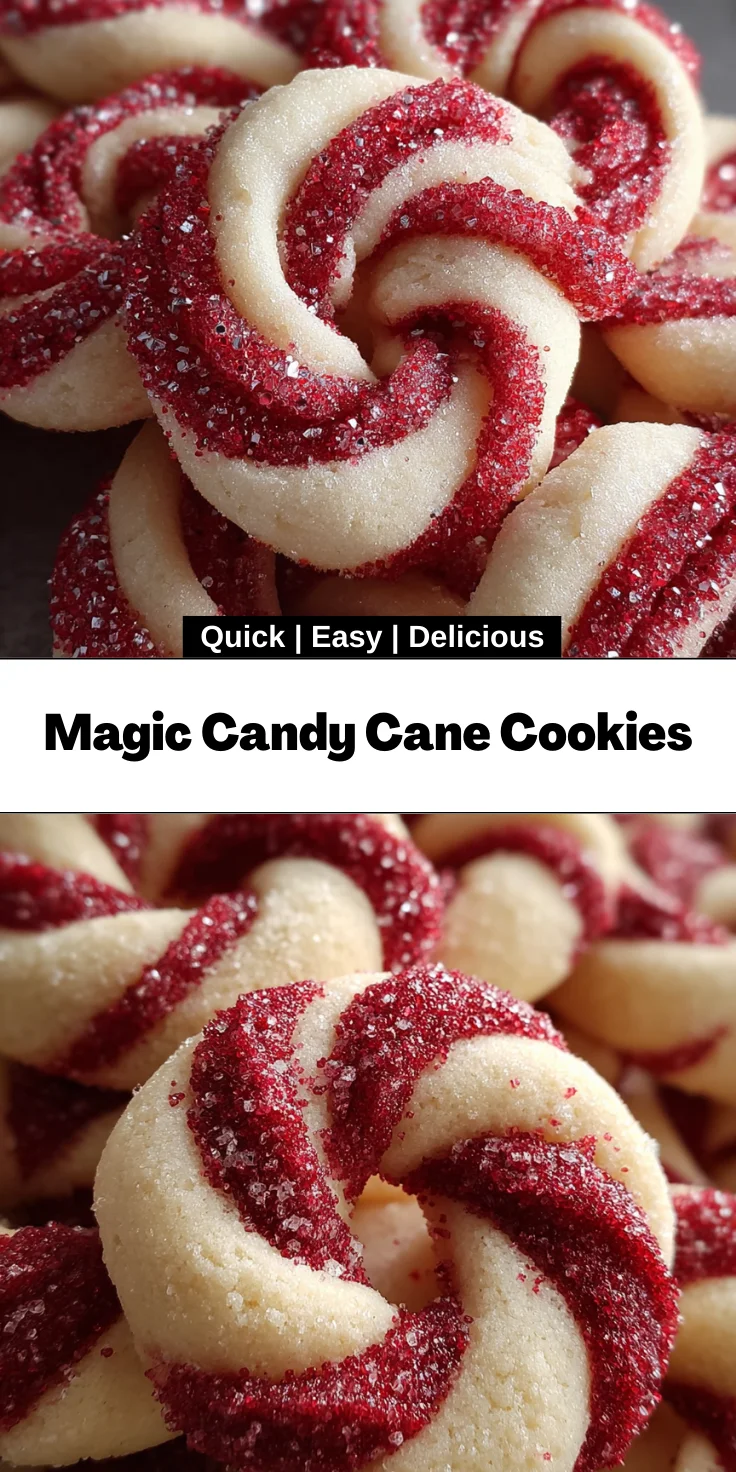
Introduction to Magic Candy Cane Cookies
Ah, the holiday season! It’s a magical time filled with twinkling lights, festive cheer, and, of course, delicious treats. Allow me to introduce you to Magic Candy Cane Cookies—the perfect addition to your holiday baking repertoire. These delightful cookies are not only easy to make, but they also look stunning on any dessert table. If you’re a busy mom or professional like me, you’ll appreciate how quickly these come together. With a few simple ingredients and a sprinkle of holiday spirit, you’ll have a batch of charming cookies to impress your family and friends!
Why You’ll Love This Magic Candy Cane Cookies
These Magic Candy Cane Cookies are the ultimate festive treat, combining ease and deliciousness in every bite. They bring a touch of whimsy to your holiday gatherings without requiring hours in the kitchen. Plus, the cheerful colors and peppermint flavor are sure to delight your loved ones. Imagine the smiles on their faces when they see and taste these charming cookies—your holiday just got a whole lot merrier!
Ingredients for Magic Candy Cane Cookies
Gathering the right ingredients is the first step in crafting your Magic Candy Cane Cookies. Here’s what you’ll need:
- Unsalted butter: This is the backbone of any great cookie. It adds a rich flavor and helps create that soft, melt-in-your-mouth texture.
- Powdered sugar: This gives the cookies their sweetness while allowing for a smooth and fluffy batter. It’s a must for that delightful melt!
- Large egg: A room temperature egg binds everything together and boosts the cookie’s fluffiness. Remember, it’s the magic of baking!
- Vanilla extract: It infuses warmth and depth into your cookies. A little dash goes a long way in enhancing baked goods.
- Peppermint extract: This is where the holiday spirit shines! It adds that refreshing, nostalgic flavor reminiscent of candy canes.
- All-purpose flour: The main structure of our cookies, it’s essential for that perfect cookie feel—soft yet sturdy!
- Salt: Just a pinch enhances flavor and balances the sweetness. It’s like a secret handshake between the ingredients!
- Red gel food coloring: This adds a vibrant pop! Get creative with the shade to make your cookies even more festive!
You’ll find the exact measurements for these ingredients at the bottom of the article, ready for printing. Happy baking!
How to Make Magic Candy Cane Cookies
Now that you have your ingredients ready, let’s dive into the fun part: making those beautiful Magic Candy Cane Cookies. Follow these steps, and I promise you’ll find joy in the process!
Step 1: Cream the Butter and Sugar
First things first, grab your softened butter and powdered sugar. In a large bowl, beat them together with a mixer on medium speed. You want a light and fluffy mixture, which usually takes about 3-5 minutes. It’s like whipping up a little bit of magic right in your kitchen! You’ll see the color lighten, and the texture will feel airy.
Step 2: Add Egg and Extracts
Next, it’s time to add the room temperature egg. Crack it in and mix until fully combined. Don’t forget to add the vanilla and peppermint extracts as they amplify those holiday flavors. Whisk them in until the batter is smooth and creamy. Take a moment to enjoy that festive aroma; it’s the beginning of something delightful!
Step 3: Combine Dry Ingredients
In a separate bowl, whisk together your all-purpose flour and salt. This mixture is crucial as it ensures even distribution and prevents lumps. Gradually add this to your wet mixture, using the mixer on low speed. As you blend, watch the dough come together into a soft, inviting ball. It’s like the beginning of a great winter story!
Step 4: Divide and Color the Dough
Now, it’s time for some artistic flair! Divide the dough in half and wrap each portion in plastic. Before chilling them for about an hour, tint one half with red gel food coloring. Just a little bit goes a long way. Don’t be afraid to get your hands a little messy; it’s all part of the fun!
Step 5: Preheat and Prepare
While your dough chills, preheat your oven to 350°F (180°C). This is an important step! You want to ensure your cookies start baking immediately once they hit the oven. Line a baking sheet with parchment paper for easy cleanup—this way, you can keep your holiday spirit intact by not worrying about scrubbing pans!
Step 6: Shape the Cookies
Once the dough is chilled, remove them from the plastic wrap. Roll equal portions of the red and white dough into thin ropes, about 6 inches long. Next, twist them together gently and form them into candy cane shapes. The more carefully you roll, the prettier they will turn out. I like to think of it as making little festive sculptures on my baking sheet!
Step 7: Bake to Perfection
Pop those adorable candy cane cookies into your preheated oven. Bake for 8 to 10 minutes. Keep an eye on them! They should set but not brown. When you take them out, they’ll be soft, and that’s what you want. Let them cool on the trays; they will firm up as they cool. Your kitchen is about to smell like a winter wonderland!
Tips for Success
- Always use softened butter for easy creaming and a fluffier cookie.
- Chill your dough to maintain shape and enhance flavors.
- Don’t skip the baking sheet lining; it makes cleanup a breeze.
- Check the cookies a minute or two early to avoid overbaking.
- Let them cool completely before moving; they’ll firm up nicely!
Equipment Needed
- Mixing bowl: A large bowl for mixing ingredients. A glass bowl works great too.
- Hand mixer: Ideal for creaming butter and sugar. A whisk can do the trick if you want a workout!
- Parchment paper: Essential for lining baking sheets. Aluminum foil can be a handy alternative.
- Rolling pin: Perfect for shaping the dough. A wine bottle can also work in a pinch!
- Baking sheets: Regular or insulated sheets work well for baking these cookies.
Variations of Magic Candy Cane Cookies
- Chocolate Drizzle: Melt some chocolate and drizzle it over the cooled cookies for a rich twist.
- Gluten-Free Option: Substitute all-purpose flour with a gluten-free blend to cater to dietary restrictions.
- Candy Cane Crush: Add crushed peppermint candies into the dough for added crunch and festive flair.
- Nutty Addition: Mix in chopped nuts such as walnuts or pecans for a delightful texture contrast.
- Milk Chocolate Chips: Toss in some milk chocolate chips to create a sweet and salty flavor profile.
Serving Suggestions for Magic Candy Cane Cookies
- Pair your Magic Candy Cane Cookies with a warm cup of hot cocoa or peppermint tea for a cozy treat.
- Arrange them on a festive platter, garnished with fresh mint leaves or holiday sprinkles for a cheerful presentation.
- These cookies make delightful gifts, packaged in decorative boxes or tins with a festive ribbon.
FAQs about Magic Candy Cane Cookies
As I’ve baked these charming Magic Candy Cane Cookies, I’ve often found myself pondering some questions that might pop into your mind too. Let’s clear up a few common queries!
Can I use regular food coloring instead of gel? While you can use regular food coloring, gel food coloring delivers a more vibrant shade without altering the dough’s consistency. It’s worth investing in for those festive colors!
How can I store these cookies to keep them fresh? Store your Magic Candy Cane Cookies in an airtight container at room temperature. They stay fresh for about a week. If you want to keep them longer, consider freezing them. Just layer them with parchment paper to prevent sticking!
Can I make the dough ahead of time? Absolutely! You can prepare the dough and keep it wrapped tightly in plastic wrap in the fridge for up to three days. Just let it soften slightly before rolling it out to shape.
What if my cookies spread too much while baking? If your cookies spread more than expected, try chilling the dough for a bit longer next time. Chilled dough helps maintain their shape during baking. Also, make sure your oven is at the right temperature before baking!
Can I add more peppermint flavor? Yes! If you’d like a stronger peppermint flavor, just increase the amount of peppermint extract slightly. But be careful; a little goes a long way!
Final Thoughts
There’s something truly special about baking Magic Candy Cane Cookies during the holiday season. Each step is filled with joy, from creaming the fluffy dough to twisting those vibrant red and white ropes. As the cookies bake, your kitchen fills with comforting aromas that warm your heart. These cheerful treats aren’t just cookies; they’re moments of happiness shared with family and friends. Whether it’s a holiday gathering or a cozy night in, these cookies add a sprinkle of magic to any occasion, reminding us of the joy found in simple pleasures. Happy baking!
Print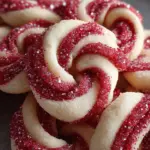
Magic Candy Cane Cookies
- Total Time: 1 hour 40 minutes
- Yield: Approximately 24 cookies 1x
- Diet: Vegetarian
Description
Magic Candy Cane Cookies are a festive delight perfect for the holiday season.
Ingredients
- 225 g unsalted butter, softened
- 120 g powdered sugar
- 1 large egg, at room temperature
- 1 teaspoon vanilla extract
- 0.5 teaspoon peppermint extract
- 315 g all-purpose flour
- 0.5 teaspoon salt
- Red gel food coloring
Instructions
- Beat the softened butter with powdered sugar until the mixture is smooth and fluffy.
- Mix in the egg along with vanilla and peppermint extracts until fully combined.
- In a separate bowl, whisk together flour and salt. Gradually add the dry mixture to the wet ingredients, mixing until a soft dough forms.
- Divide the dough in half. Tint one half with red gel food coloring until desired shade is achieved. Wrap each portion in plastic and chill for 1 hour.
- Preheat the oven to 180°C.
- Roll equal portions of red and white dough into thin ropes. Twist together and shape into candy cane forms.
- Place shaped dough on a parchment-lined baking sheet. Bake for 8 to 10 minutes, or until set but not browned. Cool on trays before serving.
Notes
- Ensure the butter is softened for best mixing results.
- Chilling the dough helps to maintain the shape of the cookies while baking.
- Do not overbake; the cookies should remain soft but hold their shape.
- Prep Time: 30 minutes
- Cook Time: 10 minutes
- Category: Dessert
- Method: Baking
- Cuisine: American
Nutrition
- Serving Size: 1 cookie
- Calories: 100
- Sugar: 6g
- Sodium: 50mg
- Fat: 5g
- Saturated Fat: 3g
- Unsaturated Fat: 2g
- Trans Fat: 0g
- Carbohydrates: 12g
- Fiber: 0g
- Protein: 1g
- Cholesterol: 10mg