Introduction to Dill Pickle Sourdough Bread
Ah, the culinary joys of baking! Today, I’m thrilled to share my delightful twist on traditional sourdough: Dill Pickle Sourdough Bread. If you’re like me, juggling a whirlwind of daily tasks, this recipe is a beacon of hope. It’s not just about the tangy flavor that dances on your tongue, but also about crafting something extraordinary in your kitchen.
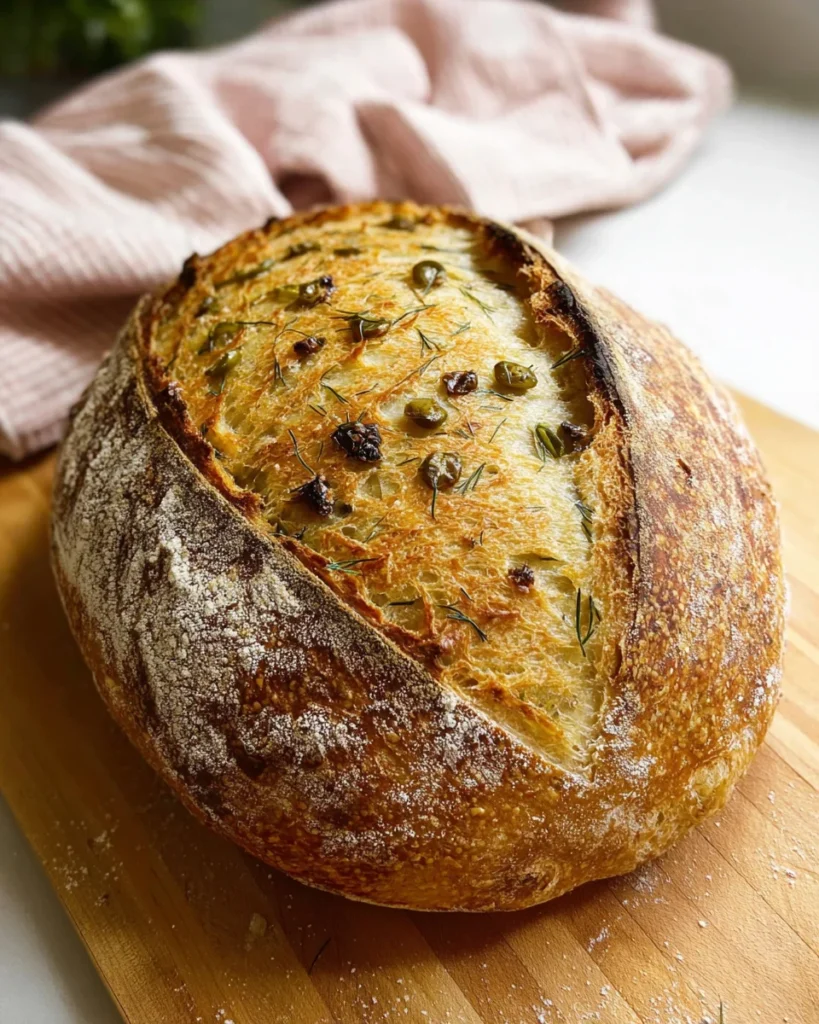
Imagine the aroma wafting through your home, as you bring a unique bread to the table. Whether it’s for a family gathering or a cozy night in, this Dill Pickle Sourdough Bread is destined to impress. Let’s get started!
Why You’ll Love This Dill Pickle Sourdough Bread
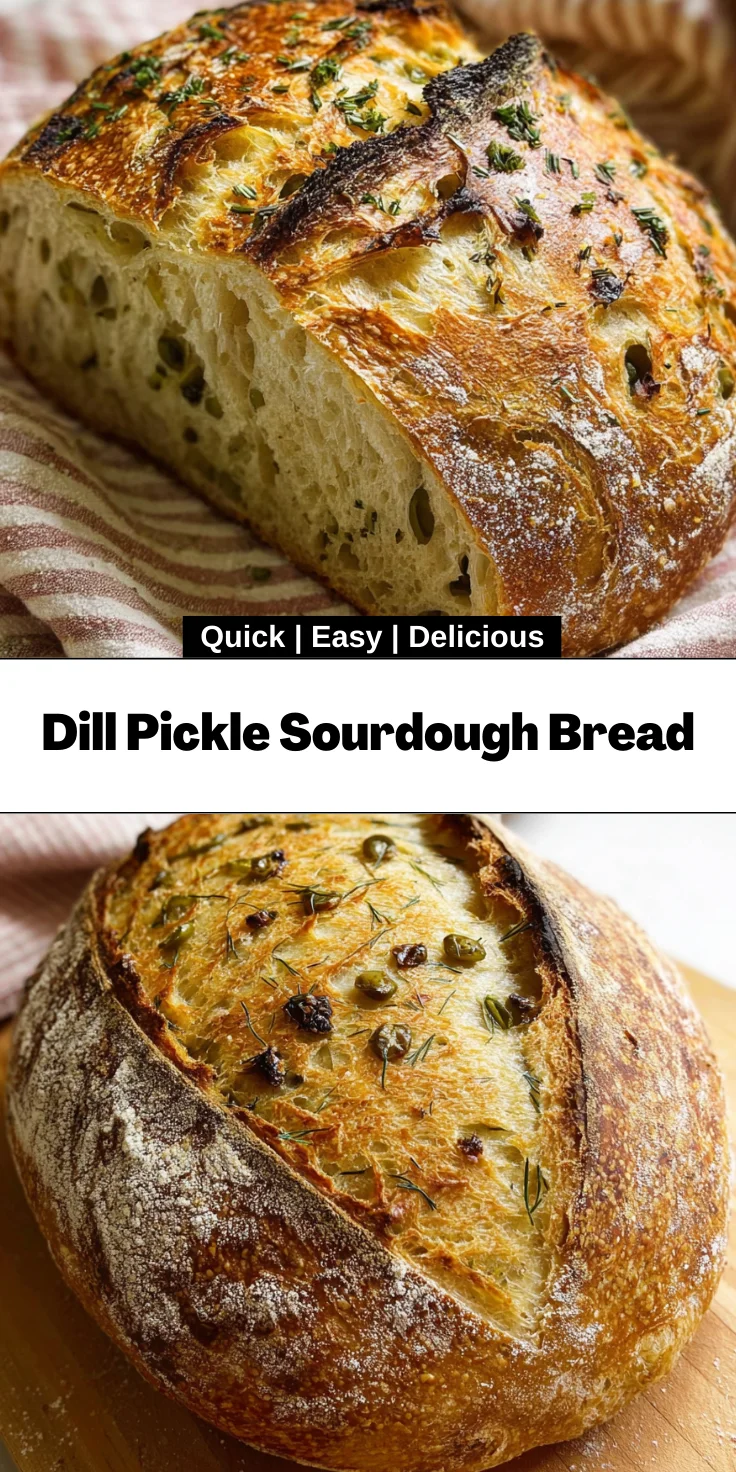
This Dill Pickle Sourdough Bread is an absolute game-changer for busy moms and professionals alike. It’s simple, quick, and the flavors? Out of this world! Imagine crispy edges and a soft, tangy interior that pairs perfectly with any meal or sandwich. Plus, the satisfaction of making sourdough from scratch will bring a smile to your face, even on the busiest days. You’re going to love the joy this recipe brings to your kitchen!
Ingredients for Dill Pickle Sourdough Bread
Creating this Dill Pickle Sourdough Bread is a breeze with a list of simple, wholesome ingredients. Here’s what you’ll need:
- Active sourdough starter: This is the backbone of your bread, bringing that signature tang and rise.
- Filtered water: Using warm, quality water helps activate the starter and create a fluffy texture.
- Dill pickle brine: Adds a delightful tang and infuses the bread with that irresistible pickle flavor.
- Organic bread flour: Provides the structure and strength for a beautiful loaf.
- Whole wheat flour: Offers added nutrition and a slightly nutty flavor to balance the bread.
- Fine sea salt: Enhances flavor and is essential for proper fermentation of the dough.
- Chopped dill pickles: These little gems pack a punch of flavor and texture, making each bite a surprise.
- Fresh dill: Adds a burst of herbaceous goodness, elevating the pickle flavor.
If you’re feeling adventurous, consider swapping out the dill pickles for jalapeños for a spicy kick, or experiment with your favorite herb mix in place of fresh dill. For exact measurements, check the bottom of the article for a handy printable version!
How to Make Dill Pickle Sourdough Bread
Ready to dive into creating your very own Dill Pickle Sourdough Bread? Let’s get our hands a little floury! Each step is filled with love, and I promise the result is worth it. Here’s a simple, practical guide to lead you through this culinary adventure.
Step 1: Mix the Starter, Water, and Brine
Preparing the Dough Base
Start by placing your active sourdough starter in a large mixing bowl. Pour in the warm filtered water and dill pickle brine. Grab a fork and blend everything together until the starter is fully dissolved. This step is crucial for an even dough. Next, we’ll integrate our flours, sparking that sourdough magic!
Step 2: Add Salt and Let Rest
Importance of Resting
Once the flour is in, sprinkle fine sea salt over the shaggy dough. Cover the bowl with a damp cloth, sealing in warmth and moisture for about 40 minutes. This resting period allows the salt to absorb into the dough, enriching the flavor and enhancing that lovely fermentation.
Step 3: Knead the Dough
Incorporating the Salt
Now it’s time to knead! With clean hands, work the salt into the dough for about two minutes. Let that muscle memory kick in! After kneading, begin your first set of stretch and folds. We’re making the gluten strands stronger, which is the key to that chewy texture we all love.
Step 4: Adding Dill Pickles and Fresh Dill
How to Fold in Add-ins
After your dough has rested, it’s time to add the fun stuff! Sprinkle in the chopped dill pickles and fresh dill on top of your dough. As you do your next stretch and fold, encase those vibrant mix-ins. This step is where the smiles come in, each bite will burst with flavor!
Step 5: Bulk Fermentation
Watching for the Right Rise
Let your dough sit at room temperature, covered, and watch it rise. You’re looking for it to grow just shy of doubling in size, which usually takes about four hours at 74 degrees F. It’s like watching magic happen, don’t you think? Each hour brings more life to your dough!
Step 6: Shaping the Dough
Preparing for the Final Rise
Once your dough has risen, gently tip it onto a floured work surface. Let it rest for 10-15 minutes. This step gives your dough a moment to relax before shaping it. Treat it kindly; it’s working hard! Once rested, shape it into a round loaf, seam side up, and place it in a flour-dusted banneton.
Step 7: The Final Rise
Options for Rising
Now, it’s time for the final rise! You have options: let it rise at room temperature for about 1.5 hours or pop it in the fridge overnight for up to 12 hours. This longer fridge rise can deepen the flavor even more. Just think about how patient your sourdough will be, resting overnight like a cozy bear!
Step 8: Preheating the Oven
Getting Ready to Bake
Before you’re ready to bake, preheat your oven with your Dutch oven inside at 450 degrees F. This high heat mimics the brilliant crust of a bakery loaf, so don’t skip this step! The heat buildup is essential for that beautiful crust we all love about sourdough.
Step 9: Baking the Bread
Ensuring Perfect Color and Texture
When your oven is roaring hot, take the dough out of the banneton. Place a piece of parchment over the top, flip, and score with a sharp knife. This lets the steam escape and helps with that crusty exterior. Slide the dough on the parchment into the Dutch oven, cover it, and bake for 25 minutes. Then remove the lid, reduce the temperature to 435 degrees F, and bake for an additional 20 minutes.
Step 10: Cooling the Bread
Why Letting it Cool Matters
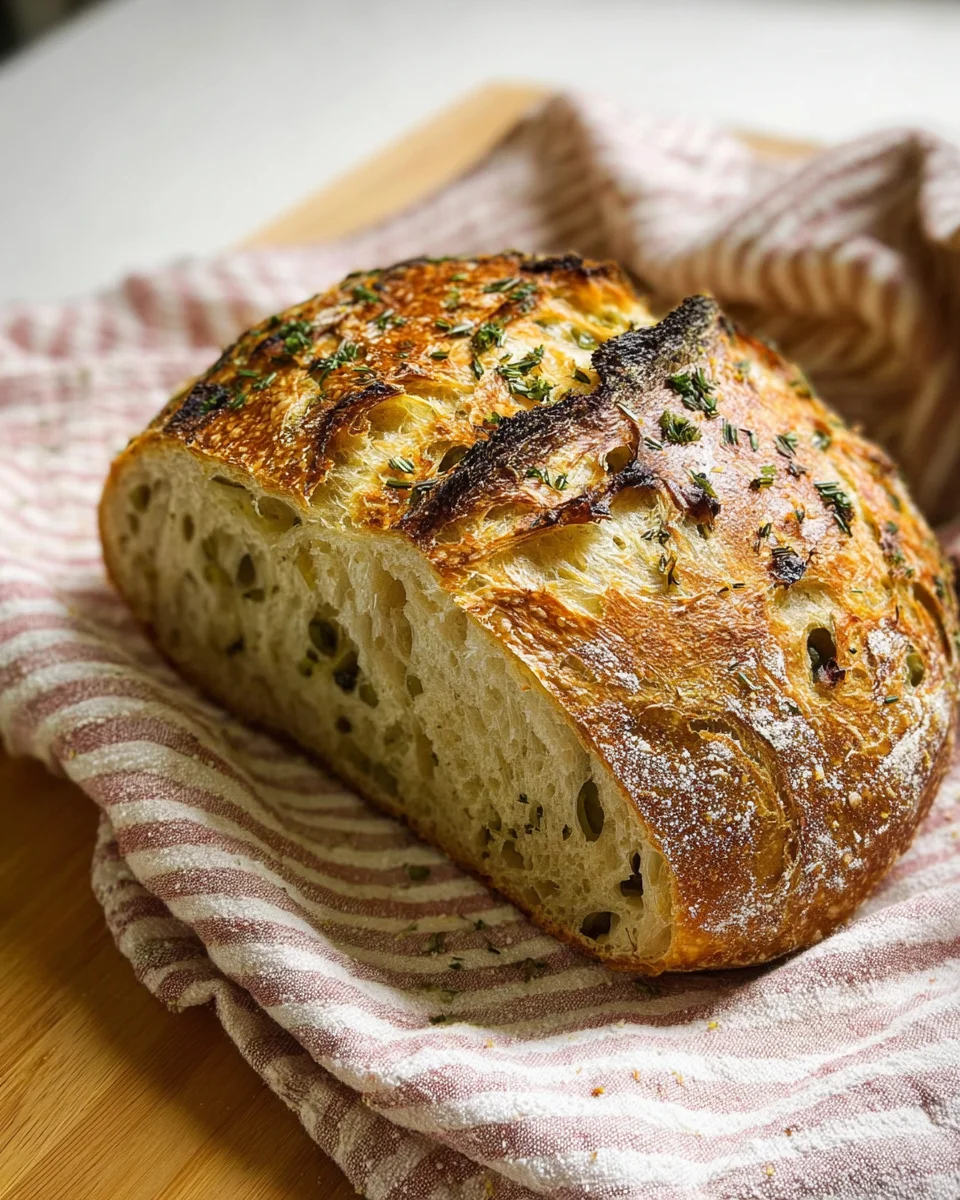
As hard as it may be, resist the urge to slice right away. Allow your bread to cool for at least one hour on a wire rack. This cooling process is crucial for finishing that baking magic. Cutting too soon can lead to gummy bread, and nobody wants that! Enjoy the aroma filling your kitchen as you patiently wait!
Tips for Success
- Always use an active sourdough starter for best results; it should be bubbly and lively.
- Don’t rush the resting periods; these are essential for flavor and texture development.
- Pat the chopped dill pickles dry to avoid excess moisture that can weigh down your dough.
- Invest in a kitchen scale for precise measurements, ensuring consistency.
- Allow your bread to cool completely before slicing for a perfect texture.
Equipment Needed
- Mixing bowl: A large bowl is ideal; any sturdy container will do.
- Dutch oven: A cast-iron pot works perfectly; you can use any oven-safe pot with a lid.
- Kitchen scale: This is handy for precise measurements; measuring cups can work as an alternative.
- Bench scraper: This simplifies handling sticky dough; a spatula will work in a pinch!
- Wire rack: Great for cooling your bread; any elevated surface will suffice.
Variations on Dill Pickle Sourdough Bread
- Spicy Dill Pickle Sourdough: Add diced jalapeños or red pepper flakes for a spicy twist that’ll pickle your taste buds!
- Herb-Infused Version: Incorporate a mix of fresh herbs like chives or thyme for added freshness and depth of flavor.
- Cheddar Dill Sourdough: Mix in shredded sharp cheddar cheese alongside the dill pickles for a rich, savory experience.
- Vegan Option: Use aquafaba (chickpea brine) instead of dill pickle brine for a vegan-friendly version while still retaining that delightful tang.
- Seeded Sourdough: Add sesame seeds, poppy seeds, or sunflower seeds into the dough for extra texture and flavor.
Serving Suggestions for Dill Pickle Sourdough Bread
- Serve warm with a spread of cream cheese and smoked salmon for an elegant appetizer.
- Pair slices with hearty soups or stews, as the bread’s tang complements rich flavors beautifully.
- Enjoy it as the base for sandwiches, especially with turkey or ham!
- Slice and toast for a crunchy bruschetta topped with your favorite savory toppings.
- Accompany with a refreshing cucumber salad to enhance that pickle flavor.
FAQs about Dill Pickle Sourdough Bread
Can I use store-bought dill pickles instead of homemade?
Absolutely! Store-bought dill pickles work perfectly. Just remember to pat them dry to avoid excess moisture in your dough.
How do I know if my sourdough starter is active enough?
Your sourdough starter should be bubbly and have doubled in size within 4-6 hours of feeding. If it meets these signs, it’s ready to kick off your Dill Pickle Sourdough Bread adventure!
Can I freeze the dough or the baked bread?
Yes! You can freeze the raw dough after shaping it. Alternatively, freeze the baked loaf once it’s cooled. Just make sure to wrap it tightly to avoid freezer burn.
What should I do if my bread doesn’t rise properly?
Don’t fret! If your bread doesn’t rise, check the warmth of your kitchen and the activity of your starter. A chilly environment or inactive starter can slow down fermentation. Try placing it in a warmer spot next time!
How long will the Dill Pickle Sourdough Bread stay fresh?
This bread is best enjoyed fresh but will stay good for 3-4 days at room temperature. For longer storage, slice and freeze. That way, you’ll always have some ready for toasting or sandwiches!
Final Thoughts
There’s something magical about pulling a loaf of fresh Dill Pickle Sourdough Bread from your oven. The soft, tangy slices bring joy to even the busiest days, creating smiles around the dinner table. Each bite transports you back to moments filled with laughter and love, making it more than just food; it’s a heartfelt reminder of home.
So, whether you’re a seasoned baker or a curious newbie, this recipe invites you to embrace the warmth of your kitchen. I can’t wait for you to experience the delightful flavor and wonderful aroma that fills your space. Happy baking!
Print
Dill Pickle Sourdough Bread
- Total Time: 4 hours 15 minutes
- Yield: 1 loaf 1x
- Diet: Vegetarian
Description
A unique and flavorful sourdough bread infused with the tangy taste of dill pickles and fresh dill.
Ingredients
- 50 grams active sourdough starter
- 260 grams filtered water, around 85 degrees F
- 30 grams dill pickle brine
- 375 grams organic bread flour
- 35 grams whole wheat flour
- 7 grams fine sea salt
- 80 grams chopped dill pickles
- 1 1/2 tablespoons finely chopped fresh dill
Instructions
- In a large bowl, mix starter, water, and brine with a fork until starter is dispersed. Add flours, mixing with a spatula first, then switching to mixing with your hand until a shaggy dough is formed, so that flour is not visible.
- Sprinkle salt on top of dough. Cover bowl with a damp cloth and let sit for 40 minutes.
- Work the salt into the dough, kneading it strongly with your hands for two minutes. Then perform your 1st set of stretch and folds. Let dough rest for 30 minutes, covered.
- After the 30 minute rest, sprinkle the pickles and fresh dill evenly on top of the dough, encasing the mix-ins into the dough during the next stretch and fold.
- Perform 2 more sets of rests and stretch and fold, waiting the 30 minutes in between each, for a total of 4 stretch and fold sequences.
- Let the dough bulk ferment on your counter until just short of doubling, about 4 hours at 74 degrees F.
- Once the dough has risen, gently move it out onto a floured work surface and let it rest for 10-15 minutes before shaping.
- Shape the dough and place it seam side up in a flour dusted, linen lined banneton, cover and let rise for a final time.
- The final rise can happen in the fridge overnight or at room temperature for about 1 1/2 hours.
- Preheat the oven with the dutch oven inside to 450 degrees F. Place parchment over the dough, flip it over, and score the top.
- Place dough on parchment paper into the dutch oven, cover, and bake for 25 minutes. Then remove the cover, turn oven down to 435 degrees F and bake for an additional 20 minutes.
- Allow to cool for one hour before slicing.
Notes
- Pat the chopped dill pickles with a paper towel to remove excess moisture before adding them to the dough.
- Final rise can be done up to 12 hours in the refrigerator.
- For best results, wait one hour before slicing to avoid gummy bread.
- Prep Time: 30 minutes
- Cook Time: 45 minutes
- Category: Bread
- Method: Baking
- Cuisine: American
Nutrition
- Serving Size: 1 slice
- Calories: 150
- Sugar: 1g
- Sodium: 220mg
- Fat: 2g
- Saturated Fat: 0g
- Unsaturated Fat: 1g
- Trans Fat: 0g
- Carbohydrates: 28g
- Fiber: 1g
- Protein: 5g
- Cholesterol: 0mg