Introduction to Christmas Jello Cake
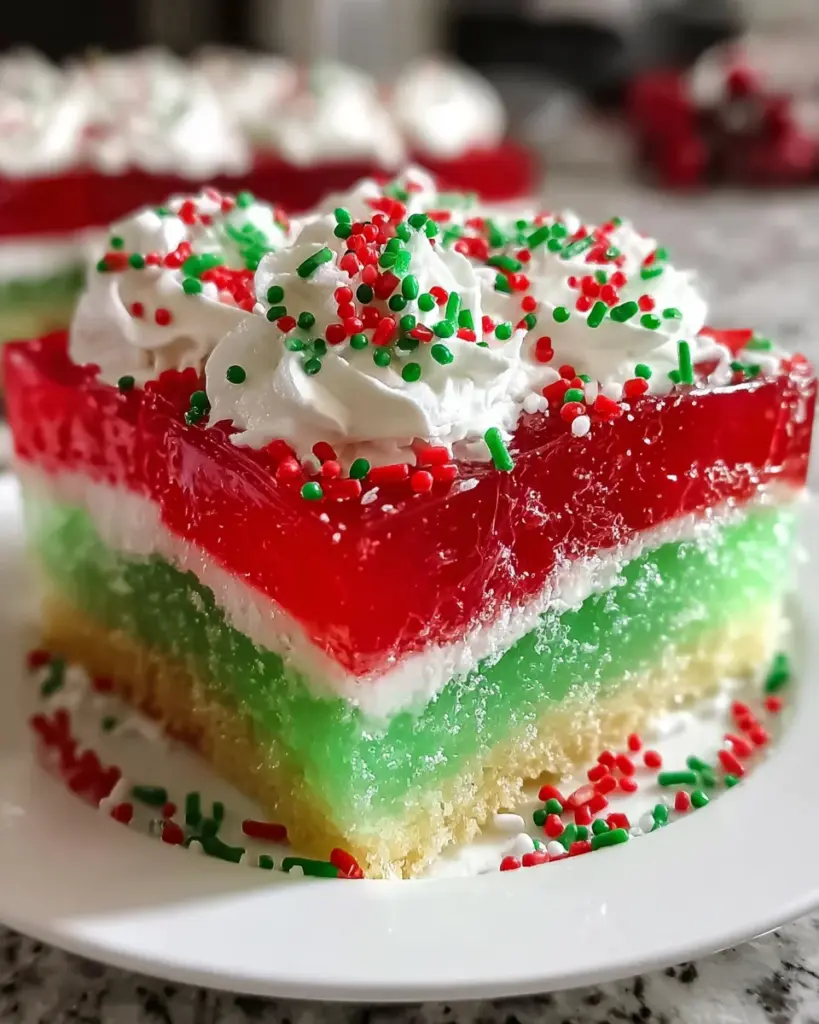
As the holiday season approaches, I find myself reaching for vibrant colors and flavors to brighten up our celebrations. That’s where my beloved Christmas Jello Cake comes into play! This festive dessert is not only a delight to the eyes but also a quick solution for busy days filled with family and friends. With layers of colorful Jello nestled in a soft cake, it’s sure to impress loved ones without taking hours in the kitchen. Trust me, this cheerful treat is sure to bring smiles, making it the perfect addition to your holiday spread!
Why You’ll Love This Christmas Jello Cake
This Christmas Jello Cake is a beacon of simplicity and joy! It comes together in just under an hour, with minimal fuss. The bright colors and delightful flavors make it a hit with kids and adults alike. Plus, it’s an impressive centerpiece for your holiday table that doesn’t require fancy baking skills. Just imagine your loved ones’ faces lighting up as they take that first bite—pure magic!
Ingredients for Christmas Jello Cake
Creating this festive dessert is a delightful experience, and it all starts with the right ingredients. Let’s explore what you’ll need for your Christmas Jello Cake.
- White cake mix – This base gives the cake its fluffy texture. You can opt for homemade if you’re feeling adventurous!
- Eggs, water, and oil – These are typically called for on the cake mix box. They’re essential for binding and moisture.
- Lime Jello – This adds a tangy sweetness that contrasts beautifully with the cake. Plus, the green color is festive!
- Cherry Jello – Sweet and vibrant, it brings a splash of red to your dessert and balances out the flavors.
- Cooled Whip – For that perfect creamy topping, Cool Whip is easy and delicious. If you prefer homemade whipped cream, go for it!
- Red and green sprinkles – Hot tip! These not only enhance the visual appeal but also add a charming crunchy texture.
Feel free to experiment with different Jello flavors or colors for a unique twist on this classic! The ingredient quantities and more detailed instructions are available at the bottom of the article for your printing convenience.
How to Make Christmas Jello Cake
Now, let’s get down to the fun part—making this colorful masterpiece! I’ll guide you step-by-step, so you can whip up this Christmas Jello Cake with ease.
Step 1: Prepare the White Cake
Start by gathering your ingredients and preheating the oven according to the cake mix instructions. In a large bowl, combine the cake mix with eggs, water, and oil. Mix until just combined—that’s the magic combo for a fluffy cake! I suggest using an electric mixer for an even better texture.
Step 2: Bake the Cake
Pour your batter into a greased 9×13 baking pan. Make sure to spread it evenly. Bake according to the package directions. When a toothpick comes out clean, that’s your cue! The heavenly aroma will fill your kitchen—trust me, it’s worth the wait!
Step 3: Cool the Cake
Once baked, allow your cake to cool for about 20 minutes, or until it’s just warm to the touch. Cooling is crucial for the next steps. If you rush this, the Jello won’t seep in properly!
Step 4: Create Holes in the Cake
Using a straw or a wooden spoon handle, gently poke evenly spaced holes all over the surface of the cake. Don’t be shy with those holes! They’re the pathways for the delicious Jello layers to ooze into the cake, making it a true treat.
Step 5: Prepare the Jello
Let’s bring out the colors! Prepare the lime Jello by dissolving it in 1 cup of boiling water, then add 1/2 cup of cold water. Give it a good stir. Repeat this process with the cherry Jello. Watch the vibrant colors come to life!
Step 6: Pour the Jello
Carefully pour half of the green Jello over one side of the cake, filling those lovely holes. Then, pour the red Jello over the other half, doing the same. The visual feast is coming together beautifully—I get giddy just thinking about it!
Step 7: Refrigerate the Cake
This is where the magic happens! Cover your cake and refrigerate it for at least 6 hours or overnight if you can. The Jello needs time to set properly. I promise, the wait will be well worth it!
Step 8: Add Toppings
Once set, remove the cake from the fridge and spread your thawed Cool Whip evenly across the top. It’s the beautiful white frosting that will elevate the colors beneath. Finish with a sprinkle of red and green sprinkles. It’s like snow falling on a bright Christmas morning!
Tips for Success
- For best results, refrigerate the cake overnight. This enhances the flavor and texture.
- Make sure your cake is completely cool before adding Jello to avoid melting!
- Use a sharp knife for clean cuts; wipe it between slices for perfect squares.
- Experiment with different Jello flavors and colors for a unique twist!
- Consider using a vegan whipped topping for a plant-based option.
Equipment Needed
- 9×13 baking pan – A classic choice. You can also use a glass dish for even heat distribution.
- Mixing bowls – Use any size; just ensure they’re large enough for batter mixing and Jello preparation.
- Electric mixer – Optional, but it speeds up mixing. A whisk works just fine for a workout!
- Straw or wooden spoon handle – To poke holes in the cake. A skewer or chopstick will do the trick as well.
Variations
- Flavor Swaps: Try using other Jello flavors like blue raspberry or orange for a fun twist. The colorful effect will still be visually stunning!
- Gluten-Free Option: Substitute the white cake mix with a gluten-free blend. It’ll still be delicious and inclusive for your gluten-sensitive friends or family.
- Healthier Topping: Opt for Greek yogurt or a light whipped topping instead of Cool Whip for a healthier alternative. It still tastes amazing!
- Add Fresh Fruit: Layer fresh berries or banana slices on top of the Cool Whip for an extra burst of flavor and nutrition.
- Layered Jello: Instead of two flavors, try incorporating additional Jello layers for a rainbow effect, making it even more festive!
Serving Suggestions
- Serve slices of Christmas Jello Cake alongside a cup of hot cocoa or spiced apple cider for a festive touch.
- Pair with gingerbread cookies or peppermint bark to enhance the holiday spirit on your dessert table.
- Present the cake on a colorful holiday platter, garnished with fresh mint leaves for an enticing look!
- Add a scoop of vanilla ice cream for a delightful contrast to the cake’s flavors.
FAQs about Christmas Jello Cake
As you embark on your culinary adventure with Christmas Jello Cake, you might have a few questions in mind. Let’s tackle some common inquiries to ensure your baking experience is as smooth as whipped cream!
Can I use different flavors of Jello?
Absolutely! Feel free to get creative with Jello flavors. Mix and match based on your family’s favorites. Blue raspberry or even peach would add a unique twist to your Christmas Jello Cake!
How long can I store leftover cake?
Your Christmas Jello Cake stays fresh in the refrigerator for about 3 to 5 days. Just make sure it’s covered well to keep it tasty and moist for a delightful treat later on!
Can I make this cake ahead of time?
Yes, indeed! This cake is perfect for prepping ahead. You can make it a day or two in advance and let those Jello layers solidify overnight—it only gets better with time!
Is this dessert suitable for kids?
Absolutely! The bright colors and playful textures of the Christmas Jello Cake make it a favorite among kids. Plus, it’s a fun way to introduce them to baking!
Can I make a smaller batch?
Sure thing! If you want a smaller Christmas Jello Cake, just cut the ingredients in half and use an 8×8 pan. It’s a perfect way to avoid extra slices that might tempt you later!
Final Thoughts
As you gather with loved ones this holiday season, the Christmas Jello Cake is sure to become a cherished tradition in your home. It’s more than just a dessert; it’s the laughter, the joy, and those sparkling eyes that truly make it special. Each colorful slice holds memories waiting to be made. Whether it’s for a festive gathering or simply a treat after dinner, this vibrant cake spreads joy with every bite. So roll up your sleeves, embrace the fun, and let this delightful dessert brighten your holiday celebrations. Happy baking!
Print
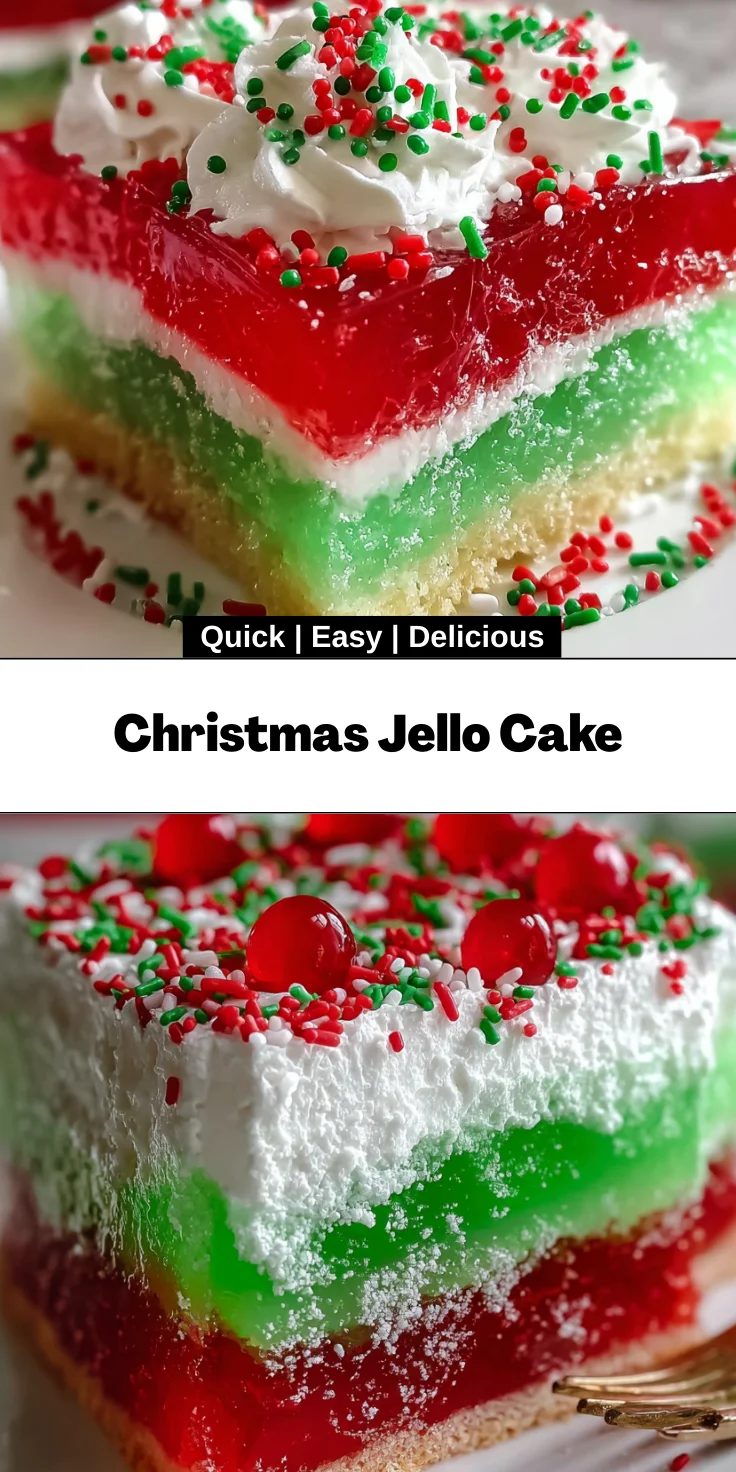
Christmas Jello Cake
- Total Time: 6 hours 30 minutes
- Yield: 12 servings 1x
- Diet: Vegetarian
Description
A festive and vibrant holiday dessert featuring a delightful combination of white cake and colorful Jello layers, topped with Cool Whip and sprinkles.
Ingredients
- 1 box white cake mix plus ingredients
- 3 oz box lime Jello
- 3 oz box cherry Jello
- 8 oz Cool Whip, thawed
- Red and green sprinkles
Instructions
- Prepare white cake according to package directions, ensuring all ingredients are properly measured.
- Pour cake batter into thoroughly greased 9×13 baking pan, spreading evenly.
- Bake cake following package time and temperature instructions until toothpick comes clean.
- Allow cake to cool approximately 20 minutes until just warm to touch.
- Create evenly spaced holes throughout entire cake surface using straw or wooden spoon handle.
- Prepare lime Jello using 1 cup boiling water and 1/2 cup cold water, stirring until crystals dissolve.
- Prepare cherry Jello using same modified water measurements as lime Jello.
- Carefully pour green Jello over one half of cake, ensuring liquid fills holes.
- Pour red Jello over remaining cake half, again filling holes completely.
- Refrigerate cake minimum 6 hours or overnight to allow Jello to set properly.
- Remove from refrigerator and spread thawed Cool Whip evenly across entire surface.
- Decorate top with red and green sprinkles in festive pattern.
- Return to refrigerator until ready to serve. Cut into squares when serving, wiping knife between cuts.
- Store any leftovers covered in refrigerator.
Notes
- For best results, refrigerate overnight to enhance flavor and texture.
- Use assorted colors of Jello for a more vibrant effect.
- This dessert is perfect for holiday parties or family gatherings.
- Prep Time: 30 minutes
- Cook Time: 30 minutes
- Category: Dessert
- Method: Baking and Refrigerating
- Cuisine: American
Nutrition
- Serving Size: 1 square
- Calories: 220
- Sugar: 25g
- Sodium: 200mg
- Fat: 7g
- Saturated Fat: 4g
- Unsaturated Fat: 2g
- Trans Fat: 0g
- Carbohydrates: 35g
- Fiber: 0g
- Protein: 2g
- Cholesterol: 30mg


