Introduction to Christmas Cake Batter Fudge
As the holiday season approaches, I find myself yearning for delightful treats that bring joy to both my family and friends. This Christmas Cake Batter Fudge is one such indulgence! It’s a deceptively simple recipe that captures the essence of festive flavors with each creamy bite. Perfect for busy moms and professionals, this fudge is quick to whip up and simply irresistible. You can easily make it ahead of time, so when guests arrive, you’ll have a sweet surprise at your fingertips. Let’s dive into this holiday treat that’s sure to impress everyone!
Why You’ll Love This Christmas Cake Batter Fudge
This Christmas Cake Batter Fudge is the answer to your holiday baking prayers. It’s quick to prepare, needing just a handful of ingredients and a microwave. The rich flavors of red velvet and white cake collide in a festive, colorful treat. Plus, it’s so versatile! You can serve it at holiday gatherings or gift it in festive boxes. Who wouldn’t love a little sweet magic during the season of giving?
Ingredients for Christmas Cake Batter Fudge
To create this scrumptious Christmas Cake Batter Fudge, you’ll need a few key ingredients that bring the flavors of the season to life. Here’s a breakdown of what you’ll need:
- White chocolate chips: These luscious morsels provide a creamy base for your fudge. Opt for high-quality white chocolate for the best flavor.
- Sweetened condensed milk: This magical ingredient adds a rich creaminess and helps the fudge set perfectly.
- Red velvet cake mix: This gives the fudge its stunning color and delightful taste. If you’re feeling adventurous, you could try using a different cake mix for variety.
- White cake mix: Adds a lovely, fluffy texture to the fudge. You can substitute this with vanilla cake mix if that’s what you have on hand.
- Holiday sprinkles: A festive touch! Use any variety of sprinkles to add color and joy to your fudge. This is optional, but trust me—it’s worth it!
All these ingredients combine to create a harmonious blend of flavors. Don’t worry, you can find the exact quantities listed at the bottom of the article, ready for printing!
How to Make Christmas Cake Batter Fudge
Now that we have gathered all the ingredients, it’s time to create this delectable Christmas Cake Batter Fudge! I’ll walk you through each step, ensuring that you feel confident and ready to whip up this festive treat in no time.
Preparing the Pan
First things first, let’s prepare a pan for our fudge. Grab a 20×20 cm square pan and line it with aluminum foil. This acts as a protective layer and makes lifting the fudge out super easy later.
Spray the foil lightly with non-stick cooking spray. This little step ensures your fudge won’t stick, allowing for clean cuts and perfect squares. Trust me, there’s nothing worse than fudge that won’t budge!
Melting the Chocolate Mixture
Next, it’s time to melt our main ingredients. In a large microwave-safe mixing bowl, combine the white chocolate chips and sweetened condensed milk. Stir them together gently to start.
Now, microwave this mixture in 30-second intervals, stirring well after each round. You want that chocolate smooth and creamy, so don’t rush it! This part usually takes about 90 seconds. Be patient; the deliciousness is almost here!
Creating the Cake Batter Flavors
Once you have a velvety mixture, it’s time to divide it – my favorite step! Split the melted chocolate mixture evenly between two bowls. In one bowl, fold in the red velvet cake mix, stirring until it’s smooth.
In the second bowl, blend in the white cake mix. This creates that beautiful contrast we all love. Just picture how festive your fudge will look! Make sure both mixtures are lump-free for the best texture.
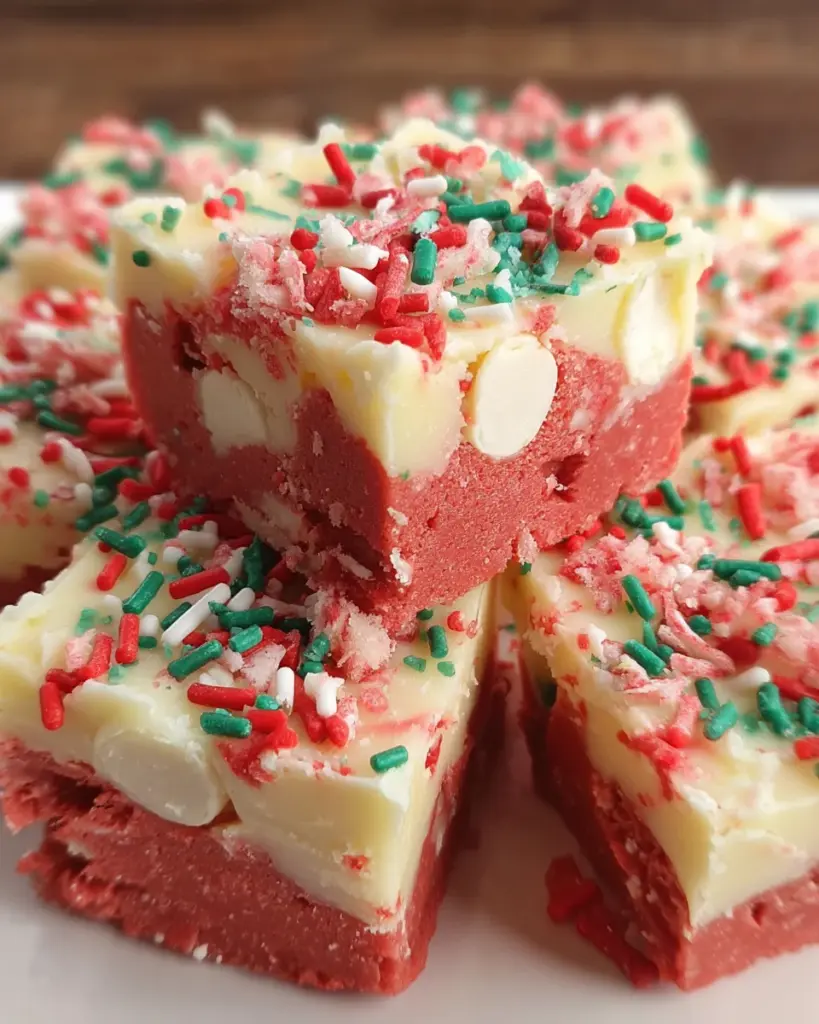
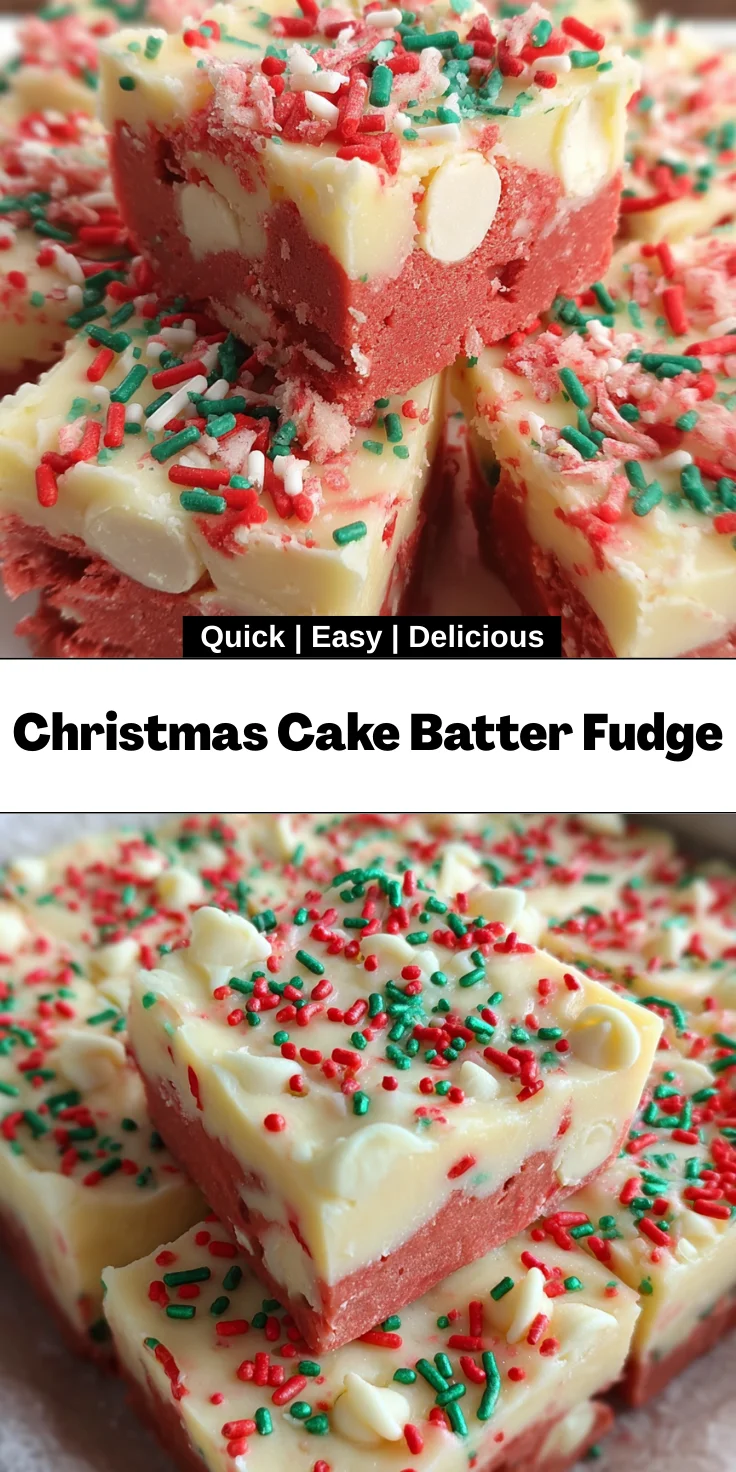
Layering the Fudge
Let’s get layering! Pour the red velvet fudge into your prepared pan first. Use a spatula to gently spread it evenly. Give the pan a little shake to ensure it settles nicely.
Next, take the white fudge mixture and carefully pour it over the red velvet layer. Smooth the top with your spatula. This might be the point where the colors start to play together beautifully, and your kitchen fills with the sweetest aroma!
Setting and Serving
Now, let’s sprinkle some festive cheer! Grab your holiday sprinkles and scatter them evenly across the top of the fudge. It’s those little details that really bring the holiday spirit to life.
Pop your fudge into the fridge for at least 60 minutes or until it’s set and firm. Once it’s ready, gently lift it out using the foil. Slice it into 25 squares, and you’ve got yourself a stunning batch of Christmas Cake Batter Fudge!
Tips for Success
- Always use good-quality ingredients for the best flavor, especially the chocolate.
- Be patient while melting the chocolate; it’s key to a smooth texture.
- Use a spatula to help spread the batter evenly in the pan.
- Let the fudge set completely in the fridge for a perfect cut.
- Experiment with different cake mixes for unique flavors.
Equipment Needed
- 20×20 cm square pan: Essential for setting your fudge. A similar-sized baking dish works too.
- Microwave-safe mixing bowls: Use any sturdy bowl for melting. Glass bowls are my favorite!
- Spatula: A must for spreading batter. A spoon can do the trick in a pinch.
- Aluminum foil: Keeps things tidy. Parchment paper works wonderfully as an alternative!
Variations
- Nutty Delight: Add chopped walnuts or pecans to the fudge mixture for a satisfying crunch.
- Chocolate Lovers: Replace half the white chocolate chips with semi-sweet chocolate chips for a richer taste.
- Gluten-Free Option: Use gluten-free cake mix to make this fudge accessible for everyone.
- Vegan Twist: Substitute white chocolate chips with dairy-free white chocolate and use coconut milk instead of sweetened condensed milk.
- Flavor Infusion: Incorporate a teaspoon of vanilla or almond extract for an extra layer of flavor.
Serving Suggestions
- Pair the fudge with a warm cup of hot cocoa or spiced cider for a cozy treat.
- Present the fudge on a festive platter garnished with fresh mint leaves for a pop of color.
- Wrap pieces in cute holiday bags for a delightful homemade gift.
- Serve alongside ice cream for an extra-indulgent dessert experience.
FAQs about Christmas Cake Batter Fudge
Let’s tackle some common questions about this festive delight! Knowing more can make your baking experience even smoother. Here are a few FAQs that I believe can help you:
Can I make this fudge ahead of time?
Absolutely! This Christmas Cake Batter Fudge is perfect for preparing a few days in advance. Once set, just store it in an airtight container in the refrigerator for up to a week.
What can I do if my fudge is too soft?
If your fudge isn’t setting, pop it back in the fridge for a bit longer. Alternatively, you could heat it gently and add a bit more cake mix to help firm it up.
How do I store any leftovers?
Keep your fudge in an airtight container in the refrigerator. It will stay fresh for about a week. Just remember to cut pieces as you want them, to maintain freshness!
Can I freeze Christmas Cake Batter Fudge?
Yes, you can freeze it! Just wrap individual squares in plastic wrap and place them in a freezer bag. It will last for about a month. Defrost in the fridge for best results!
Can I use different cake mix flavors?
Definitely! Get creative and experiment with your favorite cake mix flavors. Chocolate or lemon cake mixes could add a fun twist to your fudge!
Final Thoughts
This Christmas Cake Batter Fudge isn’t just a recipe; it’s a festive experience that brings warmth and joy to anyone who indulges in it. With its vibrant colors and delightful flavors, it’s sure to spark smiles and create lasting memories with loved ones. I love how it bridges the gap between busy schedules and holiday cheer, allowing you to create something special with minimal effort. So, as you gather around the table this season, let this fudge be a sweet reminder of the magic that comes from sharing delicious treats and heartwarming moments. Happy holidays!
Print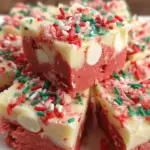
Christmas Cake Batter Fudge
- Total Time: 1 hour 20 minutes
- Yield: 25 squares 1x
- Diet: Vegetarian
Description
A delightful and festive fudge treat featuring the flavors of red velvet and white cake, perfect for holiday gatherings.
Ingredients
- 340 g white chocolate chips
- 397 g sweetened condensed milk
- 45 g red velvet cake mix
- 45 g white cake mix
- Holiday sprinkles, for garnish
Instructions
- Line a 20×20 cm square pan with aluminium foil and lightly coat with non-stick cooking spray.
- Combine white chocolate chips and sweetened condensed milk in a large microwave-safe mixing bowl.
- Heat mixture in 30-second intervals, stirring after each interval, until fully melted and smooth.
- Split the melted mixture evenly between two bowls.
- Blend red velvet cake mix into one bowl and white cake mix into the other, stirring each until batter is uniform and smooth.
- Pour the red velvet fudge mixture into the prepared pan and gently shake to create an even layer.
- Carefully pour the white fudge mixture over the red velvet layer, smoothing the top gently.
- Scatter holiday sprinkles evenly over the surface.
- Refrigerate for at least 60 minutes or until the fudge is firm and set.
- Lift the fudge from the pan using the foil, slice into 25 squares, and serve.
Notes
- Make sure to use a microwave-safe bowl when melting the chocolate and condensed milk.
- Store any leftovers in an airtight container in the refrigerator.
- Prep Time: 20 minutes
- Cook Time: 3 minutes
- Category: Dessert
- Method: Microwave
- Cuisine: American
Nutrition
- Serving Size: 1 square
- Calories: 150
- Sugar: 15 g
- Sodium: 50 mg
- Fat: 8 g
- Saturated Fat: 5 g
- Unsaturated Fat: 2 g
- Trans Fat: 0 g
- Carbohydrates: 18 g
- Fiber: 0 g
- Protein: 1 g
- Cholesterol: 10 mg