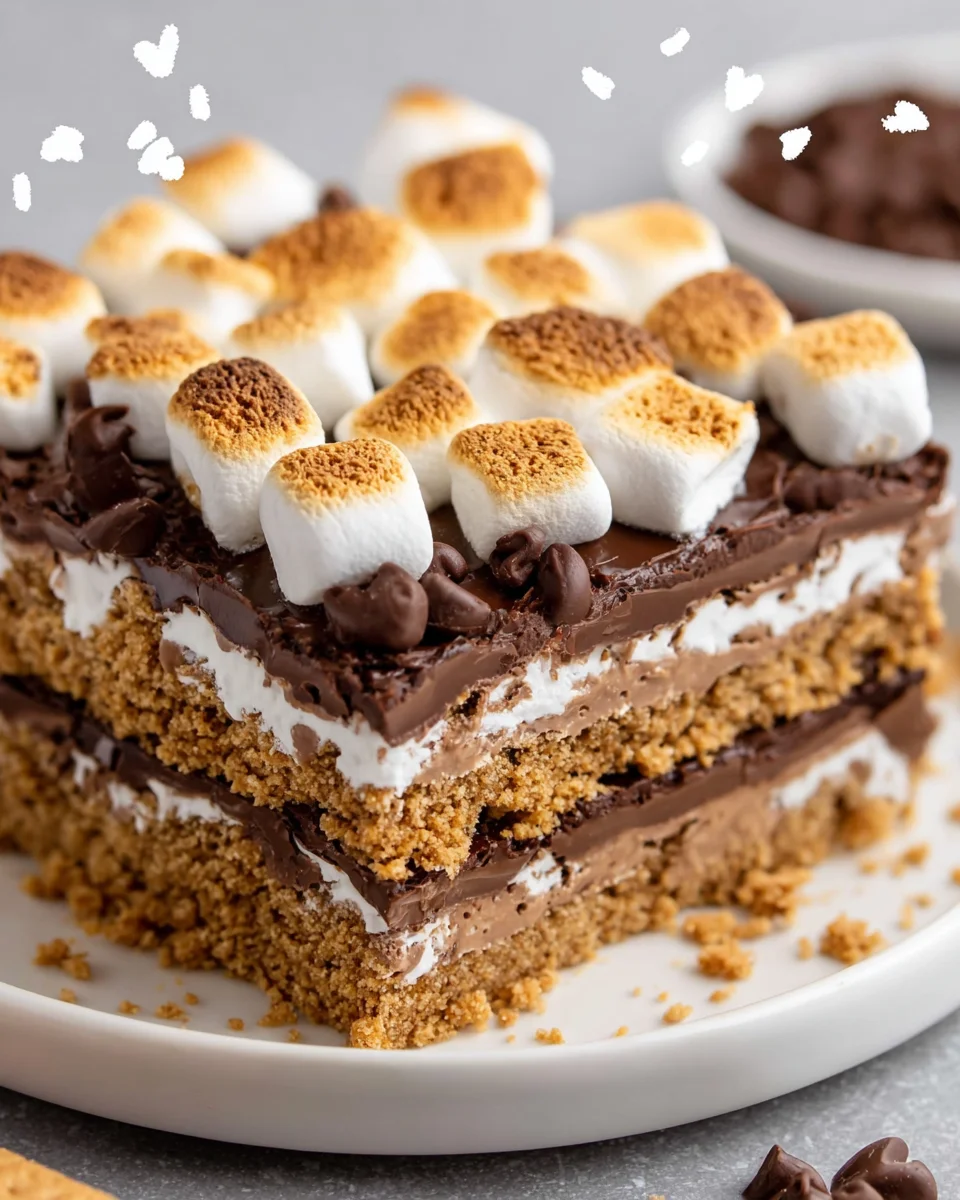
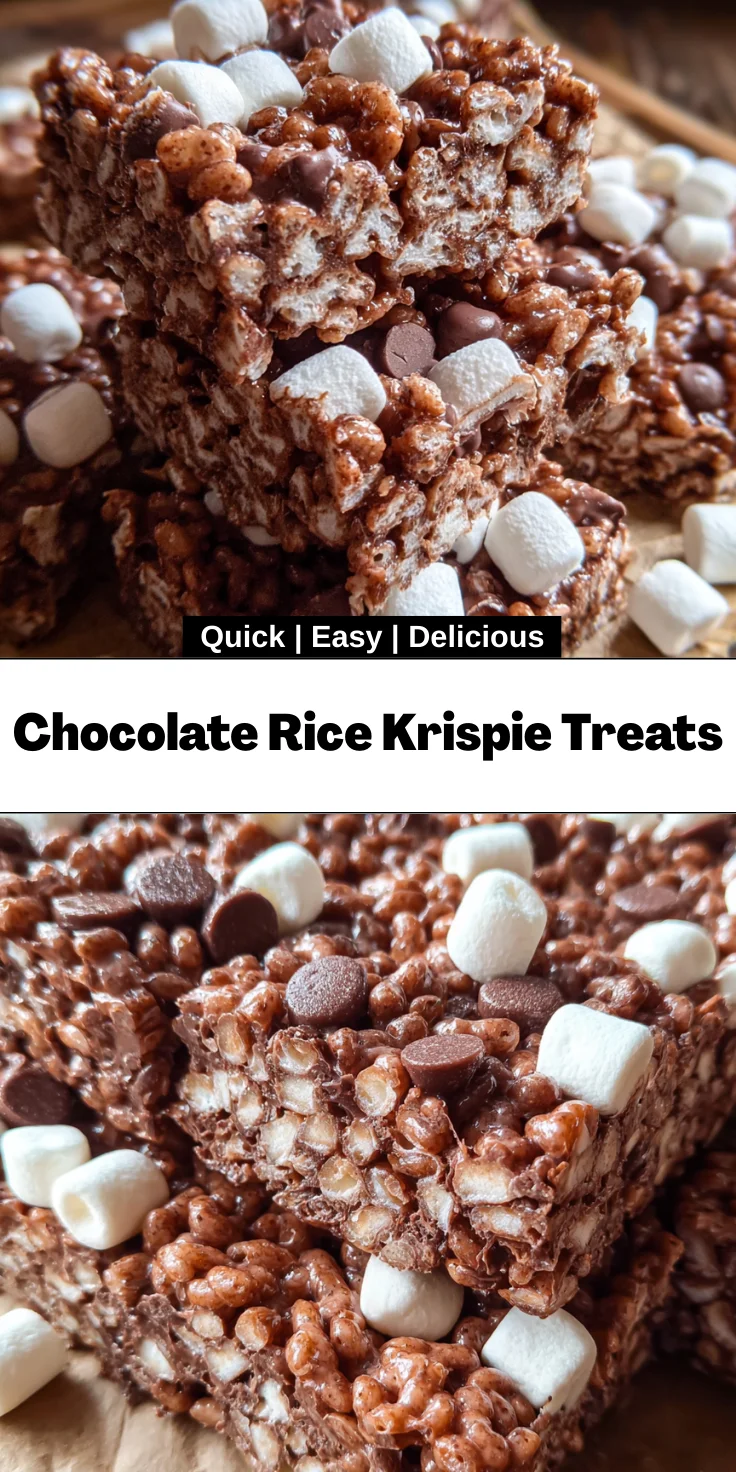
Introduction to Chocolate Rice Krispie Treats
Welcome to the world of Chocolate Rice Krispie Treats! If you’re like me, life gets busy, and finding the perfect dessert that’s quick and rewarding can feel like searching for a needle in a haystack. Luckily, these delightful treats marry crispy cereals with a chewy, chocolatey marshmallow concoction that’ll make your taste buds dance.
Whether you’re looking to treat your kids after school, planning a simple gathering, or just craving something sweet, this recipe, with its easy steps, is bound to become a favorite! So, roll up your sleeves, and let’s whip up something delicious together.
Why You’ll Love This Chocolate Rice Krispie Treats
These Chocolate Rice Krispie Treats are not just a hit for their taste; they’re utterly simple to make! With just a few ingredients, you can whip up a sweet delight that pleases everyone, from picky eaters to adults with a sweet tooth. They come together in no time, making them perfect for busy weeknights. Each bite brings chocolatey goodness and lots of nostalgia, creating smiles all around.
Ingredients for Chocolate Rice Krispie Treats
Gathering the right ingredients is half the battle, and thankfully, this recipe is simple! Here’s what you’ll need:
- Rice Krispies cereal: The classic base adds crunch and texture, complemented perfectly by Cocoa Pebbles. Don’t skimp on the crunch factor!
- Cocoa Pebbles cereal: These chocolatey nuggets introduce a rich cocoa flavor that elevates the treats and keeps everyone coming back for more.
- Salted butter: This adds a creaminess to the marshmallow mixture and balances the sweetness. Unsalted butter works too, but consider a pinch of salt for flavor.
- Mini marshmallows: They provide that gooey texture that makes these treats so delightful. You can switch to large marshmallows if that’s what you have; just chop them up a bit.
- Sea salt: Just a touch enhances the flavor, making the chocolate even more pronounced. You can use regular table salt, but sea salt offers a nice crunch.
- Semi-sweet chocolate chips: These contribute to the sweet, melty goodness. Feel free to substitute with milk chocolate for a sweeter treat or dark chocolate for a richer flavor.
You’ll find the exact quantities for all ingredients at the bottom of this article, ready for you to print. Happy cooking!
How to Make Chocolate Rice Krispie Treats
Now that you have your ingredients ready, let’s dive into making these Chocolate Rice Krispie Treats! The steps are straightforward, and I’ll sprinkle in some tips along the way to help you nail it on the first try.
Step 1: Prepare the Baking Dish
Start by lining a 23×33 cm baking pan with parchment paper. If you don’t have parchment paper, simply grease the pan generously with butter or cooking spray. This step is key to ensuring that your treats come out easily once they’re set!
Step 2: Combine Cereals
In a large heatproof bowl, combine both the Rice Krispies and Cocoa Pebbles. Give them a little mix with your hands or a spatula. This mixture is going to be the base of our delectable treats, so make sure the two are evenly combined for even flavor!
Step 3: Melt Butter and Marshmallows
In a large saucepan, melt the salted butter over low to medium-low heat. Once it’s perfectly melted, add in 320 g of mini marshmallows. Stir constantly for about 5 minutes until it’s almost entirely melted and the mixture is smooth. Keep the heat low; we want a gentle melt, not a wild boil!
Step 4: Add Chocolate and Salt
Here comes the magic! Add the 260 g of chocolate chips and the half teaspoon of sea salt into the melted marshmallow mixture. Stir it all together for another 2 minutes until everything is smooth and delicious. You’ll love how the chocolate and marshmallows meld together into a glossy treat. Trust me, it’s hard not to sneak a taste!
Step 5: Combine Mixture with Cereals
Pour that luscious chocolate-marshmallow mixture over your cereals. Gently fold everything together until every crispy piece is coated. When it’s slightly cooled, you might want to use your hands to really get in there. Just make sure your hands are clean! This makes for uniform coverage, and it feels like pure joy.
Step 6: Fold in Mini Marshmallows and Chocolate Chips
Now, fold in the remaining 104 g of mini marshmallows and 80 g of chocolate chips. This adds little pockets of chewy marshmallow and melty chocolate in every bite, sounding scrumptious already, doesn’t it? Be gentle to keep your treats light and fluffy!
Step 7: Press Mixture into Pan
Transfer that sweet messy goodness into the prepared pan. Gently press it down, making sure it evenly fills all corners. Use a spatula or your fingers, but avoid squishing them too hard; you want them to hold their shape. After you’ve pressed it down, let them cool completely for 30–60 minutes before slicing into squares. Patience is a virtue here, I know, but it’s worth it!
Tips for Success
- Use fresh ingredients for the best flavor, especially the marshmallows and chocolate chips.
- Don’t rush the cooling process; it helps the treats set correctly.
- If your mixture feels too sticky, lightly grease your hands when mixing.
- For extra crunch, try adding a handful of nuts or crispy cereal to the mix.
- Customize with toppings like sprinkles or a drizzle of chocolate for an extra treat!
Equipment Needed
- Baking pan: A 23×33 cm pan works best. A similar-sized glass dish can be a good alternative.
- Large heatproof bowl: For mixing your cereals. A regular mixing bowl will do if you don’t have a heatproof option.
- Large saucepan: Any deep saucepan will suffice for melting ingredients.
- Spatula: Use a sturdy spatula or wooden spoon for easy mixing.
- Parchment paper: If unavailable, grease the pan thoroughly with butter or cooking spray.
Variations
- Add a splash of flavor by mixing in a teaspoon of vanilla extract when melting the marshmallows. It enhances the sweetness!
- For a nutty twist, consider folding in chopped nuts like almonds or walnuts. They add a delightful crunch.
- Swap in gluten-free cereals if you’re catering to gluten-sensitive friends or family. Most Rice Krispies now have a gluten-free version!
- Make it extra special by drizzling melted white chocolate on top before it sets. It creates a beautiful contrast and flavor!
- If you love coconut, toss in some shredded coconut as well for a tropical touch that pairs wonderfully with chocolate!
Serving Suggestions for Chocolate Rice Krispie Treats
- Pair these treats with a tall glass of cold milk for that classic combination of chocolate and dairy.
- Serve them alongside fresh fruit, like strawberries or bananas, to balance the sweetness.
- For a festive touch, plate them with colorful napkins and sprinkle edible glitter on top!
- Cut them into fun shapes using cookie cutters for parties and special occasions.
- Drizzle melted chocolate over the top before serving for an elegant finish.
FAQs about Chocolate Rice Krispie Treats
When diving into the delicious world of Chocolate Rice Krispie Treats, you might have a few questions swirling around in your mind. Don’t worry; I’ve got you covered! Here are some common queries that many home cooks ask:
Can I use different types of chocolate chips?
Absolutely! While semi-sweet chocolate chips make for tasty treats, feel free to experiment. Milk chocolate offers a sweeter flavor, and dark chocolate brings a rich, intense taste. Try what you love best!
How do I store leftover treats?
To keep your Chocolate Rice Krispie Treats fresh, store them in an airtight container at room temperature. They can last for about a week, but trust me, they’ll likely be gone before then!
Can I make these treats in advance?
You can definitely make them ahead of time! Just prepare and store them in an airtight container. They’re perfect for parties or gatherings, making your life a little easier!
What can I do if the mixture is too sticky to handle?
If your hands get too sticky while mixing, simply coat them with a little butter or oil. This trick will help you mix without the marshmallows clinging to you like a needy toddler!
Can I add more marshmallows or cereal?
Of course! Adjusting the amount of marshmallows and cereals is perfectly fine. Just remember that more marshmallows may make them extra gooey. Balance is key for that ideal texture!
Final Thoughts
Making Chocolate Rice Krispie Treats is more than just whipping up a dessert; it’s about creating sweet memories. The simplicity of the recipe allows for kitchen fun, whether you’re cooking solo or involving your kids. Every square combines nostalgia with a delightful crunch, making it hard to have just one! I love seeing the smiles on my family’s faces, especially when they share their homemade creation. So next time you’re in need of a sweet treat, embrace this recipe. It’s quick, easy, and sure to bring joy to your busy day, just like a hug in dessert form!
Print
Chocolate Rice Krispie Treats
- Total Time: 25-30 minutes
- Yield: 12 servings 1x
- Diet: Vegetarian
Description
A delightful and easy-to-make dessert combining Rice Krispies and Cocoa Pebbles with a chocolatey marshmallow mixture.
Ingredients
- 400 g Rice Krispies cereal
- 400 g Cocoa Pebbles cereal
- 57 g salted butter
- 424 g mini marshmallows, divided
- 0.5 teaspoon sea salt
- 340 g semi-sweet chocolate chips, divided
Instructions
- Line a 23×33 cm rectangular baking pan with parchment paper or grease thoroughly; set aside.
- Combine Rice Krispies and Cocoa Pebbles in a large heatproof bowl; set aside.
- Melt salted butter in a large saucepan over low to medium-low heat. Add 320 g mini marshmallows. Stir constantly until mixture is nearly melted and smooth, about 5 minutes.
- Add 260 g chocolate chips and sea salt to the melted marshmallow mixture. Continue stirring for 2 minutes until fully melted and homogeneous.
- Pour chocolate marshmallow mixture over the cereals. Gently fold to combine until evenly coated. When slightly cooled, use clean hands to finish blending for uniform coverage.
- Fold in the remaining 104 g mini marshmallows and 80 g chocolate chips until gently distributed.
- Transfer mixture to the prepared pan. Press gently and evenly into all corners. Allow to cool completely for 30–60 minutes before slicing into squares.
Notes
- For best results, allow the mixture to cool completely before slicing.
- Store leftovers in an airtight container to keep them fresh.
- Prep Time: 15 minutes
- Cook Time: 10 minutes
- Category: Dessert
- Method: Stovetop
- Cuisine: American
Nutrition
- Serving Size: 1 square
- Calories: 220
- Sugar: 15 g
- Sodium: 100 mg
- Fat: 10 g
- Saturated Fat: 6 g
- Unsaturated Fat: 4 g
- Trans Fat: 0 g
- Carbohydrates: 30 g
- Fiber: 1 g
- Protein: 2 g
- Cholesterol: 20 mg