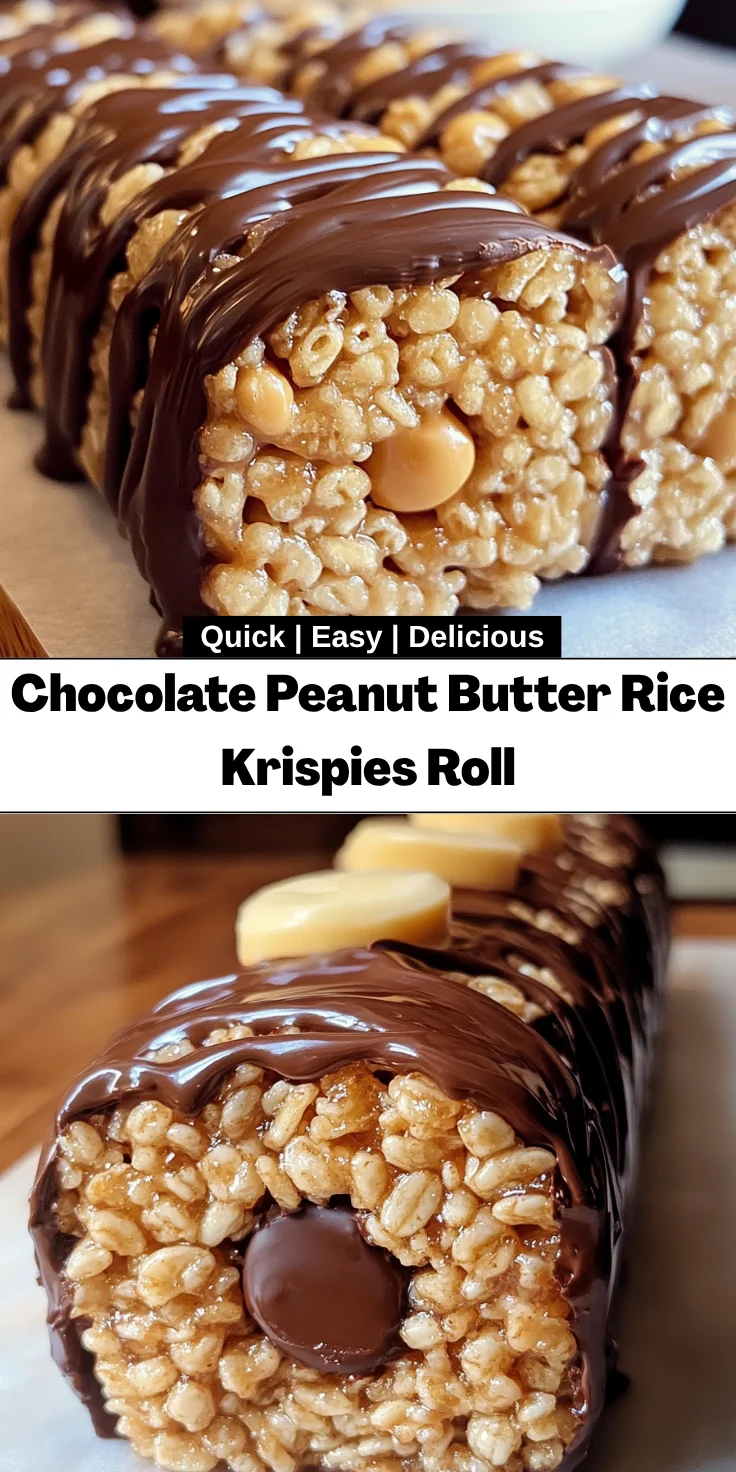
Introduction to Chocolate Peanut Butter Rice Krispies Roll
Are you a busy mom or professional looking for a delightful treat that brings a smile to your family’s faces? Let me introduce you to the Chocolate Peanut Butter Rice Krispies Roll! This no-bake dessert combines the nostalgic crunch of Rice Krispies with the rich flavors of chocolate and peanut butter. It’s incredibly easy to whip up, making it perfect for those hectic days. Trust me, when you serve this delightful roll, it’s bound to become a household favorite!
Why You’ll Love This Chocolate Peanut Butter Rice Krispies Roll
This Chocolate Peanut Butter Rice Krispies Roll is a winner for so many reasons. First, it comes together in a flash, making it perfect for busy schedules. The balance of crunchy Rice Krispies and creamy peanut butter, covered in silky chocolate, creates a flavor explosion that will have everyone coming back for more. Plus, there’s no baking involved! It truly is an effortless yet impressive treat the whole family will adore.
Ingredients for Chocolate Peanut Butter Rice Krispies Roll
Gathering the ingredients for this Chocolate Peanut Butter Rice Krispies Roll is half the fun! Here’s what you’ll need:
- Rice Krispies cereal: The star ingredient, adding that delightful crunch.
- Creamy peanut butter: Smooth and rich, it binds the mixture together and brings a delicious flavor.
- Unsalted butter: This adds moisture and richness, balancing the sweetness perfectly.
- Granulated sugar: For sweetness, giving that classic treat flavor everyone loves.
- Light corn syrup or honey: This acts as a glue to hold everything together while adding a hint of sweetness.
- Semi-sweet chocolate chips: Melted to create a luscious coating that envelopes the roll in chocolatey goodness.
- Additional unsalted butter: Used for melting with the chocolate to ensure a smooth finish.
Want to get adventurous? Consider adding a sprinkle of sea salt on top for a sweet-salty combo or even some chopped nuts for added crunch! All the ingredients with specific measurements can be found at the bottom of the article for easy reference and printing.
How to Make Chocolate Peanut Butter Rice Krispies Roll
Making this Chocolate Peanut Butter Rice Krispies Roll is like a little culinary adventure. Don’t worry—I’ll guide you through each step with clear instructions and helpful tips. Let’s dive in!
Step 1: Prepare the Mixture
Start by gathering all your fabulous ingredients. In a medium saucepan over medium heat, combine the creamy peanut butter, unsalted butter, granulated sugar, and light corn syrup (or honey). Stir continuously until everything melts into a smooth, delicious blend. It’s like a warm hug in a saucepan!
Step 2: Form the Rice Krispies Base
Once your mixture is smooth, remove it from the heat. Now, add the Rice Krispies cereal to the melting pot. Stir gently but thoroughly, ensuring each crispy piece gets coated. This is key for that delightful crunch in every bite!
Next, lay a sheet of parchment or wax paper on your counter. Carefully transfer the Rice Krispies mixture onto it and press it into a rectangle about 12×8 inches. Use your hands or a rolling pin to smooth it out evenly. This is where the magic begins!
Step 3: Melt the Chocolate
Now, let’s talk chocolate! In a microwave-safe bowl, combine the semi-sweet chocolate chips and the additional unsalted butter. Heat them in 30-second intervals, stirring each time until smooth and glossy. The aroma of melting chocolate will make your kitchen feel like a bakery!
Step 4: Assemble the Roll
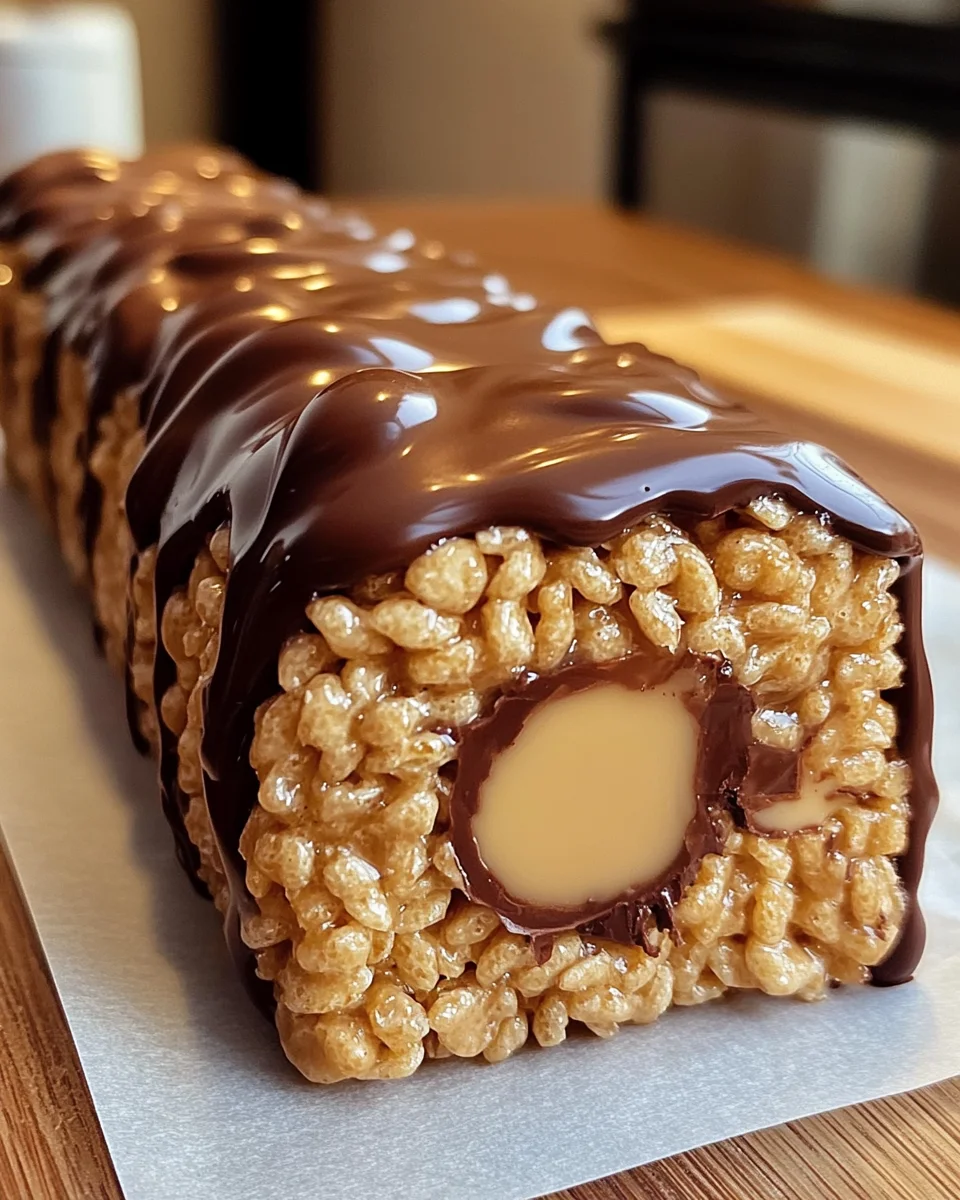
Time to give your Rice Krispies base some chocolate love. Spread the melted chocolate evenly over the rectangle, ensuring to cover every corner. Allow it to sit for about five minutes. We want it to cool slightly, but it needs to remain pliable for our rolling adventure ahead.
Now, here comes the fun part! Starting from the shorter side of the rectangle, use the parchment paper to help you carefully roll it into a tight log. The parchment acts like your trusty sidekick, guiding the roll without making a mess. Once rolled, place the seam-side down to maintain its shape.
Step 5: Chill and Slice
Wrap your beautiful roll in the parchment paper to keep it fresh. Refrigerate it for at least an hour, or until firm. Waiting can be the hardest part, but let me assure you, this Chocolate Peanut Butter Rice Krispies Roll will be worth it!
Once chilled, unwrap your masterpiece and slice it into ½-inch rounds. Each slice reveals an inviting combination of crunch and smooth chocolate. Enjoy these refreshing treats with a smile; they’re bound to be a hit!
Tips for Success
- Make sure the Rice Krispies are thoroughly coated for maximum flavor.
- Use a sharp knife to slice the roll for cleaner, prettier pieces.
- Let the chocolate cool slightly before rolling to avoid a sticky mess.
- For an extra touch, sprinkle some sea salt on top of the melted chocolate.
- Seal the roll tightly in parchment paper to keep it fresh longer.
Equipment Needed
- Medium saucepan: Use any pot you have handy; just make sure it has a sturdy base.
- Mixing bowl: A large bowl works best for mixing the chocolate without splatter.
- Parchment or wax paper: You can also use plastic wrap in a pinch!
- Sharp knife: A bread knife can work wonders for slicing the roll.
- Microwave-safe bowl: Any heatproof bowl will do for melting chocolate—just be cautious!
Variations on Chocolate Peanut Butter Rice Krispies Roll
- Nutty Delight: Toss in some chopped peanuts or almonds for added crunch, enhancing the texture.
- Dark Chocolate Twist: Use dark chocolate chips instead of semi-sweet for a richer chocolate flavor.
- Fruit Fusion: Add dried fruits like cranberries or raisins for a hint of sweetness and chewiness.
- Flavorful Peanut Butter: Swap the creamy peanut butter for flavored varieties like honey-roasted or chocolate peanut butter.
- Vegan Option: Substitute the butter with coconut oil and use dairy-free chocolate for a plant-based treat.
- Spice It Up: Mix in a dash of cinnamon or a sprinkle of sea salt for a flavor boost that surprises the palate.
Serving Suggestions
- Refreshing Milk: Pair these delightful rolls with a glass of cold milk for a classic combo.
- Fruit Slices: Serve alongside apple or banana slices to add a fresh touch.
- Presentation: Arrange the slices on a colorful platter, drizzling some melted chocolate on top for flair.
- Coffee Break: Enjoy these treats with your afternoon coffee for a sweet pick-me-up.

FAQs about Chocolate Peanut Butter Rice Krispies Roll
Can I make the Chocolate Peanut Butter Rice Krispies Roll ahead of time?
Absolutely! This no-bake treat can be prepared a day in advance. Just keep it tightly wrapped in the refrigerator, and it will stay fresh and delicious.
What other toppings can I use for the roll?
If you’re feeling adventurous, consider adding crushed nuts, sprinkles, or even a drizzle of caramel on top. Each addition can elevate your dessert experience!
Can I use different types of cereal in this recipe?
Sure! While Rice Krispies are classic, feel free to experiment with other cereals—like Cornflakes or Cheerios. Each will bring its own unique texture to the roll.
What if I have a peanut allergy?
If peanuts aren’t your friends, you can substitute the peanut butter with sun butter or almond butter. These alternatives work perfectly while still keeping the flavor profile delicious!
How do I store leftovers?
To keep your Chocolate Peanut Butter Rice Krispies Roll fresh, wrap tightly in parchment paper or plastic wrap and store it in the refrigerator. It should last for about a week!
Final Thoughts on Chocolate Peanut Butter Rice Krispies Roll
There’s something truly special about creating this Chocolate Peanut Butter Rice Krispies Roll. Every bite offers a crunchy, chocolatey embrace that brings back childhood memories. It’s a recipe that not only satisfies your cravings but also invites family and friends to gather around. Whether you’re celebrating a special occasion or simply enjoying a quiet evening, this treat adds a spark of joy. I hope you create plenty of sweet moments with it, just like I do! So roll up your sleeves, get cooking, and let the smiles roll in!
Print
Chocolate Peanut Butter Rice Krispies Roll
- Total Time: 1 hour 25 minutes
- Yield: 12 servings 1x
- Diet: Vegetarian
Description
A delicious and easy-to-make treat combining the flavors of chocolate and peanut butter in a crispy rice roll.
Ingredients
- 3 cups (90 g) Rice Krispies cereal
- 1/2 cup (120 g) creamy peanut butter
- 1/4 cup (60 g) unsalted butter
- 1/2 cup (100 g) granulated sugar
- 1/4 cup (60 ml) light corn syrup or honey
- 1 cup (175 g) semi-sweet chocolate chips
- 2 tablespoons (30 g) unsalted butter
Instructions
- In a medium saucepan over medium heat, combine the peanut butter, butter, sugar, and corn syrup (or honey). Stir until melted and smooth.
- Remove from heat and stir in the Rice Krispies until evenly coated.
- Place a sheet of parchment paper or wax paper on a flat surface. Press the Rice Krispies mixture evenly into a rectangle, approximately 12×8 inches. Use a rolling pin or your hands to smooth it out.
- In a microwave-safe bowl, melt the chocolate chips and butter in 30-second intervals, stirring until smooth and glossy.
- Spread the melted chocolate evenly over the Rice Krispies rectangle. Let it sit for 5 minutes to cool slightly but still remain pliable.
- Starting from the shorter side, carefully roll the rectangle into a tight log using the parchment paper to help lift and guide the roll. Place the roll seam-side down on the parchment.
- Wrap the roll in the parchment paper and refrigerate for at least 1 hour, or until firm. Once chilled, slice into 1/2-inch rounds and serve.
Notes
- Ensure the Rice Krispies are fully coated for even flavor.
- Keep the roll tightly sealed in the refrigerator to maintain freshness.
- Prep Time: 15 minutes
- Cook Time: 10 minutes
- Category: Dessert
- Method: No-bake
- Cuisine: American
Nutrition
- Serving Size: 1 slice
- Calories: 150
- Sugar: 8g
- Sodium: 50mg
- Fat: 8g
- Saturated Fat: 4g
- Unsaturated Fat: 3g
- Trans Fat: 0g
- Carbohydrates: 18g
- Fiber: 1g
- Protein: 2g
- Cholesterol: 10mg