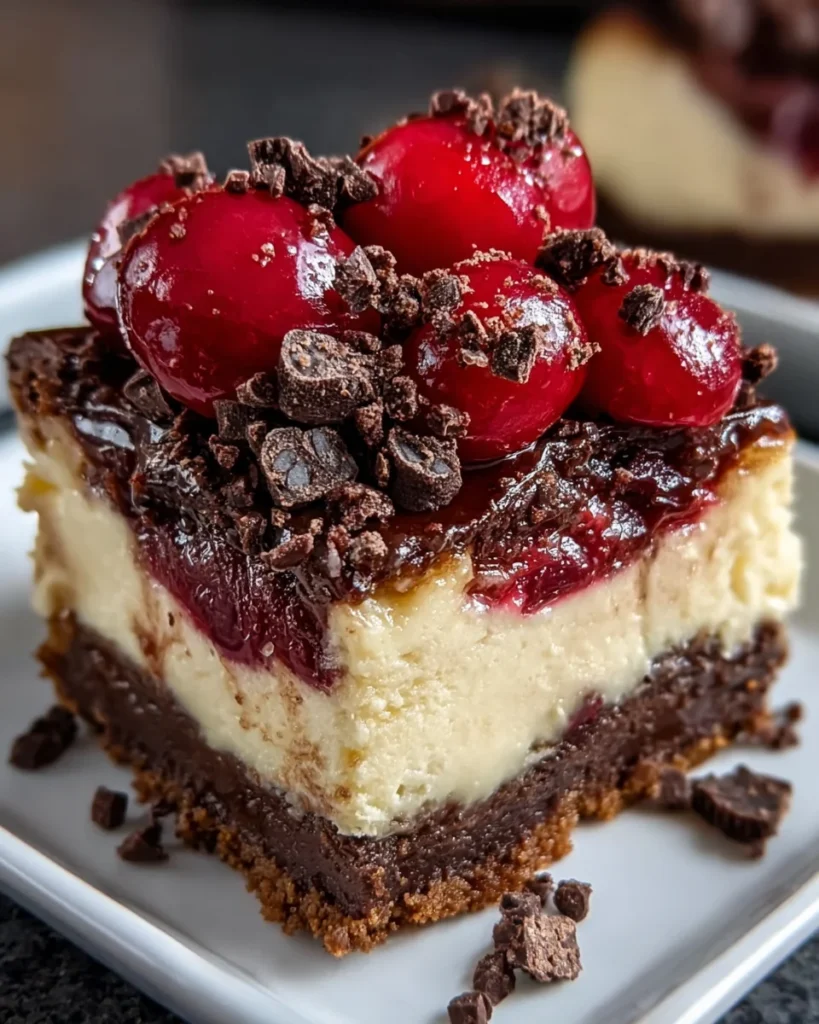
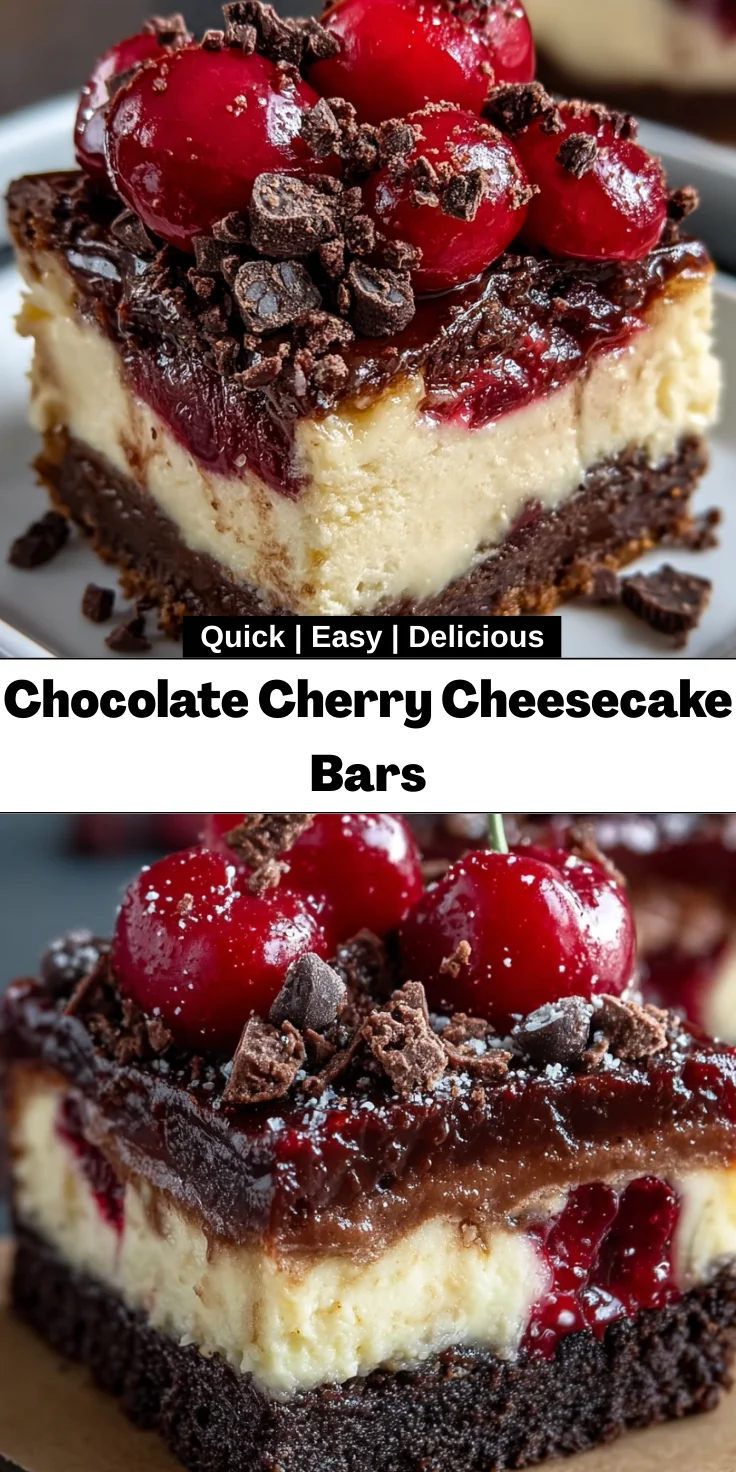
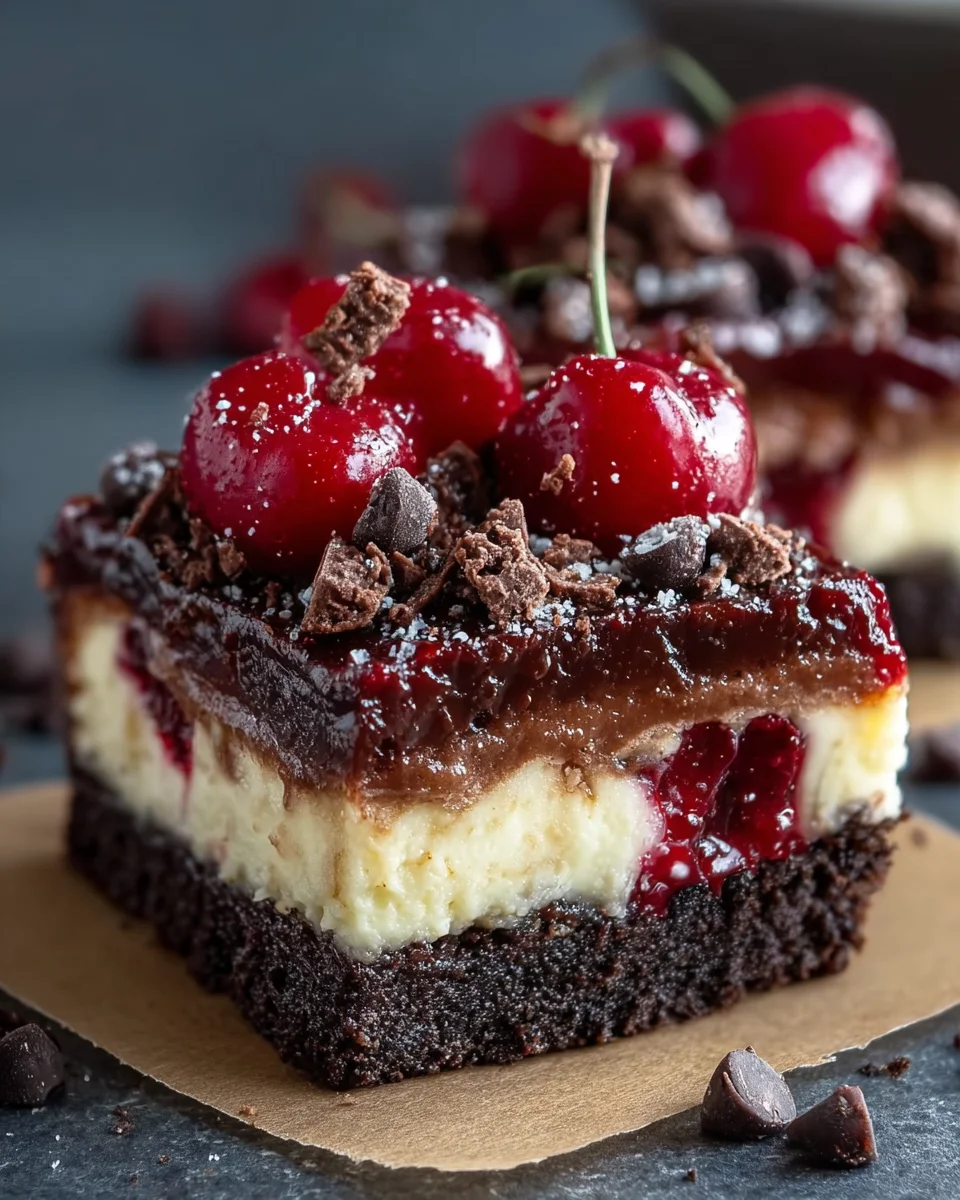
Introduction to Chocolate Cherry Cheesecake Bars
Welcome to a delightful world where chocolate and cherries dance together in perfect harmony! If you’re like me—juggling work, kids, and a million responsibilities—you’ll appreciate this recipe for Chocolate Cherry Cheesecake Bars. They’re not just eye-catching; they’re a creamy, dreamy dessert that feels luxurious without the fuss. Perfect for a quick weeknight treat or a special occasion, these bars will impress your loved ones at every gathering. Let’s dive into this delicious recipe that will become a staple in your busy kitchen!
Why You’ll Love This Chocolate Cherry Cheesecake Bars
These Chocolate Cherry Cheesecake Bars are a dream come true for anyone pressed for time. They require minimal effort yet deliver maximum flavor! The creamy texture pairs beautifully with the tartness of the cherries, creating an irresistible treat everyone will love. Plus, they can be prepared ahead of time, making them perfect for busy days. Treat yourself and your family to something delightful without breaking a sweat!
Ingredients for Chocolate Cherry Cheesecake Bars
Gathering the right ingredients is the first step toward making these delightful Chocolate Cherry Cheesecake Bars! Here’s what you’ll need:
- Graham cracker crumbs or chocolate sandwich cookie crumbs: These serve as the base. Choose graham crackers for a classic taste or chocolate sandwich cookies for a richer flavor.
- Unsalted butter: Melted, it binds the crust together and adds that delicious richness. Unsalted is preferred, as it lets the other flavors shine.
- Cream cheese: The star of the show! You’ll want it softened for a smooth, creamy texture that blends beautifully with the other ingredients.
- Granulated sugar: This sweetens the cheesecake filling, balancing the tartness of the cherries and making every bite irresistible.
- Eggs: They provide structure and help the cheesecake set, ensuring each bar holds its shape after slicing.
- Vanilla extract: Its warm flavor enhances the overall taste of the cheesecake, adding depth and a touch of sweetness.
- Cherry pie filling: Packed with fruity goodness, it brings a burst of tart cherry flavor. Use fresh cherries for a lighter alternative.
- Semi-sweet chocolate chips: These add a delightful touch of chocolate that pairs perfectly with the cheesecake and cherries. Feel free to experiment with dark or milk chocolate, depending on your mood.
Exact quantities for these ingredients can be found at the bottom of this article for easy printing! Happy baking!
How to Make Chocolate Cherry Cheesecake Bars
Now, let’s embark on the delicious journey of making these Chocolate Cherry Cheesecake Bars! With just a few simple steps, you’ll create a delightful dessert that will have everyone clamoring for more.
Step 1: Prepare the Baking Pan
Start by preheating your oven to 350°F (175°C). While it warms up, grab an 8-inch square baking pan. Line it with parchment paper, letting it hang over the edges. This bit of prep makes it super easy to lift the bars out later. Trust me, it’s a game changer!
Step 2: Make the Crust
In a mixing bowl, combine your graham cracker crumbs or chocolate sandwich cookie crumbs with the melted unsalted butter. Stir until the mixture resembles wet sand—it should hold together when pressed. Next, firmly press this crumb mixture into the bottom of your lined baking pan. Use the bottom of a flat measuring cup to get a nice, even layer. This crust is the solid foundation for your luscious bars!
Step 3: Prepare the Cheesecake Filling
In another large bowl, beat the softened cream cheese and granulated sugar together until the mixture is velvety smooth. This step is crucial; you want a creamy texture that will melt in your mouth! Add the eggs one at a time, mixing gently after each addition. Then, blend in the vanilla extract. Just until it’s combined—no need to overdo it!
Step 4: Assemble the Cheesecake Bars
Pour the luscious cheesecake filling over the crumb crust, smoothing the surface with a spatula. Now comes the fun part! Drop spoonfuls of cherry pie filling across the top of the cheesecake layer. Grab a knife and gently swirl the cherry filling into the cheesecake. Aim for a marbled effect, but don’t overmix—some cherry bursts are perfect!
Step 5: Bake to Perfection
Time to pop these beauties into the oven! Bake for about 30 to 45 minutes. Look for the edges to be set while the center remains just slightly jiggly. This means you’ve achieved that perfectly creamy cheesecake texture everyone craves. Avoid overbaking, as you want that heavenly creaminess!
Step 6: Cool and Chill
Once baked, remove your pan from the oven and let it cool completely in the pan. After it’s cooled down, refrigerate for several hours or until fully chilled. Chilling is key here—trust me, this step makes slicing easier and enhances the flavors beautifully! Once chilled, lift the bars out using the parchment overhang and cut them into generous squares.
Tips for Success
- Use room temperature cream cheese for a smooth filling—no lumps allowed!
- Chill the bars overnight for the best flavor and texture.
- For cleaner cuts, use a sharp knife dipped in hot water to slice the bars.
- Feel free to customize with your favorite toppings like nuts or whipped cream.
- Store leftovers in an airtight container in the fridge for up to a week!
Equipment Needed
- 8-inch square baking pan: If you don’t have one, a similarly sized round pan works too.
- Parchment paper: Use aluminum foil if you’re in a pinch, but parchment gives a cleaner release.
- Mixing bowls: A large bowl for the filling and a medium bowl for the crust.
- Spatula: Perfect for smoothing out the filling; a wooden spoon can work as well.
- Whisk or electric mixer: A whisk is great for hand mixing, but an electric mixer makes it faster!
Variations on Chocolate Cherry Cheesecake Bars
- Nutty Delight: Add a handful of chopped walnuts or pecans to the crust for a delightful crunch that pairs well with the creamy filling.
- Healthier Swap: Use Greek yogurt instead of cream cheese for a lighter version. It will still be creamy but with less fat and a tangy flavor!
- Berry Burst: Substitute cherry pie filling with fresh raspberries or blueberries for a fruity twist that’s just as vibrant and delicious.
- Gluten-Free Option: Swap regular graham crackers for gluten-free ones or almond flour to create a crust suitable for gluten-sensitive diets.
- Decadent Chocolate: Overload on chocolate by mixing chocolate chips into the cheesecake filling for an extra chocolaty experience!
Serving Suggestions for Chocolate Cherry Cheesecake Bars
- Pair with a dollop of whipped cream for added richness and a touch of elegance.
- Serve with a scoop of vanilla ice cream for a delightful contrast in temperatures.
- Drizzle with chocolate sauce or warm cherry syrup for a decadent finishing touch.
- Garnish with fresh cherries or mint leaves for a pop of color.
- Enjoy with a cup of coffee or a glass of dessert wine for a perfect end to any meal.
FAQs about Chocolate Cherry Cheesecake Bars
Can I make Chocolate Cherry Cheesecake Bars ahead of time?
Absolutely! These bars actually taste even better when made a day in advance. Just be sure to store them in the fridge until you’re ready to serve. This allows the flavors to meld beautifully!
How do I store leftover bars?
Store your Chocolate Cherry Cheesecake Bars in an airtight container in the fridge. They’ll stay fresh for about a week—if they last that long!
Can I use fresh cherries instead of cherry pie filling?
You can! Fresh cherries bring a bright flavor and a wonderful texture. Just pit and chop them before swirling into the cheesecake filling. It’s a lovely twist if you want something lighter!
What can I substitute for cream cheese?
If you’re looking for a lighter option, try using Greek yogurt or a dairy-free cream cheese alternative. Just be aware that the texture may vary slightly, but you’ll still enjoy a delicious flavor.
Why are my bars cracking on top?
Cracks can occur if the cheesecake is baked at too high a temperature or overbaked. To help prevent this, bake at the recommended temperature and keep an eye on them towards the end. Remember, a slightly jiggly center is ideal!
Final Thoughts
These Chocolate Cherry Cheesecake Bars are not just a treat but also a celebration of life’s little moments. With each creamy, chocolatey bite, you’ll feel a wave of joy wash over you. Whether you’re sharing them with family or enjoying a well-deserved solo snack, these bars make every occasion feel special. As a busy mom or professional, embracing the joy of baking can be a sweet escape from our hectic lives. I hope this recipe invites a little sweetness into your daily routine. So go ahead, indulge, and let the flavors bring happiness to your day!
Print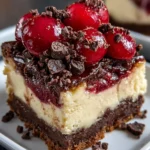
Chocolate Cherry Cheesecake Bars
- Total Time: 3 hours (including chilling time)
- Yield: 16 bars 1x
- Diet: Vegetarian
Description
Delicious chocolate cherry cheesecake bars that offer a creamy texture and a delightful burst of cherry flavor.
Ingredients
- 1 1/2 cups graham cracker crumbs or chocolate sandwich cookie crumbs
- 5 tablespoons unsalted butter, melted
- 16 ounces cream cheese, softened
- 1/2 cup granulated sugar
- 2 large eggs
- 1 teaspoon vanilla extract
- 1/2 cup cherry pie filling
- 1/2 cup semi-sweet chocolate chips
Instructions
- Preheat the oven to 350°F (175°C). Line an 8-inch square baking pan with parchment paper, leaving an overhang on two sides.
- Combine graham cracker crumbs or chocolate sandwich cookie crumbs with melted butter in a bowl. Press the mixture firmly into the bottom of the prepared baking pan to form an even base.
- Beat softened cream cheese with granulated sugar in a large bowl until the mixture is smooth and creamy.
- Add eggs one at a time, mixing gently after each addition, then blend in the vanilla extract just until combined.
- Pour the cheesecake filling over the prepared crust and smooth the surface with a spatula.
- Drop spoonfuls of cherry pie filling over the cheesecake layer. Gently swirl with a knife for a marbled effect, being careful not to overmix.
- Sprinkle semi-sweet chocolate chips across the top, pressing them slightly into the filling if desired.
- Bake in the preheated oven for 30–45 minutes or until the edges are set and the center is just slightly jiggly.
- Remove from the oven and cool completely in the pan. Refrigerate for several hours or until fully chilled before slicing into bars.
Notes
- Ensure the cream cheese is fully softened for a smooth filling.
- Chilling the bars before cutting will result in cleaner slices.
- Feel free to use fresh cherries instead of cherry pie filling for a fresher taste.
- Prep Time: 15 minutes
- Cook Time: 30-45 minutes
- Category: Dessert
- Method: Baking
- Cuisine: American
Nutrition
- Serving Size: 1 bar
- Calories: 250
- Sugar: 18g
- Sodium: 200mg
- Fat: 15g
- Saturated Fat: 8g
- Unsaturated Fat: 2g
- Trans Fat: 0g
- Carbohydrates: 28g
- Fiber: 1g
- Protein: 3g
- Cholesterol: 60mg