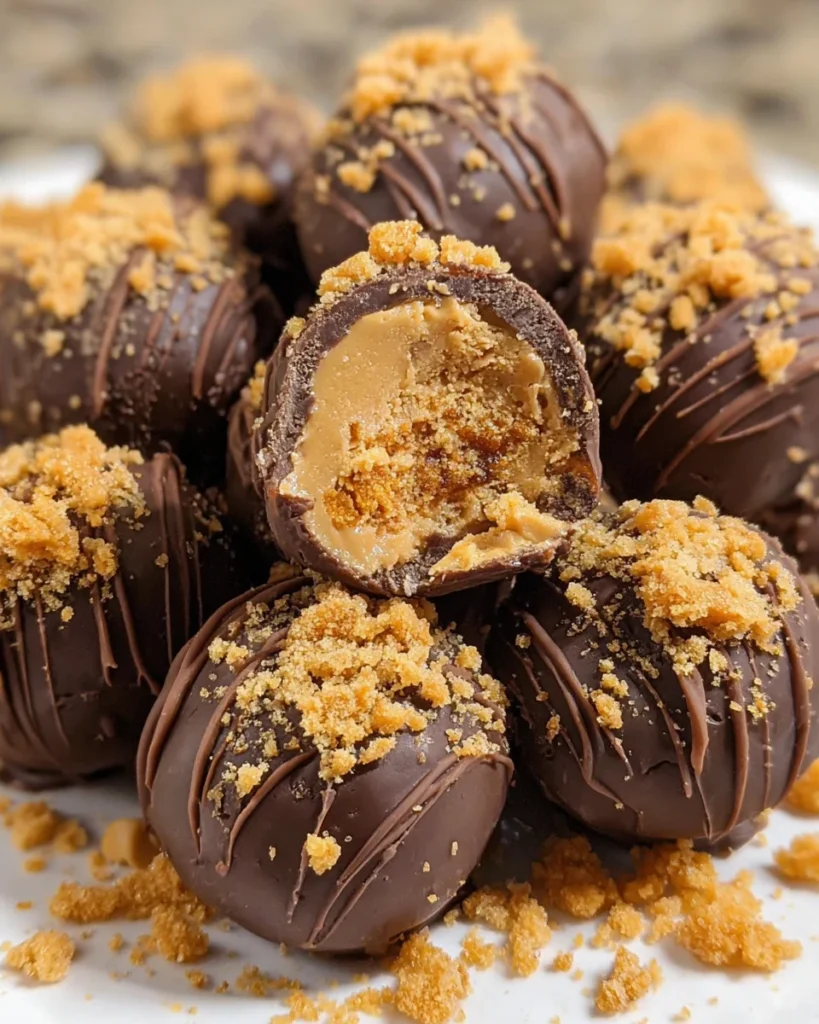
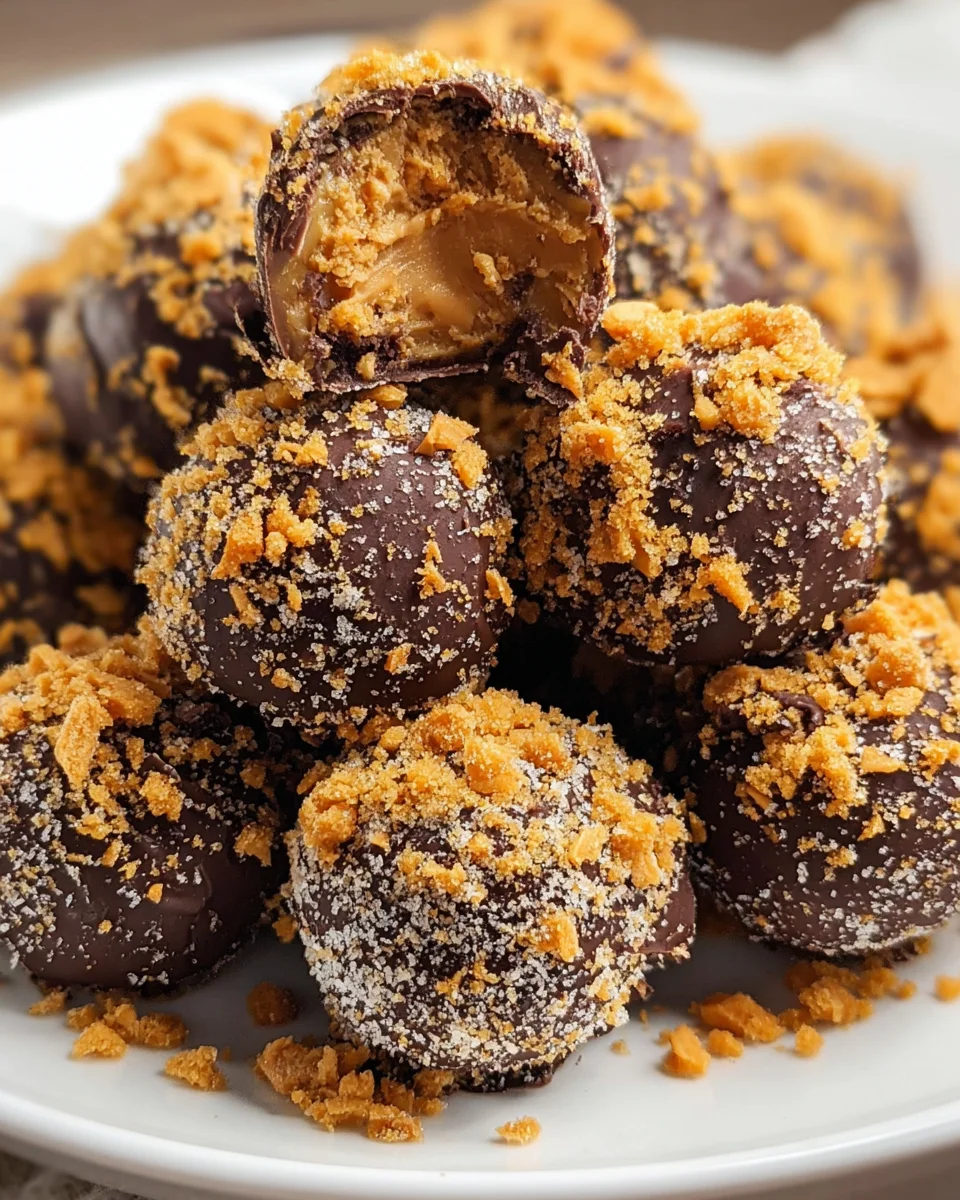
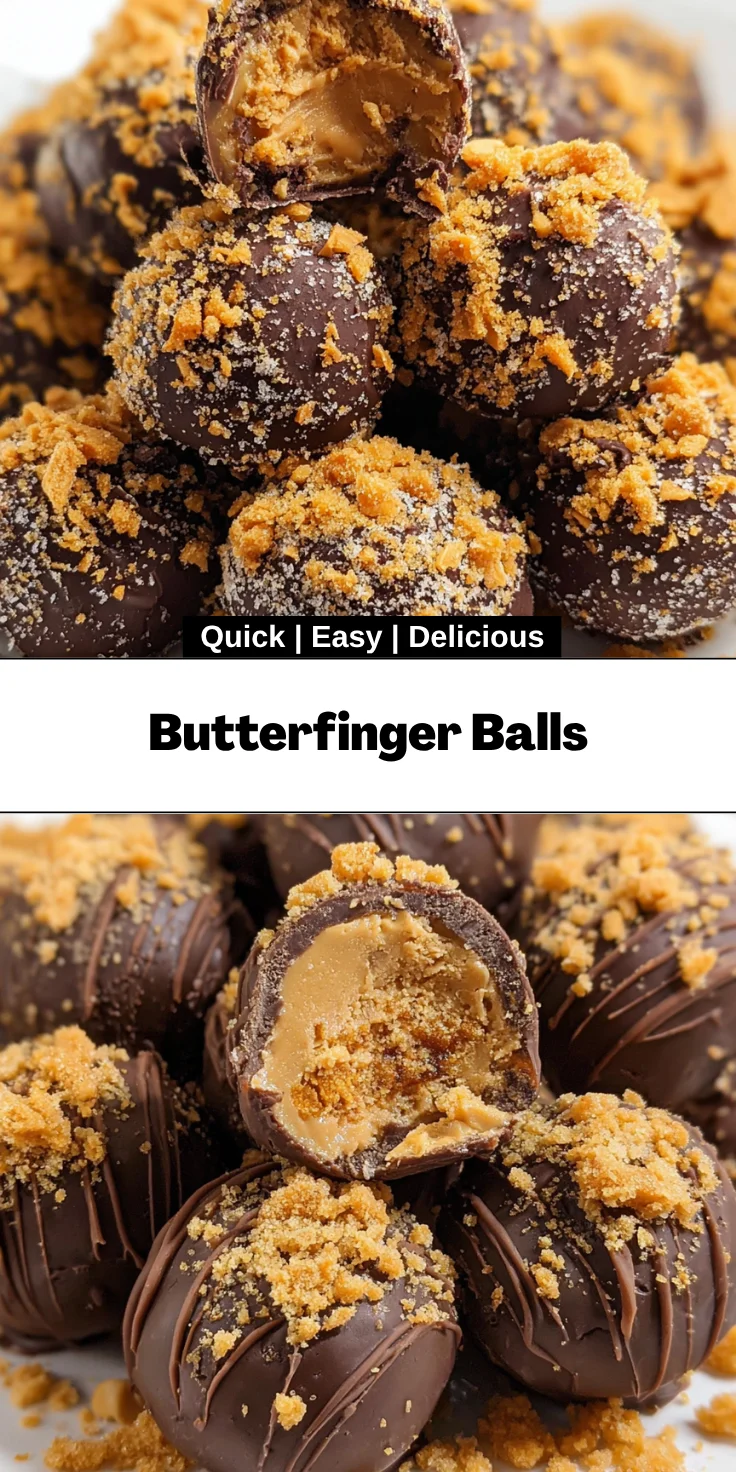
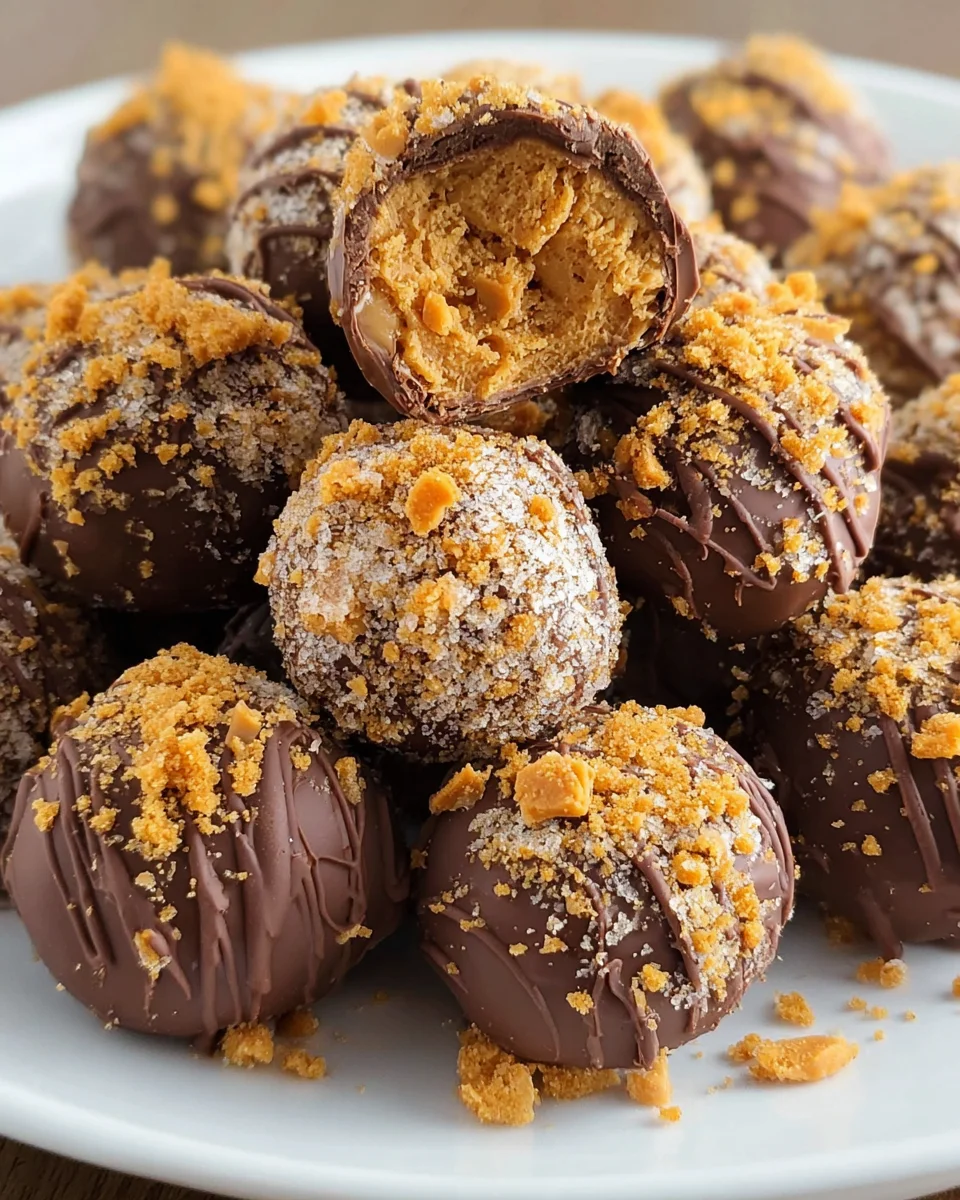
Introduction to Butterfinger Balls
As a busy mom, I know how precious those quick, effortless treats can be after a long day. That’s where these delightful Butterfinger Balls come in handy! They’re not only super easy to whip up but also deliver that delicious peanut butter and chocolate combo that everyone loves. Imagine treating your family or colleagues to these little bites of joy without spending hours in the kitchen. Whether you’re tackling bake sales or just looking for a sweet escape, these no-bake treats will impress your loved ones and satisfy your sweet tooth effortlessly.
Why You’ll Love This Butterfinger Balls
Butterfinger Balls are the perfect solution for those busy days when time is tight but you still want something sweet. These no-bake delights are not only quick to make, but they’re also kid-approved and practically foolproof! With that creamy peanut butter and crunchy, chocolatey goodness wrapped around every bite, you’ll find yourself reaching for seconds. Plus, they store well, making them a great treat for unexpected guests too!
Ingredients for Butterfinger Balls
Before we dive into making these scrumptious Butterfinger Balls, let’s gather our ingredients! Each component plays a vital role in crafting this easy no-bake treat. Here’s what you’ll need:
- Creamy peanut butter: This is the star of our show! Smooth peanut butter lends richness and that luscious flavor we crave.
- Salted butter: Softened butter brings moisture and a bit of indulgence. You can use unsalted if you prefer, but it helps to enhance the overall flavor.
- Pure vanilla extract: A splash of real vanilla adds warmth, elevating the sweetness of the peanut butter and chocolate.
- Powdered sugar: This gives our Butterfinger Balls their sweetness, ensuring they’re as delightful as they look.
- Graham cracker crumbs: These provide a lovely texture and help to bind everything together. You can also use digestive biscuits for a twist.
- Crushed Butterfinger candy: The highlight of this recipe! It adds that signature crunchy, chocolatey goodness. Feel free to toss in an extra bar or two if you want that Butterfinger flavor to shine!
- Chocolate-flavored almond bark: This is what coats our treats in a glossy, chocolate shell. If you’re feeling adventurous, swap it for your favorite melted chocolate!
You can find exact measurements and additional details at the bottom of this article for printing. Now that you know what goes into these delicious treats, let’s roll up our sleeves and get started!
How to Make Butterfinger Balls
Making Butterfinger Balls is a breeze! Follow these clear steps to create a sweet treat that you and your family will love. Trust me, you’ll be surprised at how simple it really is!
Step 1: Combine Peanut Butter Mixture
Start by grabbing a medium-sized mixing bowl. In it, you’ll combine one cup of creamy peanut butter, a quarter cup of softened salted butter, and a teaspoon of pure vanilla extract.
I like to use a handheld mixer on medium-high speed for about one minute. This helps create a smooth and delightful base.
The creamy blend will have your taste buds dancing with excitement before we even get to the fun part!
Step 2: Mix in Dry Ingredients
Next, lower the mixer speed to medium-low. Add in one cup of powdered sugar, three-quarters of a cup of graham cracker crumbs, and half a cup of crushed Butterfinger candy.
Take your time here! Mix everything together for about 1½ to 2 minutes. You want to ensure the texture is uniform and that every bite will have that amazing blend of flavors.
It’s the crunchy bits of Butterfinger that keep things exciting!
Step 3: Form Balls
Now onto the fun part! Line a baking sheet with parchment paper to catch all those sticky goodies.
Using a 1-tablespoon cookie scoop, scoop the Butterfinger mixture and roll it into bite-sized balls in your hands.
Place each ball on the lined baking sheet. They should be about the size of a golf ball! After that, pop them in the refrigerator to chill for at least 30 minutes. This helps them set nicely.
Step 4: Melt Almond Bark
While the balls are chilling, it’s time to melt the chocolate-flavored almond bark.
In a microwave-safe bowl, add eight ounces of almond bark. Heat it in the microwave at full power for 45 seconds.
Be sure to stir. Then, continue heating in 30-second intervals until it’s melted and smooth.
Avoid overheating—nobody likes burnt chocolate!
Step 5: Coat Butterfinger Balls
Once your Butterfinger balls are firm, retrieve them from the fridge.
Using a fork, carefully roll each ball in the melted almond bark, ensuring they’re fully coated in that glossy, mouth-watering chocolate.
Place them back on the parchment-lined baking sheet. This coating makes every bite irresistible!
Step 6: Final Touches
Let’s make them look just as good as they taste! In a separate bowl, melt the remaining two ounces of almond bark.
Drizzle this chocolate over the coated Butterfinger balls for a beautiful finishing touch.
Feel free to sprinkle a little extra crushed Butterfinger candy on top for that added crunch.
Finally, refrigerate them until you’re ready to serve. Your guests will be clamoring for more!
Tips for Success
- Always use creamy peanut butter for a smoother texture; chunkier versions can change the consistency.
- Chill the balls thoroughly; this ensures they hold their shape when coating with chocolate.
- Be patient while melting almond bark; stir often to avoid any scorching.
- For easier rolling, lightly grease your hands to prevent the mixture from sticking.
- Experiment with toppings like crushed nuts or sprinkles to personalize your Butterfinger Balls!
Equipment Needed
- Mixing Bowl: A medium-sized bowl works best; a large bowl can be used if you prefer more room for mixing.
- Handheld Mixer: This makes combining ingredients a breeze; a whisk can be used if you enjoy a workout!
- Cookie Scoop: A 1-tablespoon cookie scoop ensures even sizes; your hands can also work if needed.
- Parchment Paper: It keeps the balls from sticking; wax paper is a good alternative if you have that on hand.
Variations of Butterfinger Balls
- Chocolate Swirl: Use a mix of milk and dark chocolate for coating. It adds a rich depth to your Butterfinger Balls.
- Nutty Twist: Incorporate chopped nuts like almonds or peanuts into the mixture for an added crunch and flavor contrast.
- Dairy-Free Option: Substitute creamy peanut butter with a nut or seed butter and use dairy-free chocolate alternatives for a vegan-friendly treat.
- Flavor Infusion: Add a tablespoon of chocolate syrup or caramel sauce into the mixture for a flavor boost.
- Gluten-Free Version: Ensure the graham cracker crumbs are certified gluten-free, or use crushed gluten-free cookies instead!
Serving Suggestions for Butterfinger Balls
- Coffee or Milk: Serve Butterfinger Balls alongside a steaming cup of coffee or a tall glass of cold milk for the perfect pairing.
- Fruit Platter: Balance the sweetness with a colorful fruit platter, featuring strawberries, banana slices, and apple wedges.
- Presentation: Arrange on a decorative plate and garnish with mint leaves for a fresh touch.
- Party Treats: Use festive cupcake liners to make them pop for any gathering or celebration.
FAQs about Butterfinger Balls
As I’ve made these delightful Butterfinger Balls over the years, I’ve come across a few questions that tend to pop up. Here are some of the most common queries, along with my helpful insights!
Can I make Butterfinger Balls ahead of time?
Absolutely! These tasty treats store well in the refrigerator. You can make them a few days in advance. Just keep them in an airtight container to maintain their freshness.
What can I use instead of almond bark?
If almond bark isn’t easily available, don’t fret! You can substitute it with any type of melted chocolate. Just make sure to use chocolate with a good consistency for coating, like creamy milk chocolate or dark chocolate.
Can I freeze Butterfinger Balls?
Yes, you can freeze them! Place them in a single layer in a freezer-safe container. Just remember to let them thaw in the refrigerator before enjoying them. They taste just as delicious!
How long do Butterfinger Balls last in the refrigerator?
These scrumptious treats are best enjoyed within a week. However, they can still be tasty up to two weeks if stored properly in an airtight container.
Can I add other mix-ins to the Butterfinger Balls?
Definitely! Feel free to get creative. Mini chocolate chips, chopped nuts, or even a pinch of sea salt can enhance the flavor of your Butterfinger Balls. It’s all about making it your own!
Final Thoughts
Making Butterfinger Balls isn’t just about creating a delicious treat; it’s about sharing sweetness with those we love. The ease and joy of crafting these no-bake delights make them a perfect solution for busy days or special celebrations.
The crunchy, chocolatey goodness will have everyone smiling with every bite, reminding us that little moments matter the most. So the next time you need a quick dessert, remember this simple recipe! Grab your loved ones, whip up a batch, and relish the laughter and warmth that follows. Trust me, these treats will leave a lasting impression!
Print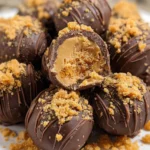
Butterfinger Balls
- Total Time: 50 minutes
- Yield: 12-15 balls 1x
- Diet: Vegetarian
Description
Butterfinger Balls are an easy no-bake treat made with creamy peanut butter and crushed Butterfinger candy, coated in chocolate almond bark.
Ingredients
- 1 cup creamy peanut butter
- ¼ cup salted butter, softened
- 1 teaspoon pure vanilla extract
- 1 cup powdered sugar
- ¾ cup graham cracker crumbs
- ½ cup crushed Butterfinger candy (approximately 6 fun-size bars), plus 1-2 extra for garnish
- 10 ounces chocolate flavored almond bark (divide into 8 ounces and 2 ounces)
Instructions
- In a medium-sized mixing bowl, combine the creamy peanut butter, softened butter, and vanilla extract. Use a handheld mixer on medium-high speed to beat together until smooth, about 1 minute.
- Lower the mixer speed to medium-low, then add the powdered sugar, graham cracker crumbs, and crushed Butterfinger candy. Mix for 1½-2 minutes or until the mixture is well combined.
- Line a baking sheet with parchment paper.
- Use a 1-tablespoon cookie scoop to scoop the Butterfinger mixture and roll them into balls. Place on the lined baking sheet and chill in the refrigerator for at least 30 minutes.
- In a microwave-safe bowl, add 8 ounces of almond bark. Heat in the microwave at full power for 45 seconds, stir, and continue heating in 30-second intervals until melted and smooth.
- Remove the balls from the refrigerator and roll each one in the melted almond bark until fully coated, then place back on the lined baking sheet.
- In a separate bowl, melt the remaining 2 ounces of almond bark using the same method as before. Drizzle over the tops of the Butterfinger balls and sprinkle with extra crushed Butterfinger candy. Refrigerate until ready to serve.
Notes
- Make sure to use smooth peanut butter for the best texture.
- You can substitute with other types of chocolate if preferred.
- Store in an airtight container in the refrigerator for up to a week.
- Prep Time: 15 minutes
- Cook Time: 5 minutes
- Category: Dessert
- Method: No-Bake
- Cuisine: American
Nutrition
- Serving Size: 1 ball
- Calories: 150
- Sugar: 10g
- Sodium: 100mg
- Fat: 8g
- Saturated Fat: 3g
- Unsaturated Fat: 5g
- Trans Fat: 0g
- Carbohydrates: 15g
- Fiber: 0g
- Protein: 3g
- Cholesterol: 10mg